
After you create a template from your data set, you can begin to map your DocuSign Fields. Once you open your template, you can add your Docusign field and configure it to match your use case.
Note:You can have a signature placeholder in the template for an in-person signing ceremony and a different signature placeholder in the same template for a sign by email ceremony for a different recipient. When Designers add fields in this manner, the Docusign envelope sends both an email and provides an in-person link to both recipients.
-
In your template, place your cursor where you wish to add the signature block.
-
In the Template Builder tab, select the E-signature button.
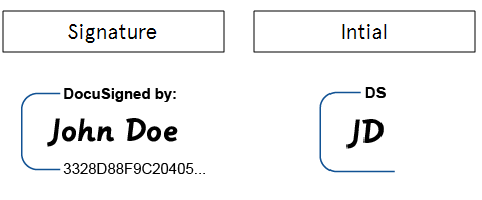
The blank E-signature field displays with the message " Select or tap here to configure." The Mapping window displays.
-
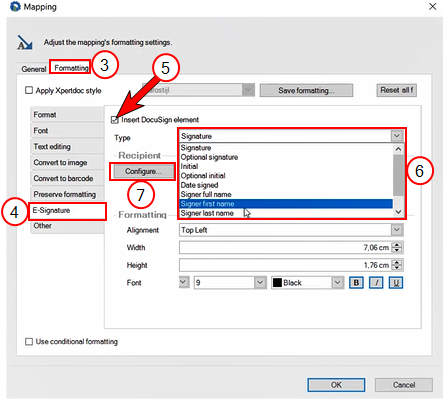
In the Mapping window, select the Formatting tab.
-
In the list view, select the E-signature option.
-
Select the checkbox next to the Insert Docusign element.
-
In the Type dropdown menu, select the type of field you wish to add.
-
Select Configure.
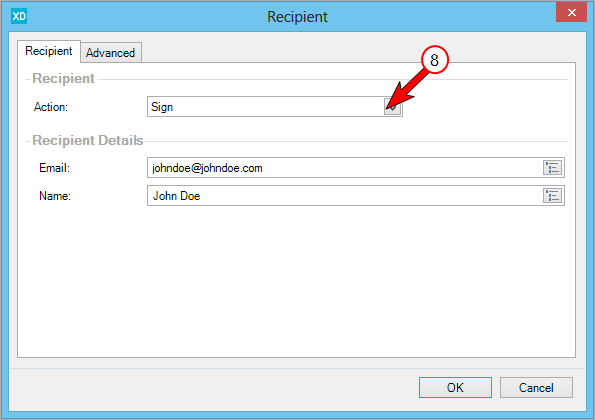
Decision Info: If you want to have your recipients sign via e-mail you'll want to select Sign. If you want your recipients to sign in person via a human interaction, select Sign in Person.
-
In the Action dropdown menu, select Sign.
Decision Info: You can input the e-mail and name for the fields by typing in the info in the Recipient window. However, we recommend using your data set to ensure that your document is scalable for your organization. Mapping the fields with your data set ensures that you can get consistent resultswithout having to configure your E-mail and Name fields repeatedly manually.
-
Determine how you want to fill your E-mail and Name fields:
-
To fill in your E-mail and Name fields by typing them, continue to STEP 10.
-
To fill in your E-mail and Name fields with fields from your data set, skip to STEP 14.
Configure the Recipient field with Rich Text
-
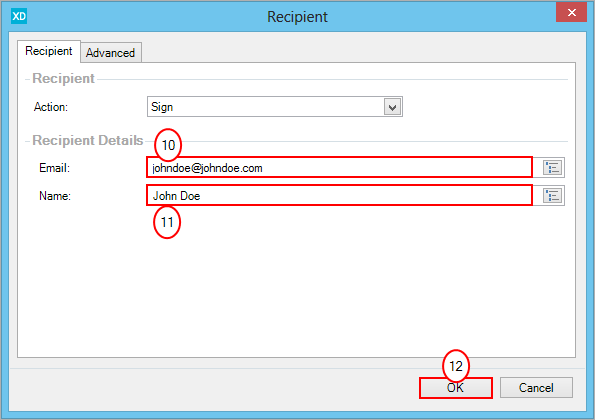
In the E-mail field, type in the e-mail of your Recipient.
-
In the Name field, type in the name of your Recipient and select OK.
-
Select OK.
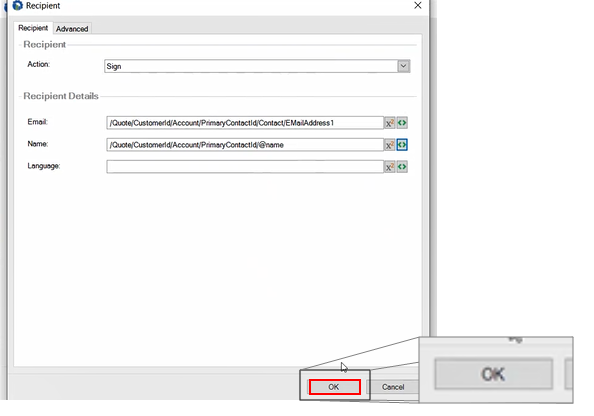
-
In the Mapping field, select OK.
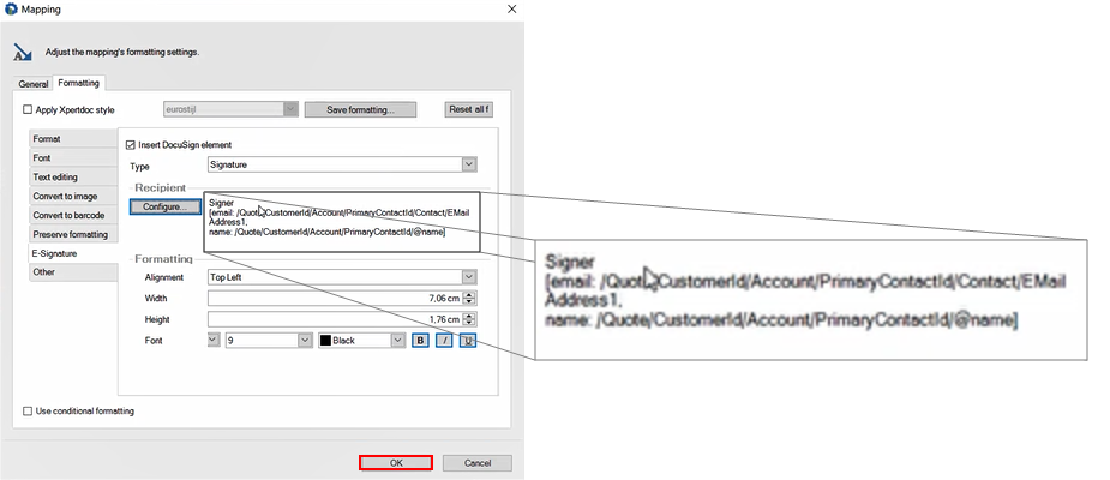
The Mapping window no longer displays. The E-signature field displays with E-signature above and within the field.
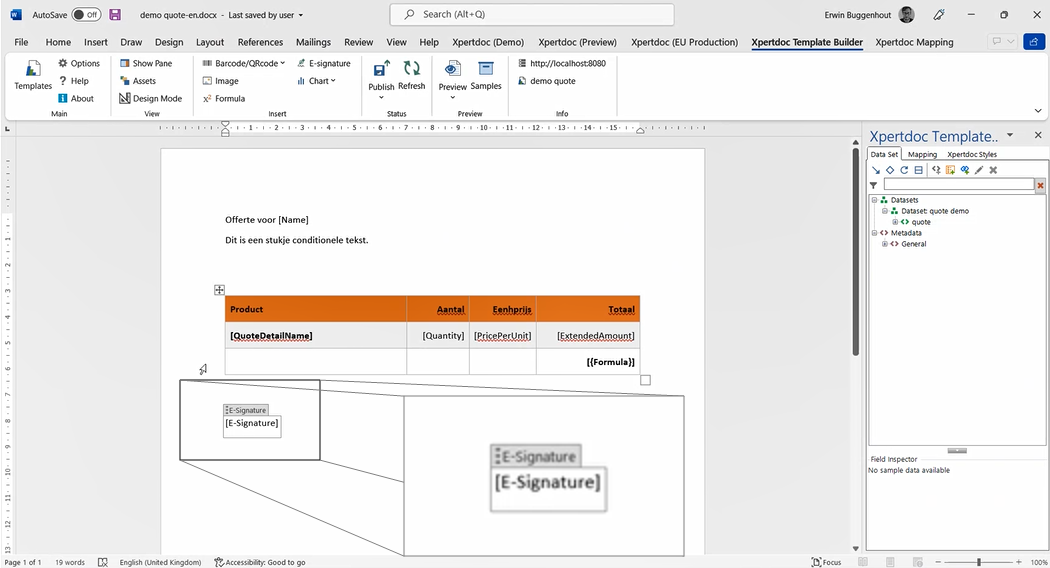
Configure Recipient field with mapped Data Set fields
-
In the E-mail field, select the green fields icon.
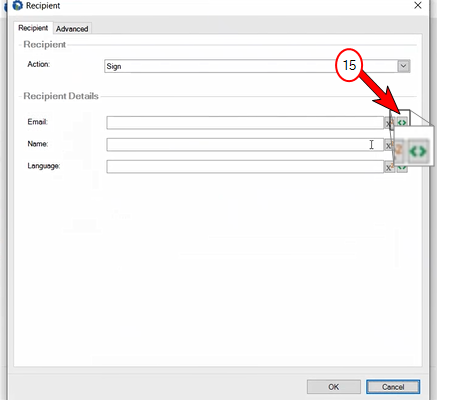
-
Use the scroll bar or the search field to locate your desired field from your data set.
-
Double-click your desired field.
-
Select OK.
The Select Field window no longer displays.
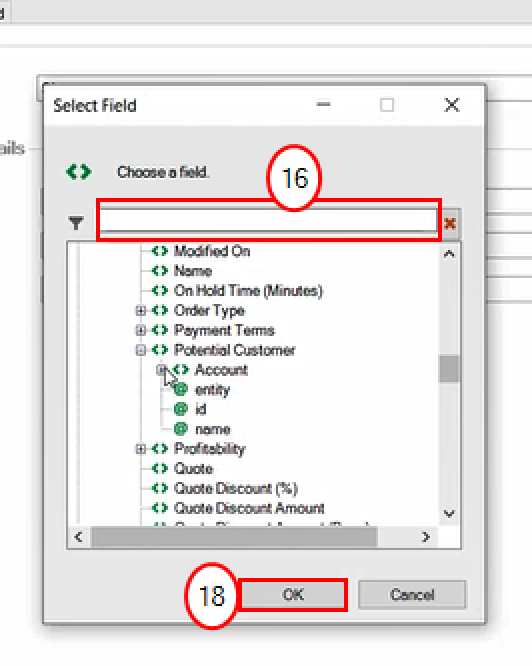
The Recipient window no longer displays. In the Mapping window, your mapped data set info displays next to the Configure button.
-
Select the OK button.
The E-signature field displays with E-signature above and within the field. In the Mapping window, your mapped dataset information displays next to the Configure button.
Add DocuSign Fields in Header & Footer
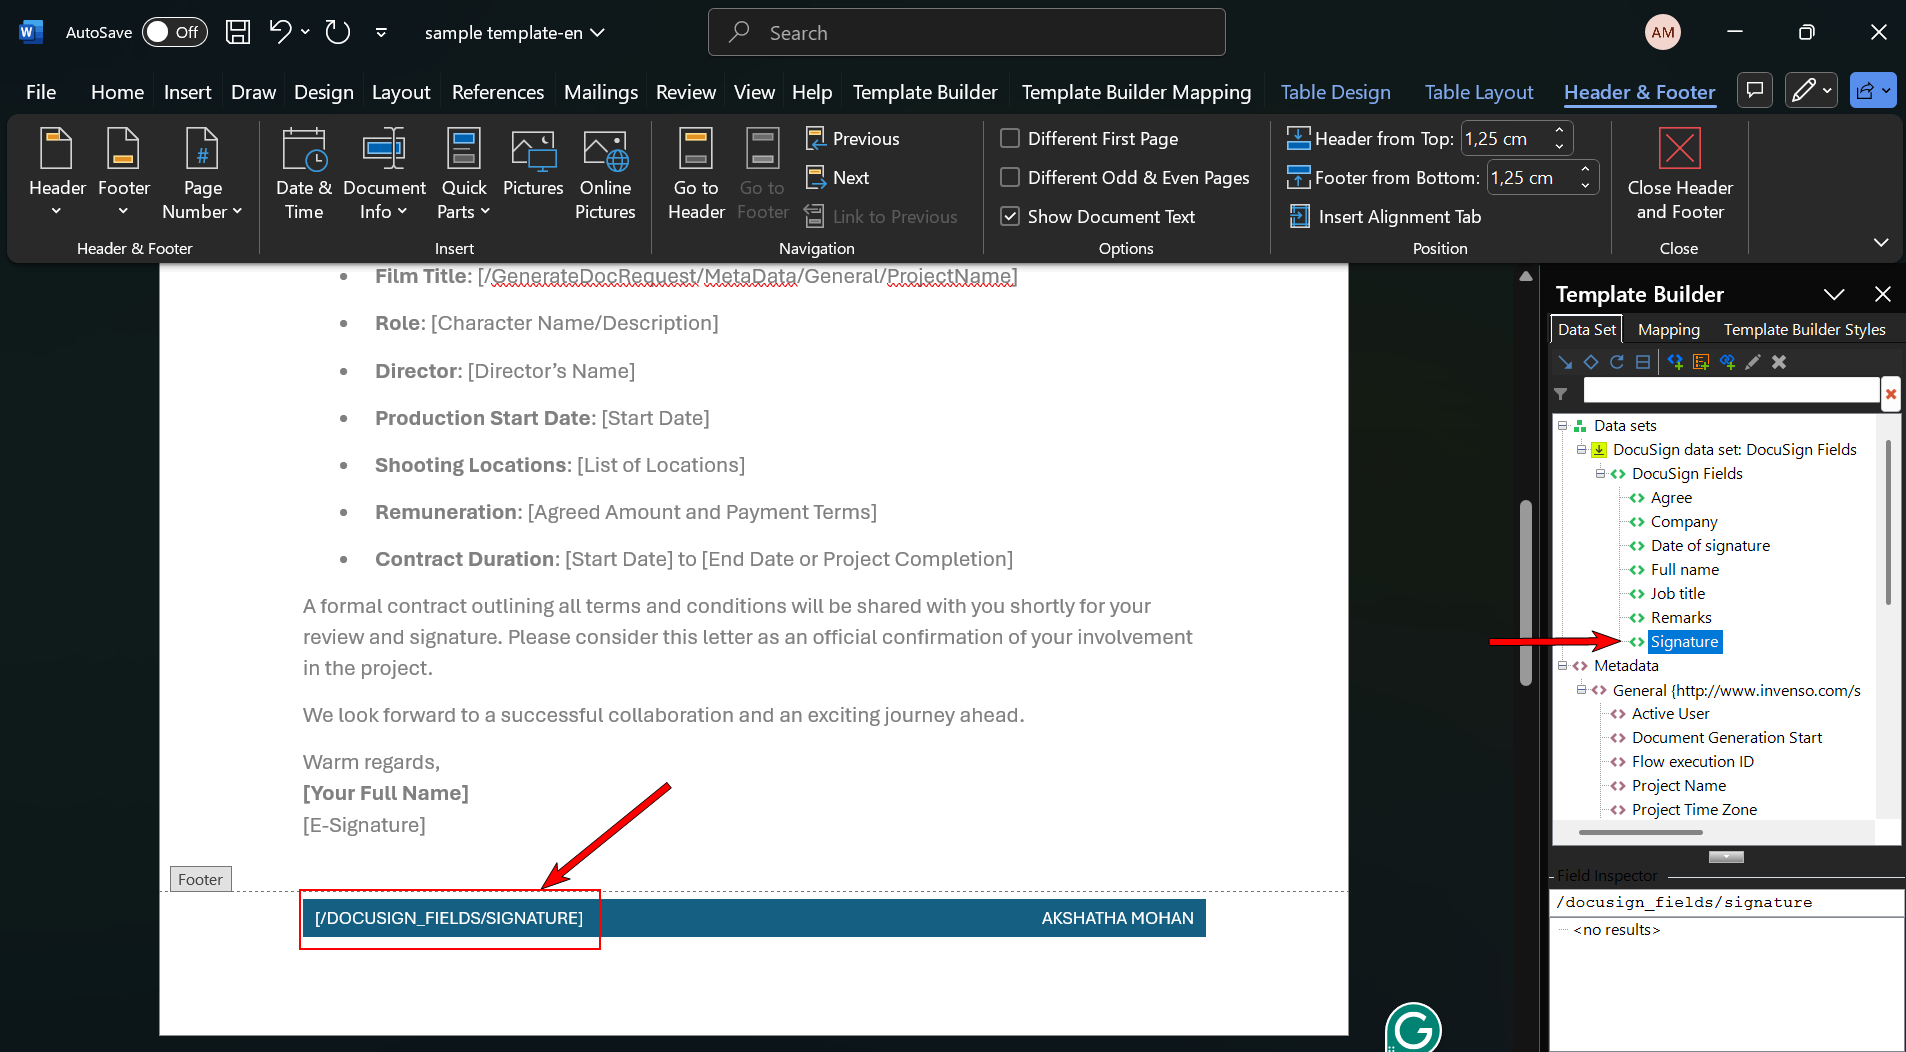
Smart Flows users can insert DocuSign fields into the header and footer sections of a template. This enhances visibility and consistent placement throughout the Word document for all signers. The Docusign fields insertion is supported only in the standard and composition template type.
Standard Template Type:
Composition Template Type:
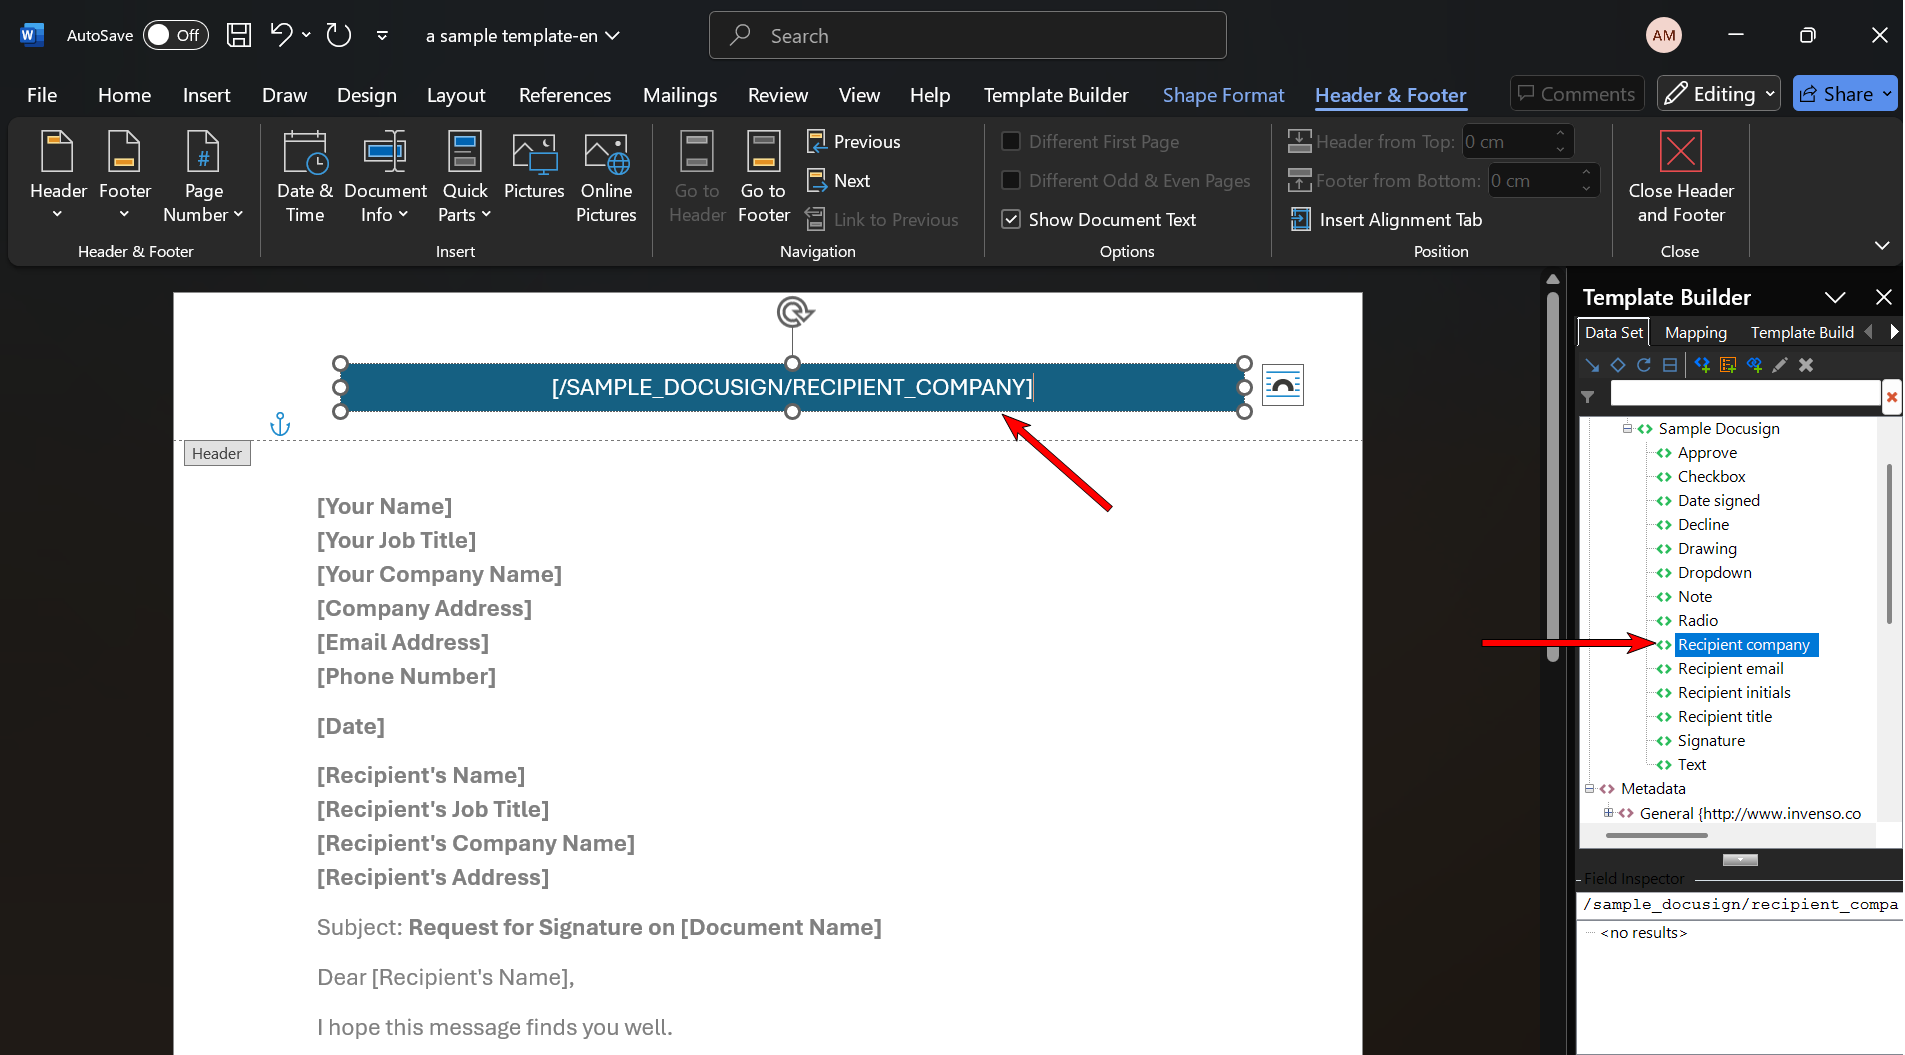
You can also add DocuSign fields to the header and footer sections of a template. This enhances visibility and consistent placement throughout the Word document for all signers. But this is supported only in the standard and composition template type.
The image below shows a DocuSign field inserted into the footer of a Standard template type
The image below shows a DocuSign field inserted into the header of a Composition template type:
Composition templates use a Standard template for editing.