
The Docusign ribbon group in the Experlogix Template Builder allows designers to quickly create Recipient profiles for their Docusign field groups. Once you have created a Recipient profile, you can quickly add Docusign fields that populate with the information based on the Recipient profile.
Open your template
-
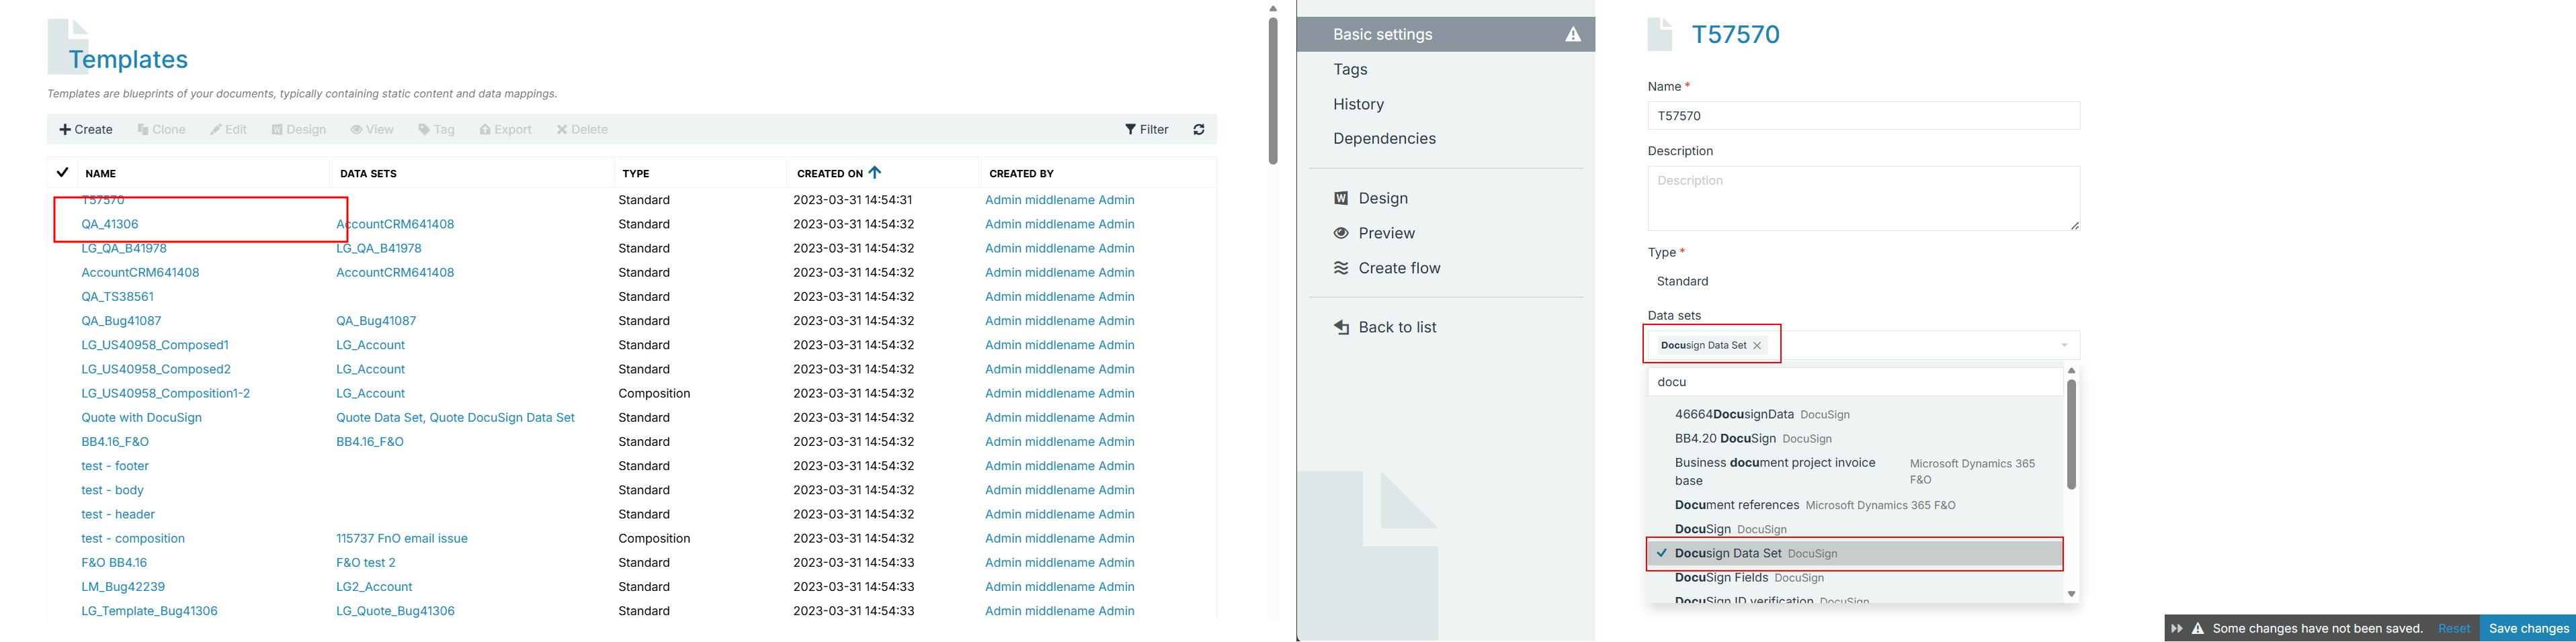
In Project Console, select the Templates > select the template > add a Docusign dataset.
-
Select Design.
-
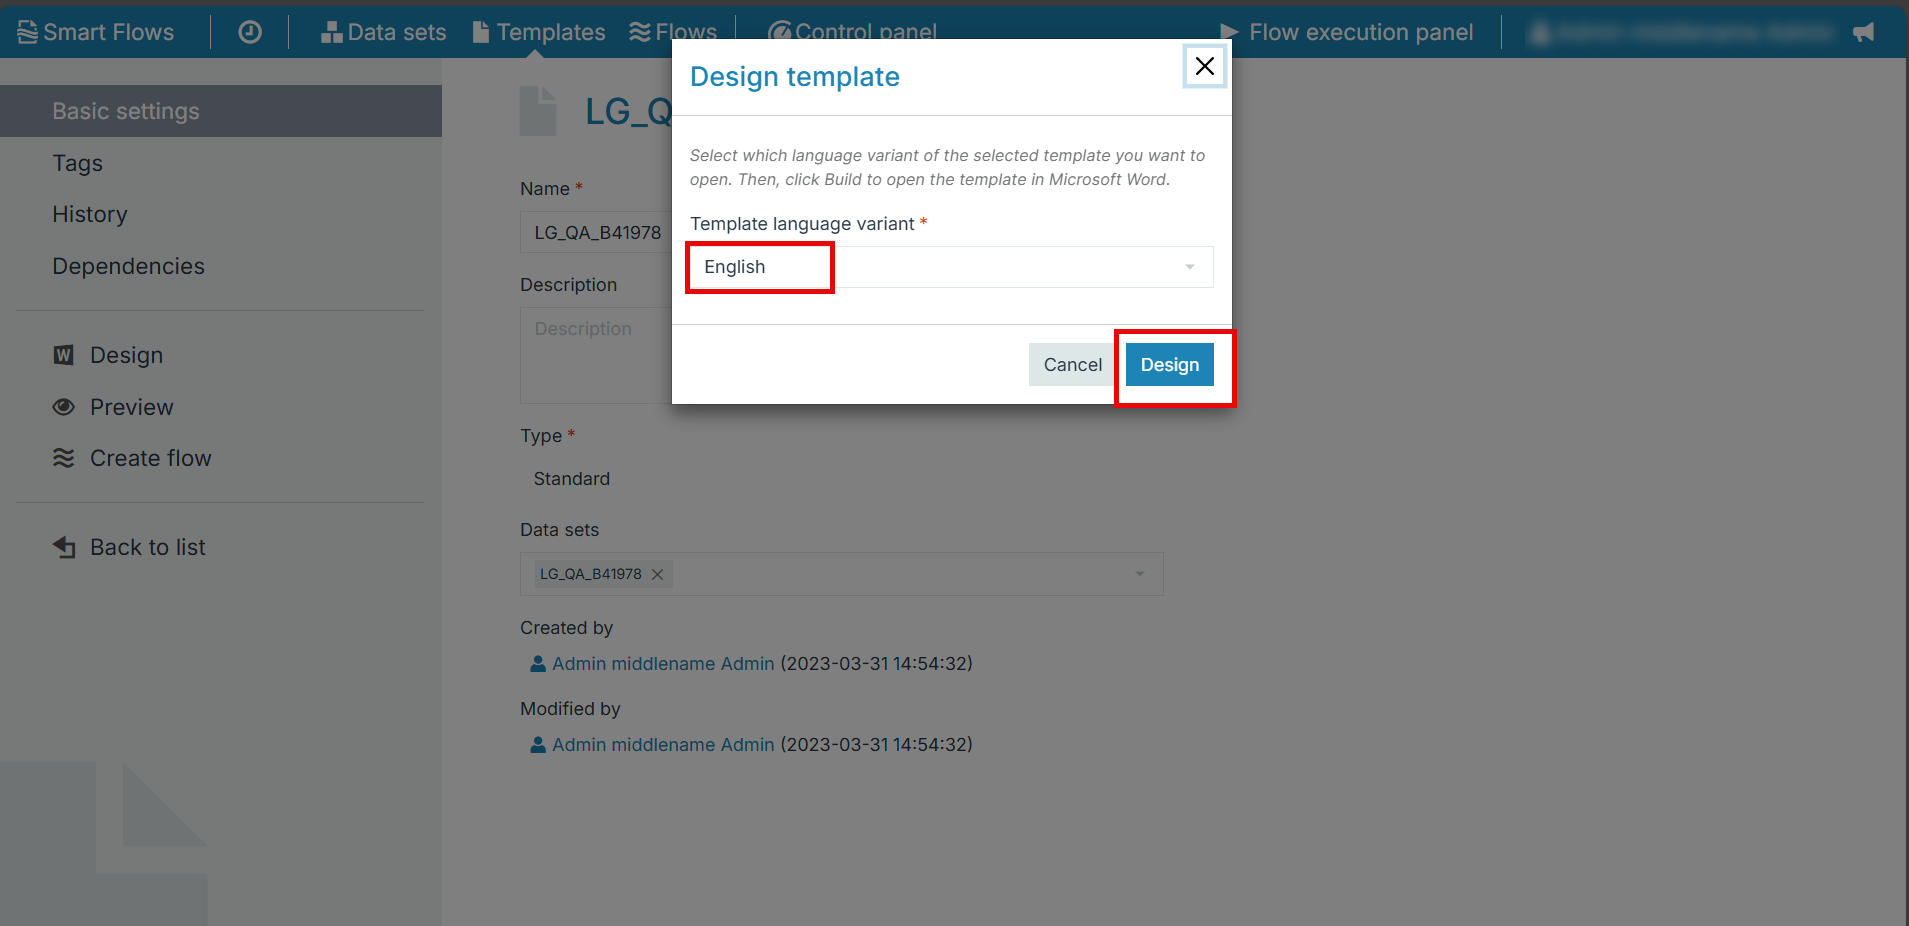
Select a language variant from the drop-down and select Design.
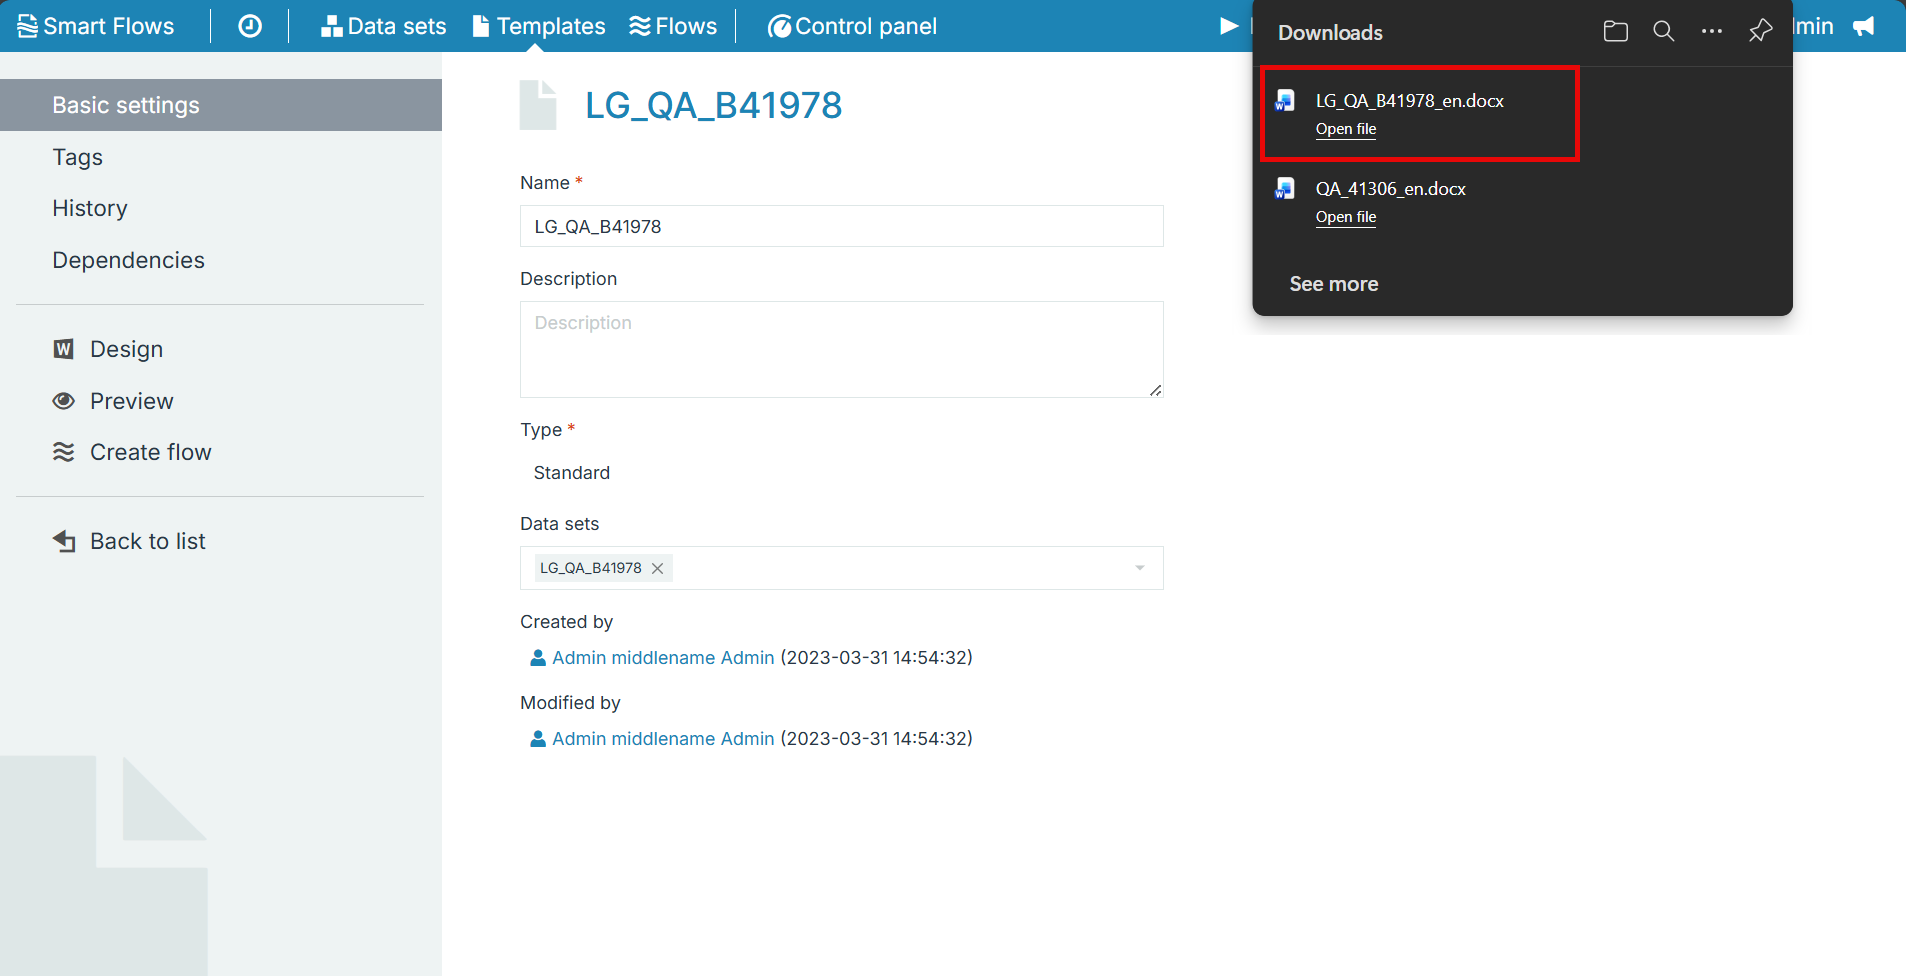
Your browser downloads the .docx file.
Configure the Recipient profile
-
Open the downloaded file.
Your anti-virus system may provide you with a warning when opening the .docx file. if this occurs, select the Enable Editing button to continue.
-
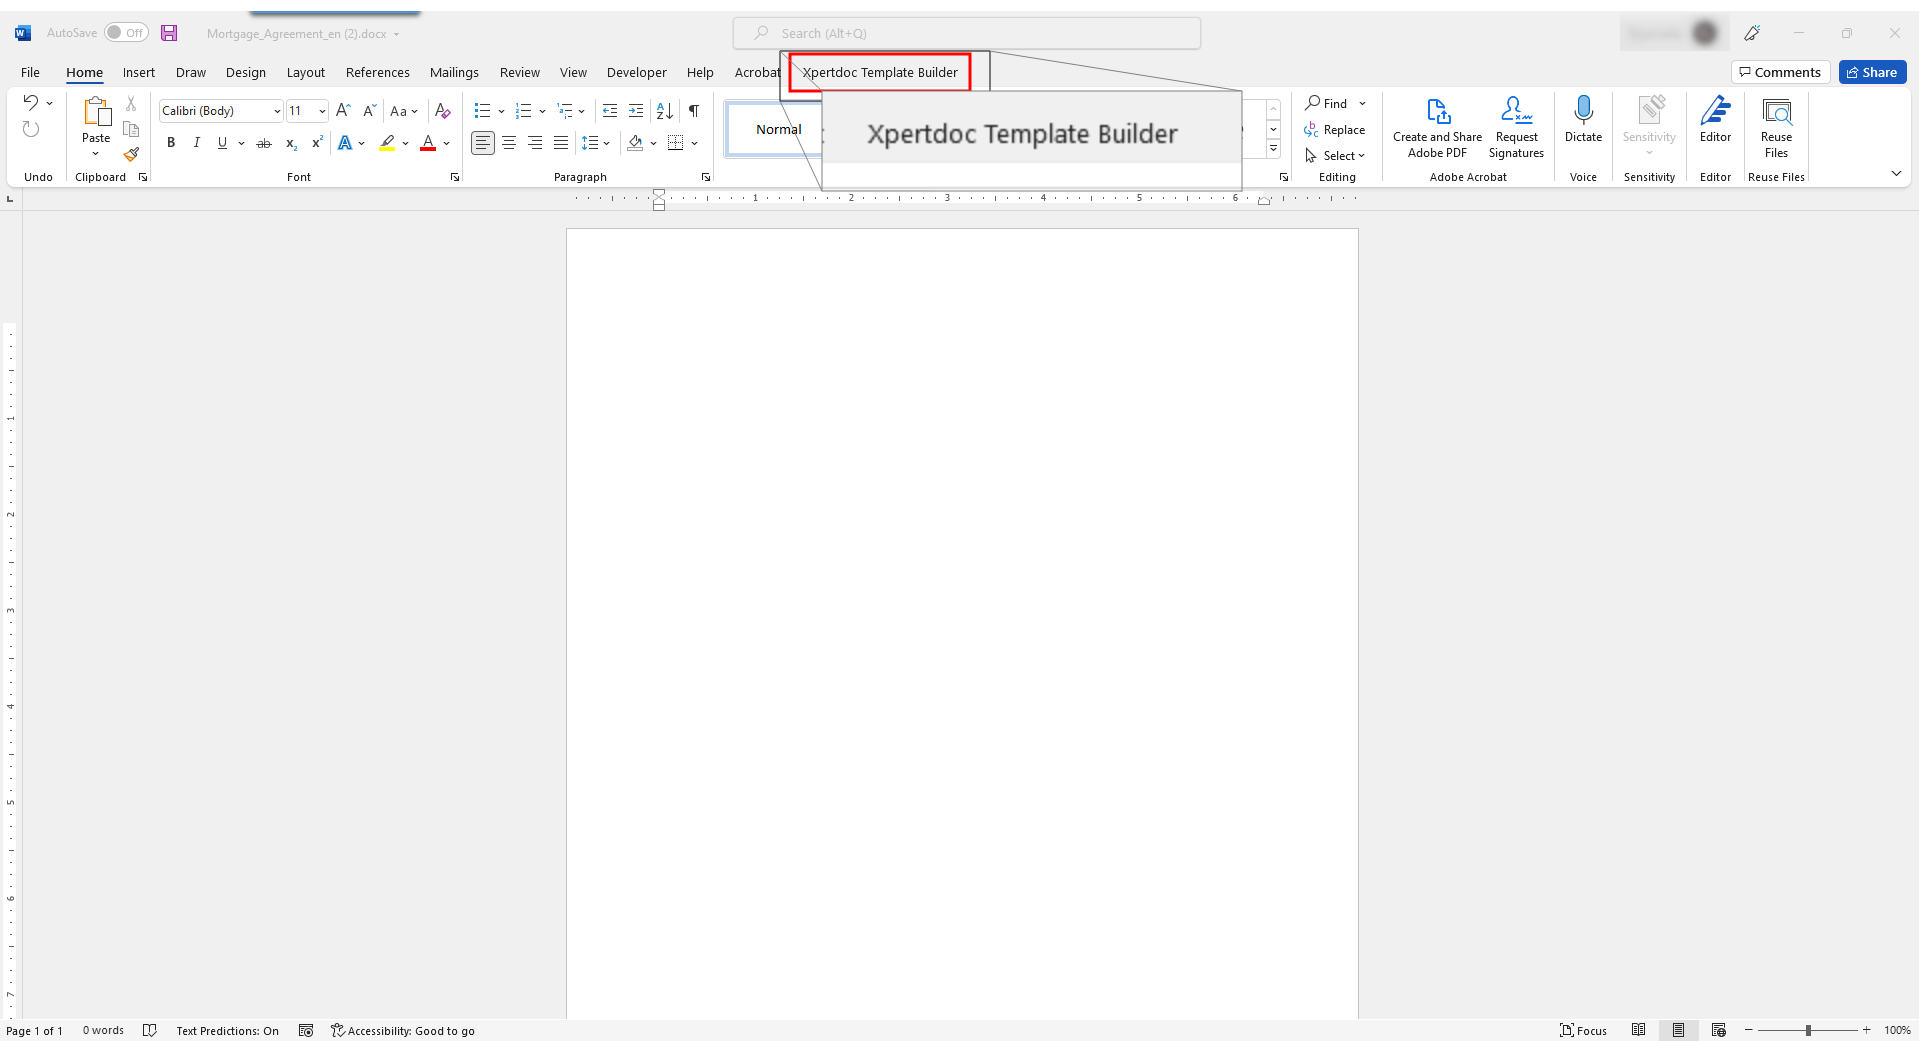
Select the Template Builder tab.
-
Select Refresh.
The system syncs your template with the server.
-
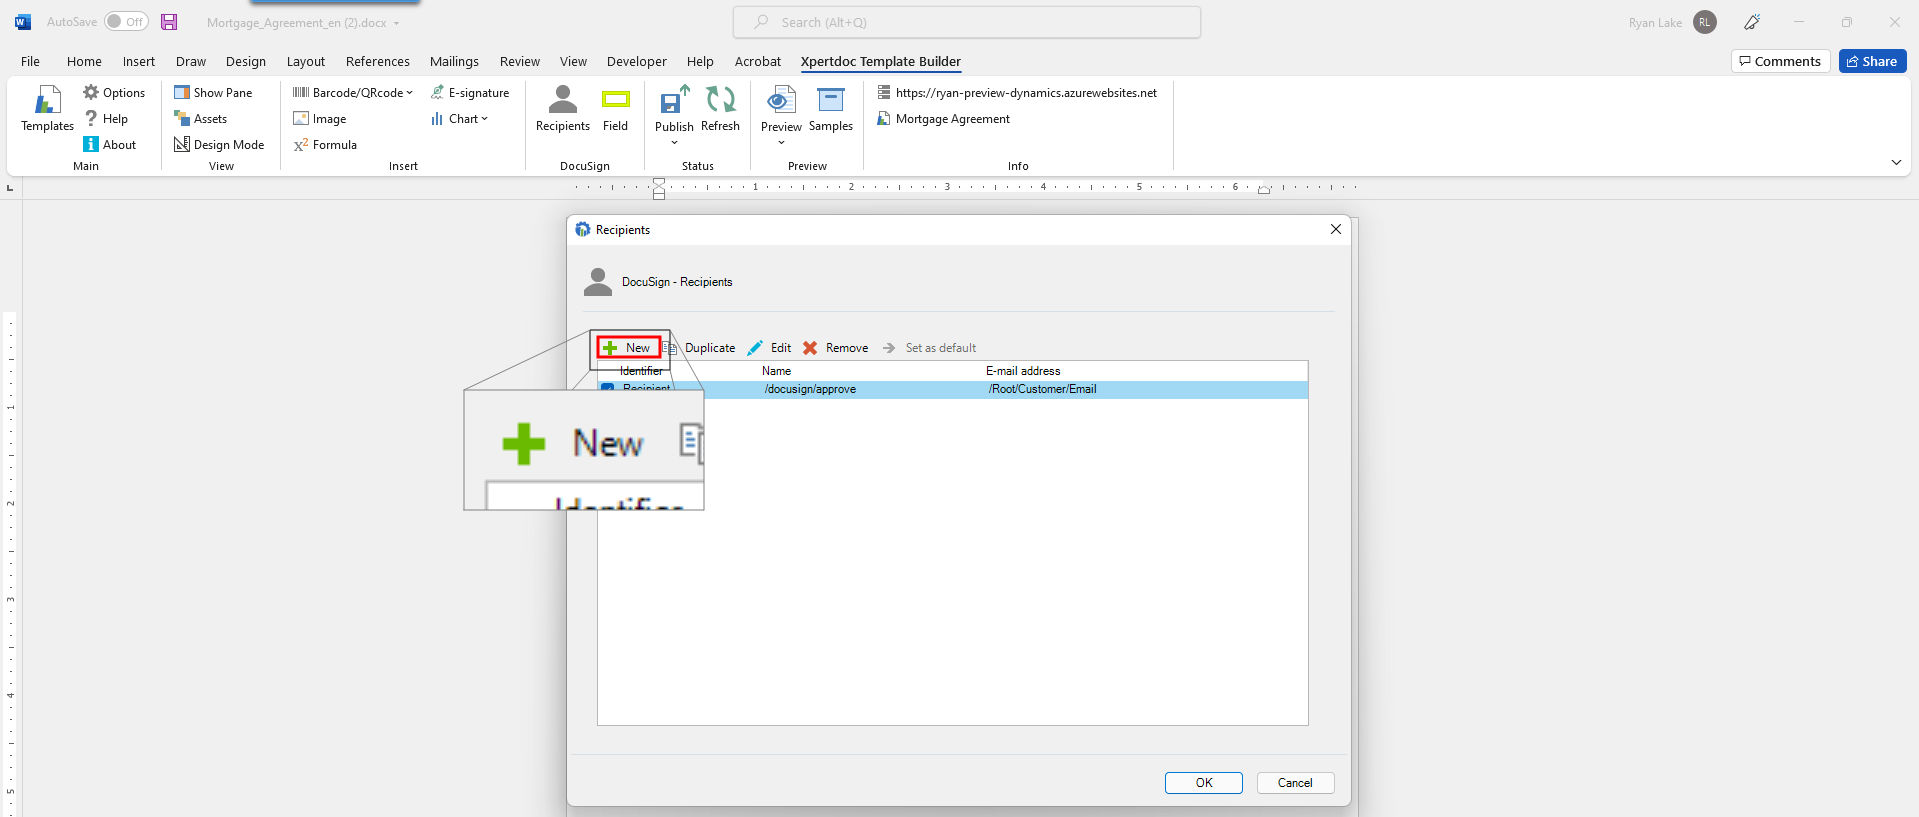
Select the Recipients button.
-
Select +New.
The Recipient window displays.
-
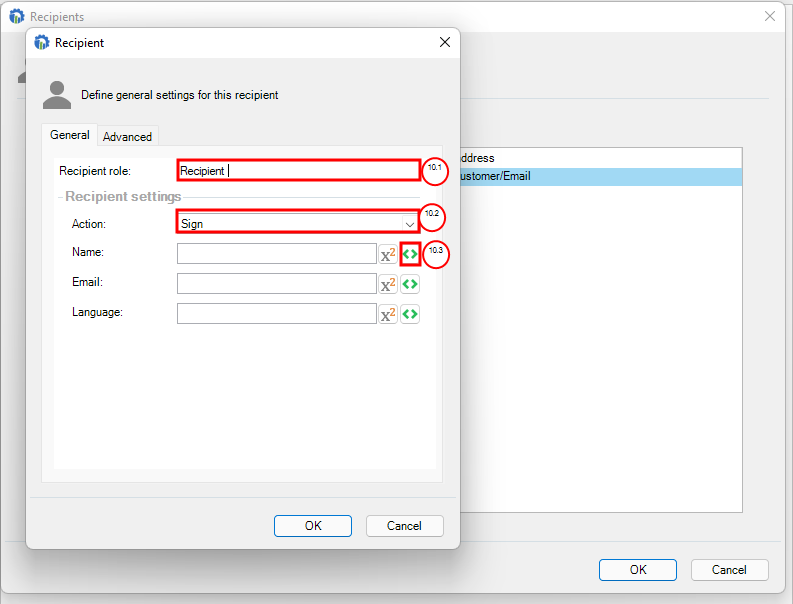
Complete the recipient information.
-
Input a name for the recipient role.
-
In the Action field, select the signing action from the dropdown menu.
-
In the Name field, select the green Mapping icon.
You can create recipient roles that fufill key signer roles within your agreements, such as the primary signer, cosigner or company representative. These roles should match fields within your customer information data set to ensure that system can acccurately map the correct fields.
-
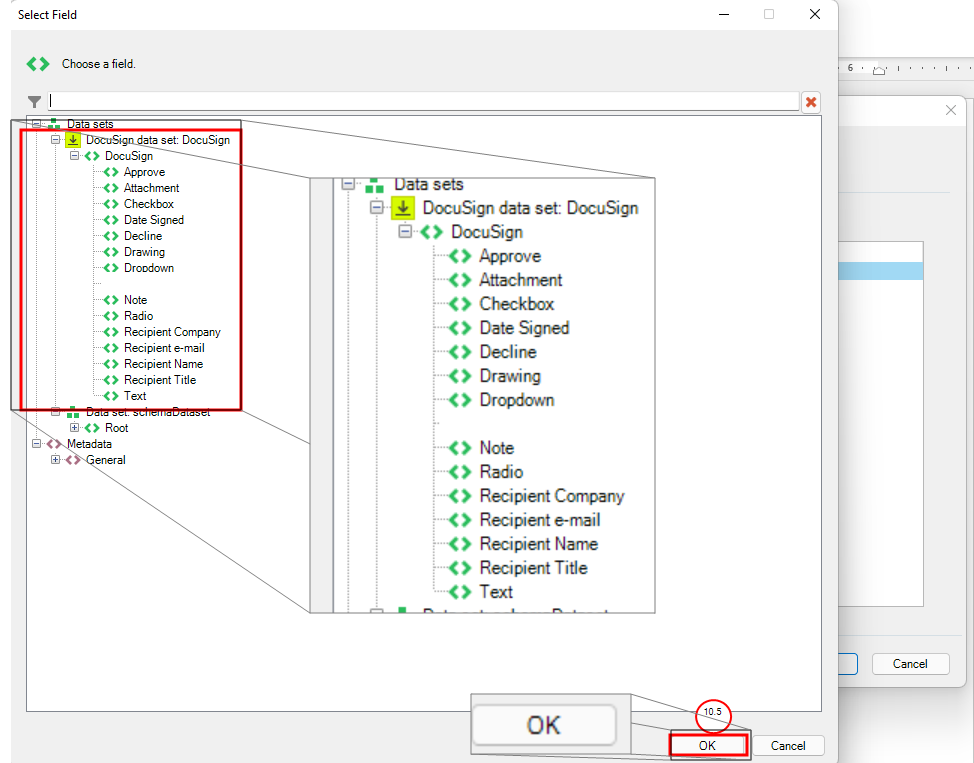
Select a field from your Docusign data set to map to the Name field.
-
Select OK.
The Select field window no longer displays.
-
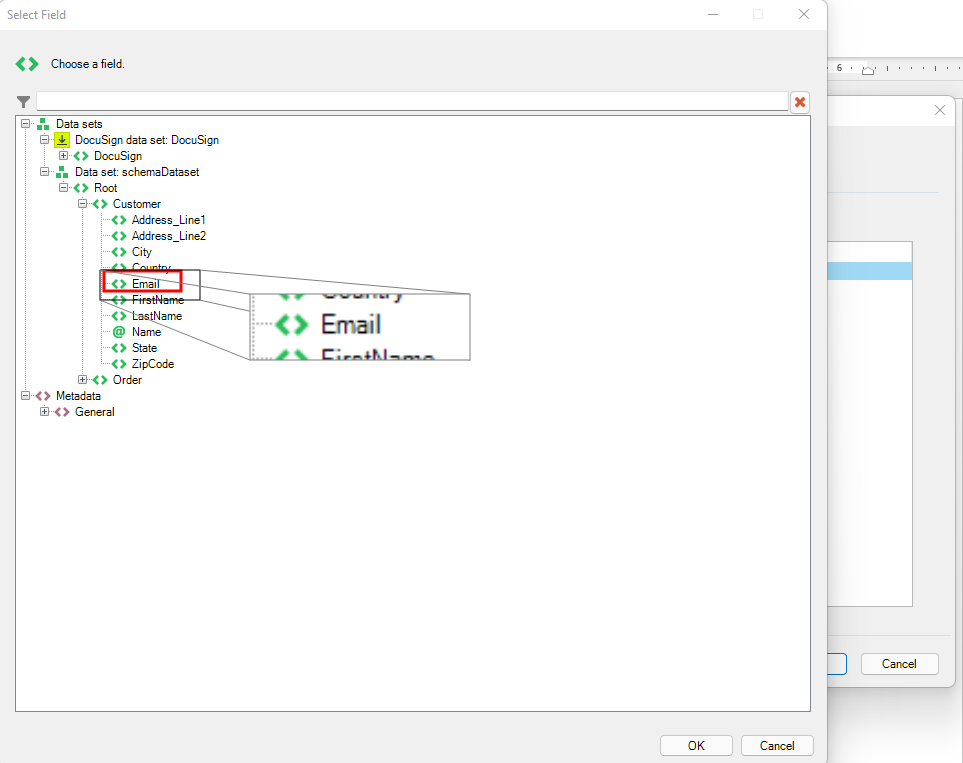
In the E-mail field, select the green Mapping icon.
-
Select a field to map to the E-mail field for the Recipient profile.
-
Select the OK button.
The Select field window no longer displays.
The Language field is optional; you would only use this field if your template has language variants.
-
In the Language field, select the green Mapping icon.
-
Select a field to map to the Language field.
-
Select OK.
-
Repeat STEP 9 for each additional Recipient profile you'd like to create.
Add a Docusign field based on a Recipient profile
-
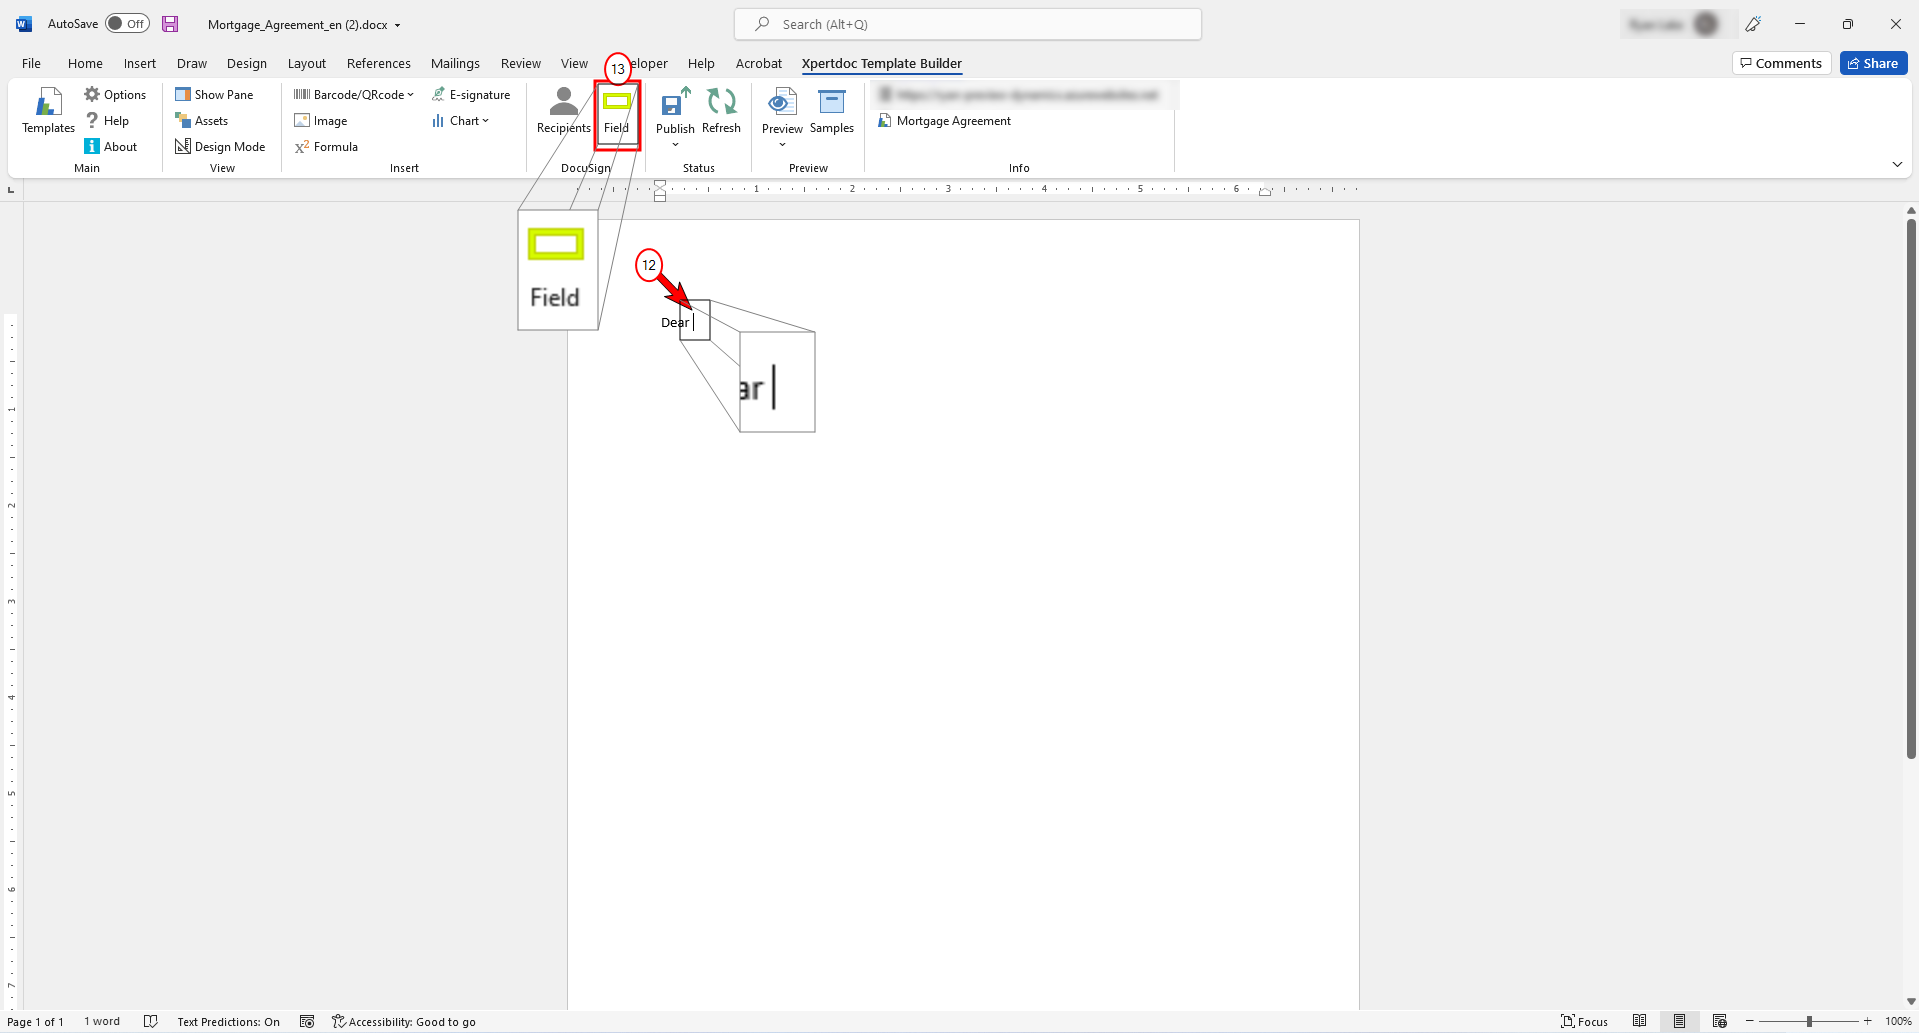
In the Experlogix Template Builder, place your cursor where you would wish to add a Docusign field.
-
On the ribbon, select the Field button.
-
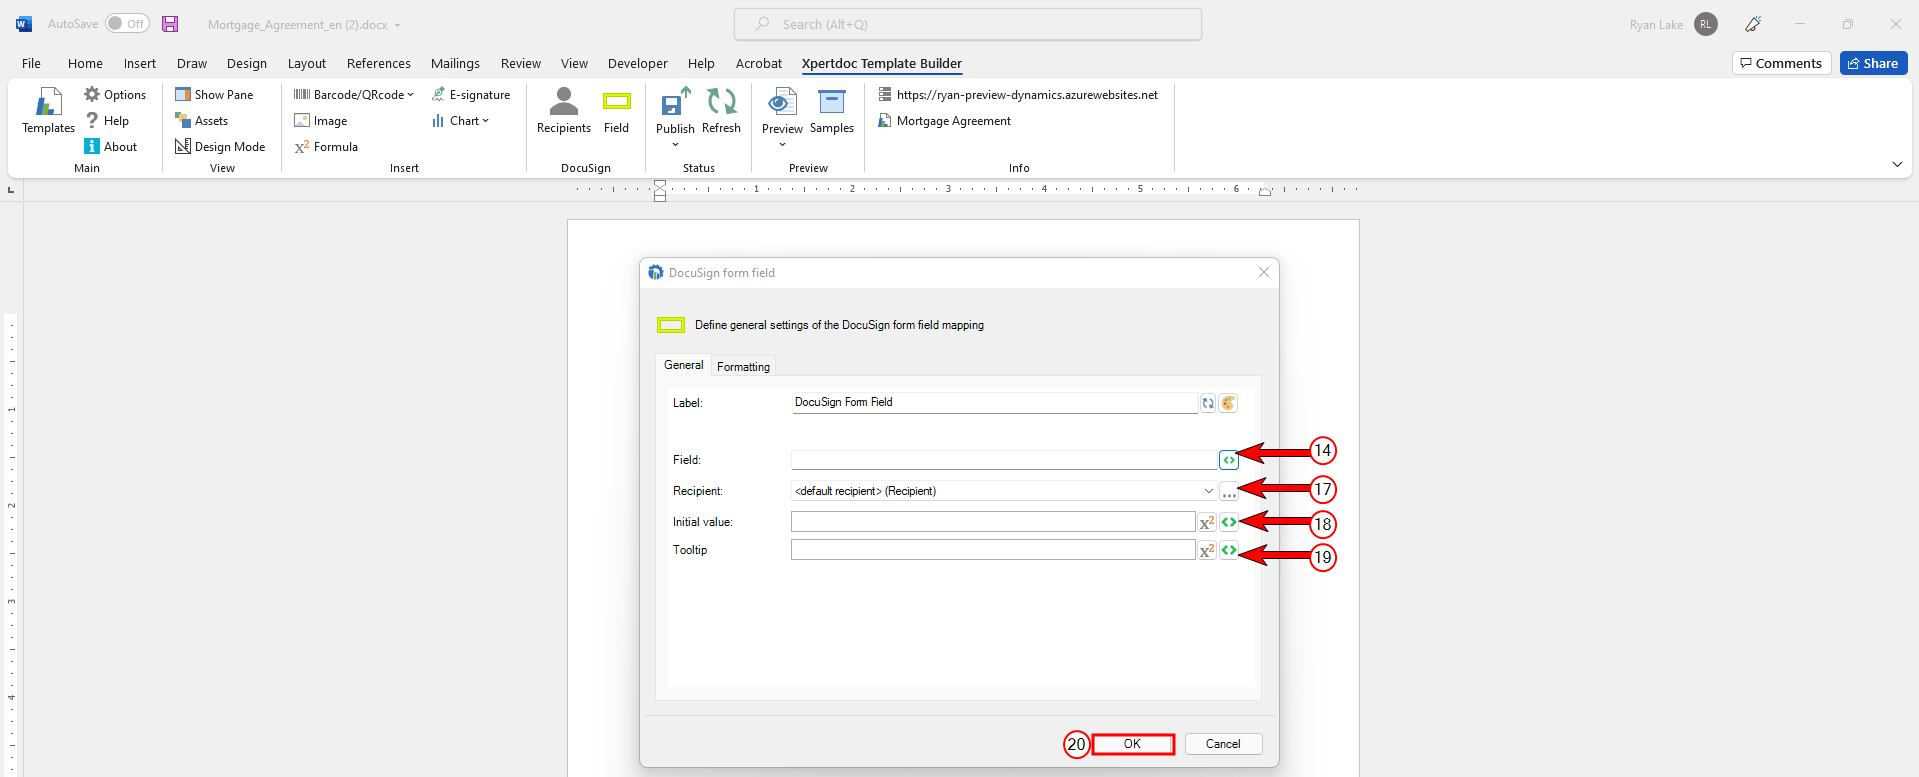
In the Field row, select the Mapping icon.
-
Select the type of Docusign form field to add.
-
Select OK.
-
Select the Recipient field to use for the Docusign form field.
-
(Optional) In the Initial value field, input the message that should display in the field before the user edits the field.
-
(Optional) In the Tooltip field, input the message to display when your signatories hover their mouse over the field.
-
Select OK.
-
Repeat STEP 11 to add additional Docusign fields.