
Docusign data set adds additional fields to your project to enable the extended features for Docusign released in Smart Flows 4.13. After you add the Docusign data set, you can enhance your Docusign enabled templates with text fields, check boxes, dropdown menus, among other fields.
You can only complete this process if you have a Docusign connector in your project. If you do not have a Docusign connector, you won't see an option for Docusign Type in the Create data set wizard. For helping setting up your Docusign connector, refer to Creating a Docusign Connector for more information.
-
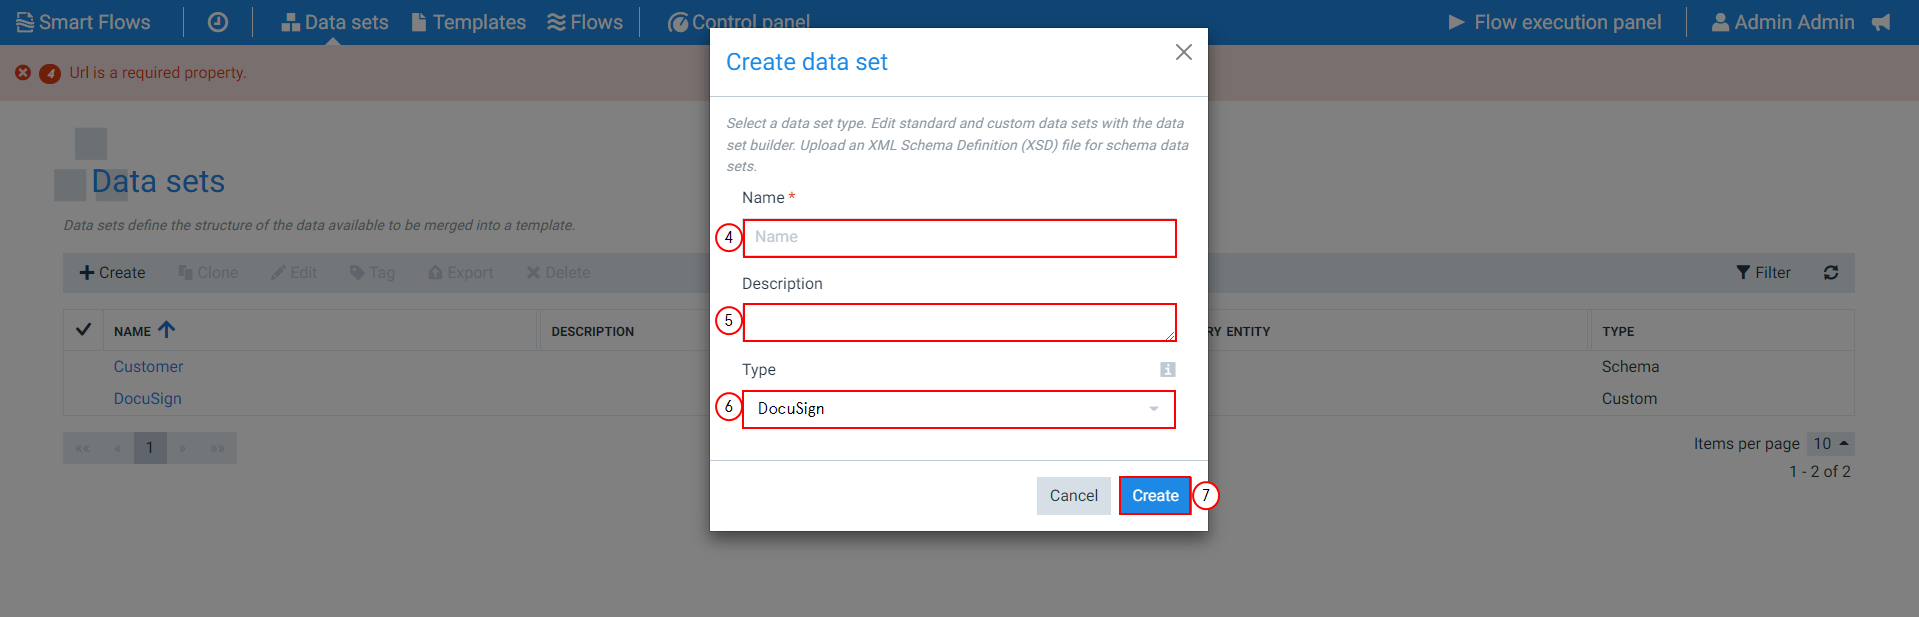
In Project Console, select Data sets > +Create.
-
In the Name field, input Docusign standard fields.
-
In the Description field, input Docusign standard fields.
-
In the Type dropdown menu, select Docusign.
-
Select Create.
-
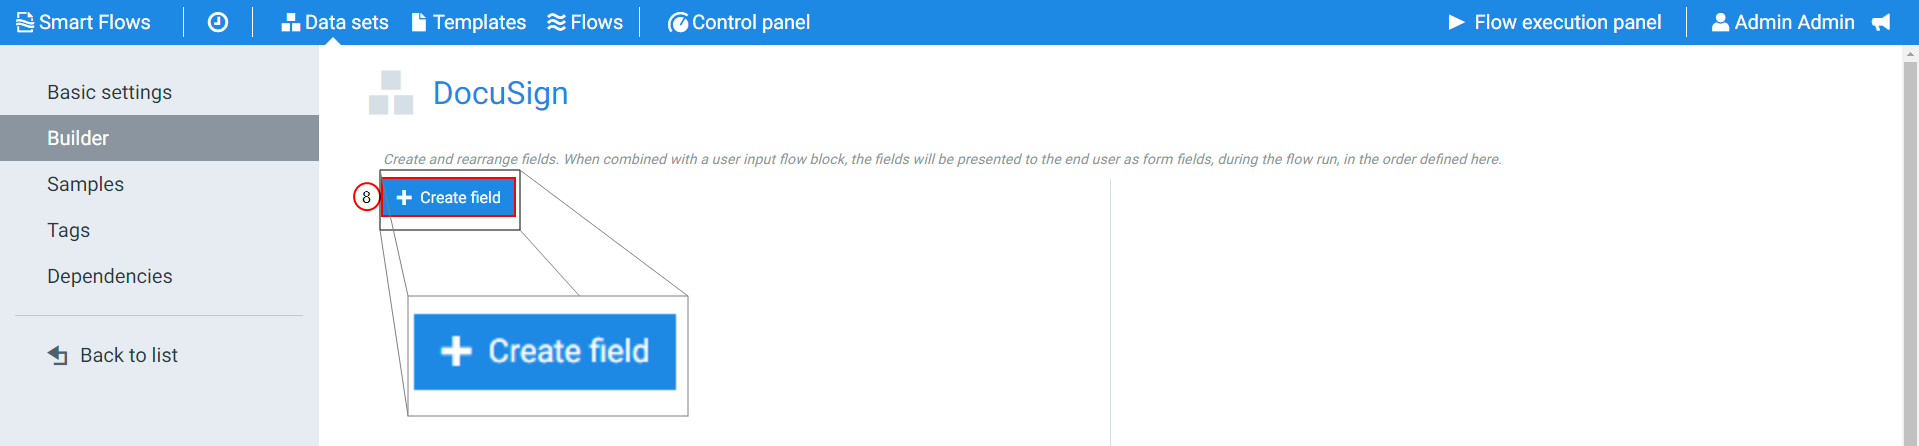
Select the +Create field button.
-
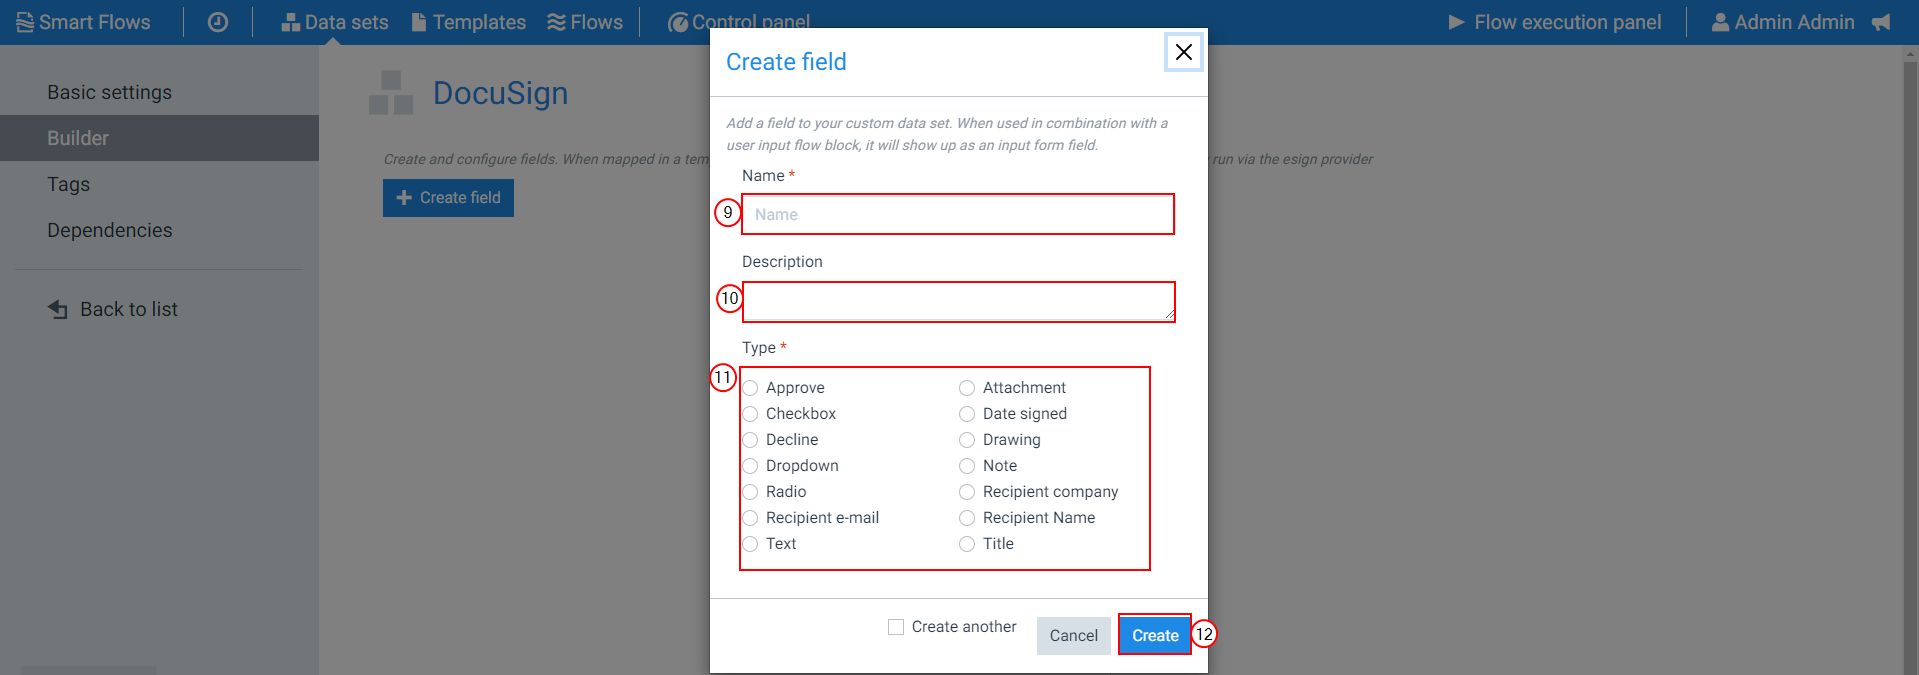
In the Name field, input the name of the field.
-
(Optional) In the Description field, input a helpful guide on what your users should use this field for or what data should be linked to it.
-
Select the Docusign field type to add by clicking the bubble next to it.
-
Select Create.
-
Repeat STEP 6 through STEP 9 for all additional Docusign fields you wish to add.
Add Docusign data set to your template.
After you have created your Docusign data set, you need to add your Docusign data set to the list of data sets connected to your template.
-
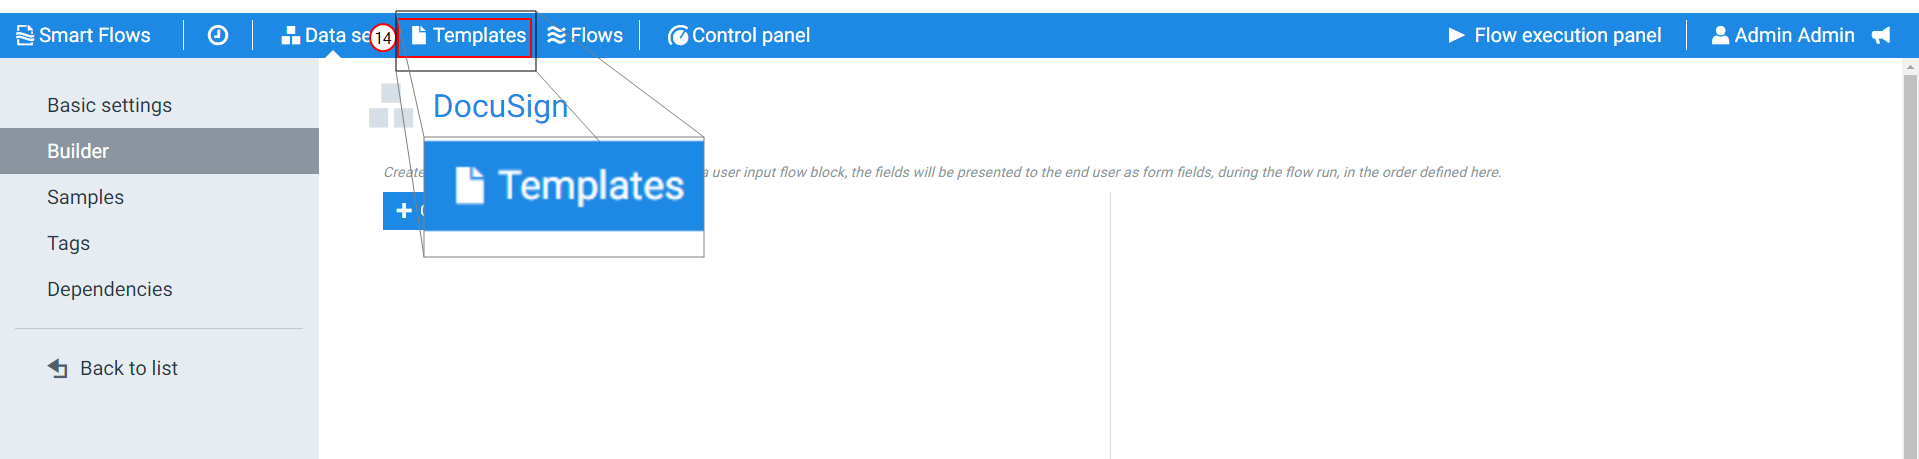
On the top navigation bar, select Templates.
-
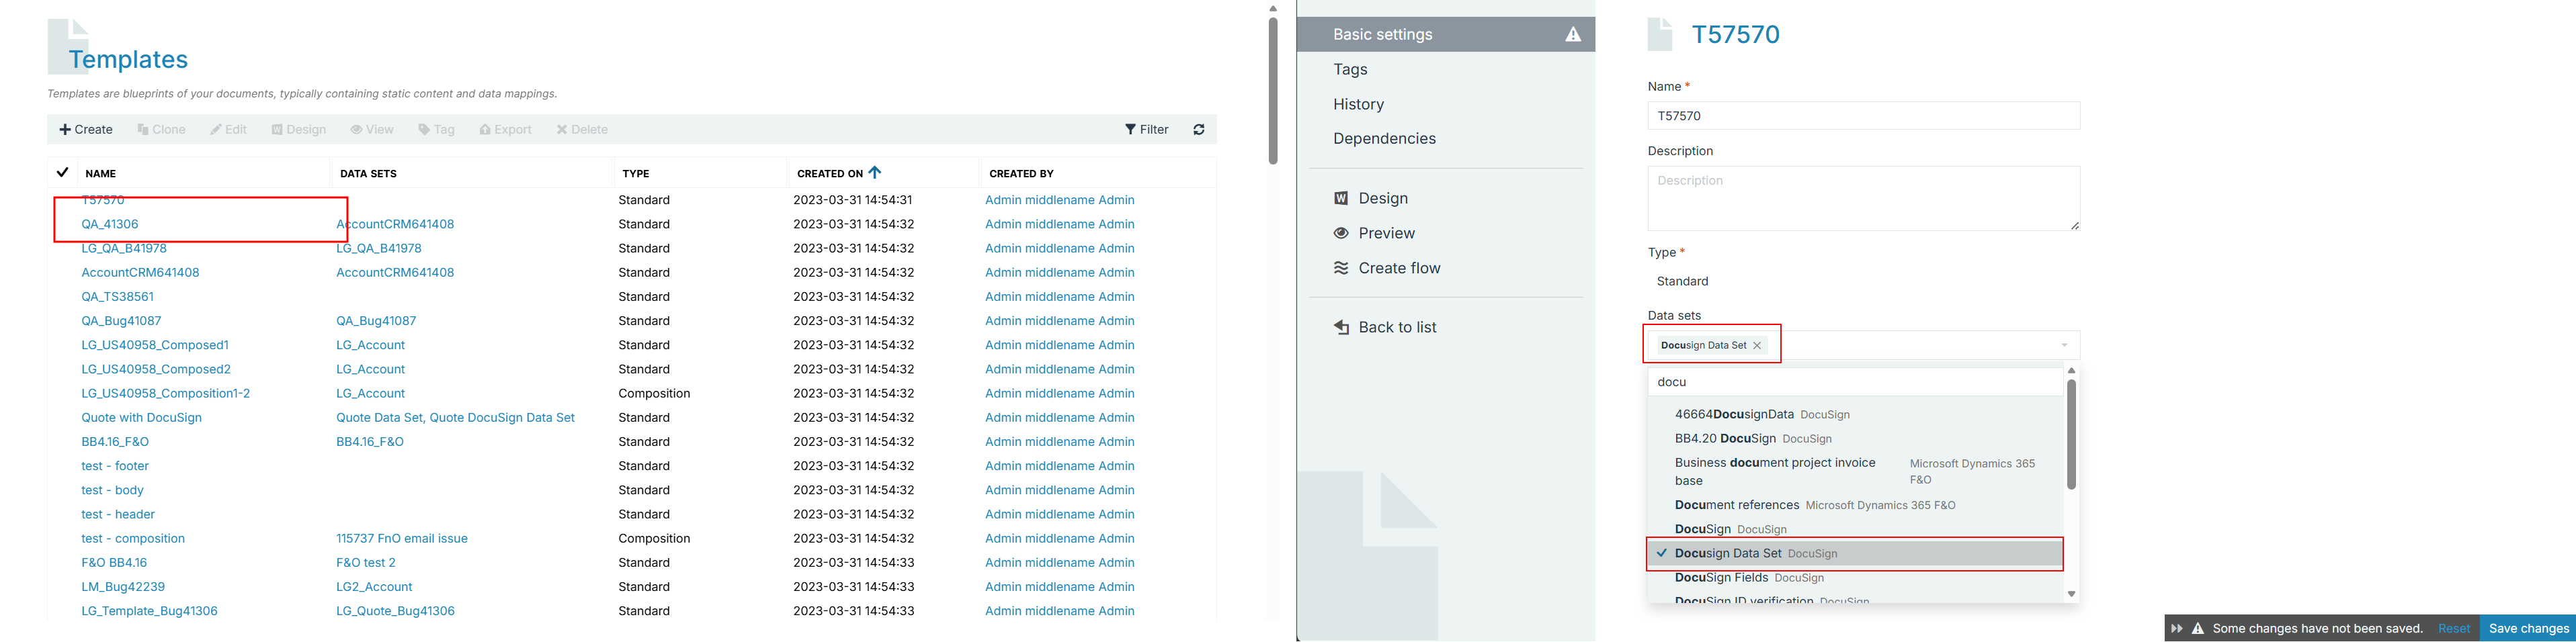
In the Templates List view, select the Template you wish to connect to the Docusign data set.
-
Select in the Data Sets field and select your Docusign data set.
The new Dataset displays above the dataset field in gray.
-
Select Save.
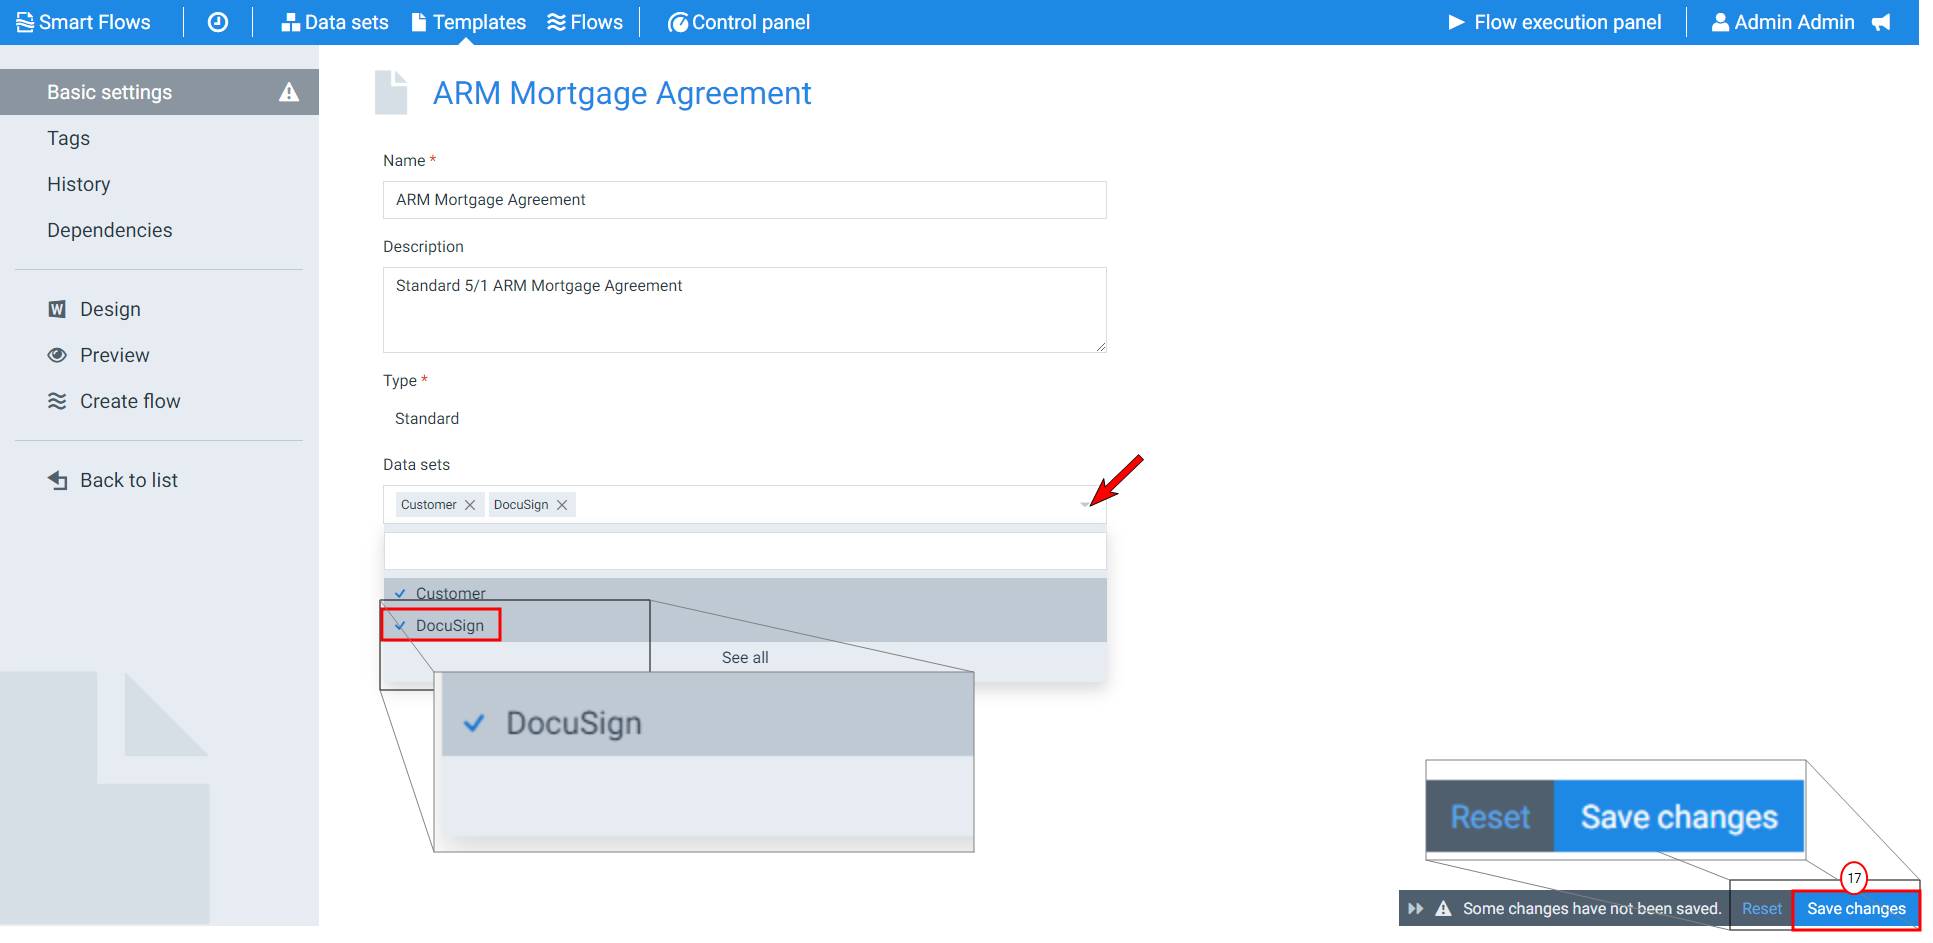
Your selected template can now take advantage of the fields you created in your Docusign data set.
You can repeat STEP 12 through STEP 14 to add your Docusign data set to additional templates.
See Also
For help adding your Docusign fields to your template, refer to Adding a Docusign field to a Template for more information.