
The Create connector wizard guides you through the configuration when creating a Single Sign-On connector. You can only create one Single Sign-On-type connector.
-
In the Project Console, navigate to Control panel > Connectors > +Create.
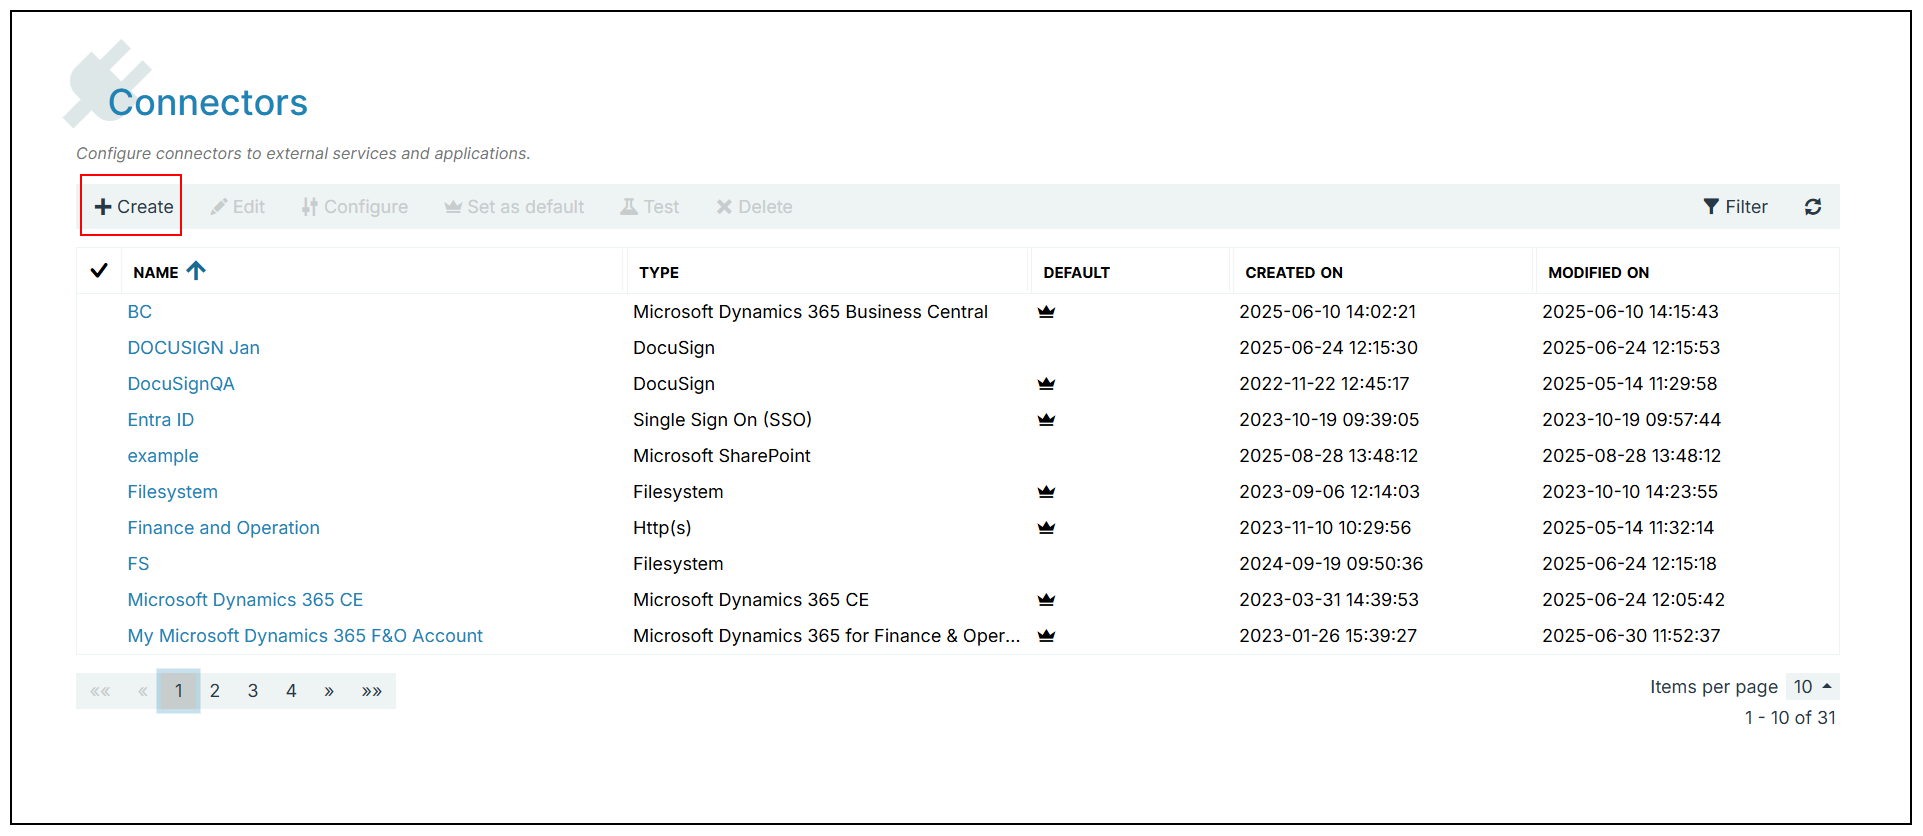
-
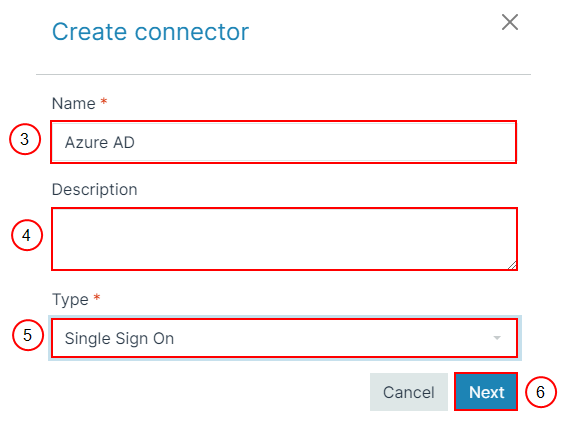
In the Name field, input the Name of your connector.
-
(Optional) In the Description field, input a Description for your connector.
-
In the Type dropdown menu, select Single Sign On.
-
Select Next.
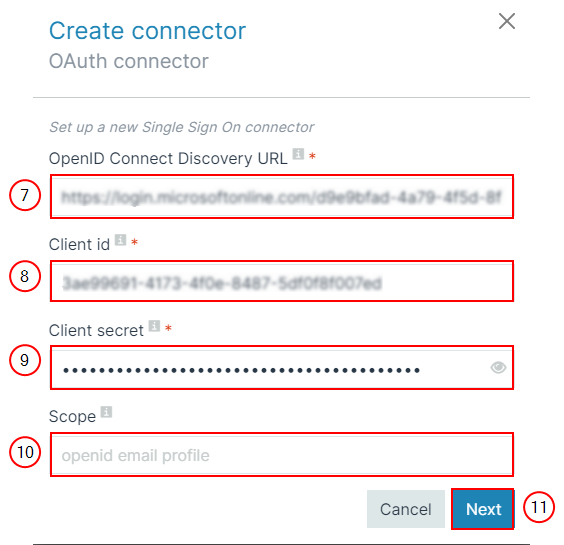
The Discovery URL is also sometimes referred to as the well-known URL. For details on App registration in Microsoft Entra ID to get Discovery URL, Client Id, and Client Secret, please refer to Configuring Microsoft Entra ID for Single Sign-On.
-
In the OpenID Connect Discovery URL field, input the Discovery URL.
-
In the Client Id field, input the client Id you generated on your Identity Provider.
-
In the Client Secret field, input the client secret you generated on your Identity Provider.
-
(Optional) In the Scope field, input default values (OpenId, e-mail, and profile).
You can use default values unless you create your scope. The scope contains at least the same values defined in the default OpenId scopes.
-
Select Next.
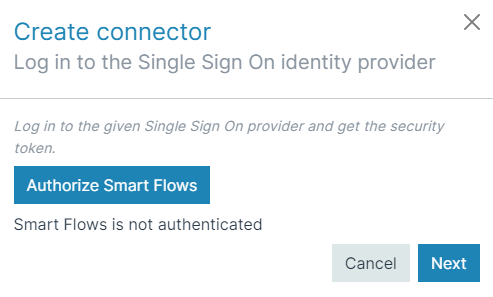
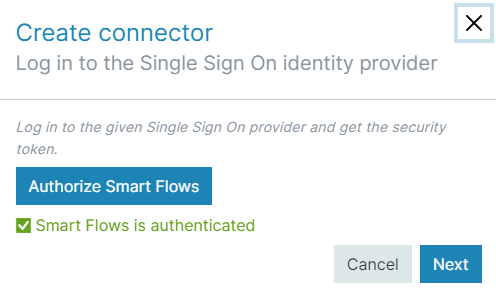
The Login to Single Sign On Identity Provider window displays.
When we add the Single Sign-On connector to Smart Flows, there is a possibility to log in to Smart Flows using Ping Identity. However, Ping Identity is currently not supported in authenticating Template Builder due to technical reasons.
-
Select Authorize Smart Flows.
The system opens the login page for your Identity Provider.
-
Confirm your credentials for Microsoft Entra ID.
The system redirects you to the Smart Flows. Smart Flows is authorized displays under the Authorize Smart Flows button.
-
Select Next.
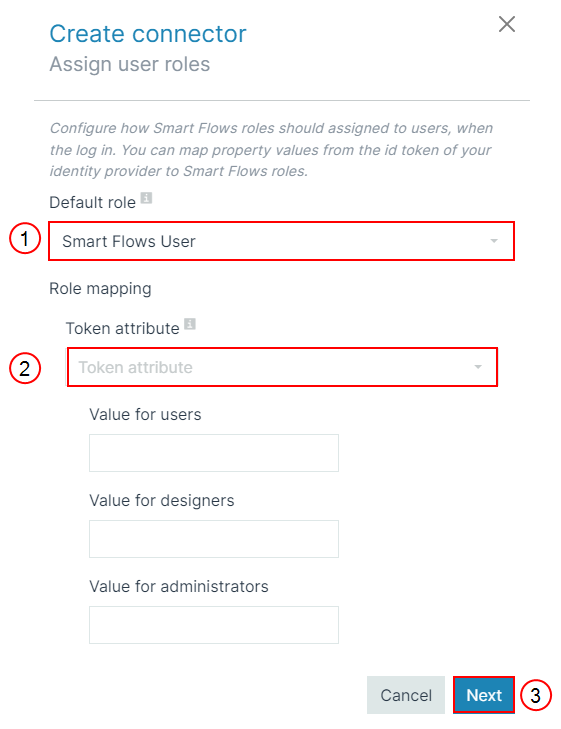
The Create connector Assign user roles window displays.
Map User Roles for Single Sign-On
The administrator can configure the Identity Provider roles that should reflect the roles we support in Smart Flows. A default role is assigned if user roles are unavailable in the response after the user logs in to the identity provider. Use the Token Id in the Token Attribute field for role mapping, this provides a list of all the attributes returned after logging in to Identity Provider. You can configure the roles in the Identity Provider that map to the corresponding Smart Flows role.
-
(Optional) In the Default role dropdown menu, select the default role for a user if no role information is present in the response from the Identity Provider.
-
(Optional) In the Token attribute dropdown menu, select the Token attribute containing the information regarding the user role defined on the Identity Provider.
-
Select Next.
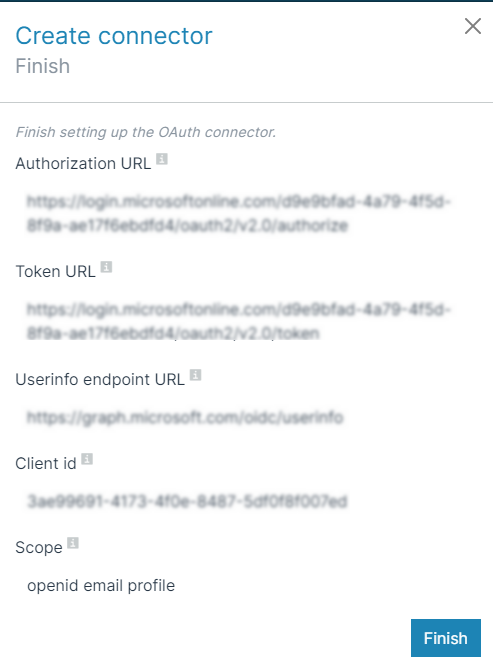
Smart Flows displays a summary of the configuration.
-
Select the Finish button to conclude the creation of your Single Sign-On connector.
The detailed view of Single Sign-On connector displays.
Once you complete setting up your connector, you will see an extra option on the login screen of Smart Flows. Suppose a user clicks on the Log in with the name of your Single Sign-On connector button. In that case, the system redirects the user to the login screen of the identity provider (if not logged in yet) or directly logs the user into Smart Flows if the identity provider has already been authenticated.
