
When creating a Single Sign-On connector, OAuth2.0 authorization is required to authenticate the connector. To do so, you must configure App registrations in Microsoft Entra ID.
Create the App Registration
-
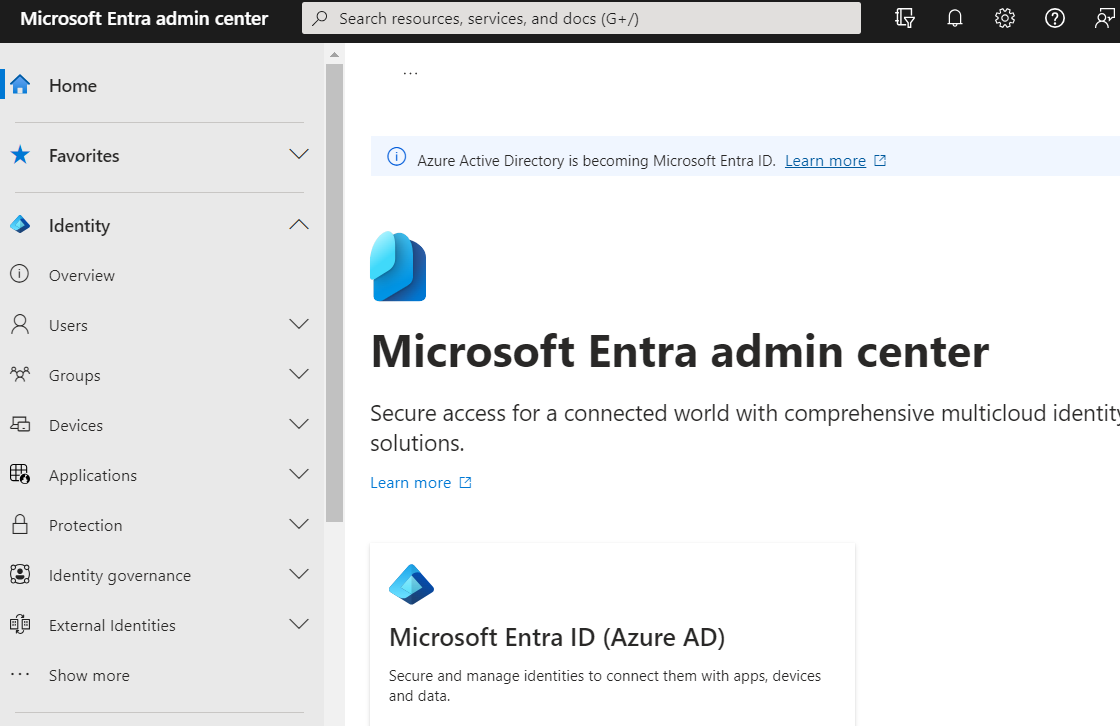
Go to your Microsoft Entra Admin Center and select Microsoft Entra ID.
-
In the left navigation panel, select the App registrations.
-
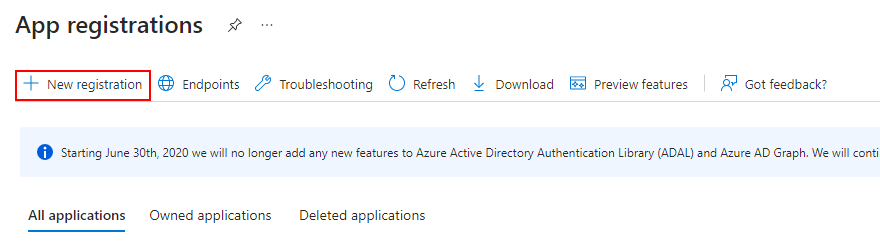
Select New registration.
-
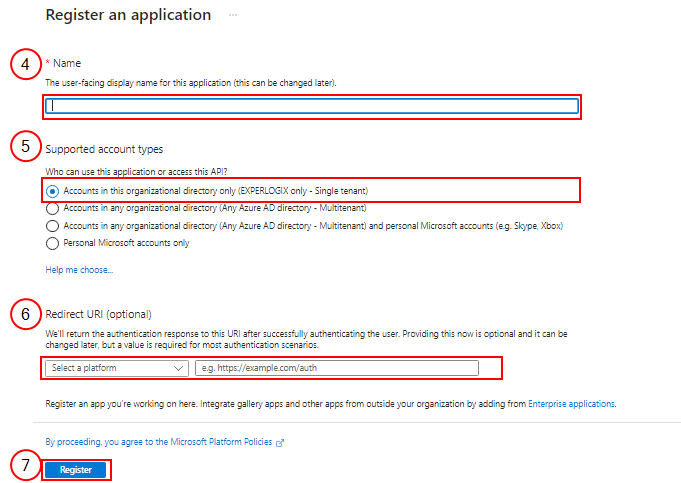
In the Name field, input the name of your application.
-
Select the appropriate supported account types for your organization. By default, it selects a Single tenant as the account type.
-
(Optional) In the Redirect URI field, input the redirect URI.
This value is the base-URL of your application with /oauth2/redirect as a suffix—for example, https://login.example.com/oauth2/redirect.
-
Select Register.
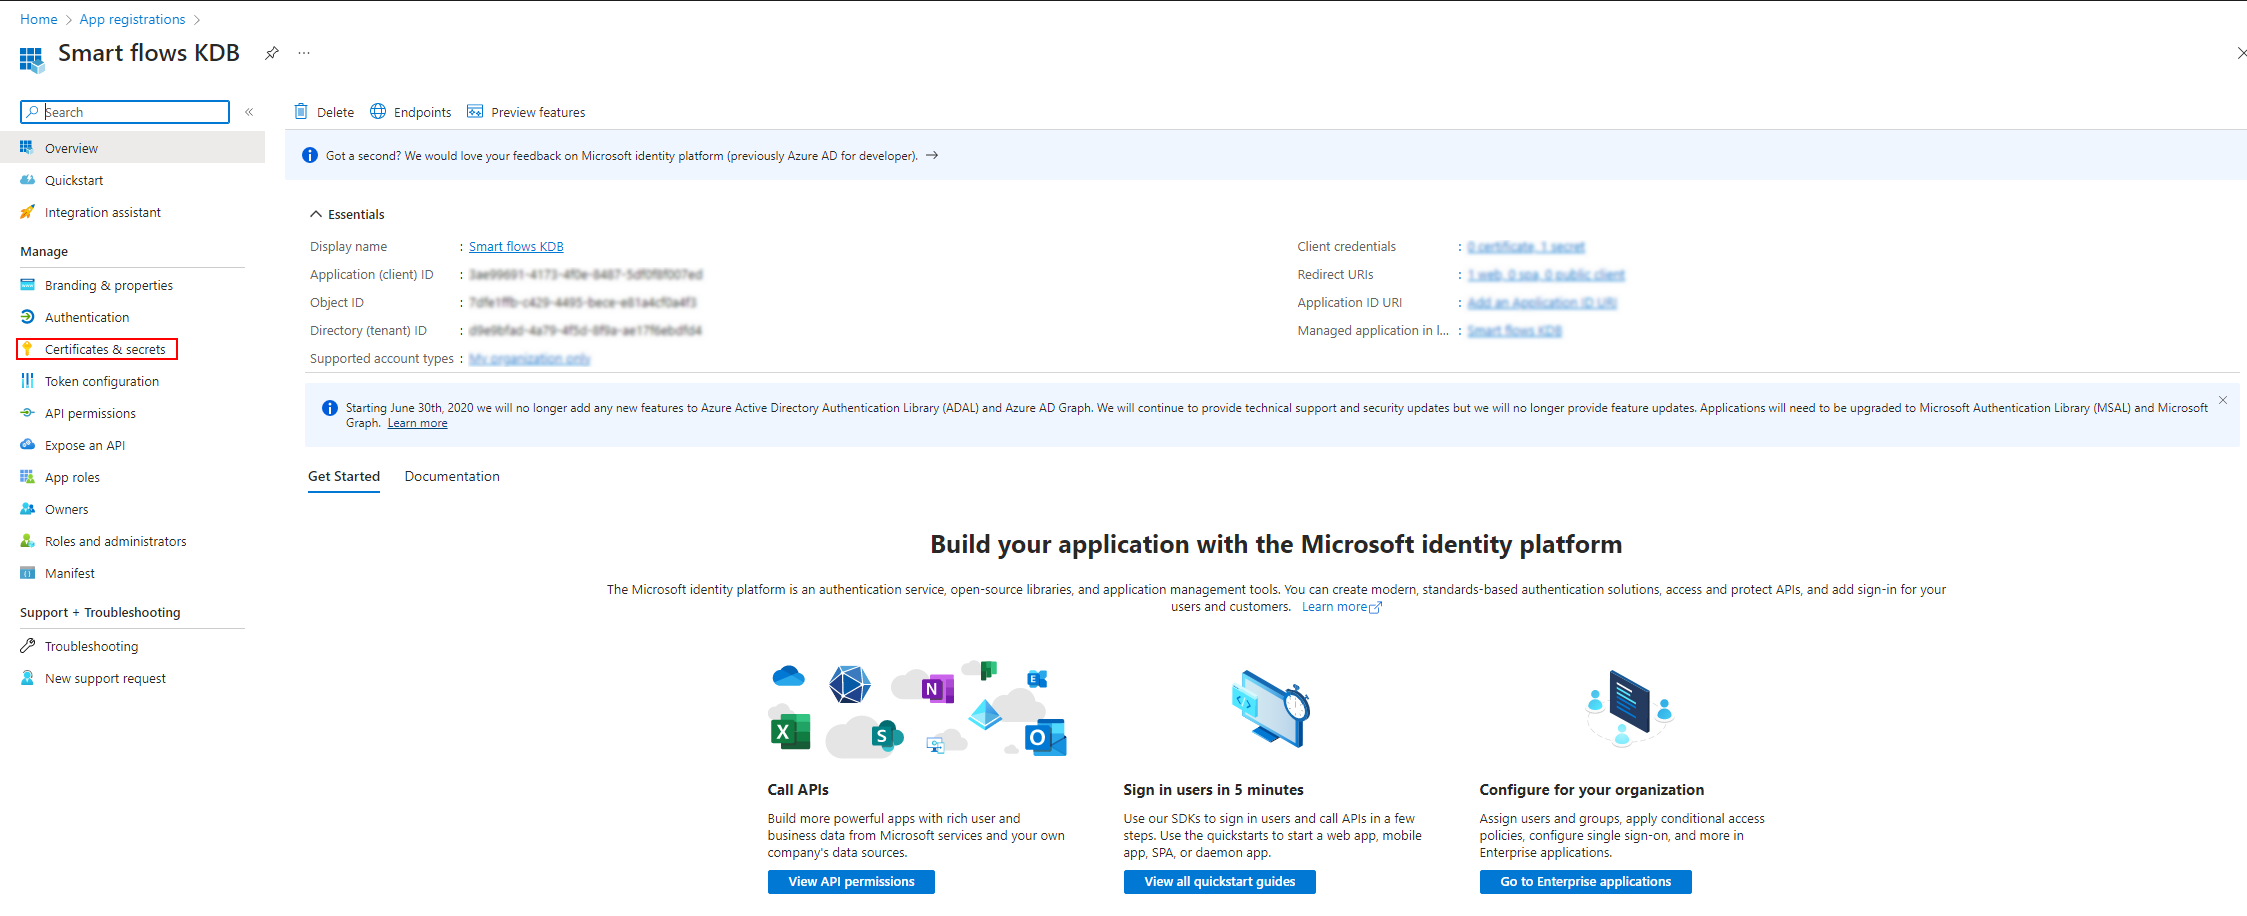
The Application Overview page displays.
Store the Client Secret
-
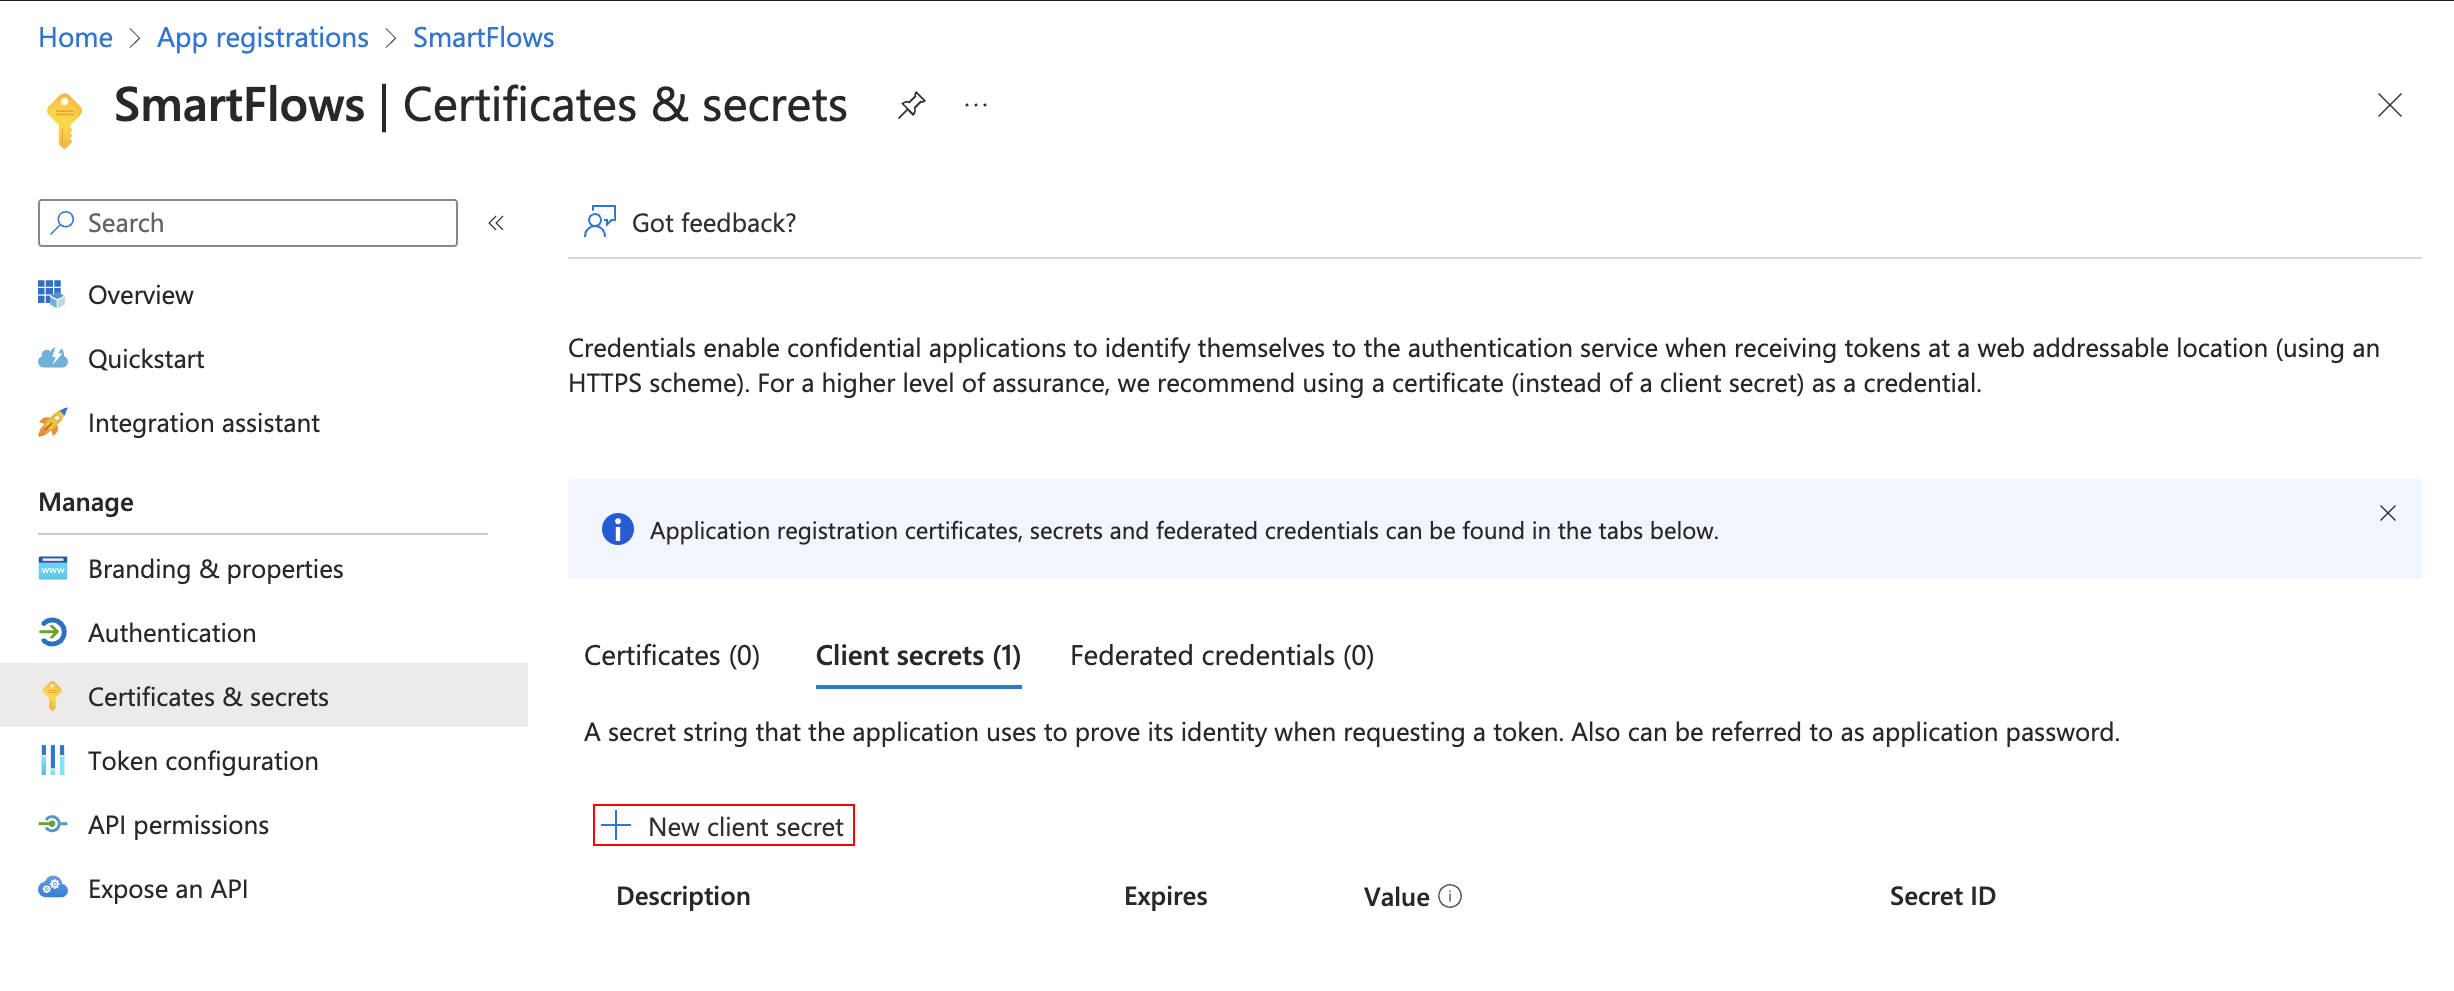
In the left navigation panel, select Certificates & secrets.
-
Select New client secret.
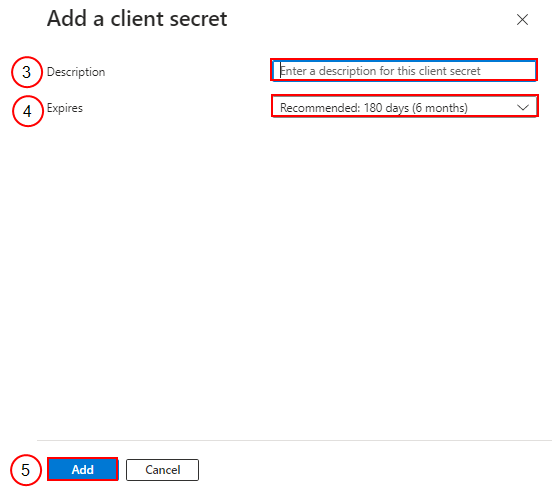
The Add a client secret dialog displays.
-
In the Description field, input the description for the client's secret.
-
In the Expires dropdown menu, select the expiry days for the client secret.
-
Select Add.
-
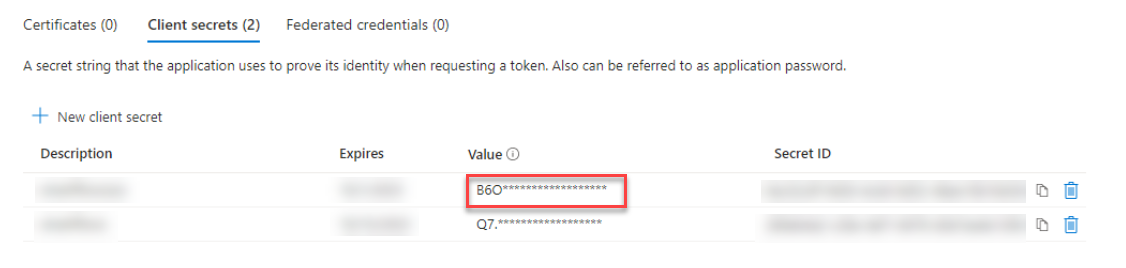
Copy the Client Secret Value and store it. This value cannot be read again and the secret will need to be regenerated if the value is not stored.
Store the Client ID
-
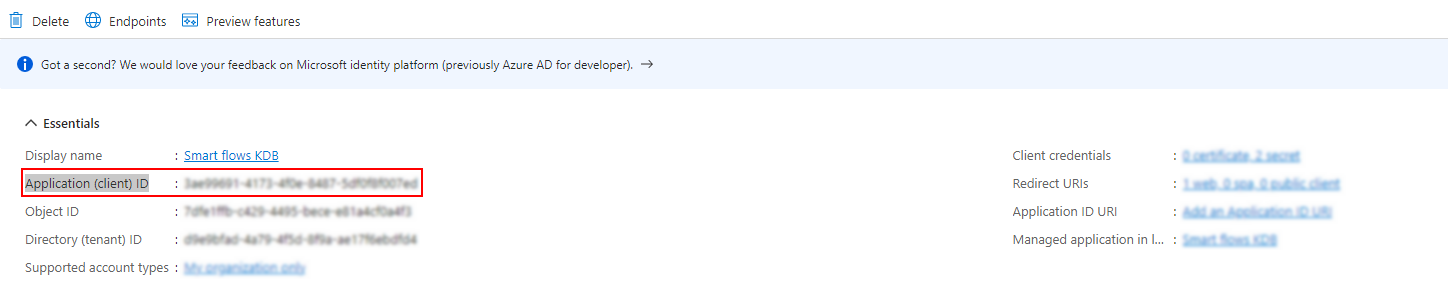
In the left navigation panel, select Overview.
-
View and store the Application (client) ID.
Store the OpenID Connect metadata document key
-
On the top navigation, select Endpoint.
-
View and store the OpenID Connect metadata document value.
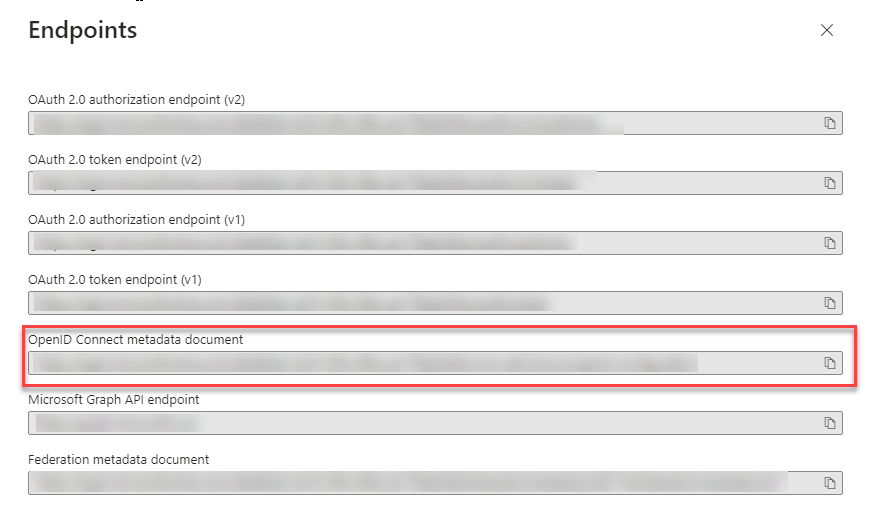
Use OpenID Connect metadata document key, Client ID, and Client Secret for Creating a Single Sign-On Connector in Smart Flows.