Creating a Sugar connector allows Admins and Designers to sync their users and start the process of configuring Smart Flows to work with Sugar. If you are creating your Sugar connector during the initialization of your Smart Flows project, skip to Configuration during Project Initialization.
You can have multiple connectors of the type Sugar in your project.
Create Sugar connector after project initialization
If a flow is started outside of Microsoft Dynamics, the system cannot maintain the identities when using impersonation. When the flow runs, it will run with the person's credentials who created the connectors. This will show that the connector creator performed subsequent actions during the flow execution instead of the person who is running the flow.
-
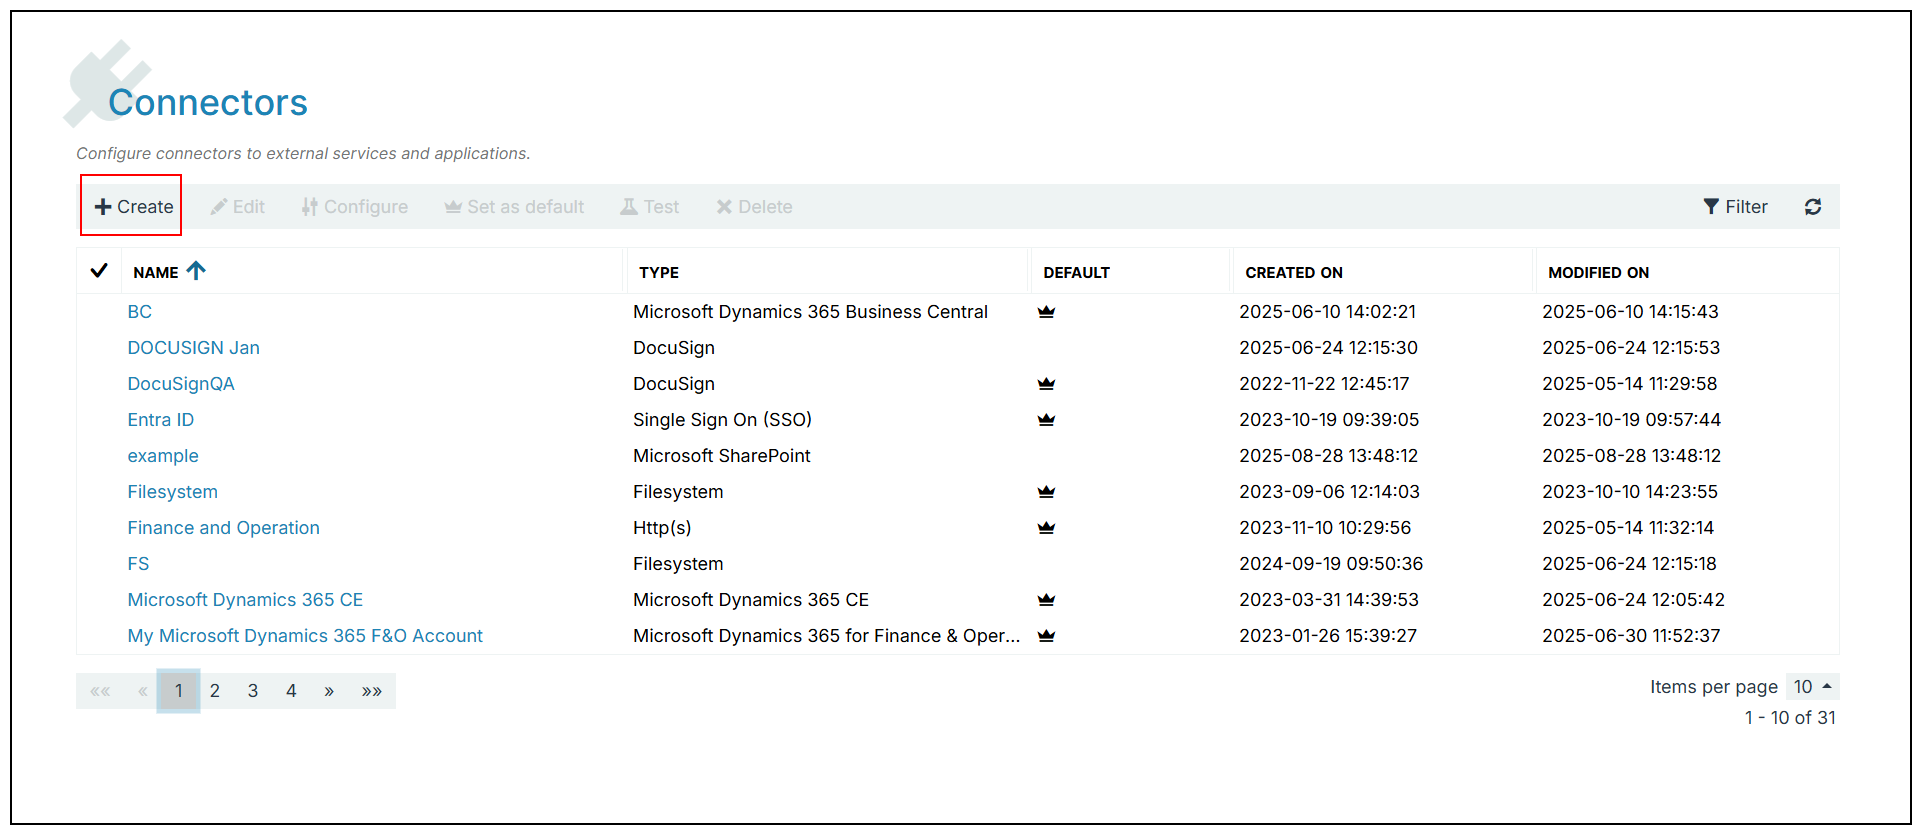
In Project Console, select Control Panel > Connectors > +Create.
-
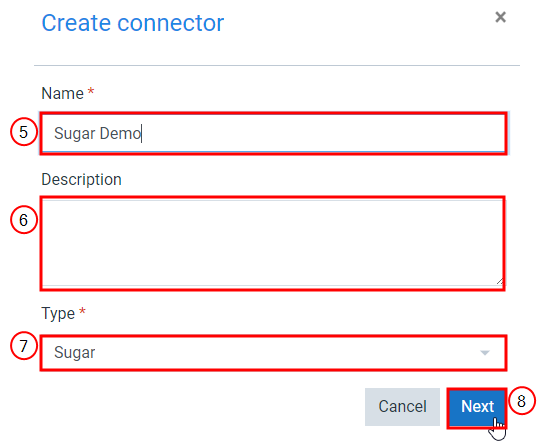
Input the name of your connector.
-
(Optional) Input a Description for your connector.
-
In the Type dropdown menu, select Sugar.
-
Select Next.
-
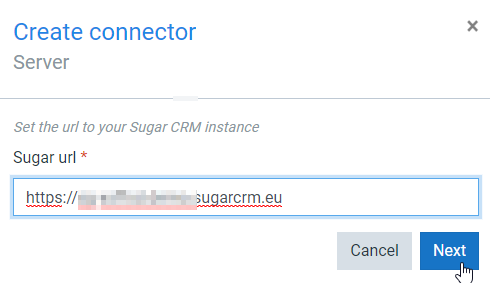
In the Sugar URL field, insert the URL of the Sugar instance to which you want to connect your Experlogix Smart Flows project.
-
Select Next.
Add the script-src to your Sugar instance
-
On the Project Console, navigate to Control Panel > Connectors.
-
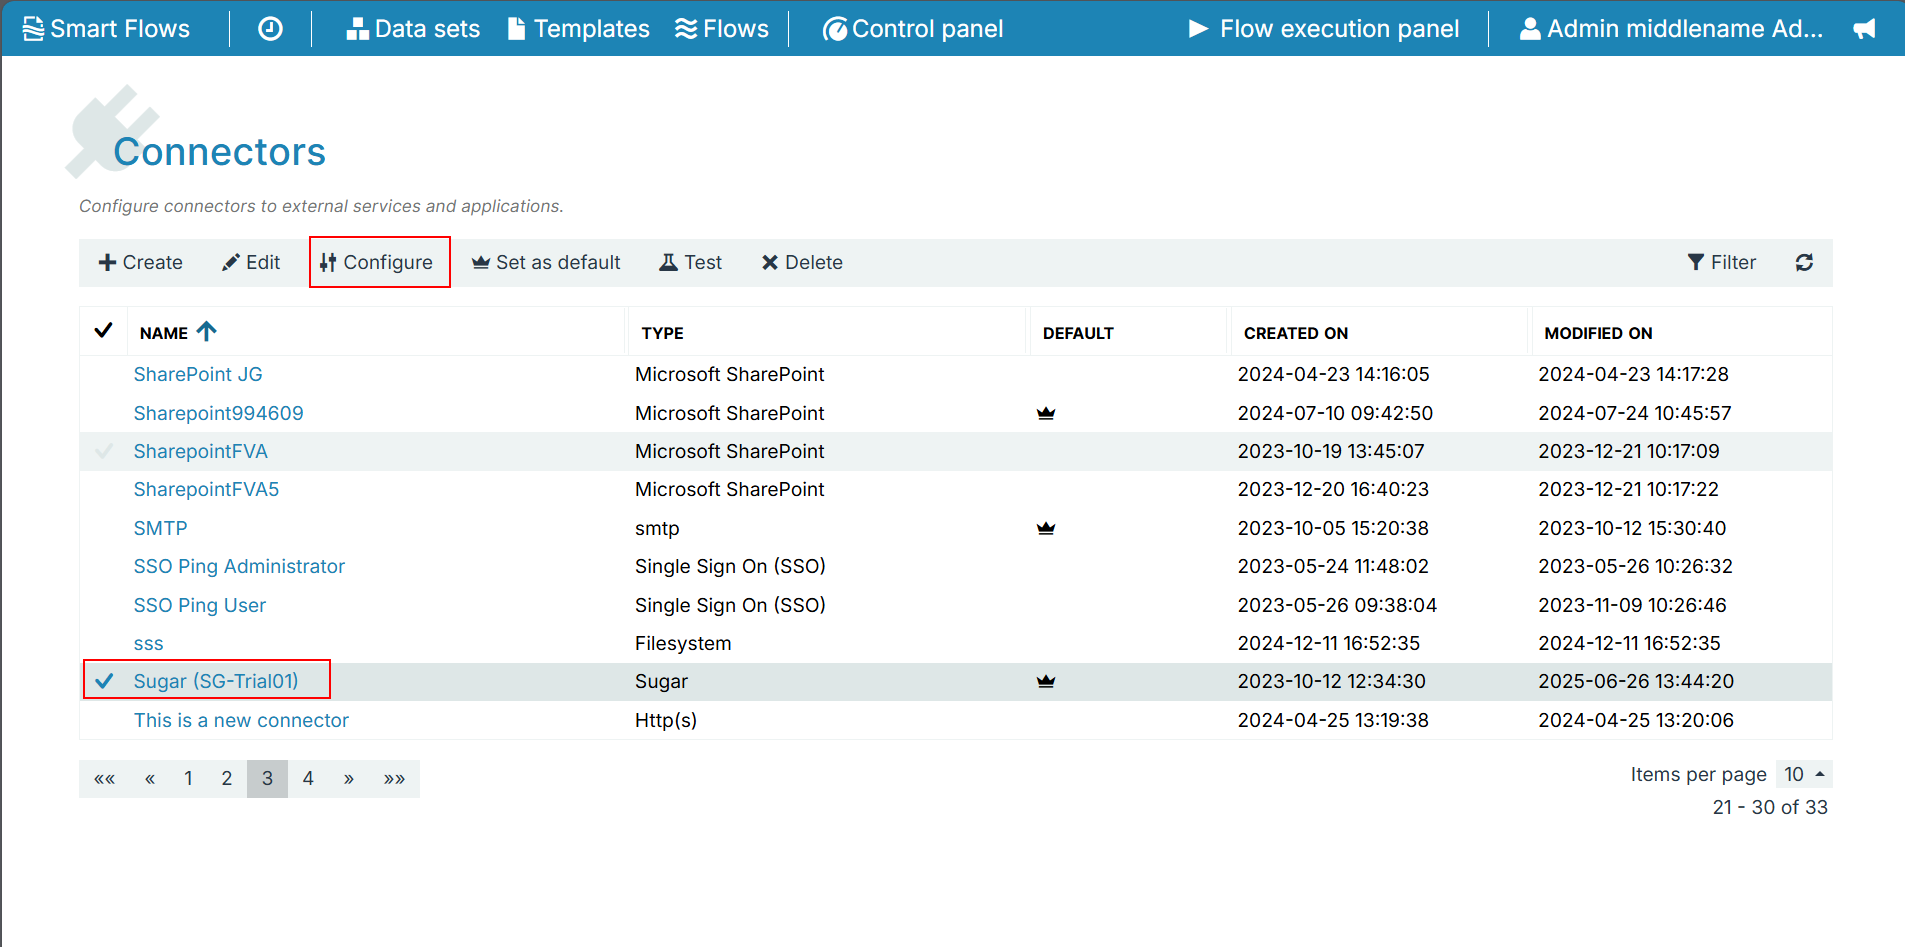
Select the Sugar connector row, then click the Configure button.
-
In the Password field, type in your password and select Next.
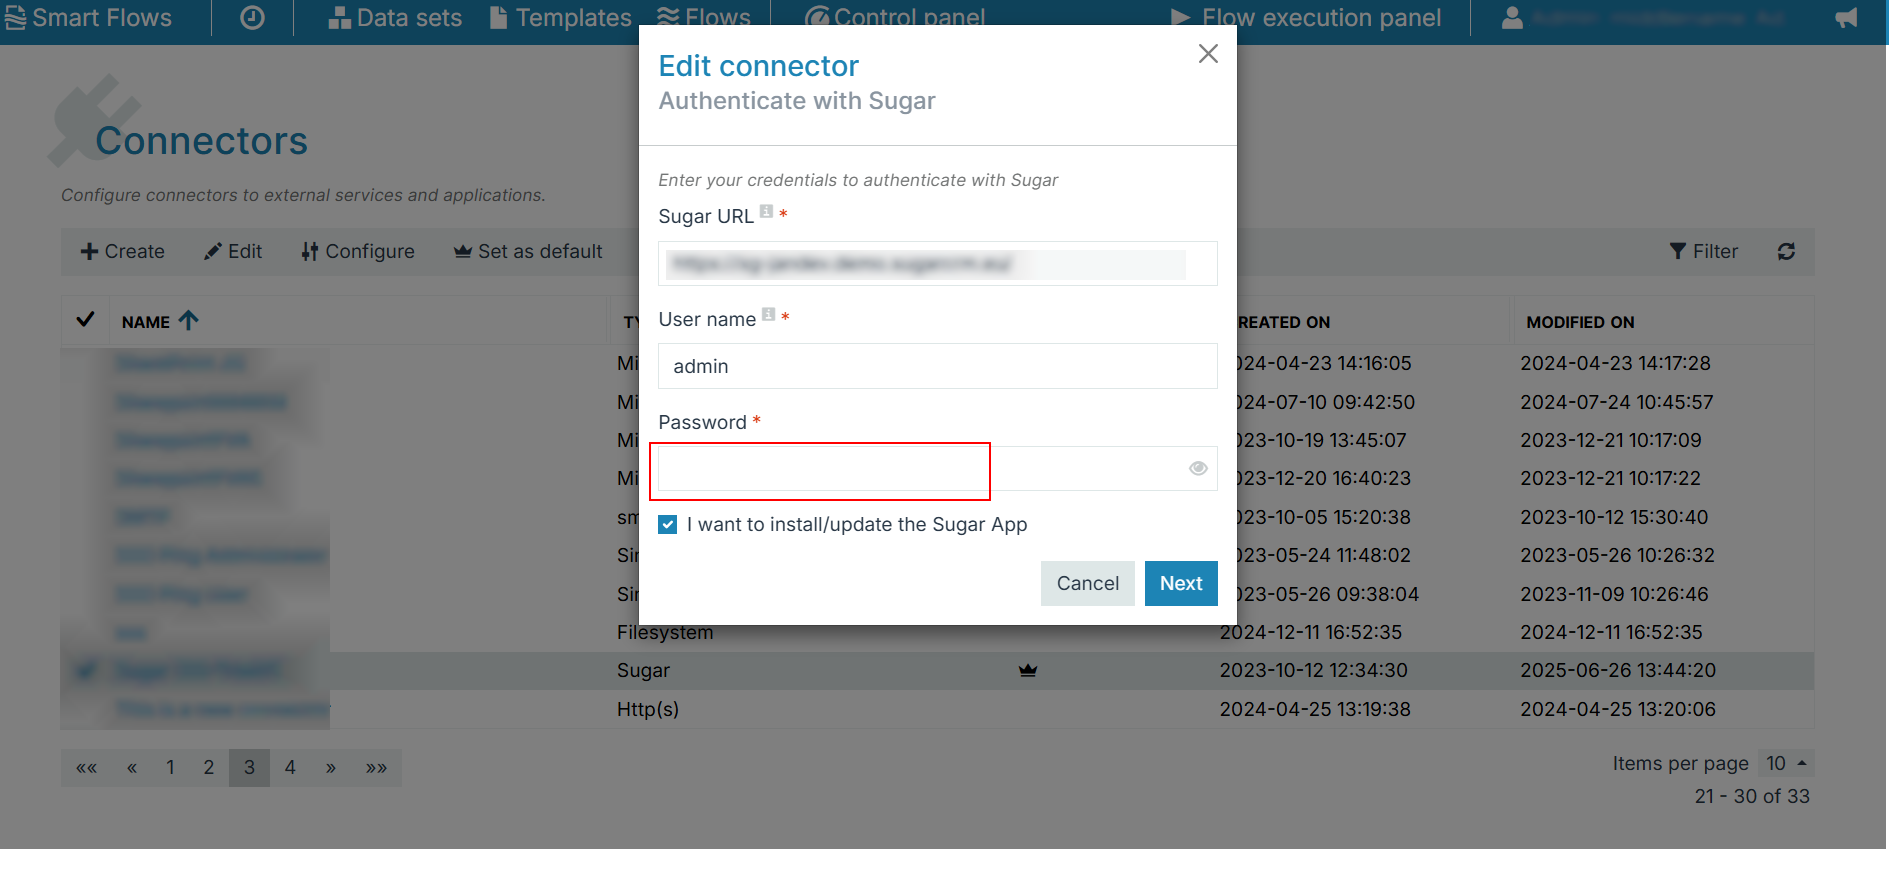
The Edit connector customize packages window displays.
-
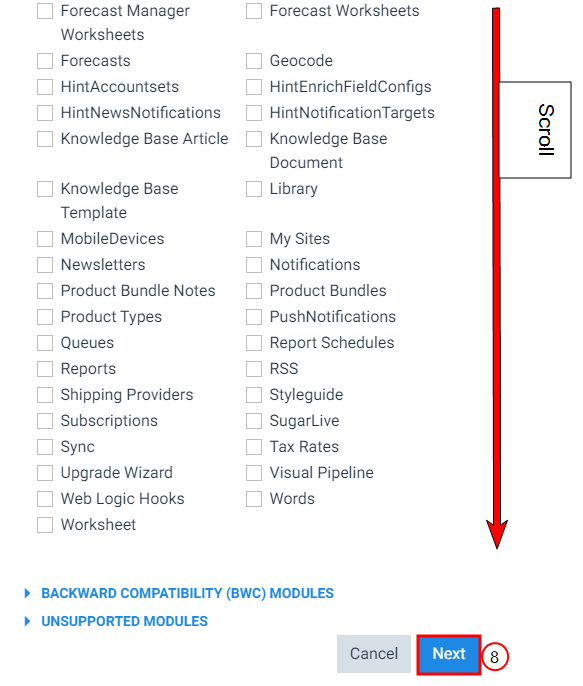
Scroll to the bottom of the window and select Next.
The Edit connector Install your Smart Flow Sugar package window displays.
-
Select Next.
The Edit connector Create/configure Sugar connection record automatically window is displayed.
-
You can either deselect the option "I want to install/update the Sugar App" or leave it selected.
-
Select Next.
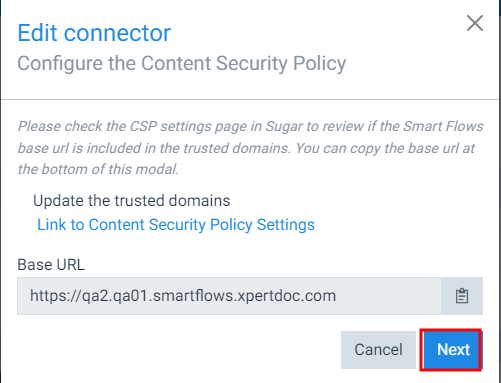
The Edit connector Configure the Content Security Policy window is displayed.
-
Select the copy button for Smart Flows Base URL.
The system copies the URL for your Smart Flows instance to your clipboard.
-
Select Link to Content Security Policy Settings.
The login page for SugarAI displays in a new tab.
-
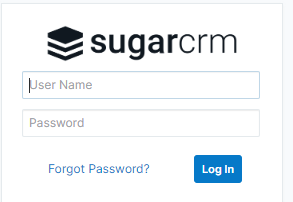
Log in to your Sugar instance.
-
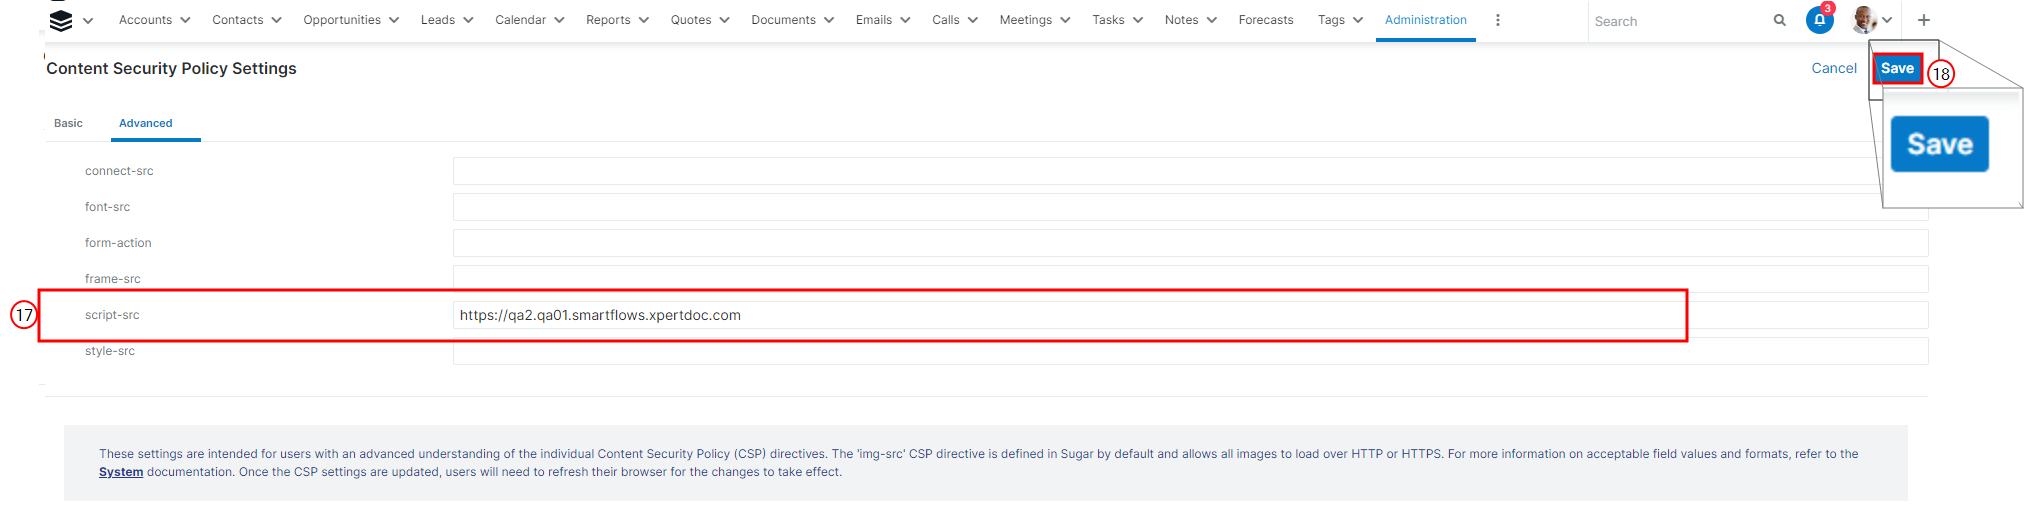
In your organization's Sugar instance, navigate to the Content Policy and Settings tab.
-
Select the Advanced tab.

When copying the Smart Flows instance URL, ensure you copy from the HTTPS through the first /
-
In the script-src field, copy and paste the URL for your Smart Flows instance.
-
Select Save.
A save confirmation displays. The system returns to the Administration page in Sugar.
-
In Smart Flows, select Next.
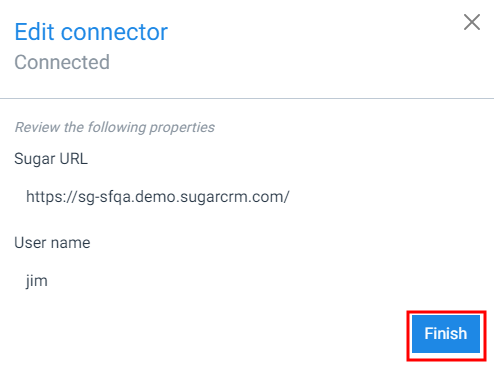
The Edit connector Connected window displays.
-
Select Finish.
The Edit connector Connected window no longer displays. The update of your Sugar connector is complete.
Uploading and Installing the Experlogix Module for Sugar
Once you've created and authenticated your Sugar connector, you must upload a deployable package from Smart Flows into Sugar. The installed app package(.zip) allows seamless communication with Sugar and Smart Flows to communicate between each other. Follow the steps below to upload and install your Sugar app package.
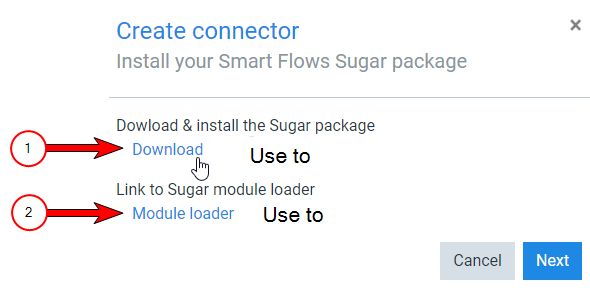
The Install your Smart Flows Sugar package window displays.
-
In the Create Connector dialog box, select Download under Download and install the Sugar package.
Your browser starts downloading the zip file.
-
Once the zip download is complete, Select the Module loader button.
-
Next to the Module field, select the Choose file button.
The File Explorer displays.
-
Navigate to and select the downloaded zip file provided by Smart Flows.
-
Select Upload.
In the lower List view, the package displays.
-
Select Install.
The Ready to Install window displays.
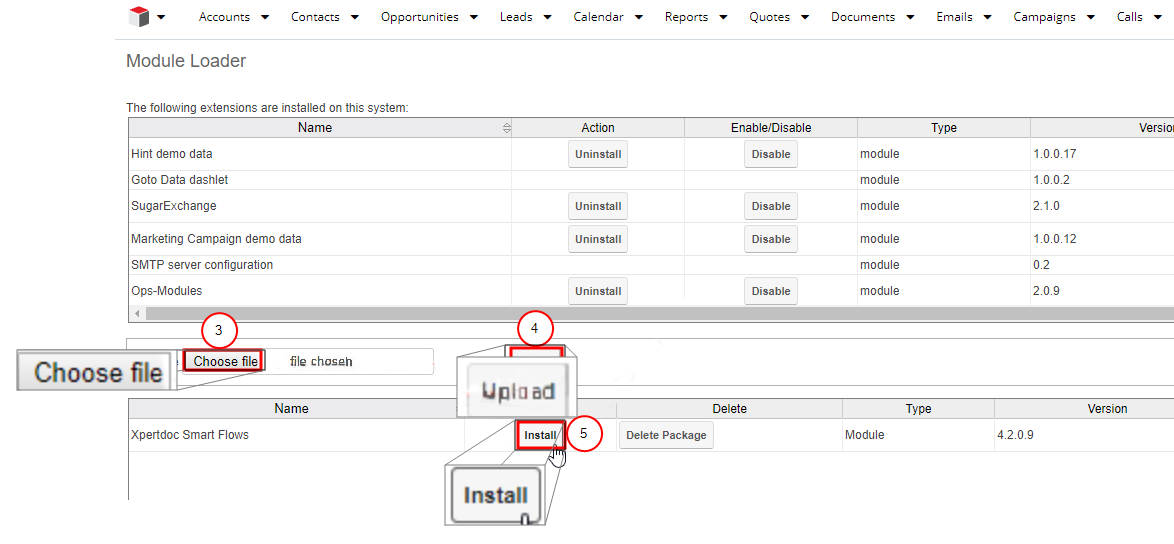
The package displays in the installed package list view.
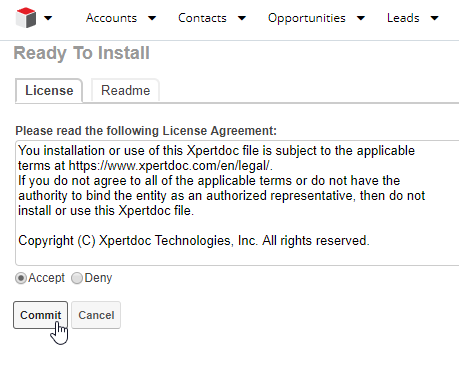
You’ve successfully created your Sugar connector. After installing the app package, you must update the configuration record between Sugar and Smart Flows; refer to Set up a configuration record for Sugar for more details.
Configuration during Project Initialization
Admins can also configure their Sugar connector during the project initialization if you have a license for Sugar. In that case, the initialization wizard prompts you to provide the URL of a Sugar instance during project setup. When prompted, follow these steps.
-
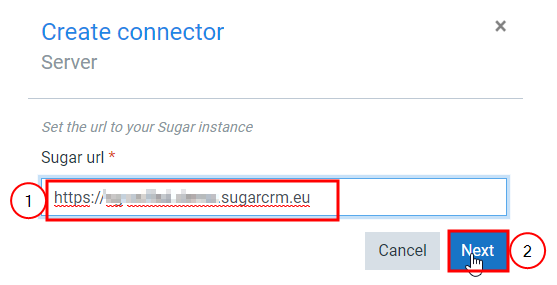
In the Sugar URL field, enter the URL of the Sugar instance that you want to connect to your Experlogix Smart Flows project.
-
Select Next.
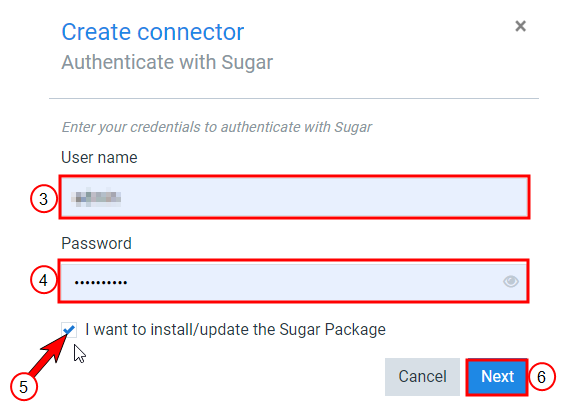
The Create connector Authenticate with Sugar window displays.
-
In the User name field, input the admin username for your selected Sugar instance.
-
In the Password field, input the admin password.
-
In the I want to install/update the Sugar package checkbox, select the checkbox.
A check mark displays. Smart Flows creates an app package for Sugar.
-
Select Next.
The Create connector Install your Smart Flows sugar package window displays.