
Overview
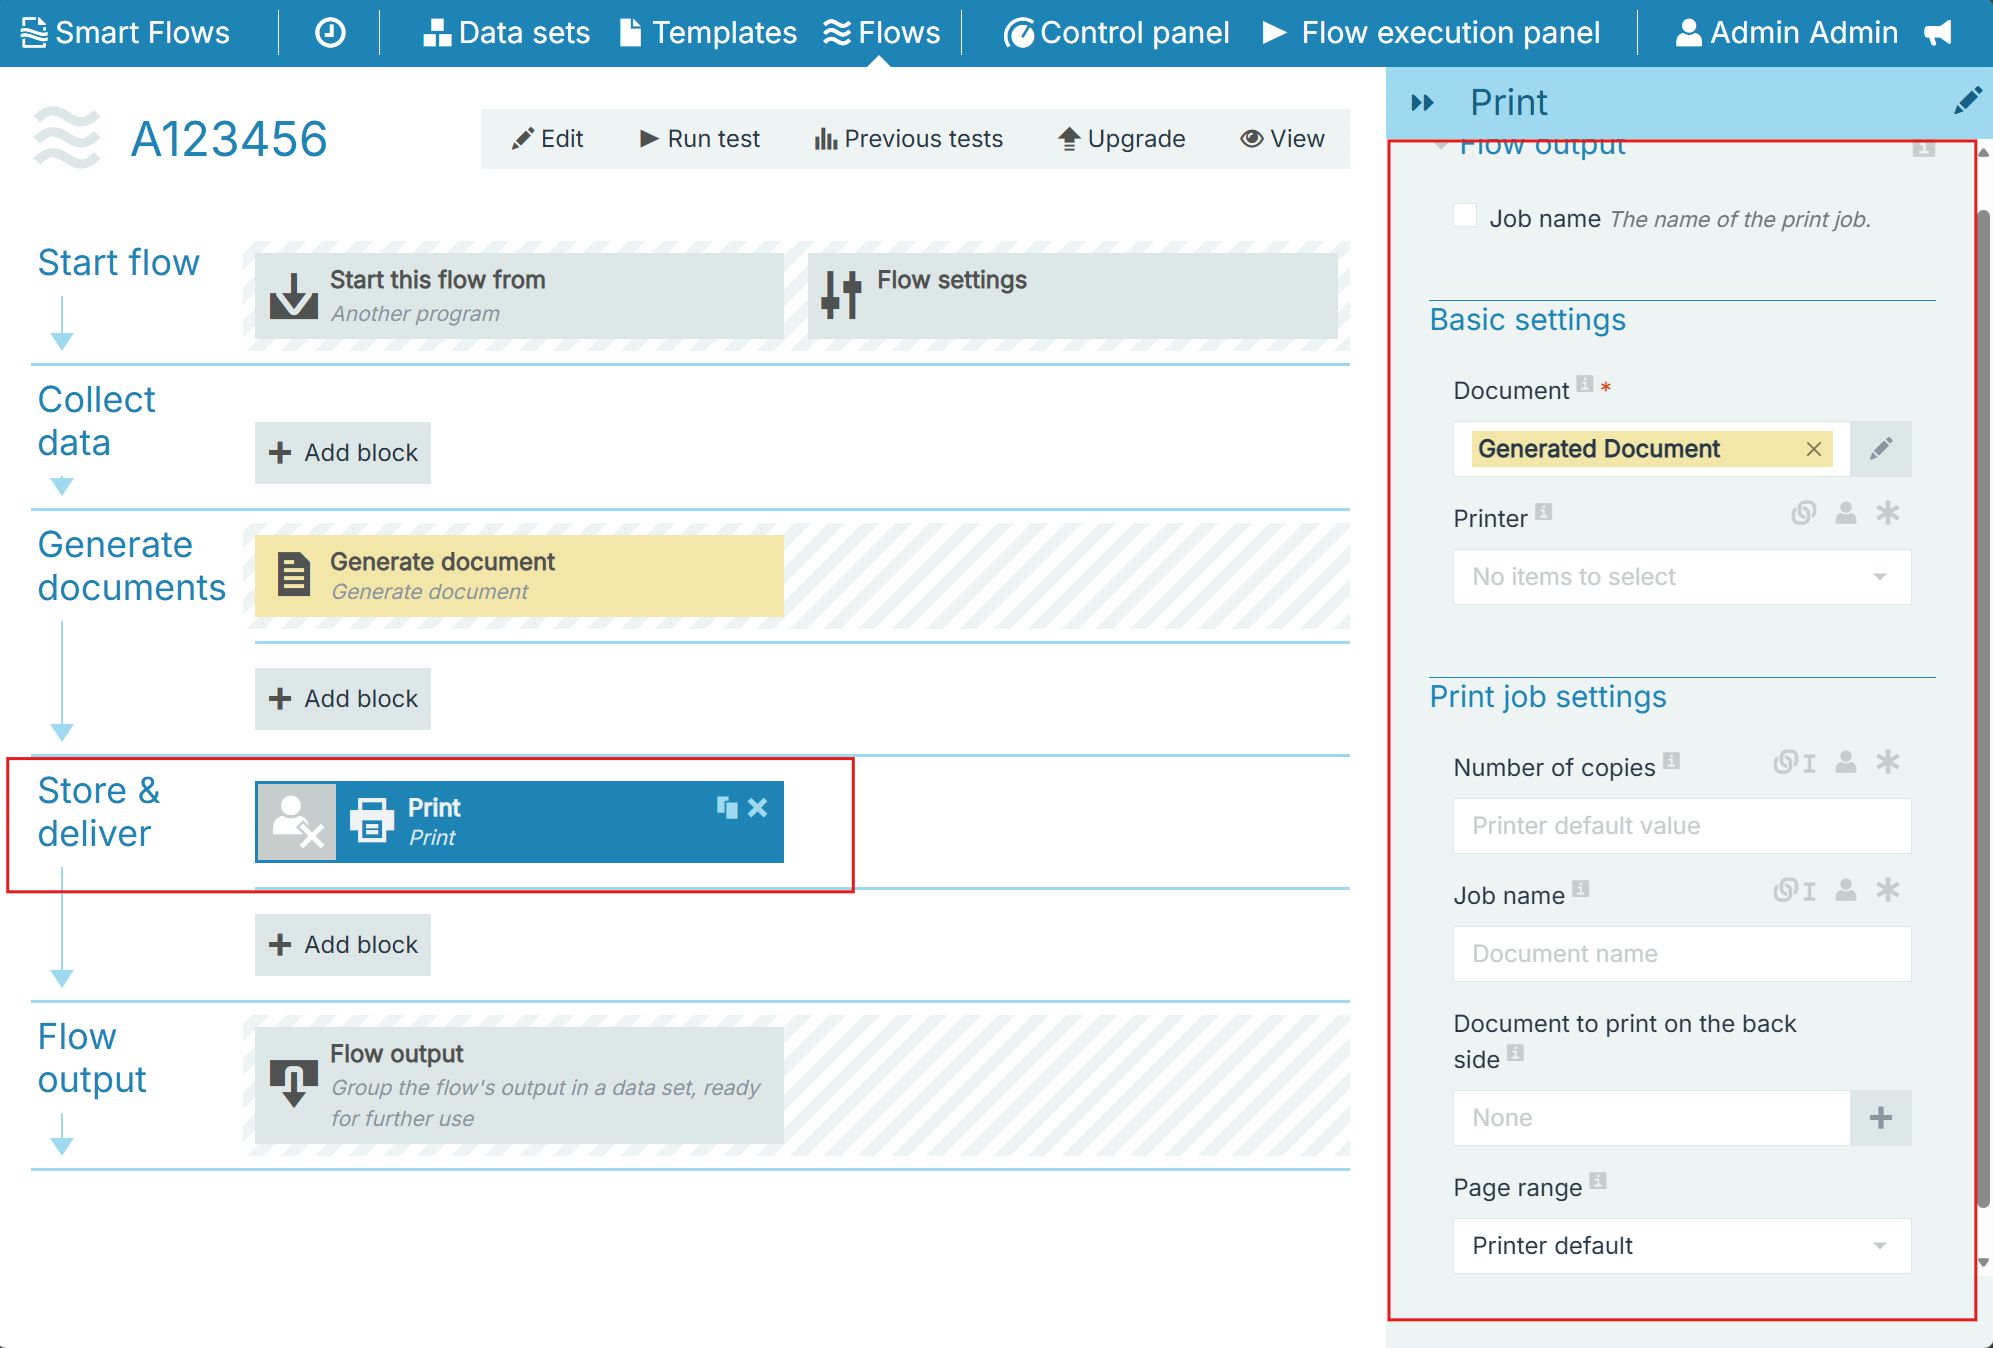
The Print flow block sends a document produced by the flow to a printer. In the list of flow blocks it is described as "Print a generated document".
The block does not define a printer. You can choose from any printer adding by an administrator in the Control Panel. The printer’s normal settings are used for the print job unless overridden in the Print block settings. See Printersfor more details.
Prerequisites
-
The project has at least one printer, added in Control panel > Printers.
-
The flow produces a document before the Print block runs, for example with a Generate document block.
Adding the Block to a Flow
To print a document from a flow:
-
Open your flow in the flow builder.
-
Add the Print block after the block that produces the document.
-
In Basic settings, select the Document to print.
-
Select the Printer, or leave the field empty to use the default printer of the project.
-
In Print job settings, set only what has to differ from the settings of the printer.
-
Save the flow.
Basic Settings
|
Field |
Description |
|---|---|
|
Document |
The document to print. Select the document produced by an earlier block. Required. |
|
Printer |
The printer to send the job to. If you leave it empty, Smart Flows uses the default printer of the project, whose name the field shows as a placeholder. |
Note: Consider making Printer user editable, so that the person running the flow can choose where to print.
Print Job Settings
Use this section to override the settings of the printer for this job only.
|
Field |
Description |
|---|---|
|
Number of copies |
The number of copies to print. Leave it empty to use the value of the printer, indicated by the placeholder Printer default value. The lowest value is 1. |
|
Job name |
The name of the print job, as it appears in the print queue. If you leave it empty, the name of the document is used. |
|
Document to print on the back side |
A second document, printed on the back of every page of the main document. |
|
Page range |
Which pages to print: Printer default, Print all pages, or Print some pages. |
|
First page |
The first page to print. Only shown when Page range is set to Print some pages. |
|
Last page |
The last page to print. Only shown when Page range is set to Print some pages. |
Consider making Number of copies user editable, so that the person running the flow can decide how many copies they need.
How the Block and the Printer Work Together
The printer holds a complete set of print settings. The block holds the exceptions for one job.
-
Printer: if you do not select one, the default printer of the project is used. If the project has no default printer, the block fails.
-
Number of copies, Job name, and Page range: if you fill them in, they replace the settings of the printer. If you leave them empty, the settings of the printer apply.
-
Print options such as duplexing, paper source, and paper size belong to the printer only. The block cannot override them.
This is why the same physical printer is often added several times in the Control panel, each time with different print options. The flow then only has to select the right printer.
Not every setting reaches every printer. A printer supplied by a PrintNode connector ignores Job name and Page range. See PrintNode Connector.
Printing on the Back of Every Page
“Document to print on the back side” takes a second document and prints it on the reverse of every page of the main document. Use it for content that is identical on the back of each page, such as terms and conditions attached to a contract.
This is not the same as double-sided printing of a single document. Printing one document on both sides is the Duplexing option of the printer.
Flow Output
|
Output |
Description |
|---|---|
|
Job name |
The name of the print job. When selected, it is shown to the person running the flow. |