
The Flow Settings flow block controls functionality that affects multiple blocks in your flow or how the flow functions overall. This article provides an overview of all Flow settings.
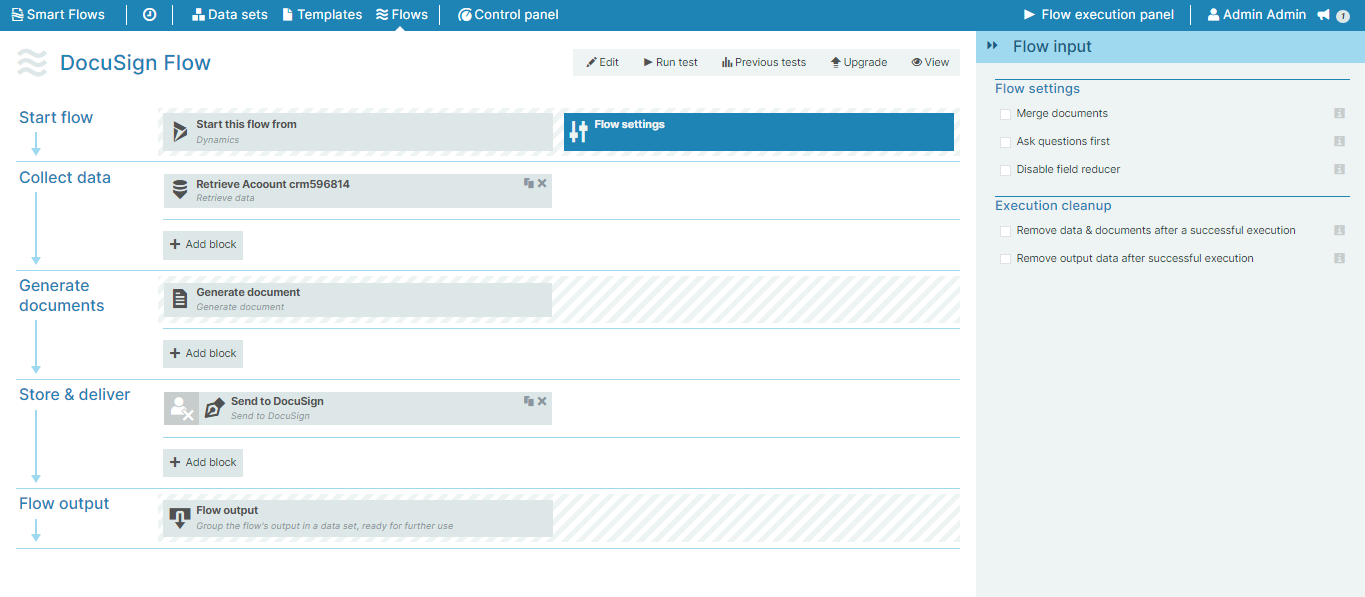
Flow Settings Parameters
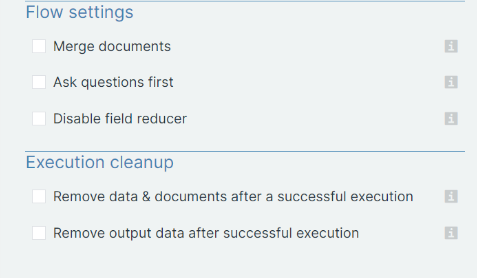
When the Flow settings block is selected, the right panel of the Flow Builder displays the following settings.
|
Field |
Description |
|---|---|
|
Merge documents |
If the user runs the flow on multiple records, this option, when checked, makes all resulting documents merge to create one single file. |
|
Ask questions first |
If checked, all the questions (Custom Data Set, Smart Form) are presented to the user at the beginning of the flow. |
|
Disable field reducer |
The field reducer analyzes the flow and its template(s) to determine which fields are used. Only those fields are retrieved during flow execution. If the option is checked, the field reducer is disabled, meaning all fields defined in the data set(s) are retrieved. Doing a Preview of a template does not involve the field reducer. The field reducer is only applicable when a flow is executed. |
|
Remove data and documents after a successful execution |
All data that is retrieved during a successful flow execution and documents that are generated are removed once the execution finishes. The execution report is retained. Choose this option if you don't want your documents and data to be saved on the Smart Flows server. |
|
Remove output data after successful execution |
If this setting is enabled, the flow output data that is created when a flow run has ended, is cleaned up and is no longer visible in the execution report. |
The Condition Builder
The Condition Builder is used to define conditions for use in flows or compositions. Conditions are used both in Flow Builder and Composition Builder:
-
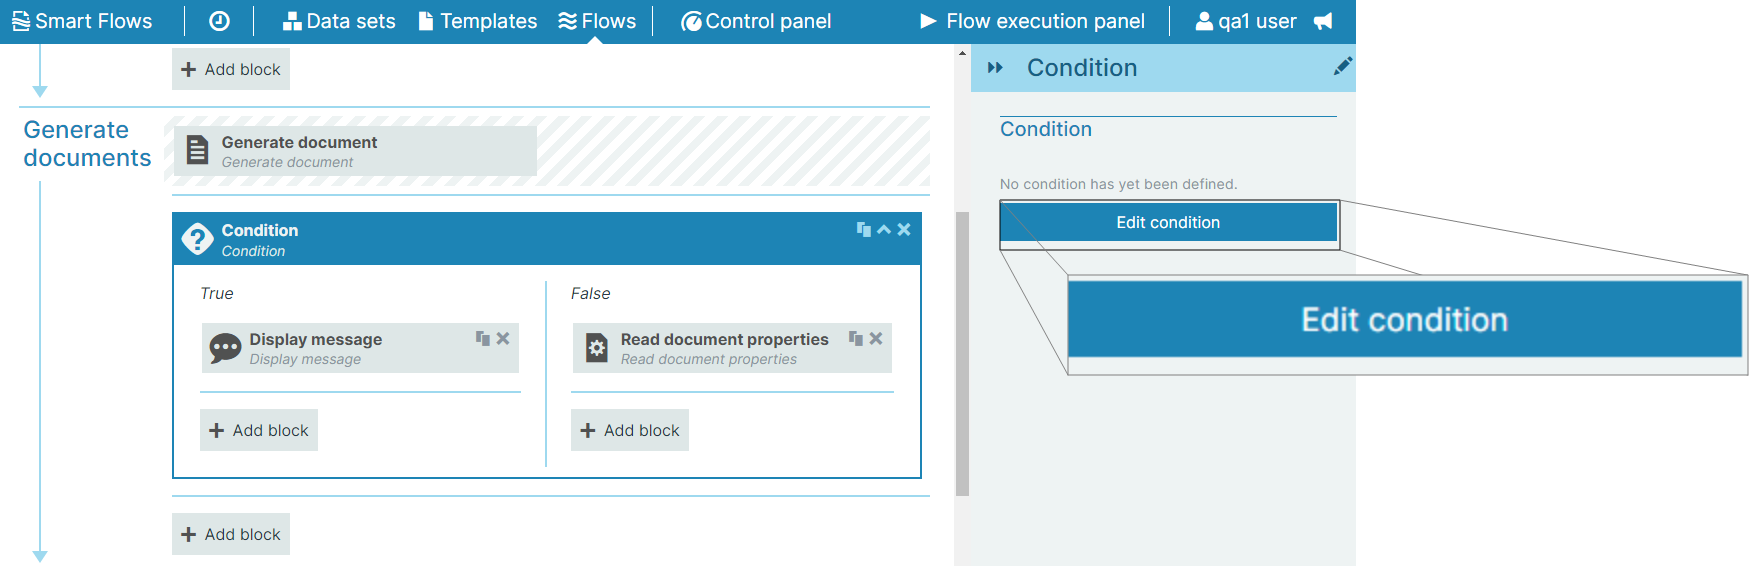
In Flow Builder, you can insert conditional blocks that split the flow into lanes based on true and false logic, with deep customization
-
In Composition Builder, you can define conditions so that templates are only inserted if a certain condition is true
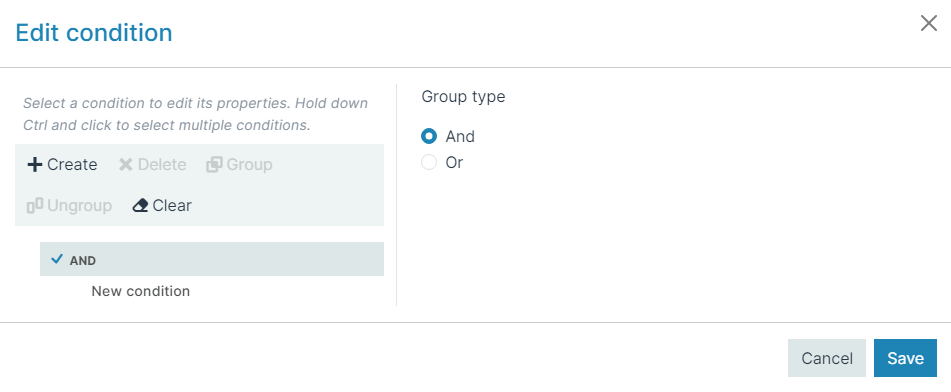
Conditions consist of one or more subconditions that can be grouped into groups, groups of a group, and continue on to be as complex as needed.
Managing conditions
Creating subconditions
-
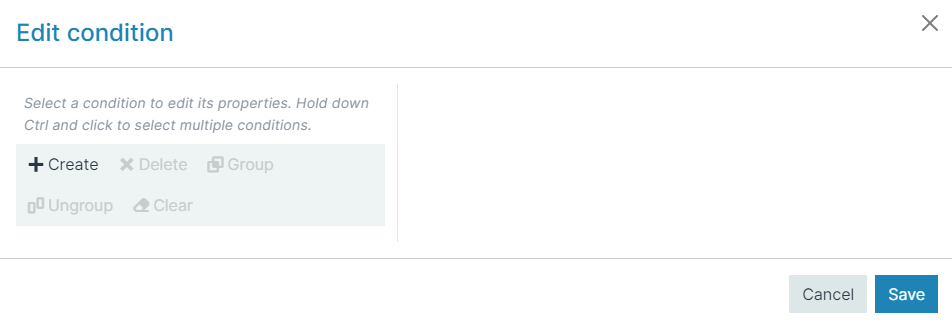
In the Flow Builder, select Edit Condition.
-
To create a subcondition in an empty condition, select Create.
-
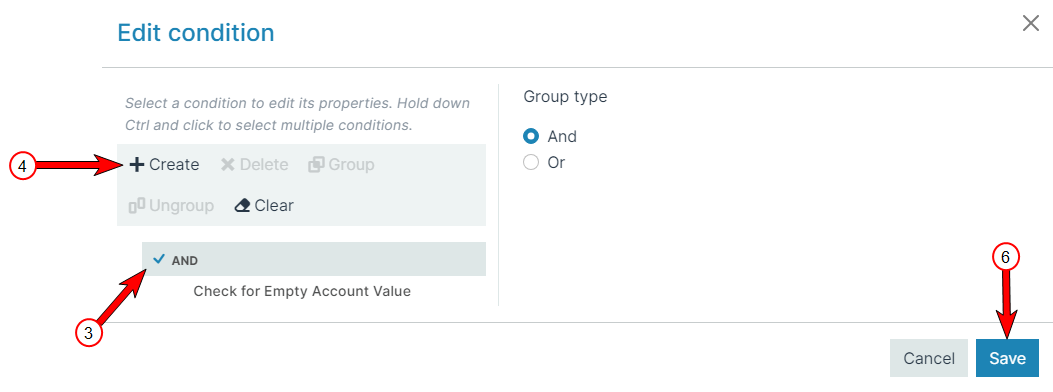
If you want to add more subconditions to the condition, select the group under which you want to create a condition.
-
Select Create.
This adds another condition under the selected group.
-
Configure your condition.
-
Select Save.
This creates an AND group by default and a new condition.
Creating groups
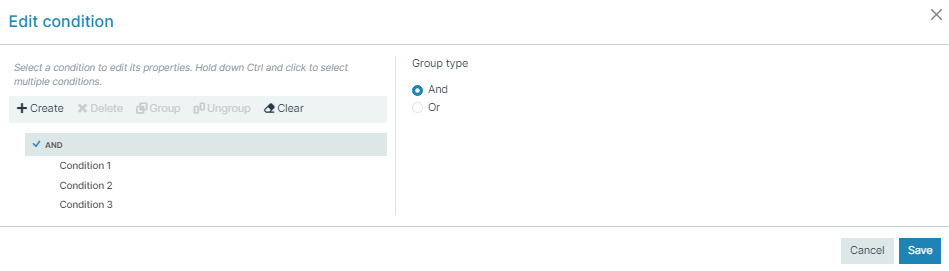
You can group subconditions together in an AND or an OR group so that either all of the subconditions must be true, or just one of them.
-
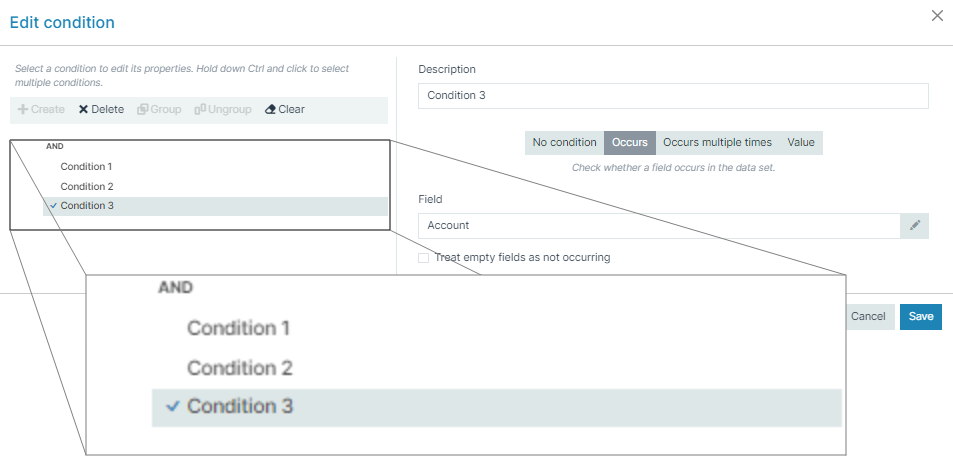
Select one of the conditions you want to group.
-
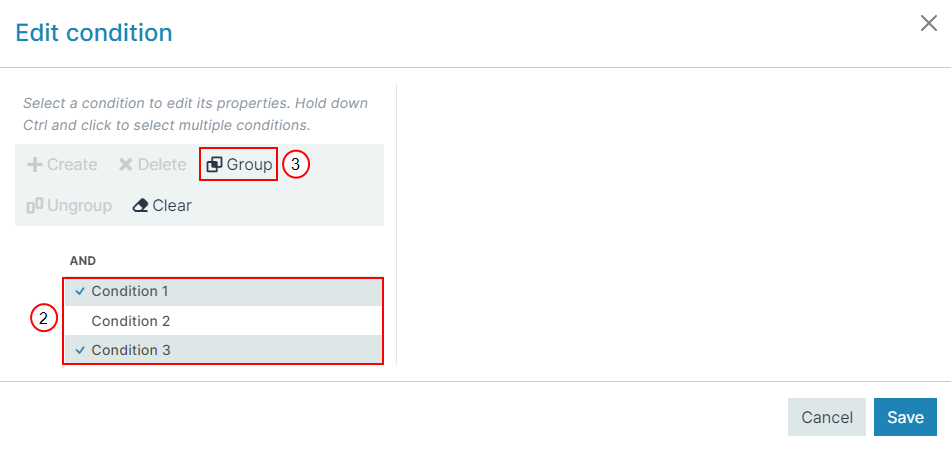
Hold down the Ctrl key and select the other conditions you want to group together.
-
Select Group.
-
(Optional) To change the group from an AND to an OR or vice versa, select it, and choose the group type to the right.
-
Select Save.
Defining a subcondition
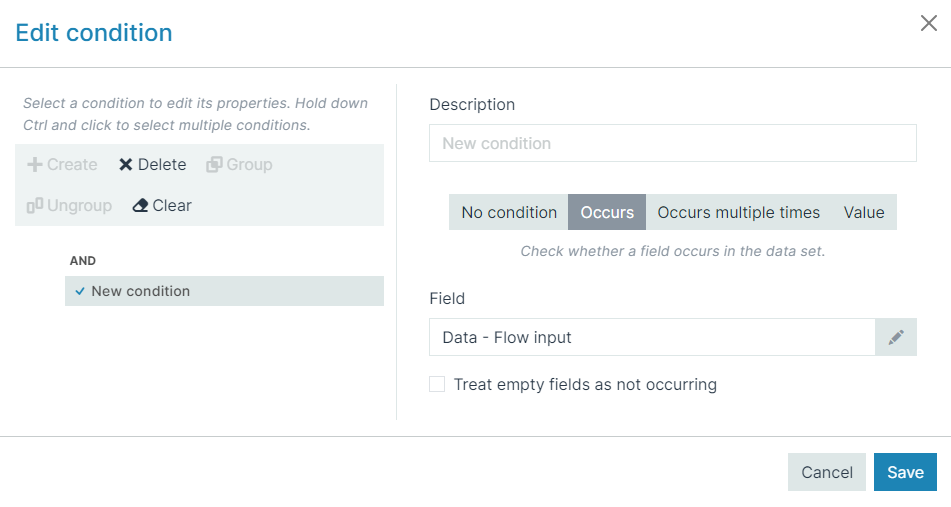
Subconditions can utilize different check types to evaluate the condition. There are 4 check types. To view a subcondition's properties, select it in the Edit Condition dialog. Select a subcondition to bring up its properties to the right. The most important thing is the check type.
|
Check type |
Description |
|---|---|
|
No condition |
No condition is the default check type, and has no fields to check. |
|
Occurs |
Checks if a field occurs in the data set. This subcondition returns as TRUE when the selected field is found at least once. |
|
Occurs multiple times |
Checks if a field occurs a number of times. |
|
Value |
Checks a field's value against another value. Most users utilize this function to validate and match values between fields. |
Occurs
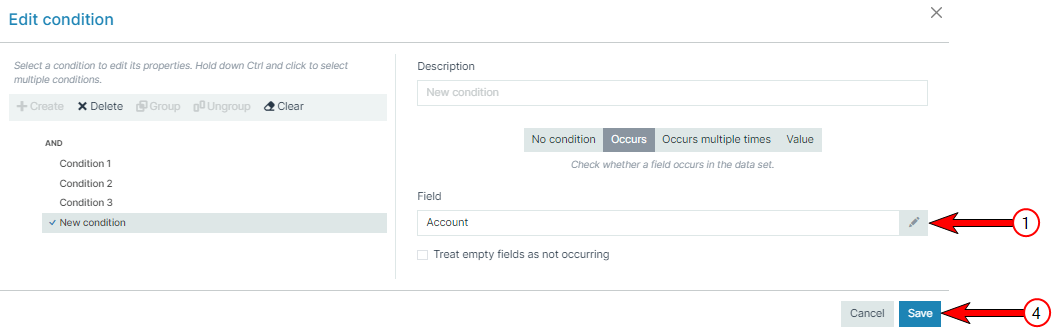
Occurs checks if a field occurs in the data set. This subcondition returns as TRUE when the selected field is found at least once.
Create an Occurs subcondition
To select a particular field:
-
In the field, select the pencil.
-
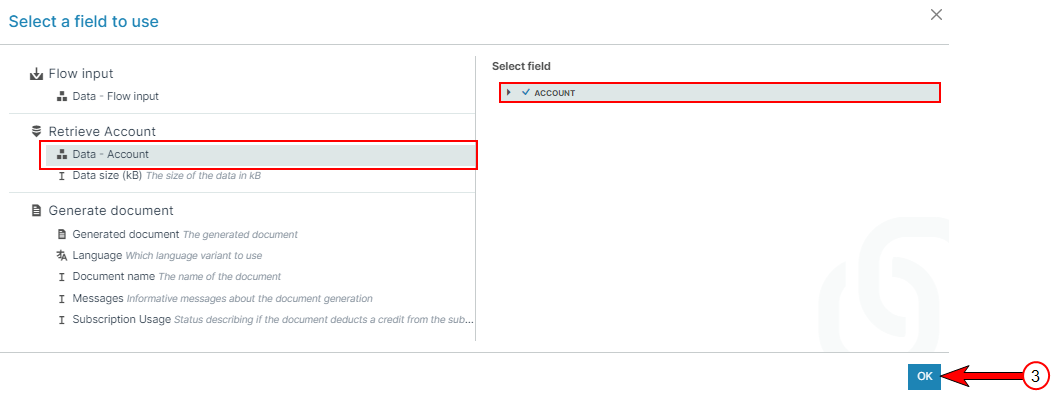
From the Select a field to use dialog, select the field to check.
-
Select OK.
-
Select Save.
Occurs multiple times
Occurs multiple times checks if a field occurs a number of times. You can use any of the following operators:
-
Does not equal
-
Equals
-
Is between
-
Is greater than
-
Is greater than or equal to
-
Is less than
-
Is less than or equal to
-
Is not between
Create an Occurs multiple times subcondition
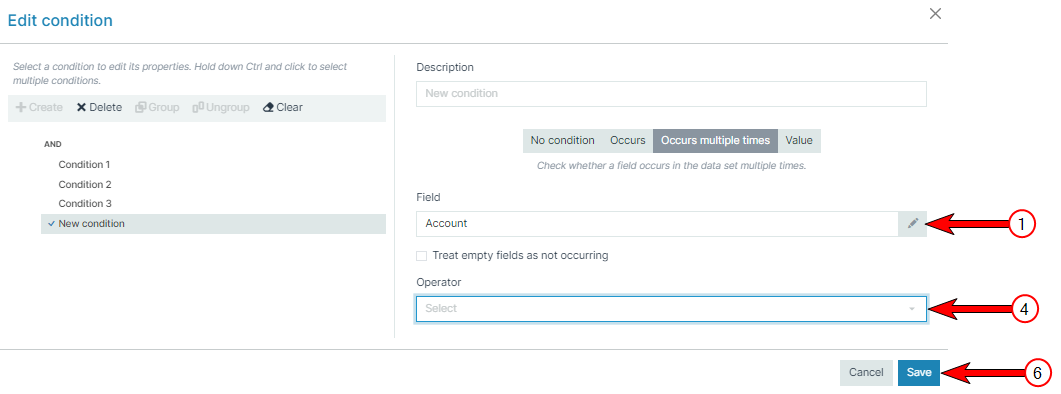
Create a subcondition for an Occurs multiple times instance
-
In the field, select the pencil.
-
From the Select a field to use dialog, select the field to check.
-
Select OK.
-
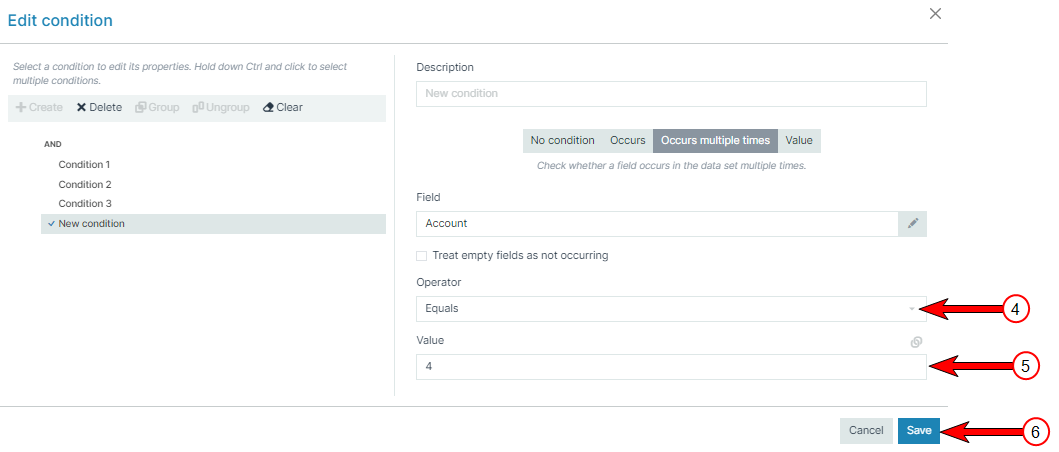
In the Operator dropdown, select your operator parameter.
-
In the Value field, enter your value.
-
Select Save.
Example: Return TRUE if the value of the multi-field is between 2 and 5.
Here's an example that will return TRUE if the value of the multi-field is between 2 and 5. Notice the link icon next to the fields:
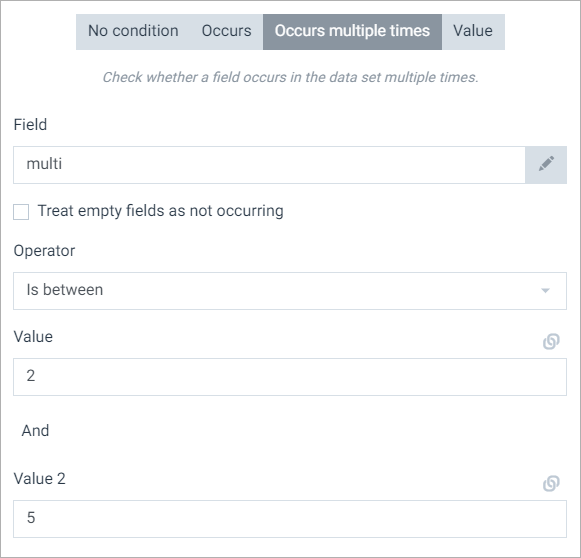
Click the pencil icon to change the field to a linked field. You can then click the pencil to select a data set field.
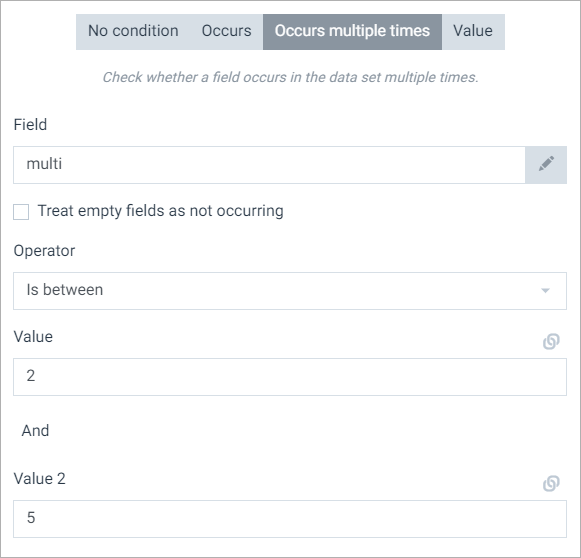
The select a field to use window displays. This allows you to check the values of fields against the values of other fields.
Value
A Value subcondition checks a field's value against another value. Most users utilize this function to validate and match values between fields.
The field type can be one of the following options:
-
Date
-
Date & time
-
Number
-
Text
-
Time
-
True/false
Depending on the field type selected, different operators are available.
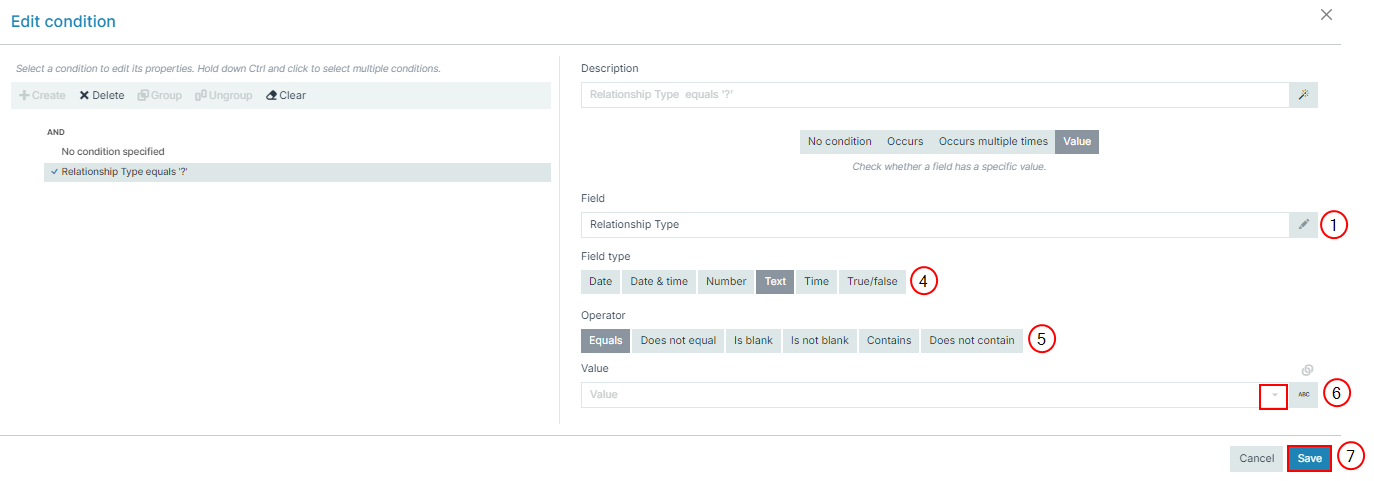
Create a subcondition for a Value instance
-
In the Field, select the pencil.
-
From the Select a field to use dialog, select the field to check.
-
Select OK.
-
In the Field type area, select your field type parameter.
-
In the Operator area, select your operator parameter.
-
In the Value dropdown menu, select your value.
-
Select Save.
Example: Check for the Relationship type field
In this example, we check whether the Relationship type field contains a value from the dropdown menu. The dropdown menu lists all the values listed in a label form. If you know the value of your field, then select the ABC button and enter the value.
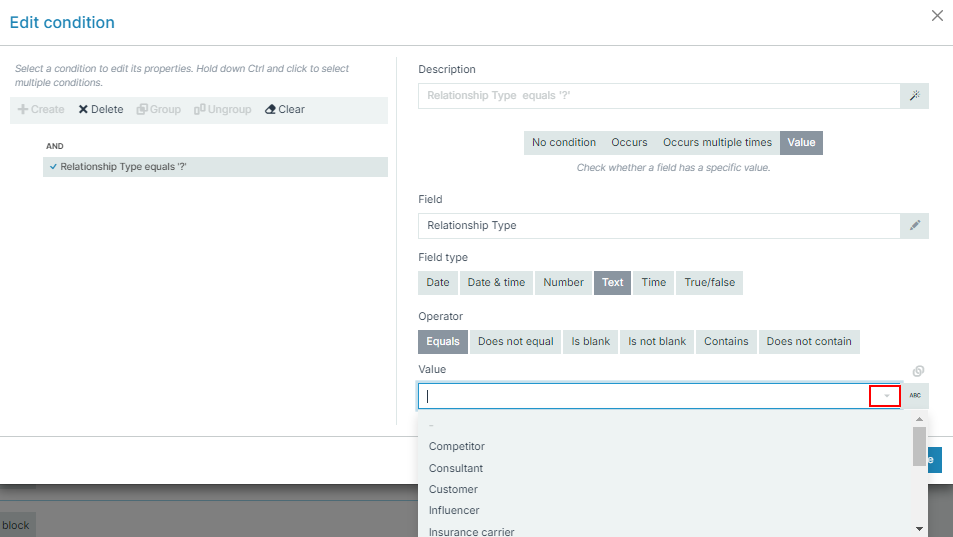
Notice the link icon. As explained in Occurs multiple times, this allows you to check the values of fields against the values of other fields.
Entity References
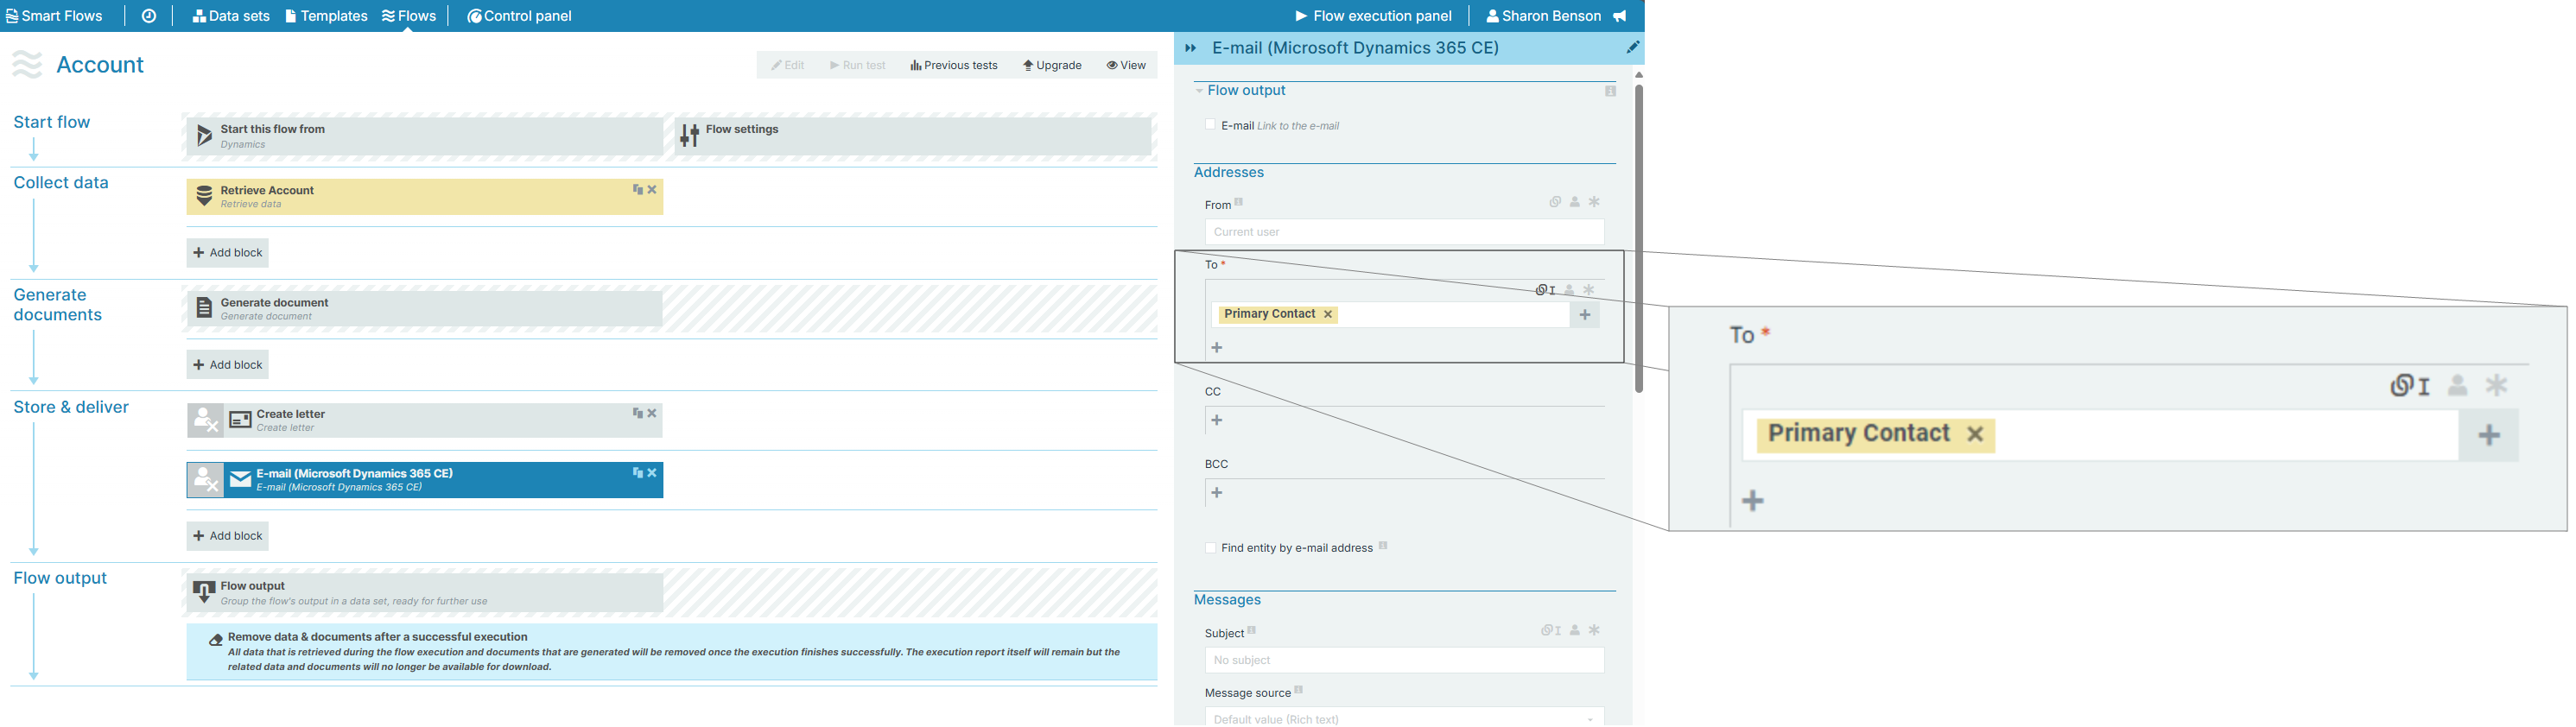
An entity reference is a value that identifies an entity recognized by Smart Flows and all connectors and can be associated with other records in the CRM. Flow blocks like Create Letter for Dynamics have parameters that require adding entity references. The image below is an example of an entity reference on the To field while creating an e-mail for Microsoft Dynamics 365 CE.
Using Entity References in Flow Block Parameters
-
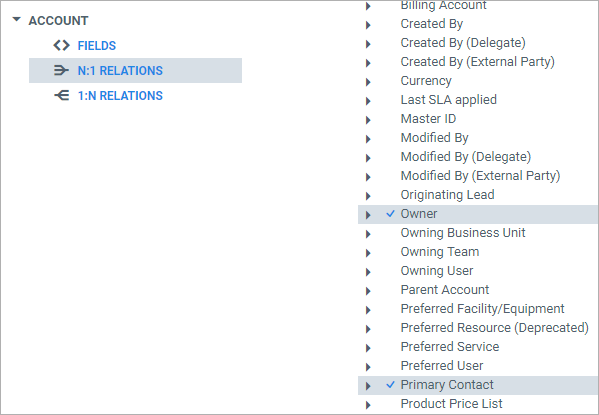
Add the entity reference to your data set by selecting it in N:1 relations.
-
In the flow, add or select a flow block.
-
Select the link icon to add the entity reference.
In this example, we want the email sent from the recordOwner.
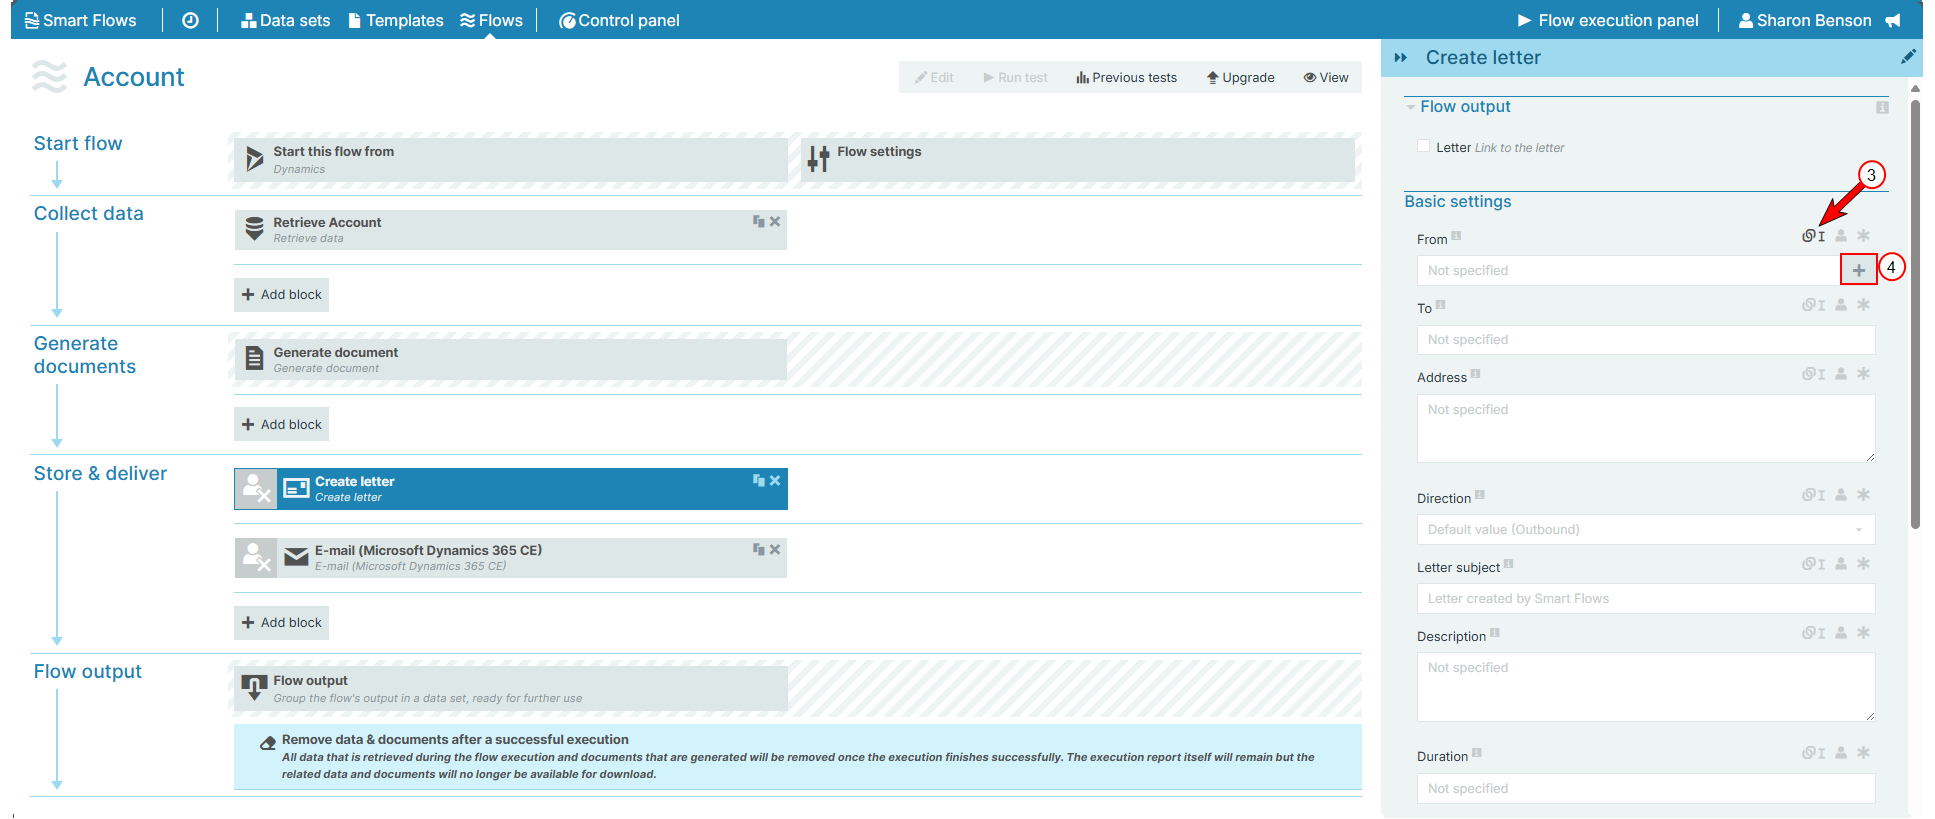
-
Select the + to add a link.
-
In the window that displays, select the entity reference field you want to use.
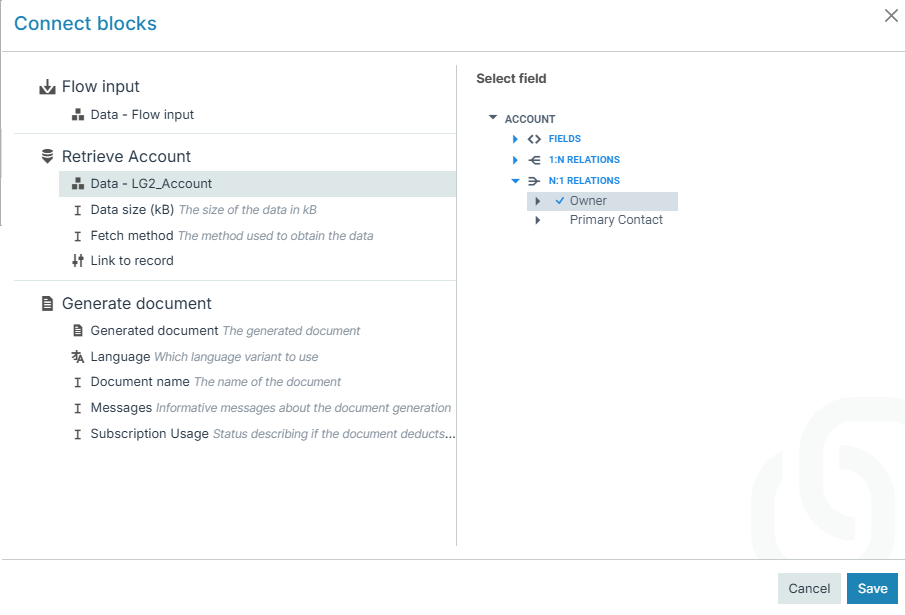
-
Select Save.
The gold colored link between the From field and the Retrieve data flow block is the visual indicator that the field is populated with an entity reference from the Retrieve Data flow block.
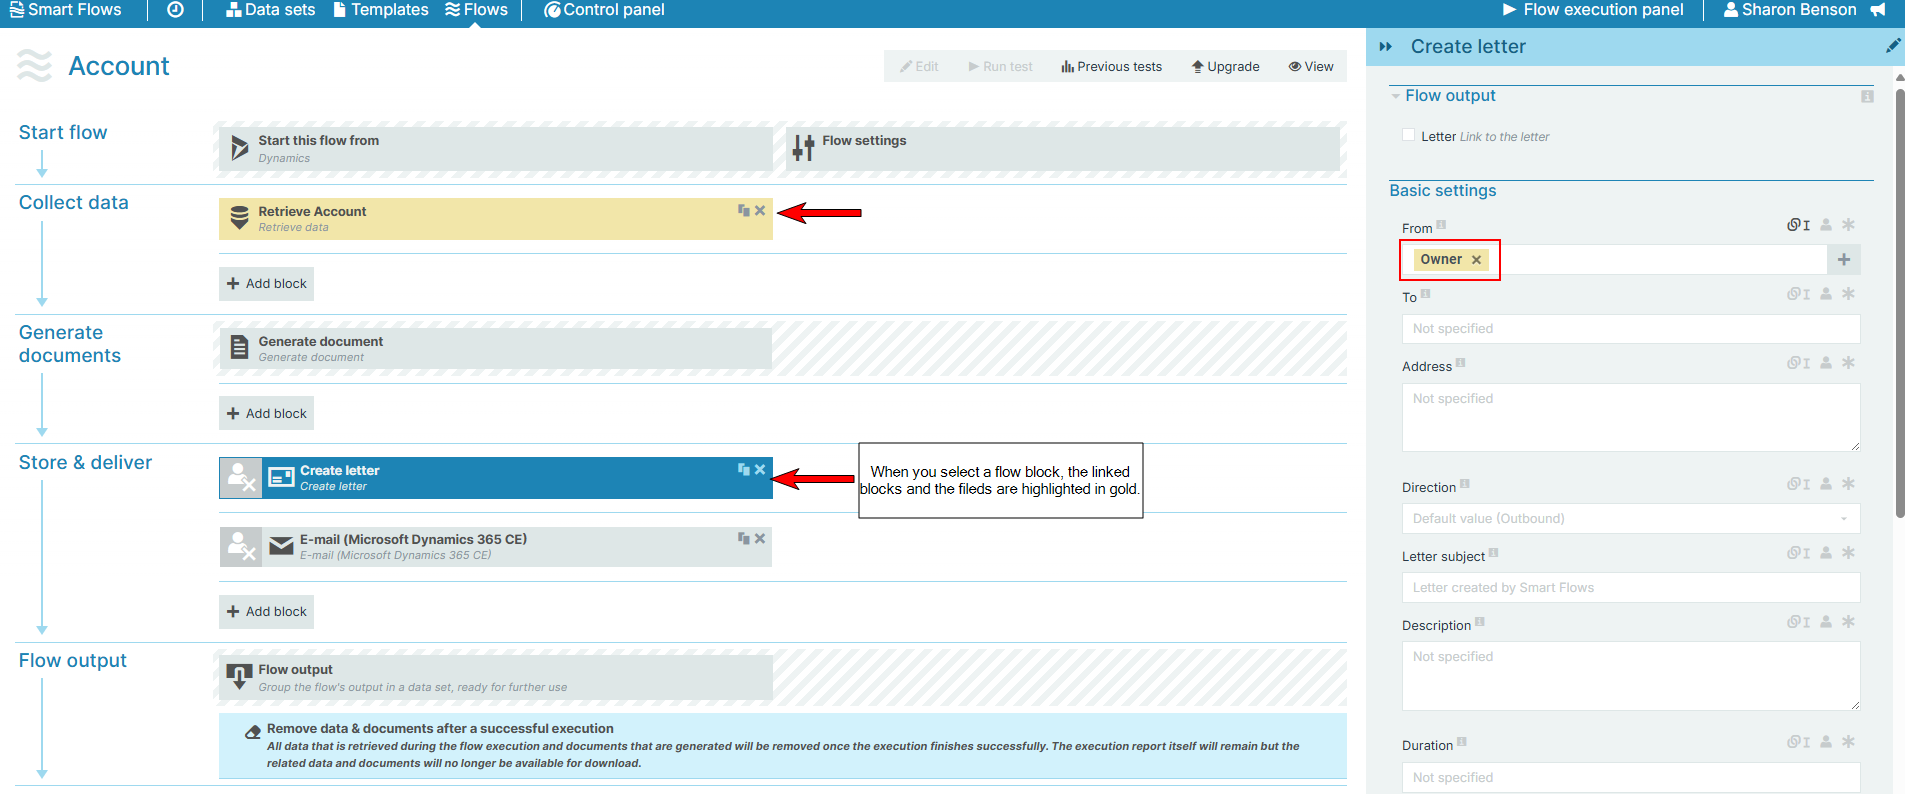
Running this flow will now create an email with an entity reference. For more information, see Testing a Flow.
Additional entity references
Starting a flow from Microsoft Dynamics 365 CE gives you additional entity references you can use. The Start this flow from block, if it's set to Microsoft Dynamics 365 CE, will provide two additional references you can use:
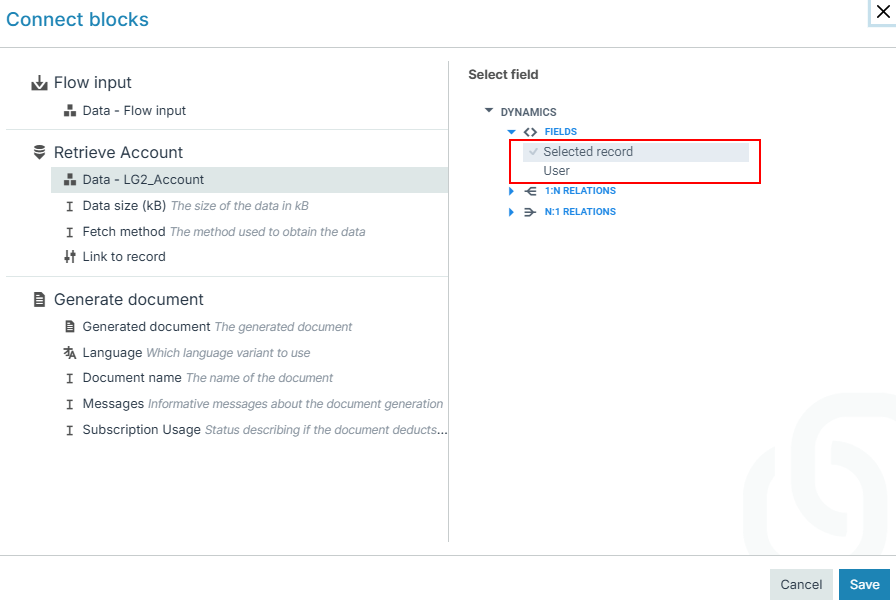
Selected record is used to refer to the record you started the flow from, and User references the user starting the flow.
Generating Documents
Smart Flows allows you to generate documents either on demand or automatically, depending on your operational needs. This topic explains how to use both manual and automated methods, including how to integrate with the Microsoft Power Platform Connector for event-driven automation.
Manual document generation
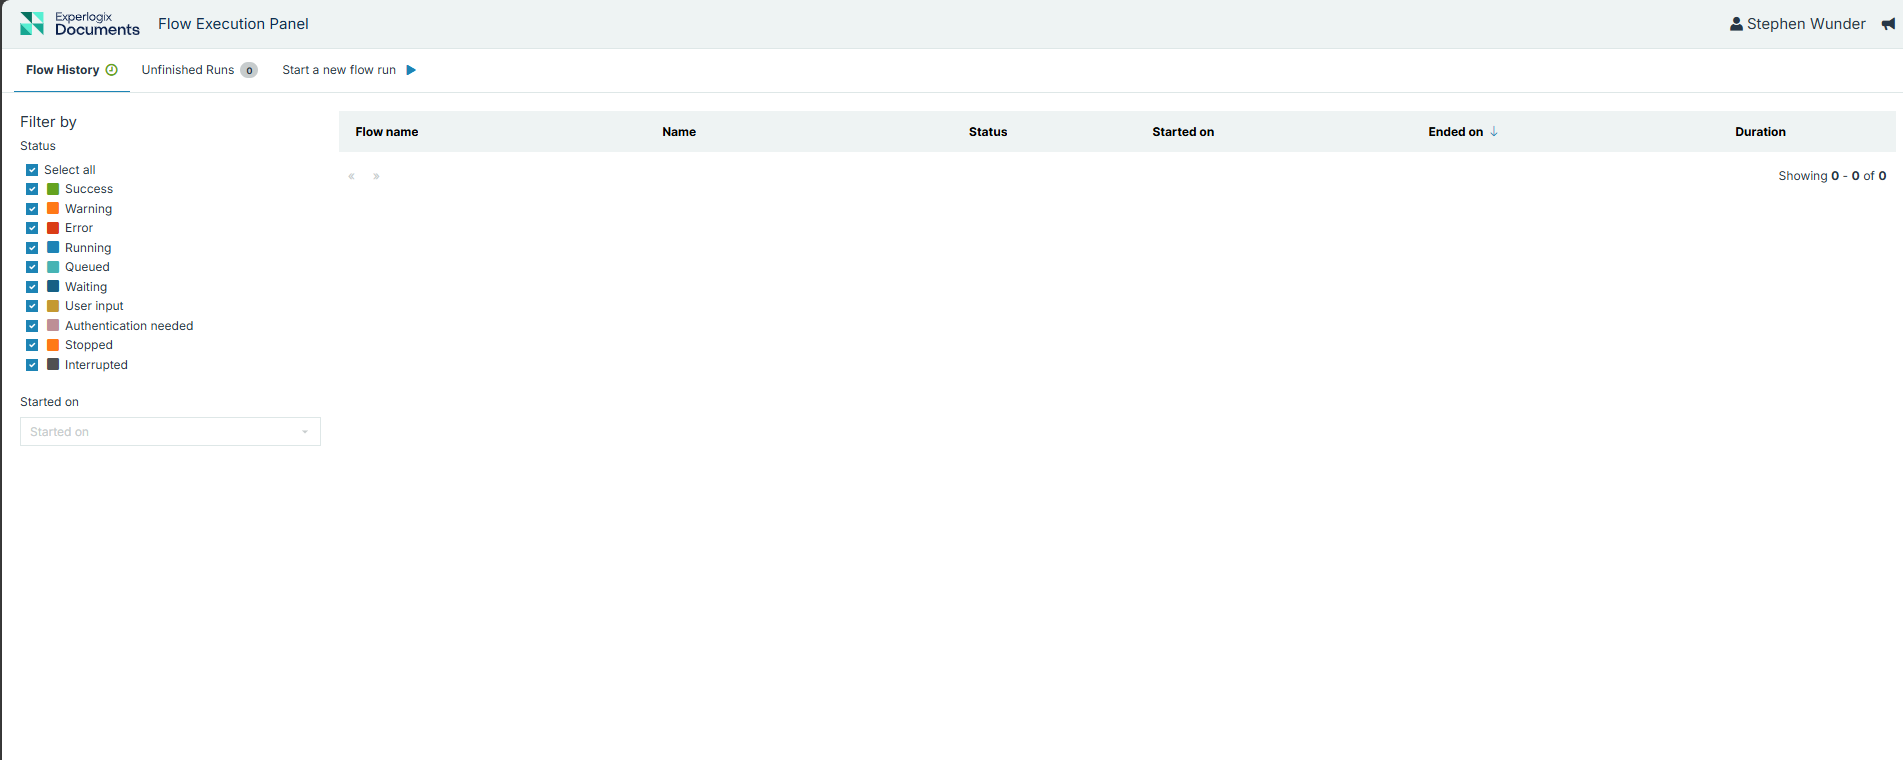
Manual document generation implies that a user selects a button to start a flow. Flow Execution Panel is where users choose which flow to run and what input to give, or they may select buttons in the connector system, such as Microsoft Dynamics 365 CE.
Use this method when:
-
You need user control over document timing.
-
The document requires user-specific input at the time of creation.
Automated Document Generation
Automated document generation allows documents to be created automatically based on defined triggers or system events.
Automating with Microsoft Power Platform
The Microsoft Power Platform integrates seamlessly with Smart Flows, enabling automation of document generation via Power Automate and Power Apps without custom coding.
Common automation scenarios include:
-
Triggering document generation when records in Microsoft Dynamics 365 CE are created or updated.
-
Automatically updating records with data from generated documents after flow execution.
-
Storing generated documents automatically in document repositories such as SharePoint.
For example, you can configure Power Automate to generate and store a sales quote document each time an account record in Microsoft Dynamics 365 CE is updated. Users can also trigger this flow manually through a Power Apps Canvas App.
To learn more about configuring this connector, see: