
Prerequisites
Before you start, ensure you have:
-
Access to the Azure portal.
-
Permissions to create app registrations, typically Application Administrator or Global Administrator.
-
The Smart Flows redirect URI, available through the application.properties file.
-
A Dynamics 365 CE or Dataverse environment using Microsoft Entra ID authentication.
Step 1 – Open App registrations
-
Sign in to the Azure portal.
-
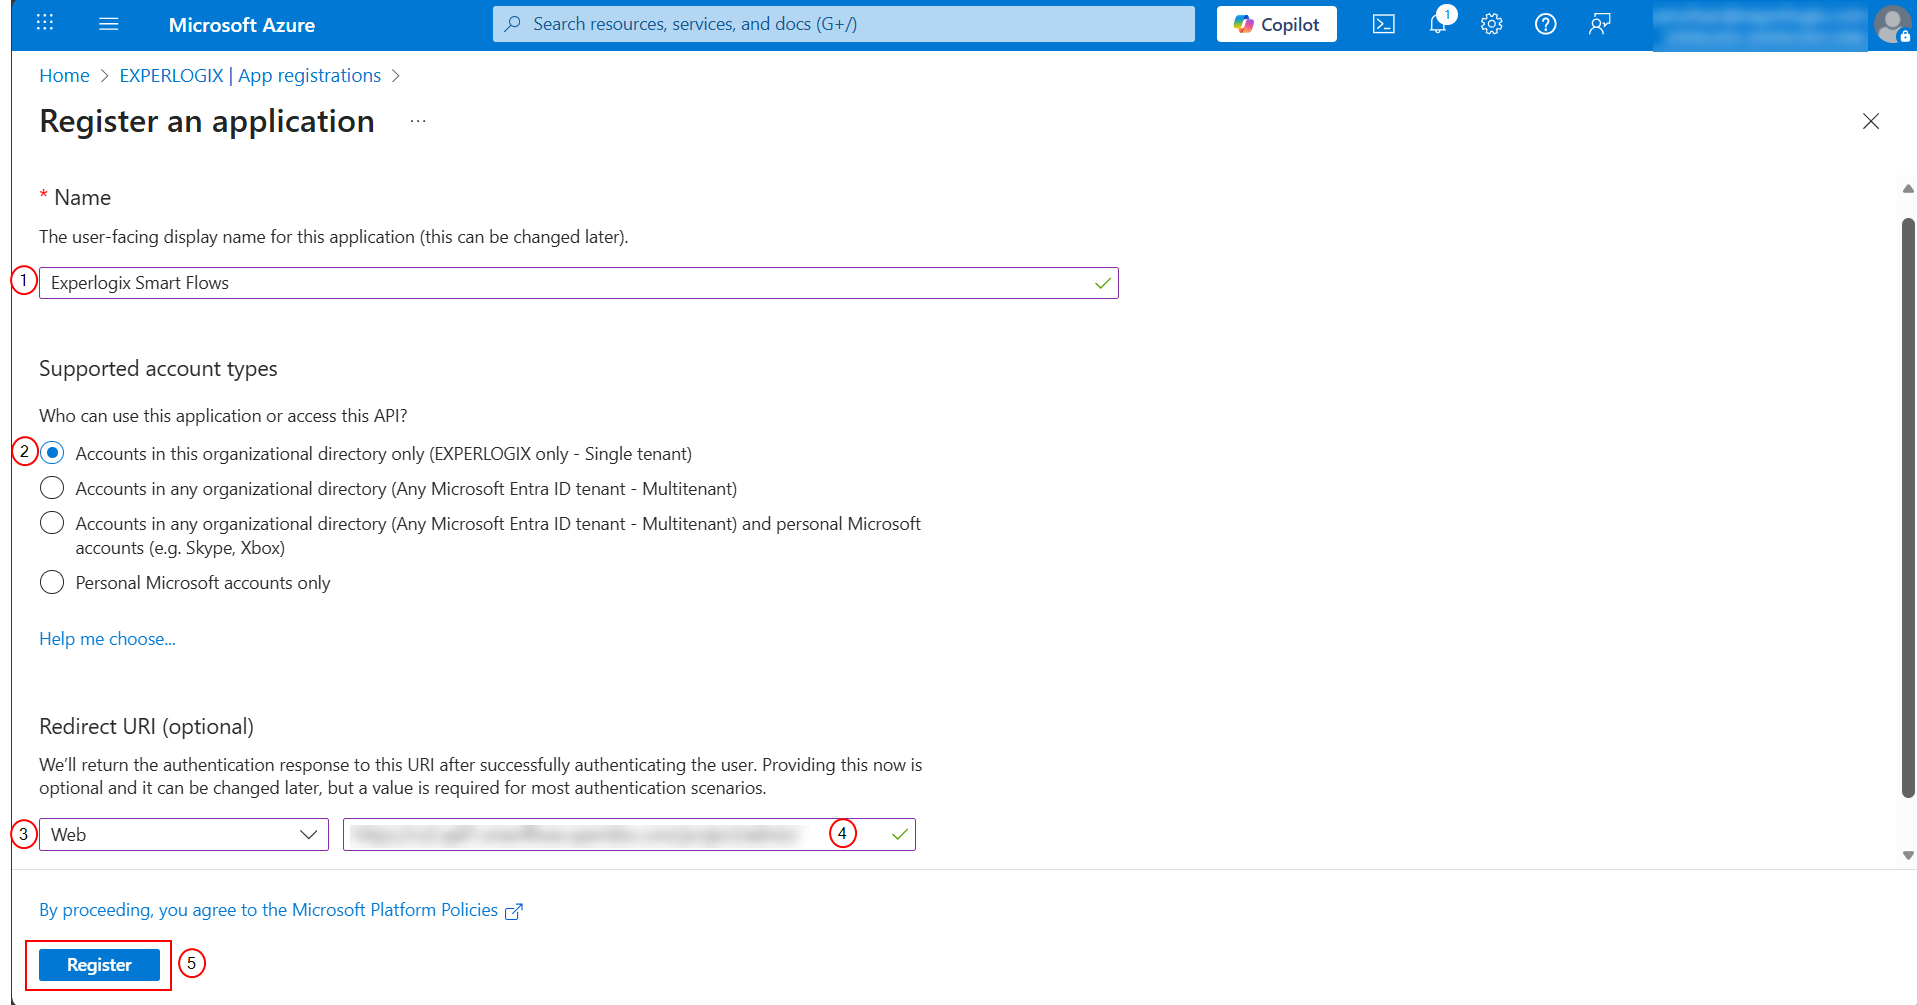
Navigate to Microsoft Entra ID > App registrations > New registration.

Step 2 – Register the Smart Flows application
-
Enter a Name.
-
Choose Supported account types:
-
Typically: Accounts in this organizational directory only (Single tenant)
-
-
Under Redirect URI:
-
Platform: Web
-
URI: Enter the exact redirect URI. The redirect URL should be "<project.baseurl>/oauth2/redirect" where "<project.baseurl>" is the location where Experlogix Smart Flows is available as set in the 'application.properties'. For example:"https://yourproject.smartflows.xpertdoc.com/oauth2/redirect".
-
-
Select Register.
Step 3 – Copy the Client ID
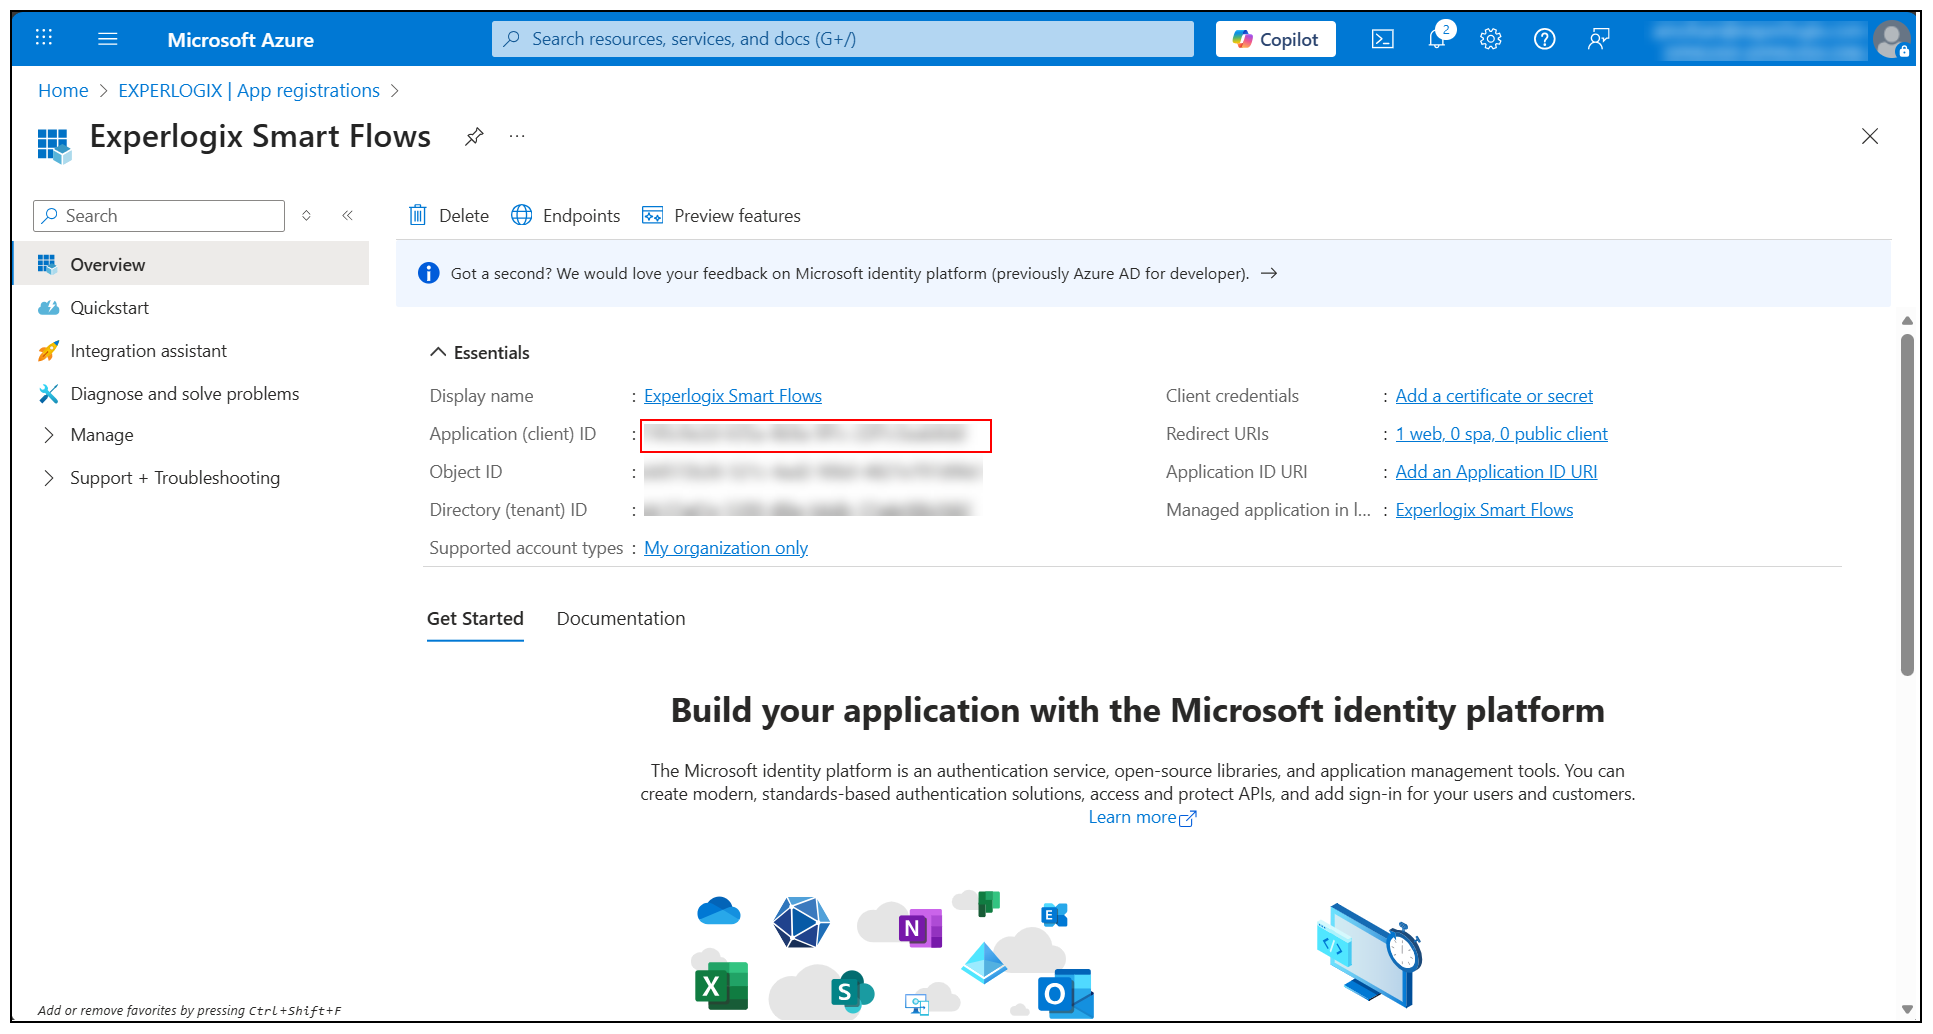
After registration, you are taken to the app Overview page.
-
Copy the value of Application (client) ID.
-
This value will later be stored in Smart Flows as the Client ID application property.
Step 4 – Create a Client Secret
-
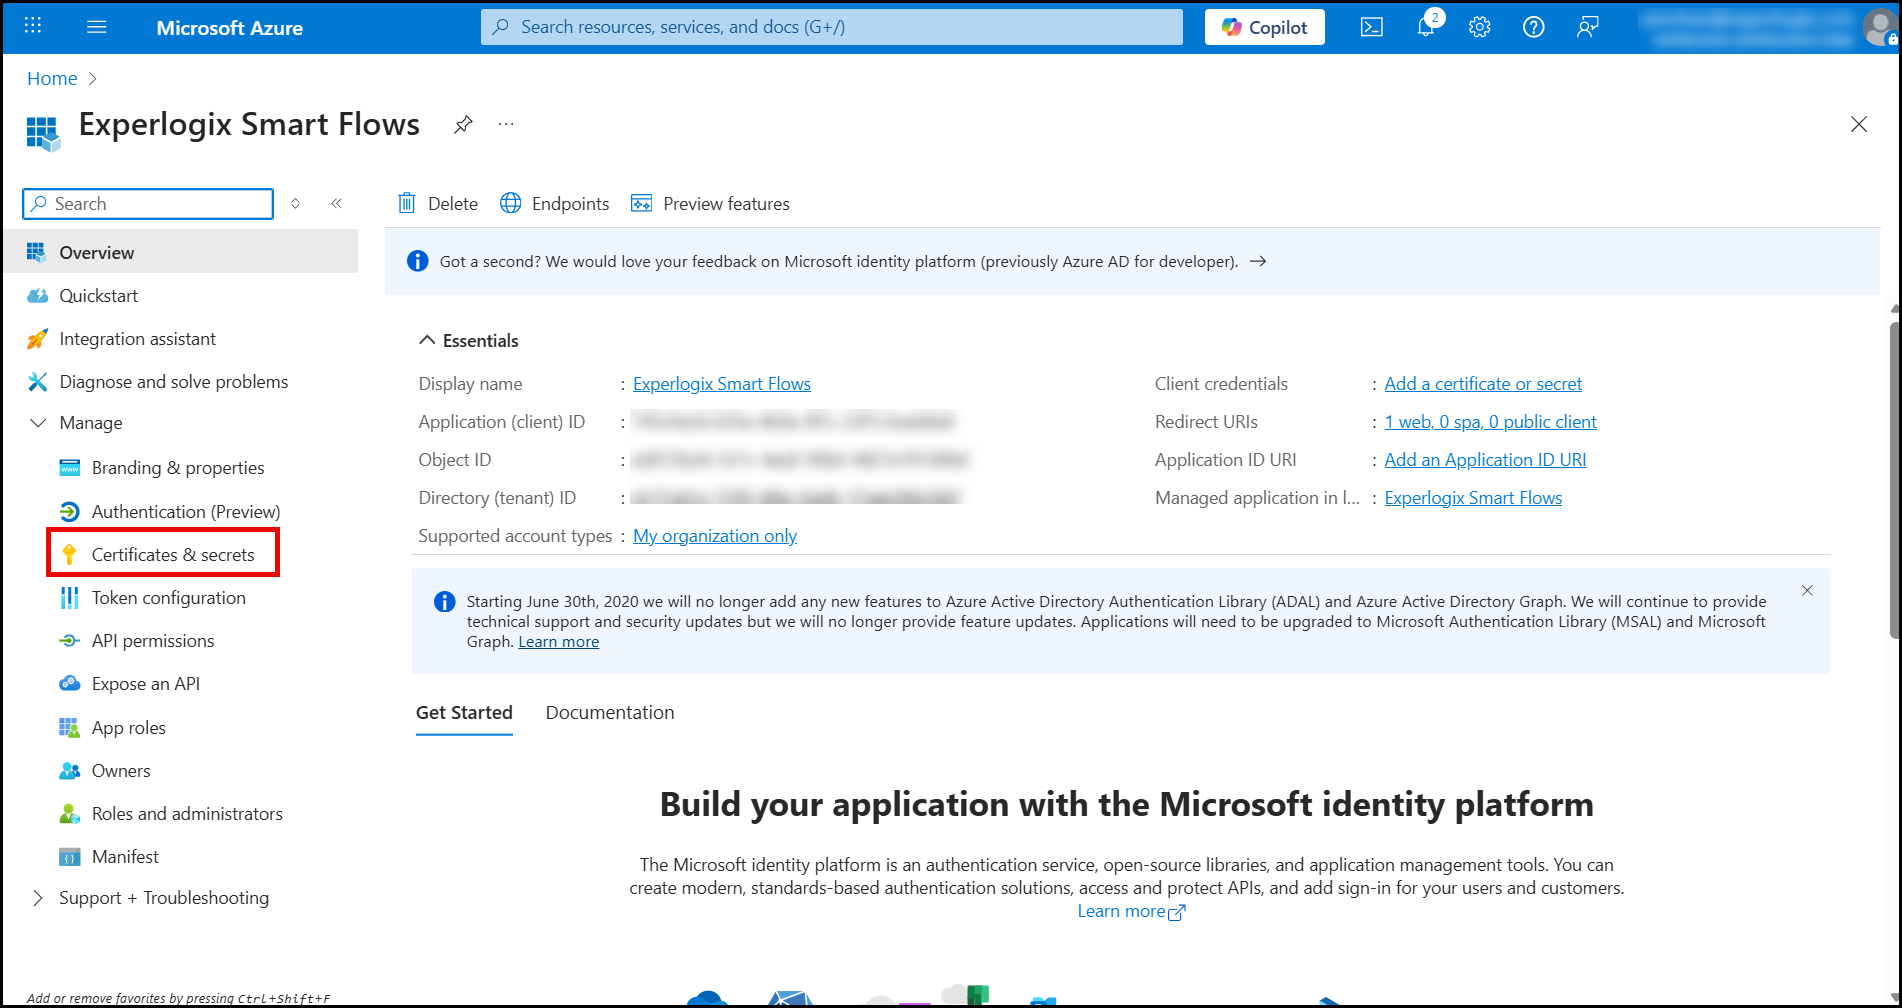
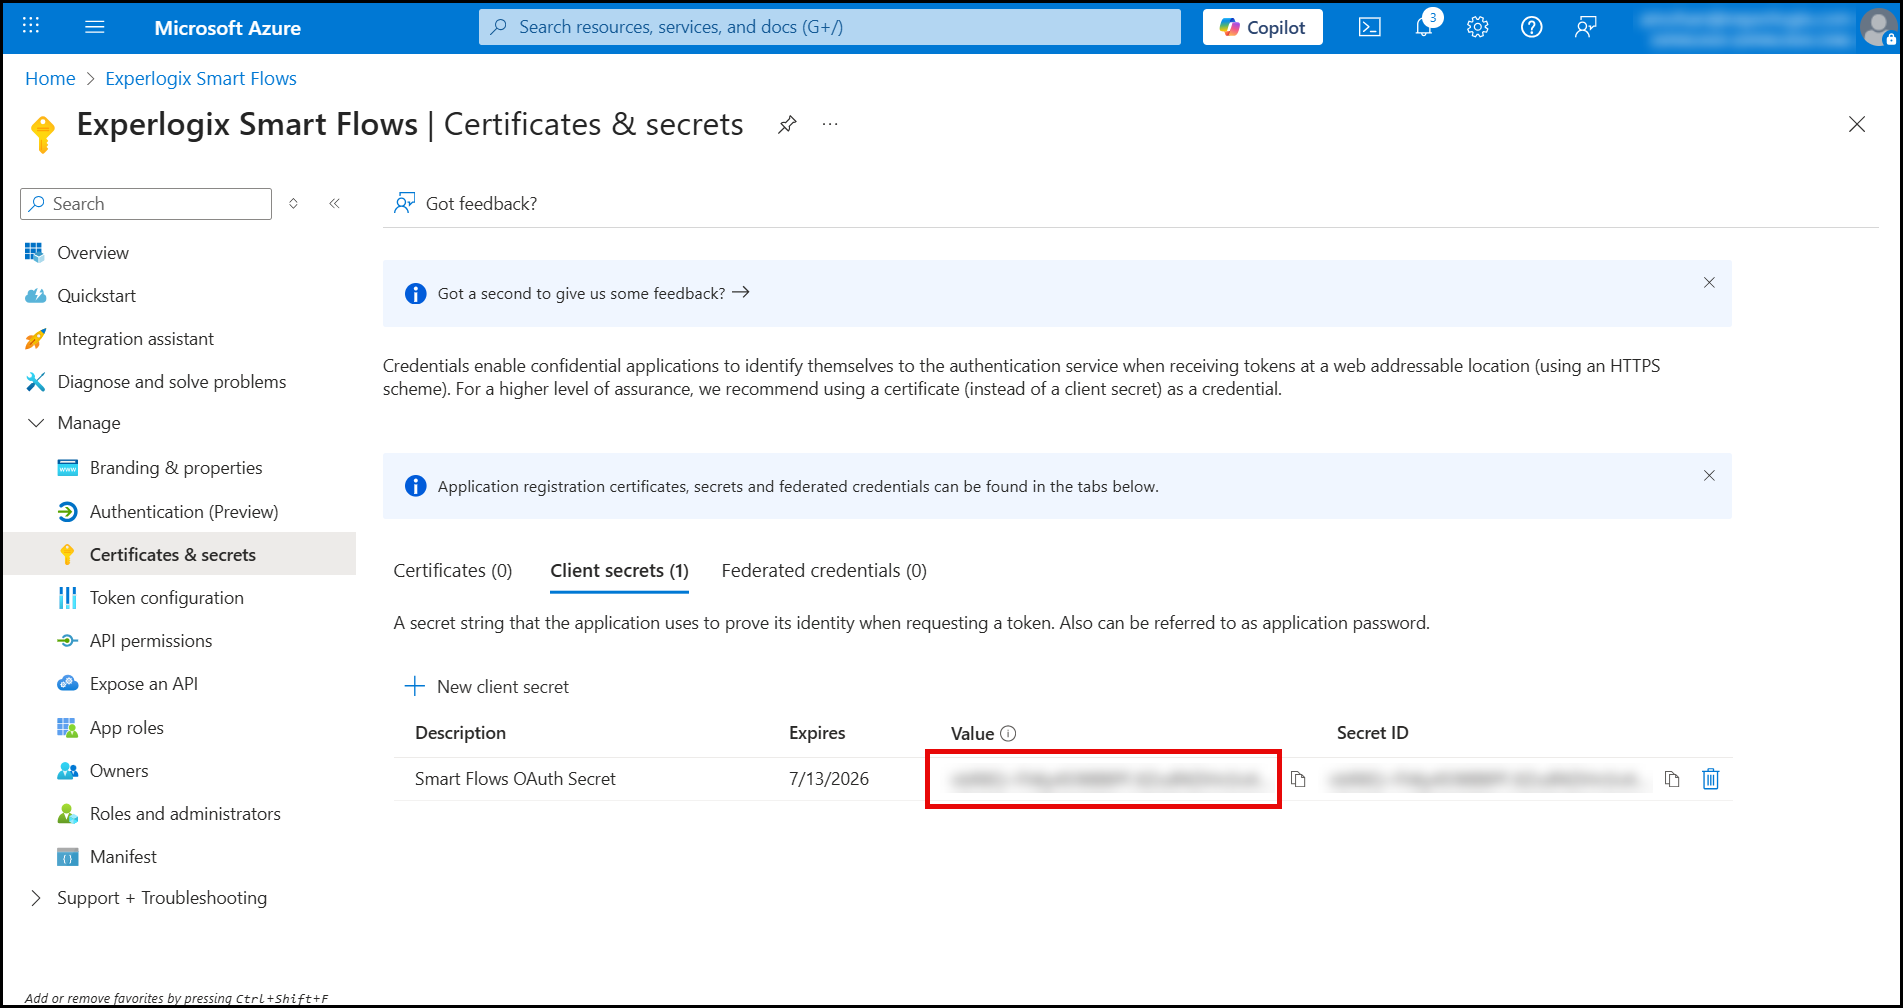
Navigate to Certificates & secrets.
-
Under Client secrets, select New client secret.
-
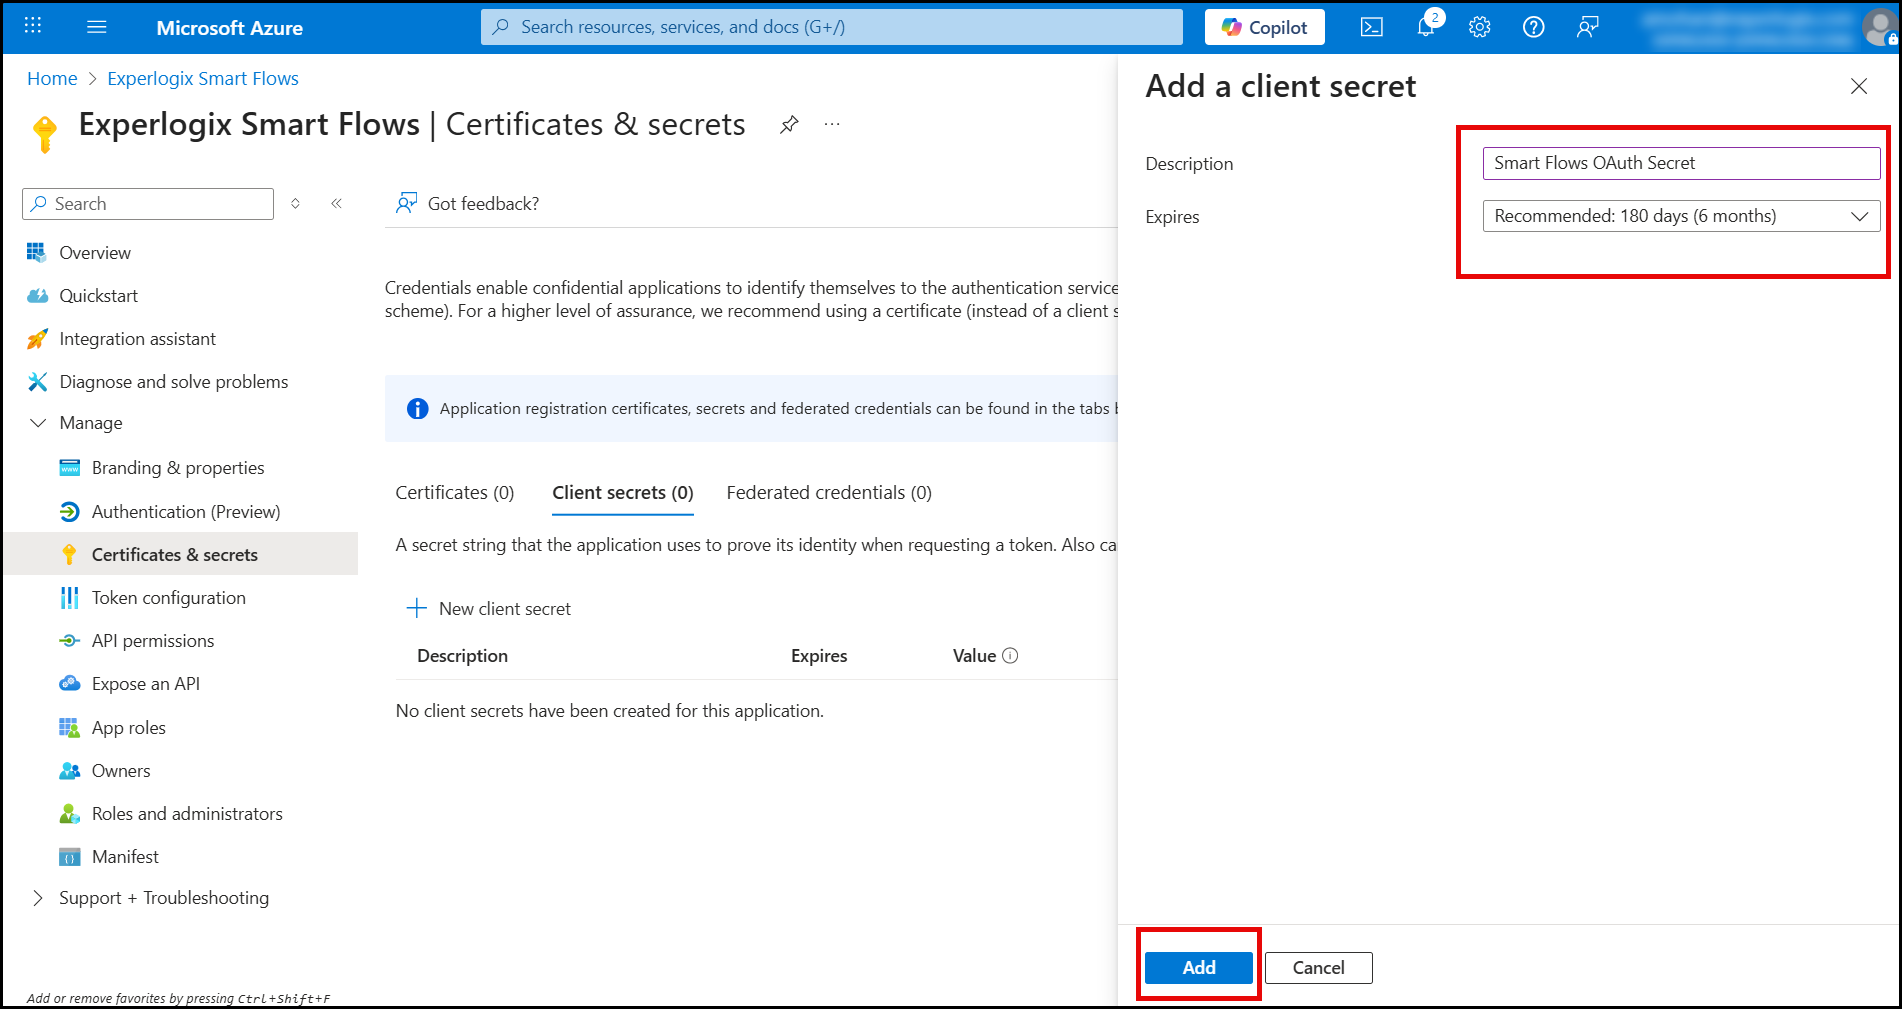
Enter:
-
Description (for example: Smart Flows OAuth Secret)
-
Expiration (choose according to your security policy)
-
-
Select Add.
-
Immediately copy the secret value.
This value is shown only once and cannot be retrieved later.
Step 5 – Configure API permissions
-
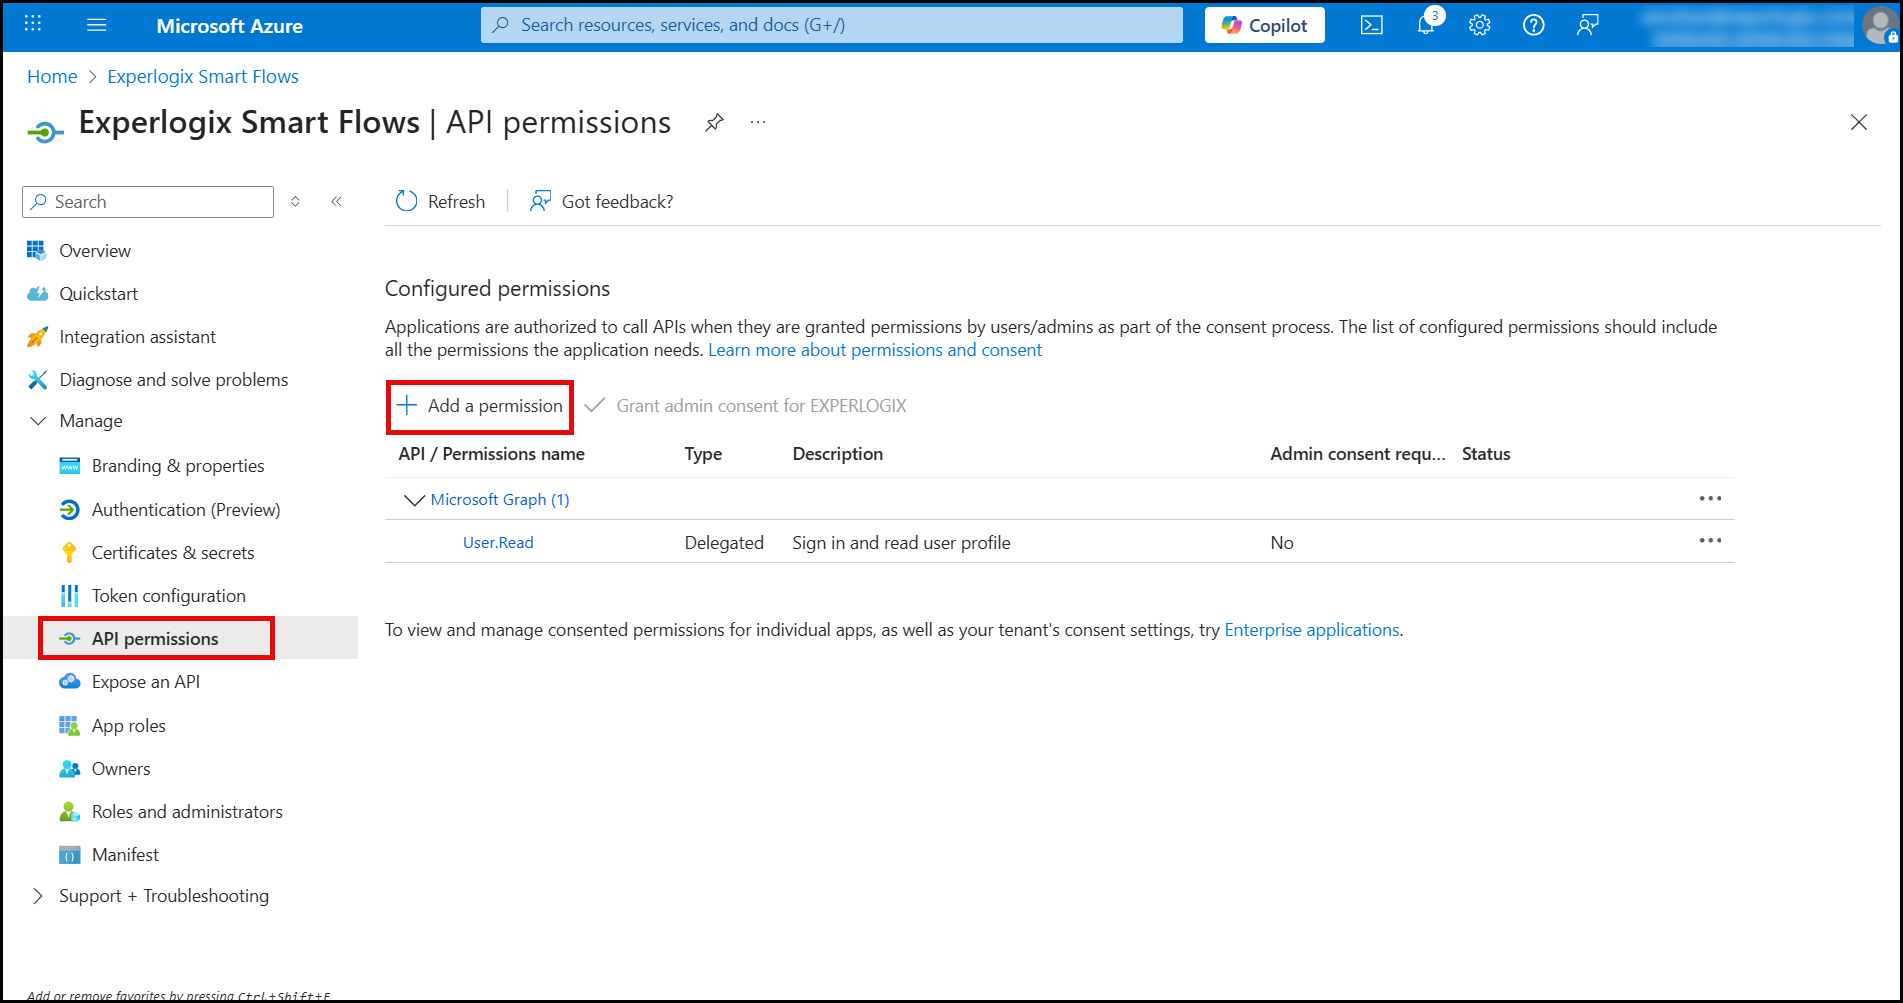
Navigate to API permissions.
-
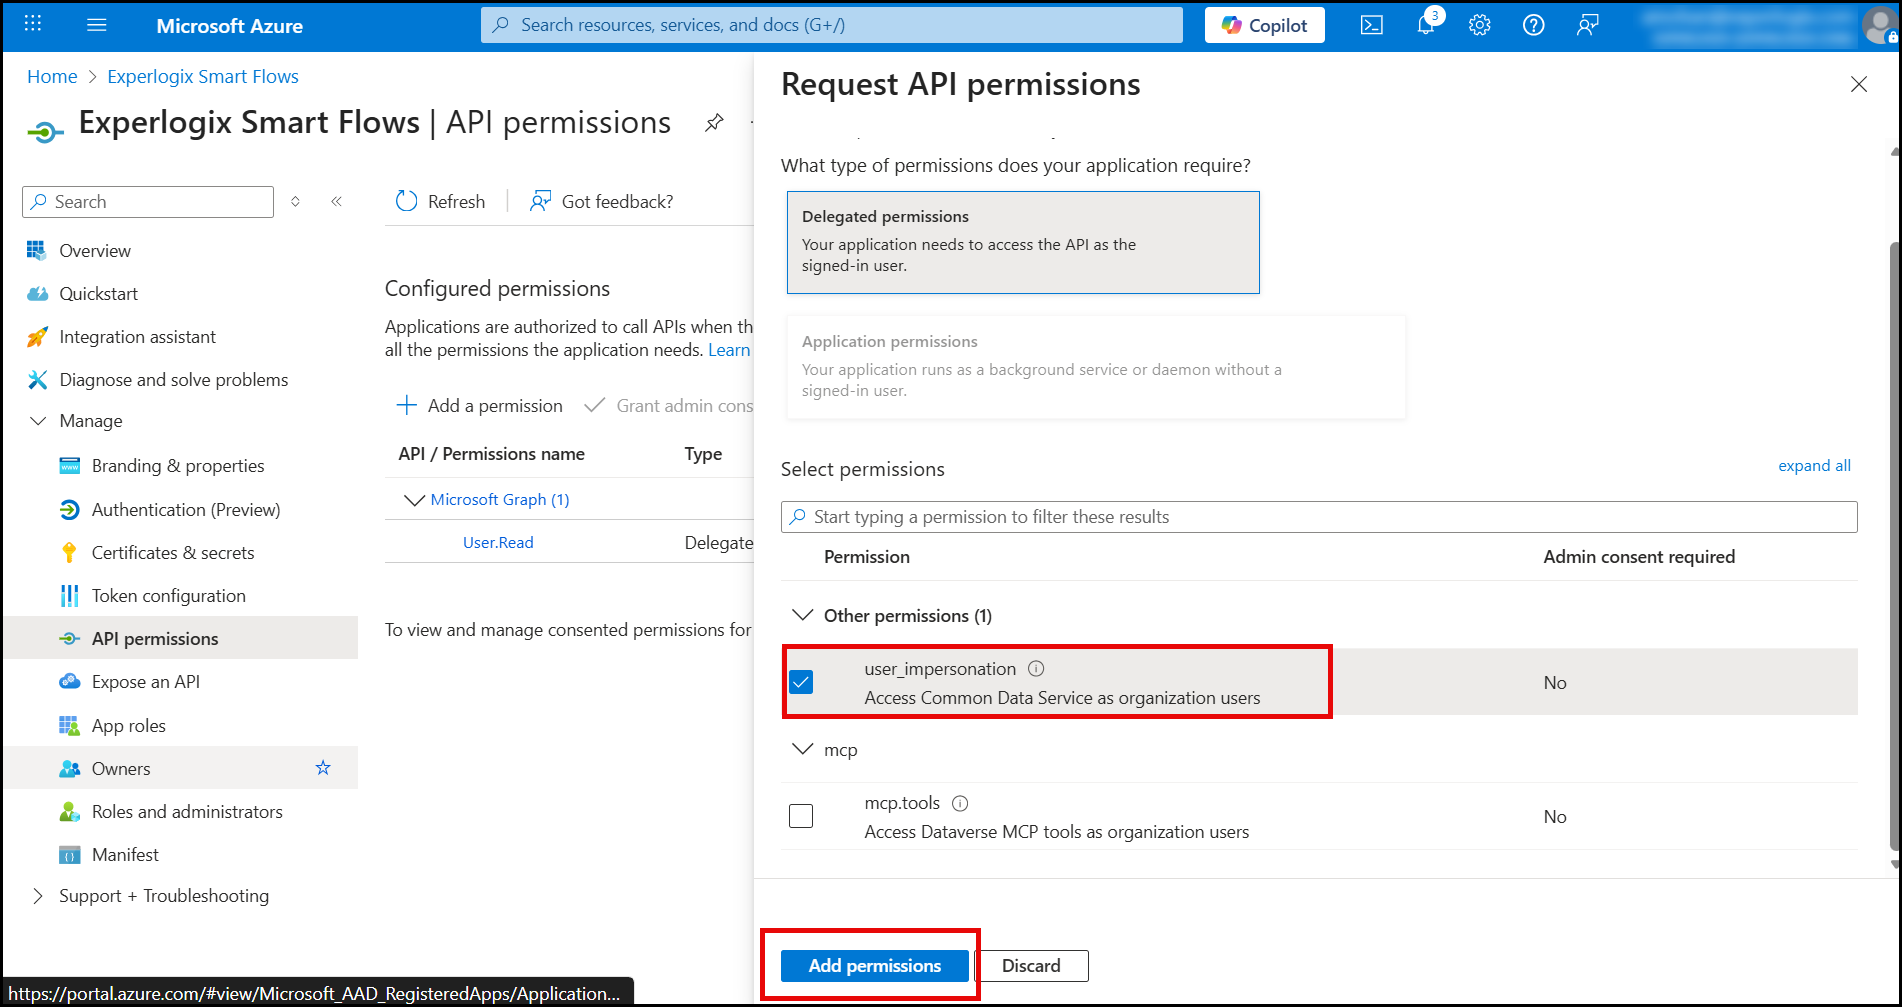
Select Add a permission.
-
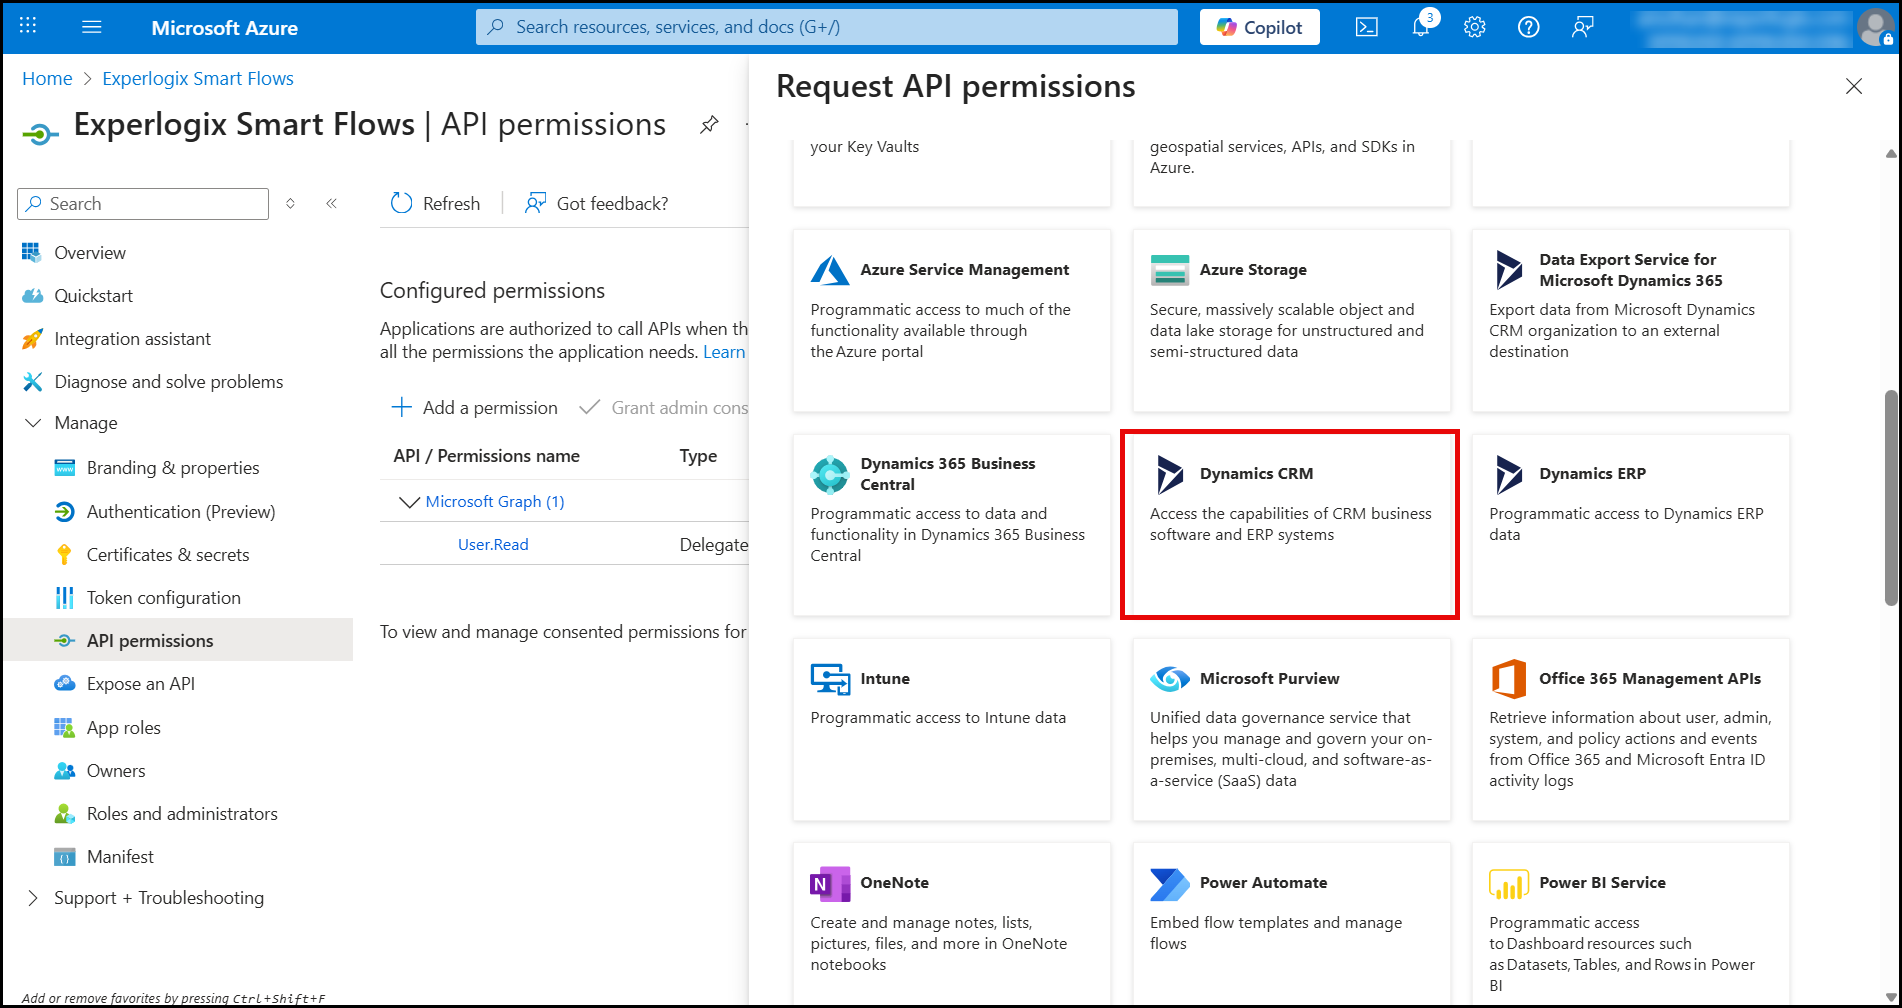
Select Dynamics CRM (for Dynamics 365 CE) or the appropriate Dataverse API.
-
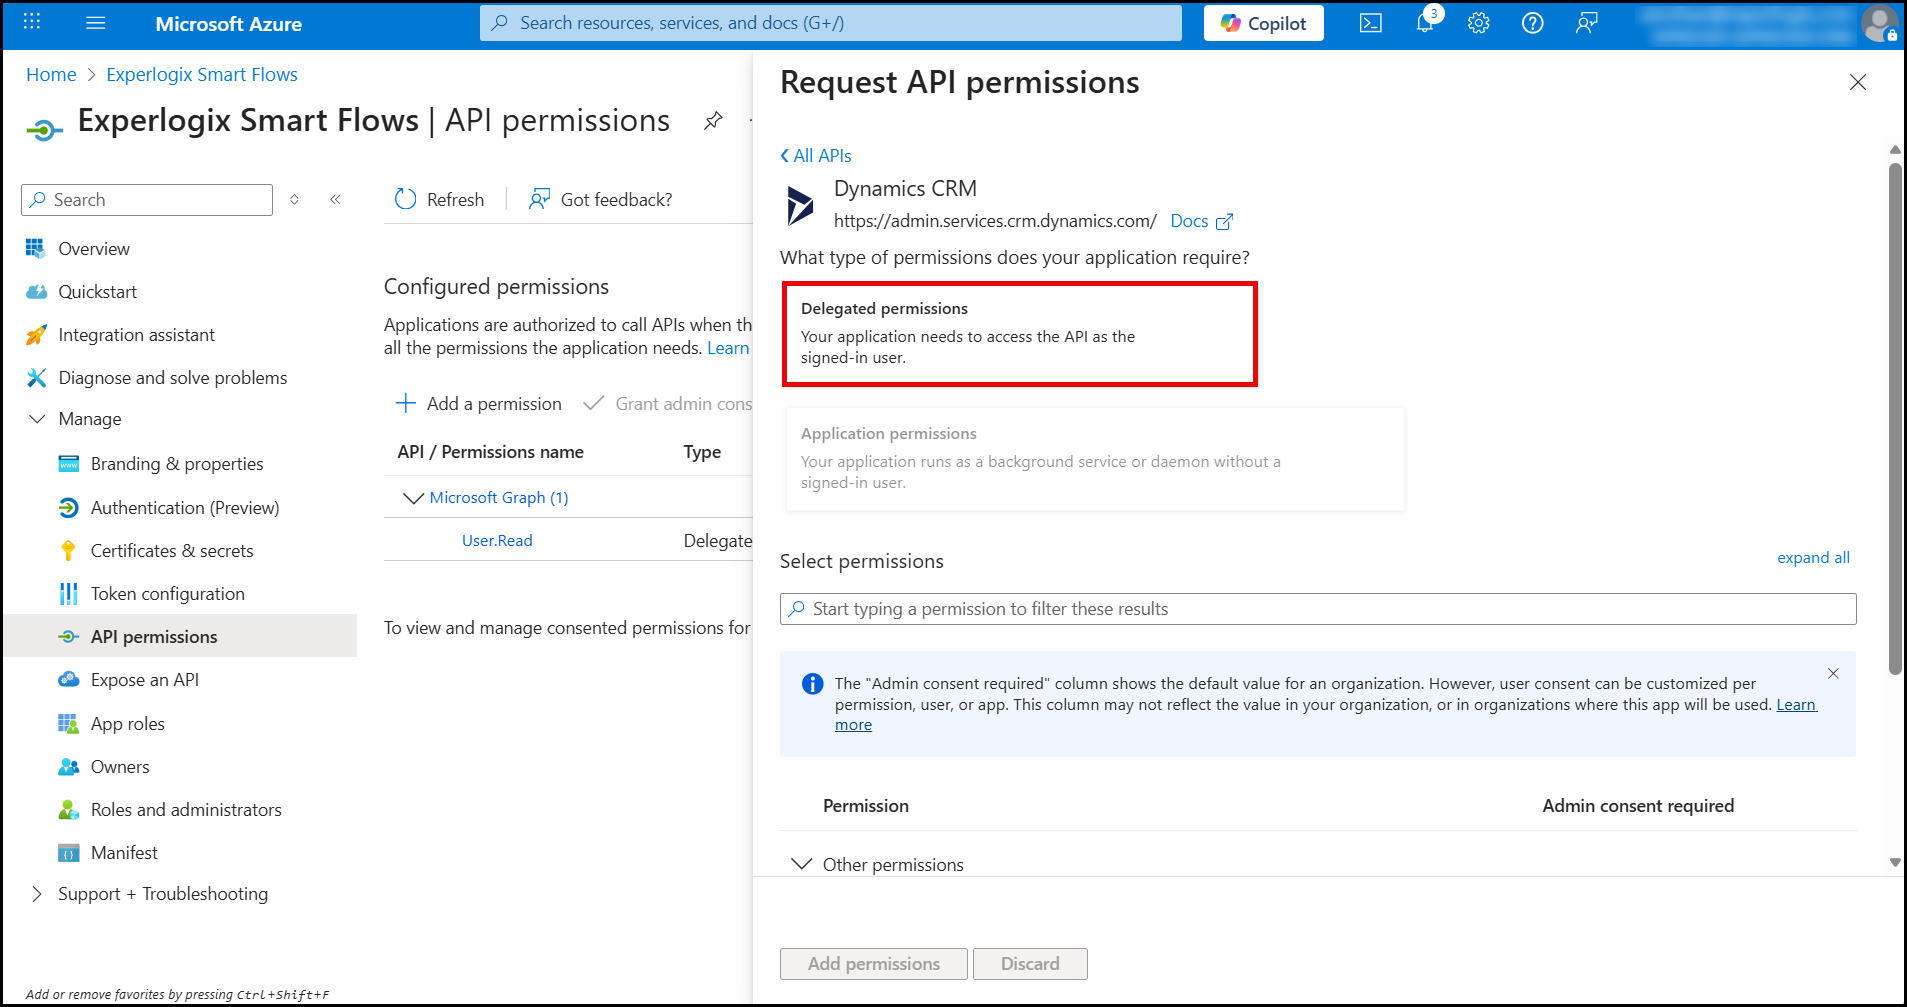
Choose Delegated permissions.
-
Add the required permission: user_impersonation.
-
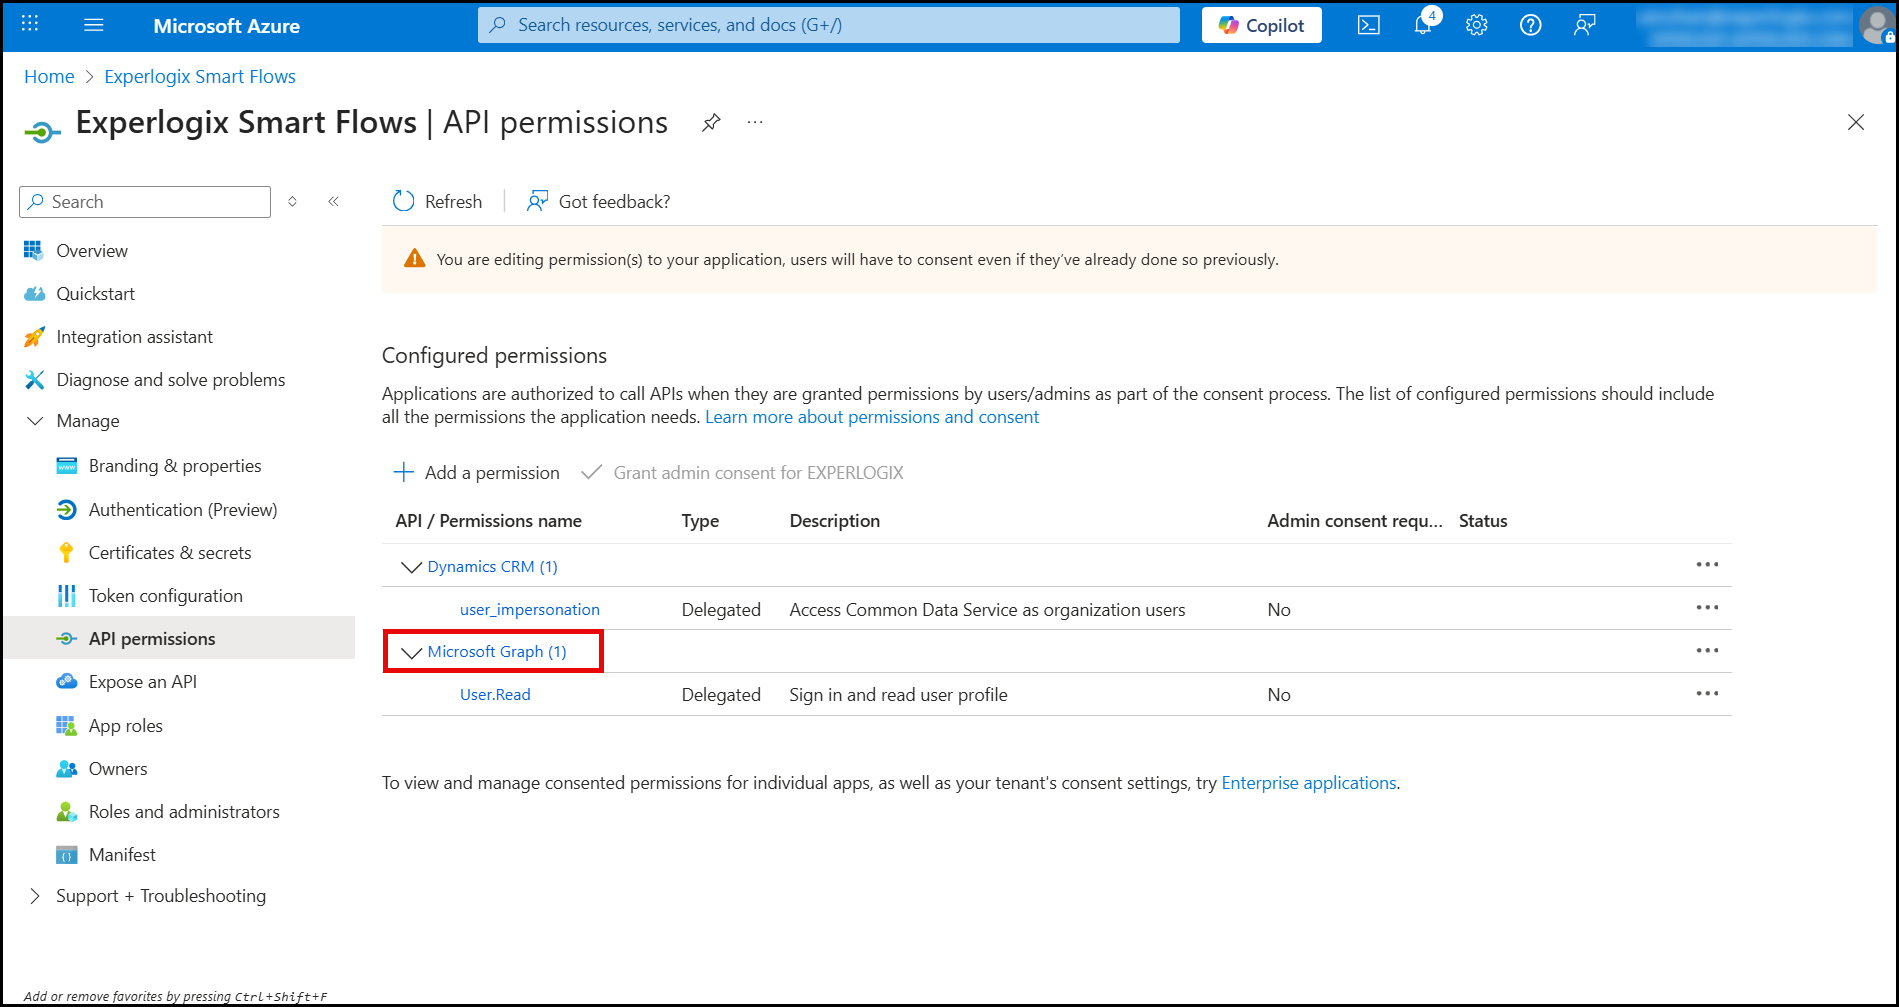
Select Microsoft Graph.
-
Choose Delegated permissions.
-
Under Users, add the required permission: user_read.
-
Select Grant admin consent for the tenant.
About the required API permissions
Dynamics CRM > user_impersonation - The app can make API calls to Dynamics 365 using the identity and permissions of the currently signed-in user. This will be the connector user when setting up the CE connector is Smart Flows. All operations are performed with the user's security context - respecting their role-based permissions in Dynamics. Privileges cannot be elevated so Smart Flows cannot do more than what the signed-in user can normally do and field-level security, business unit access, and role permissions are all enforced.
Microsoft Graph > user.read - The app has basic profile access (read the user's display name, email, user principal name, job title, and other basic profile properties). It can only access information about the currently signed-in user (not other users). This permission is commonly considered a basic, low-risk permission.
Step 6 – Store the values in Smart Flows
-
In the Experlogix Smart Flows application.properties file create the following properties:
-
dynamics.clientid- Paste the Application (client) ID from Step 3.
-
dynamics.clientsecret - Paste the Secret value from Step 4.
Example:
-
dynamics.clientid=c8ef4bdb-4e17-4b9e-a48b-a698629a383d
-
dynamics.clientsecret=qXY]V.PE/n2e2lu4Z_GCdHGq4i7/tofQ
-
-
-
Save the application.properties file.
Your Experlogix Smart Flows environment is now ready to configure a Microsoft Dynamics 365 CE Online connector using OAuth via EntraID.