Formatting a field means that you change the way it is displayed. You can turn a field into a number, date, time, an image, a bar code, a hyperlink, an e-signature, and so on.
Formatting dialog
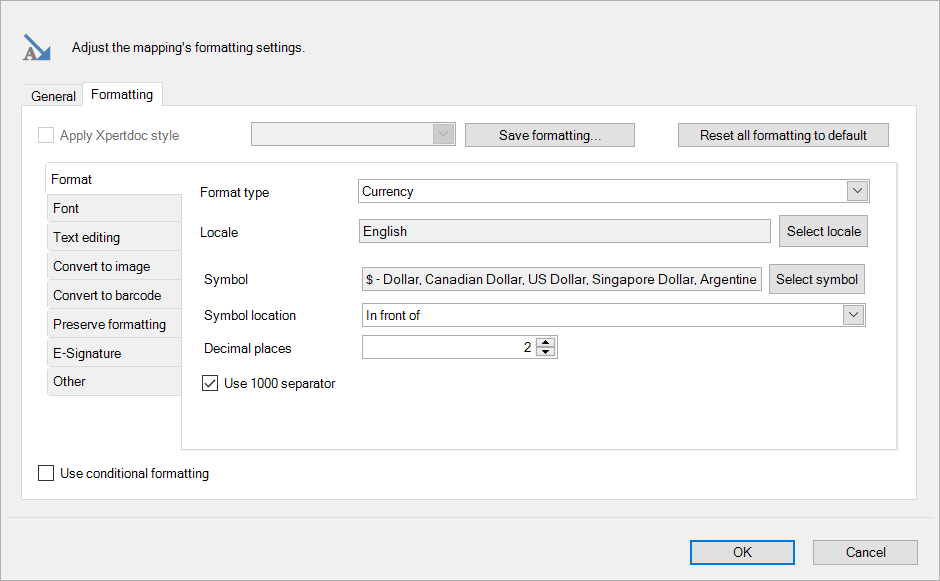
The mapping window is where you apply formatting to the selected mapping. Double-click a mapping in the Mapping tab of the Smart Flows pane (or select a mapping and select Settings) to bring it up.
Here's the Formatting part of that window:
Template Builder styles
To configure your style use the tabs explained below, and then save it by doing the following:
Creating a new Template Builder style.
-
In Template Builder, open your template.
-
On the toolbar, select the Template Builder Mapping tab.
-
Configure your formatting as desired.
-
Select Save formatting button.
The Settings dialog opens.
-
In the Name field, enter a name.
-
Select OK.
Quick apply a style to a Template
-
Open your template.
-
Right-click the field to modify, and select Assign Template Builder Style.
-
From the Select Style dialog, select a style.
-
Select OK.
Reset to default
If you want to reset your mapping's settings to the default values, you can select the Reset all formatting to default button:

Format
The Format tab is used to display the field in the selected format. By default, all fields are interpreted as text. This is the list of available formats:
-
Text
-
Currency
-
Number
-
Date
-
Datetime
-
Time
-
Duration
-
Percentage
-
Custom number
-
Custom date
-
Capturing groups
When you choose a format type, additional options appear:
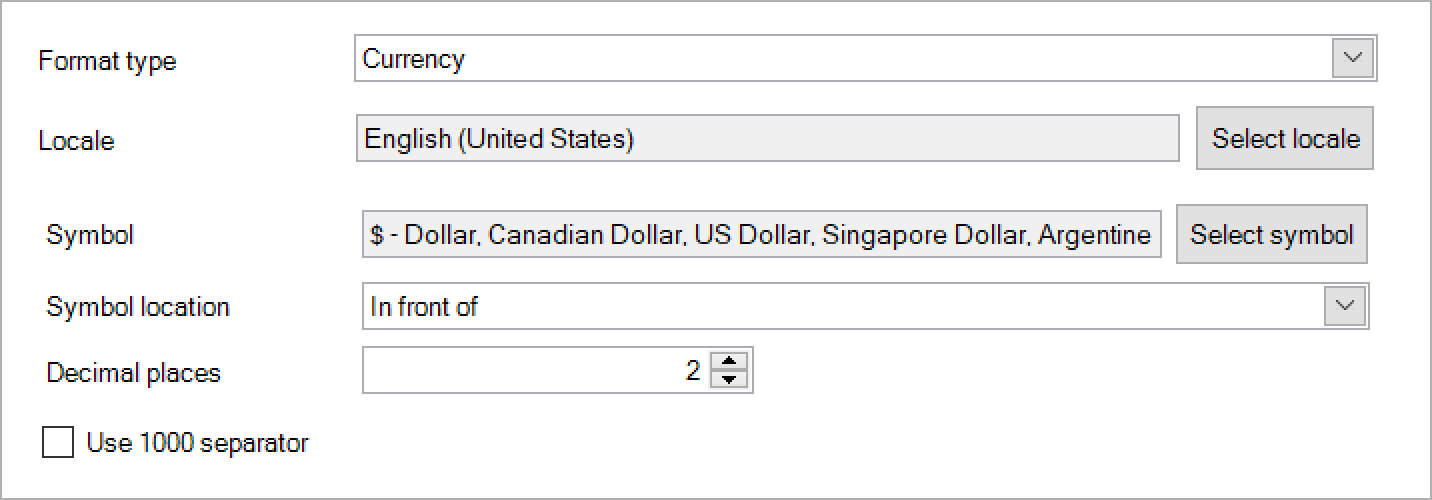
Choosing the right format is important, since some combinations of fields and formats don't make sense. For instance, how are you going to convert "700" to a date? Or "documents" to a percentage, etc.
Numbers, times & dates
How the currency, number, date, datetime, time, percentage, custom number and custom date formats work is covered on this page.
Durations
Durations can be used to specify a period of time. This is used primarily to output a pseudo-field or formula in a certain duration format.
You can define a base moment, by clicking the calendar button or grabbing a value from a field:

This base moment will then be used to calculate months. This is important because not every month is of the same length, so turning e.g. 90 days into months will require that you specify a base moment. If you do not specify a base moment but the calculation requires it (months to something or something to months), then the current moment will be used.
All of this only makes sense in the context of date/time calculations, which is described in detail on this page.
Capturing groups
Capturing groups can be used to disassemble a field into groups, after which you can choose which of those groups to show and in which order. This is useful for output that needs to follow a certain pattern, such as telephone numbers.
Creating, moving and removing groups
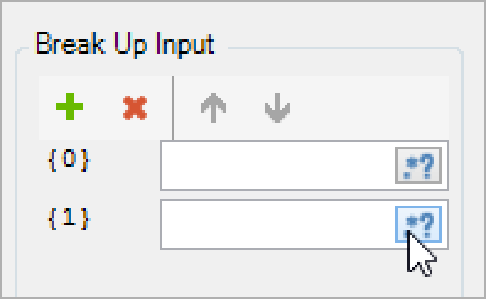
First, you need to create your groups. Select the green plus to add a new group:
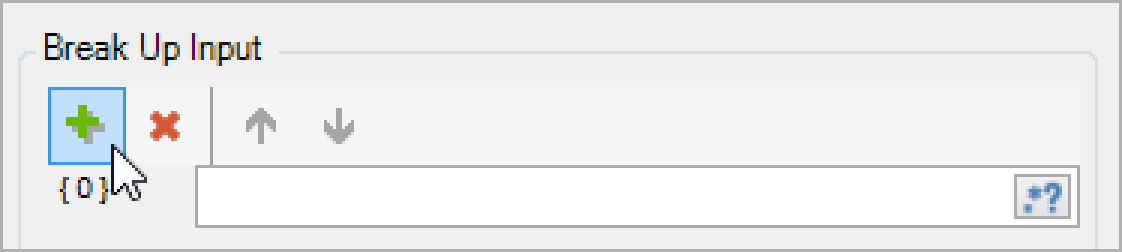
You can add more groups by clicking the green plus. Select a group and select the red X to remove a group. Finally, you can move a group up or down the list by selecting it and clicking the up or down arrows.
Defining groups
Now that you've created your groups, you need to define them. Select the .*? button in a group's text box to bring up a list of regular expressions which you can use to define your group:
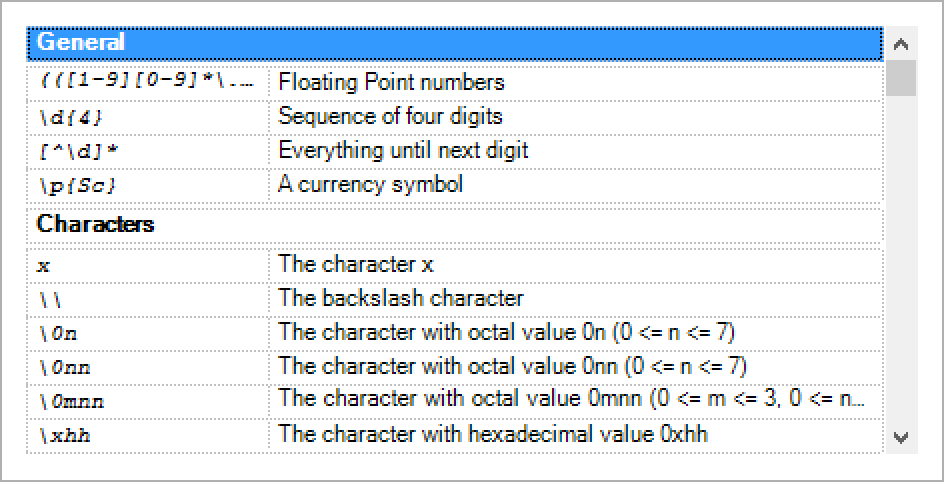
You can select one the expressions (this page has more information about regular expressions) and select OK to insert it, or you can type it in yourself in the text box:

Setting the output
Once you've set up and defined your groups, you can decide how to output them. You can type in the group identifiers (such as {0}) and other characters in the Assemble Output text box:
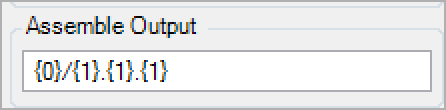
For instance, if group {0} contains A, group {1} contains B and the output is set as in the above screenshot, then this will be the output: A/B.B.B.
Check the box Input must be an exact match of the break-up pattern above to force the input to adhere to the set pattern. This means that if you have 4 groups that each catch a digit, 1234 will be a match, but 12345 won't, because that contains 5 digits.
Example
Capturing groups is a powerful feature, but it can get quite complex - so let's use a real-life example. Take the following setup, which we use for formatting a telephone number:
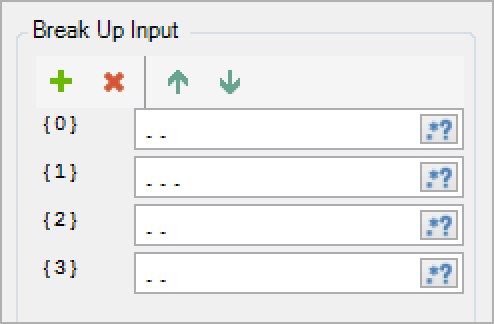
This setup defines 4 groups with the following rules:
-
Group {0} contains the first 2 characters of the mapping's content (a dot means any character).
-
Group {1} contains the following 3 characters.
-
Group {2} contains the following 2 characters.
-
Group {3} contains the following 2 characters.
The telephone number that we want to format is 047770123. This means that the groups will contain the following:
-
Group {0}: 04
-
Group {1}: 777
-
Group {2}: 01
-
Group {3}: 23
Finally, here's how we set up our output:
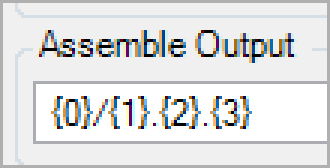
This results in the following output: 04/777.01.23
Formatting telephone numbers is only one very basic example, but this should give you an idea of what is possible with capturing groups.
Text editing
The Text editing tab is used to replace parts of a text mapping, or to insert parts into the mapping.
Replacing text
To replace part of your text, type the part you wish to replace in the left text box, and the part you wish to replace it with in the right text box:
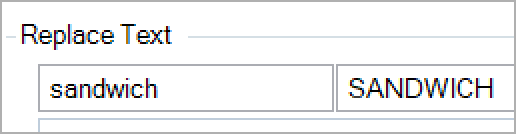
This example will replace all lowercase occurrences of sandwich with SANDWICH. Select the ellipsis (...) to bring up more options:
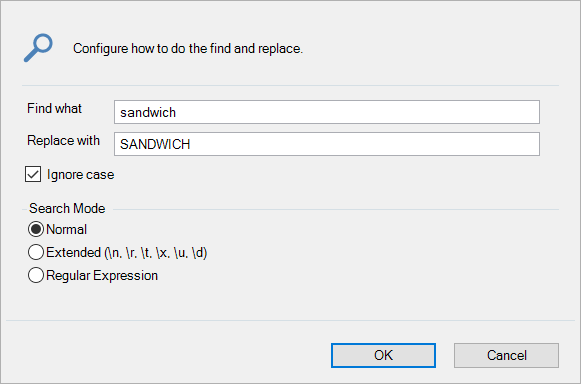
In here, you can change some settings:
-
Ignore case: check this if you want to treat lowercase and uppercase letters the same. When this is checked, there is no difference between BLUE, blue, bLUe, Blue etc.
-
Normal search mode: the text is considered to be plain text without special characters.
-
Extended search mode: this allows the insertion of special characters in the text. This wikipedia page has more information about special characters.
-
Regular Expression search mode: this treats the text as a regular expression. This page has more information about regular expressions.
Select OK to save the settings for that text replacement.
After you've set up the text replacement, select the green plus to add it to the list:
You can add multiple text replacements and move the order in which they are checked by selecting one of them and clicking the up and down arrows. If you want to remove a text replacement, select it and select the red X. Finally, you can update a text replacement by selecting it, changing the text/settings and clicking the update button:
Inserting text
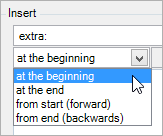
To insert text, type the text you want to insert in the text box, choose the position where you want to insert it and select the green plus:
This adds the text insert to the list of text inserts.
There are multiple positions to insert your text:
-
At the beginning: the typed text is inserted at the beginning of the field's text.
-
At the end: the typed text is added to the end of the field's text.
-
From start (forwards): the typed text is added in the position you specify to the right. 0 is at the beginning, 1 is after the first character etc.
-
From end (backward): the typed text is added in the position you specify to the right. 0 is at the end, 1 is before the last character, etc.
You can add multiple text inserts and move the order in which they are checked by selecting one of them and clicking the up and down arrows. If you want to remove a text insert, select it and select the red X. Finally, you can update a text insert by selecting it, changing the text/settings and clicking the update button:
Preserve formatting
The Preserve Formatting tab is used for keeping original formatting intact. Original formatting can include:
-
Line breaks
-
HTML
-
Entire documents
By default, Smart Flows removes all formatting when a field is mapped. For fields that require additional formatting such as currency or date fields, this is beneficial. But if you want to keep the original formatting intact, this is the tab for you.
This tab is found under the Format tab in a mapping's settings:
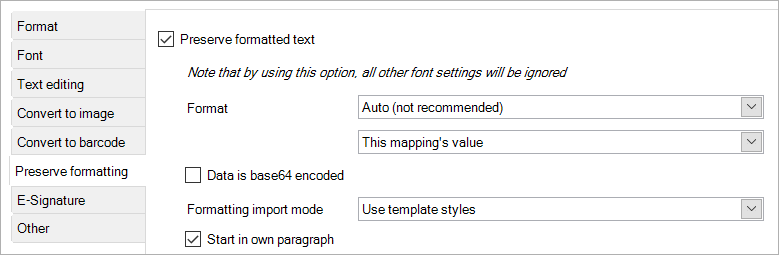
Make sure to check the box, as this unlocks the controls you need for configuration.
Note that activating this setting overrides both Word's and Smart Flows' font settings. If this is a problem, the information on this page may be of use.
Typical uses
Here are a few examples that show why you'd want to use this feature:
Inserting documents
You can insert entire documents if those documents are stored as base64 in a field. This is the default way to store byte array in XML (which is what Smart Flows uses), so in general, any document you include in your CRM system will be saved by Smart Flows as base64.
For example, if you include an attachment to a note in Dynamics CRM, that attachment is saved in the Document field (an advanced field) as base64:
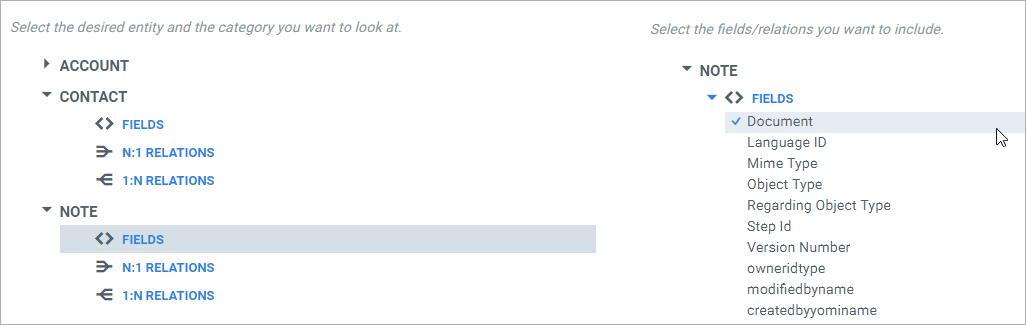
If you then map this field and use the Preserve Formatting option (and set it to the correct format), the entire document will be inserted where you mapped the field.
Rendering HTML
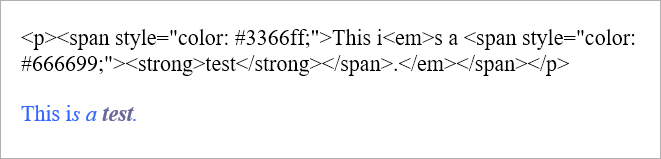
You can include HTML in a field, for instance when you make a custom data set with a formatted text box field:
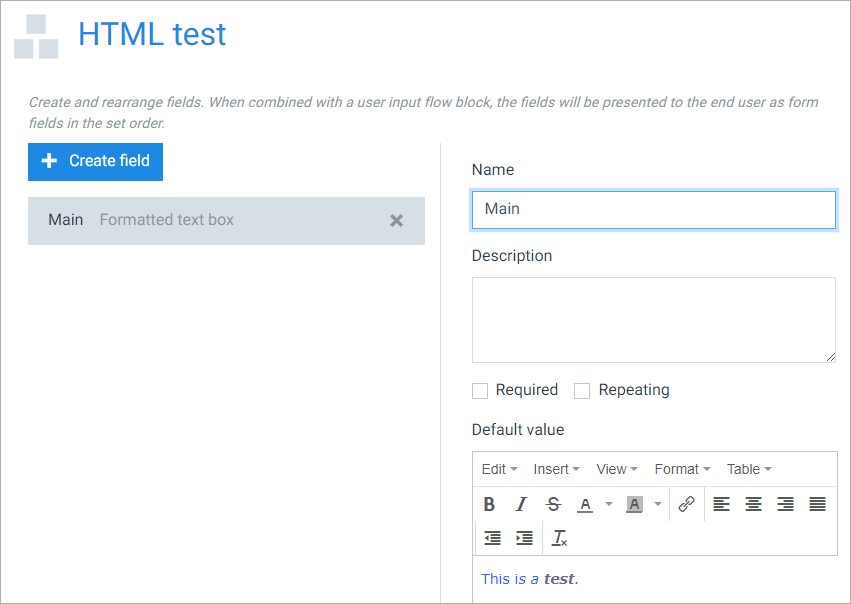
The This is a test. line has all kinds of formatting. This is all converted to HTML - you can see this if you make a sample out of it and then look at the sample's content (select View):
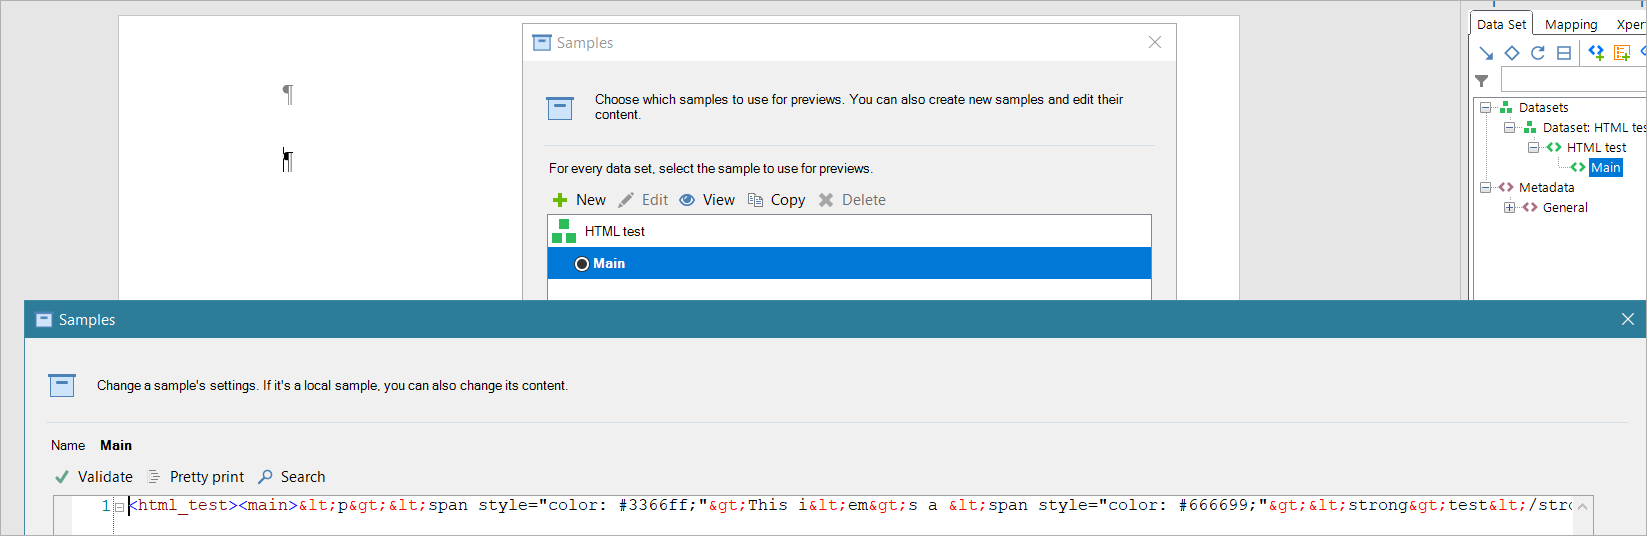
The < is a < and the > is a >, so these are just XML tags. They're automatically replaced since to make XML inside XML possible.
If you map this field, Smart Flows will automatically detect that it's HTML and it will activate the Preserve Formatting setting for you:

In the screenshot above, we removed the Preserve Formatting from the first mapping, so the first is without and the second is with Preserve Formatting. Here's the result:
Keeping line breaks
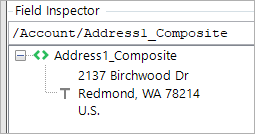
Some fields contain line breaks, typically address fields:
If you map this without doing anything, it will look like this:

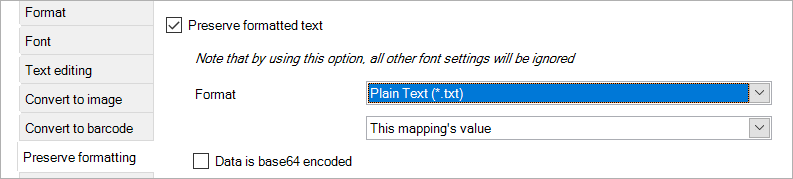
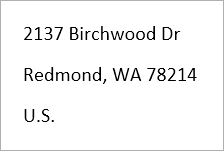
If you want to keep the line breaks, you need to enable Preserve Formatting:
Now it's rendered like this:
Options
Format

The first setting should match the format of the original content. If you're inserting a document, find out the format of the original document. If it's a .docx file, select that as the format. If it's a PDF, select PDF etc. Here's the list of all supported format:
-
Auto (not recommended)
-
Word Document (*.docx)
-
Word Macro-Enabled Document (*(.docm)
-
Word Template (*.dotx)
-
Word macro-Enabled Template (*.dotm)
-
Word 97-2003 Document (*.doc)
-
Word 97-2003 Template (*.dot)
-
Word Pre 97 Document (*.doc)
-
Word XML Document (*.xml)
-
Portal Document Format (*.pdf)
-
OpenDocument Text (*.odt)
-
OpenDocument text Template (*.ott)
-
Web Page (*.htm, *.html)
-
Single File Web Page (*.mht, *.mhtml)
-
Rich Text Format (*.rtf)
-
Plain Text (*.txt)
-
Printer Command Language (*.pcl)
-
Open XML Paper Specification (*.xps)
-
LaTeX (*.tex)
-
Scalable Vector Graphics (*.svg, *.svgz)
-
Computer Graphics Metafile Document (*.cgm)
-
Electronic Publication(*.epub)
-
Flat OPC Documents
-
Flat OPC Macro-Enabled Document
There's also an Auto setting. This will force Smart Flows to try and deduce the format from the content, but this is not guaranteed to work. We do not recommend you use Auto unless you have no choice.
The second setting has 5 options and asks you where the data comes from:
-
This mapping's value: typically the one you want. This uses the current field's value as is.
-
A file in a folder: use this when you want to use a file on the Smart Flows server instead of this mapping's value. You can then use something like 'c:\\temp\\file.doc' as the expression for this mapping, and force Smart Flows to look for that file and do the Preserve Formatting on that file.
-
An asset: use this when you want to use an asset instead of this mapping's value. The mapping value will be interpreted as an asset, so if you have an asset called Document you can just use 'Document' as the mapping's value and Smart Flows will know to look for an asset called Document.
-
URL: use this when you have a URL inside the mapping. Smart Flows will interpret it as an URL and try to retrieve data from that URL. If it's a web page, you can use the Web page HTML format to render it.
-
A Microsoft SharePoint or Sugar connector defined in the project console.
Data is base64 encoded
This setting should be checked when the data is base64 encoded.
Data can be of type string, with the contents of the string looking like base64 encoded data. This is not always clearly visible so you may have to try with and without checking this box if you don't get the result you expect.
Formatting import mode
This setting determines what happens to Word styles when converting a Word document.
-
Use template styles means that your current template's Word styles will overwrite the ones found in the original content.
-
Use styles of the original document keeps the original styles intact. (As said above, all content is assigned a Word style. Plain text will get the Normal style, HTML H1 will become Heading 1 etc. The best way of determining how Smart Flows converts your original content into Word styles is to preview your template in docx format and then see which styles are assigned to the content.)
Insert as image
This setting can be used when you want to insert the content as an image rather than text. This is especially useful for inserting PDF files, as you cannot insert their content as text.
Checking this setting opens up another Settings button. Clicking that brings up a window where you can adjust the image's position, size, text wrapping etc. like you can do with regular Word images.
Images added to a Dynamics CE Note can be mapped in your template. For images uploaded from a file, set Source for embedded images to Dynamics Connector. For images inserted from a URL, leave Source for embedded images set to None.
Merge PDF documents when the document is converted to PDF
This is an interesting feature for when you are inserting PDF files in a template whose documents are to be outputted to PDF. Checking this box will make sure that the documents are added as fully-fledged PDF files to the document, keeping text etc. intact. However, this will only work when the document format is PDF, as you can only add PDFs to other PDFs.
This setting helps to keep the file size small and increases performance by speeding up the output process. Because you output as PDF, Smart Flows can insert PDFs without having to re-render them, and this allows faster document generation.
Checking this setting opens up another Settings button. Clicking that brings up a window where you can give the inserted PDF a description and table of contents position (for use in PDF's table of contents), and you can also include a background layer (both near the header or footer) that you can use to put in front of your PDF. This is useful when you are using page numbering, and you want to make room for that.
If you are going to output to non-PDF formats and you want to insert PDFs, this setting needs to be unchecked. Instead, you need to check the Insert as image box instead.
Other settings
There are other settings, not grouped together:
-
Start in own paragraph: checking this will create a new paragraph for this mapping so that the "preserved document" doesn't begin in the middle of another paragraph.
-
Skip external content: checking this prevents Smart Flows from waiting on web content that doesn't load by skipping its content. For instance, when including a Word file that has links to images on a website, this setting would not let Smart Flows wait until the images are retrieved - the cached versions will be used.
-
Ignore formatting rules: when importing a text file (.txt), check this if you want to ignore all formatting that Word might automatically detect. For instance, Word will detect 1. Table 2. Chair 3. Lamp as a list, but if you check this box then it will just be imported as text.
-
Remove empty paragraphs at the end: check this if you want to remove empty paragraphs at the end.
-
Create separate section for content: checking this gives you the power to add structure to your document by creating Word sections along with preserving the formatted text. By default this is continuous, but you can also choose to create a new page, new column, even page or odd page section.
E-Signature
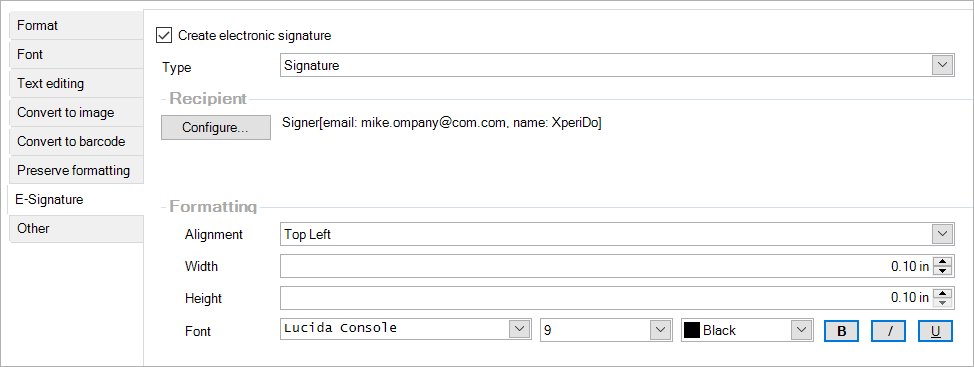
The E-signature tab is used for inserting electronic signatures. Activating this turns a mapping into an e-signature.
Smart Flows currently supports three e-sign platforms: Docusign, Sertifi and OneSpan Sign
Creating an e-signature placeholder
To insert an e-signature, select E-Signature in the Smart Flows ribbon:

This creates an empty mapping with the digital signature option activated:
Docusign:
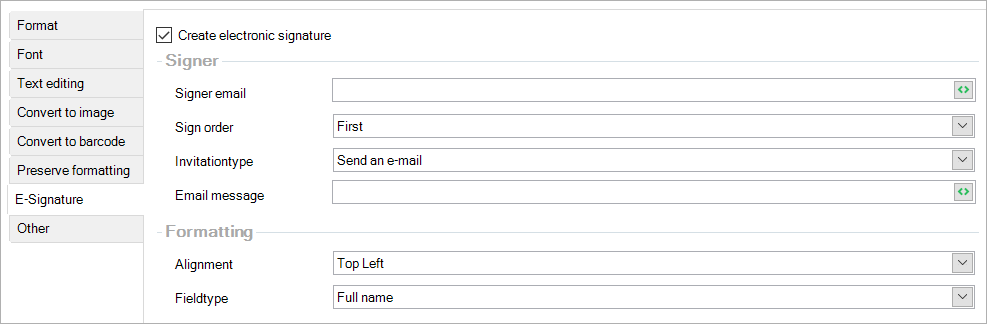
Sertifi:
Configuring an e-signature placeholder
To use this signature, you'll need to configure it properly. How to do that depends on the e-sign platform that you use in Smart Flows:
Adobe Acrobat Sign
When you generate a document that contains an Adobe Acrobat Sign electronic signature, one of two things will happen:
-
Either you get a link that redirects you to the signing procedure. This is called sign in person, where the person that needs to sign is there with you.
-
Either an e-mail is sent to the party that needs to sign the document. This is called sign by e-mail.
You can insert multiple signatures in the same document and all signers will sign with the same method (e-mail or in person).
Settings in Template Builder
Signer
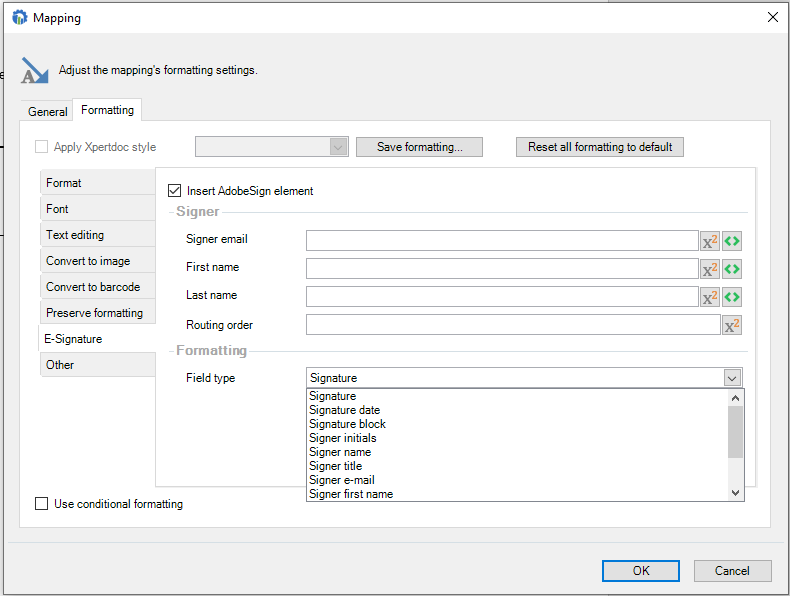
The Signer part shows who is the signer of the signature. You need to check the option 'Insert AdobeSign Element' to be able to configure the signer.
-
The Signer E-mail field should contain the e-mail address of the signer.
-
The First Name field should contain the first name of the signer.
-
The Last Name field should contain the last name of the signer.
The Routing order field should contain a number that indicates in which order the signer will sign the document.
The following scenario may happen:
-
You have multiple signatures with routing order X
-
You have at least one signature with a routing order greater than X
In this scenario, the document will first be sent to all the recipients whose signatures have the routing order X. After EVERYONE signs/declines the document, only then will the recipient from the other signature get the document to sign.
Formatting
There are 8 types of signature blocks.
-
Signature A signature placeholder will be inserted at the location of the mapping. The signer will need to sign using one of the four methods (Type, Draw, Image or Mobile) and enter its name.

-
Signature date The signature date will be automatically inserted at the location of the mapping.

-
Signature block A signature block will be inserted at the location of the mapping. A signature block includes the labels "Signature:" and "E-mail:".

-
Signer initials An initials signature placeholder will be inserted at the location of the mapping.

-
Signer name The name of the signer will be inserted at the location of the mapping. That value comes from the Signature placeholder.
-
Signer title A placeholder will be inserted at the location of the mapping allowing the signer to enter its title.
-
Signer e-mail The e-mail of the signer will be inserted at the location of the mapping.
-
Signer first name The first name of the signer will be inserted at the location of the mapping. That value comes from the Signature placeholder.
-
Signer last name The last name of the signer will be inserted at the location of the mapping. That value comes from the Signature placeholder.
-
Signer company A placeholder will be inserted at the location of the mapping allowing the signer to enter its company name.
-
Digital signature Use to replicate the Signature at that location. During the signing ceremony, a single click will duplicate the signature at the location of the mapping.
-
Stamp Allow the signer to 'approve' the document by upload a "stamp" image.
Settings in Smart Flows
To send a document to Adobe Acrobat Sign from a Smart Flow, simply add the block Send to Adobe Acrobat Sign.
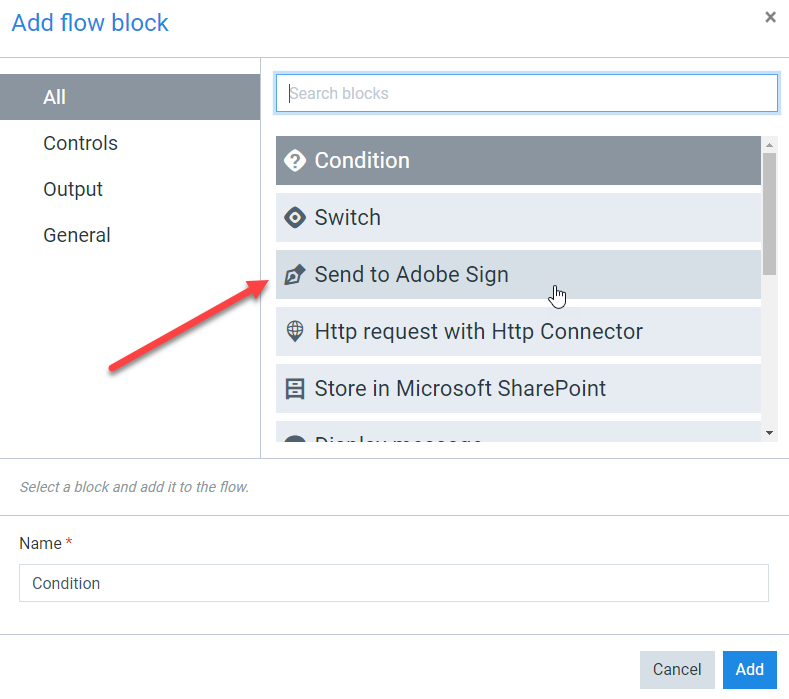
For all the information regarding the parameters available on that flow step, go to Send to Adobe Acrobat Sign.
Onespan Sign
When you generate a document that contains a OneSpan Sign electronic signature, one of two things will happen:
-
Either you get a link that redirects you to the signing procedure. This is called sign in person, where the person that needs to sign is there with you.
-
Either an e-mail is sent to the party that needs to sign the document. This is called sign by e-mail.
You can insert multiple signatures in the same document, but you cannot mix sign in person with sign by e-mail signatures.
Settings in Template Builder
Signer
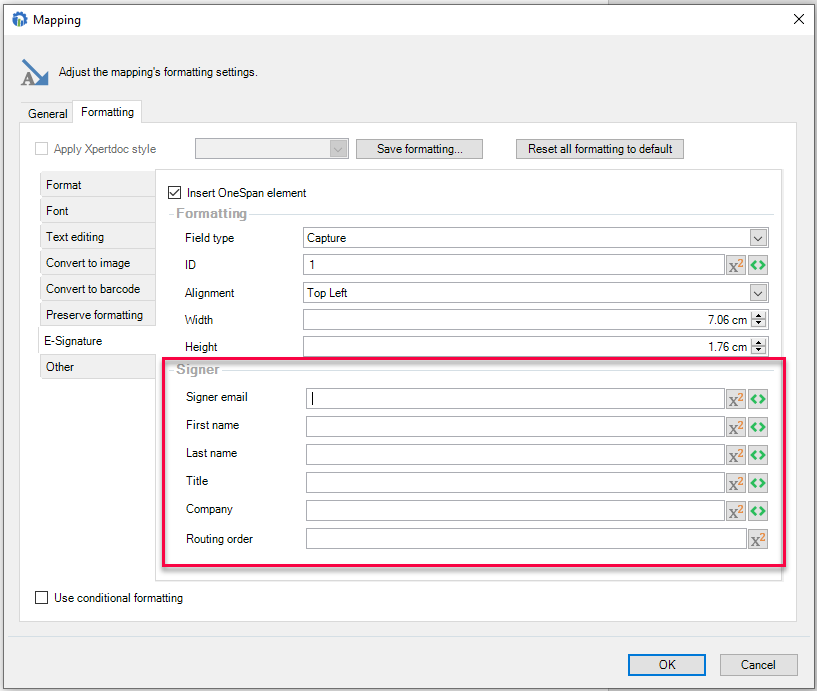
The Signer part shows who is the signer of the signature. You need to check the option 'Insert OneSpan Element' to be able to configure the signer.
-
The Signer E-mail field should contain the e-mail address of the signer.
-
The First Name field should contain the first name of the signer.
-
The Last Name field should contain the last name of the signer.
-
The Title field should contain the Title of the signer
-
The Company field should contain the company of the signer
The Routing order field should contain a number that indicates in which order the signer will sign the document.
The following scenario may happen:
-
You have multiple signatures with routing order X
-
You have at least one signature with a routing order greater than X
In this scenario, the document will first be sent to all the recipients whose signatures have the routing order X. After EVERYONE signs/declines the document, only then will the recipient from the other signature get the document to sign.
Formatting
There are 8 field types for a signature blocks.
-
Full name: During the signing ceremony, the signer simply clicks the block and its full name is then stamped on the block.
-
Initials: During the signing ceremony, the signer simply clicks the block and its initials are then stamped on the block.
-
Capture: During the signing ceremony, the signer simply clicks the block and draws its signature.
-
Mobile Capture: A recipient writes its signature in a mobile browser using their fingertip or a stylus. Must be configured at the account level.
-
Signature Date: The signature date is automatically inserted at the block's location after the signer completed the signature ceremony.
-
Signer name: The signer name is automatically inserted at the block's location after the signer completed the signature ceremony.
-
Signer title: The signer title is automatically inserted at the block's location after the signer completed the signature ceremony.
-
Signer company: The signer company is automatically inserted at the block's location after the signer completed the signature ceremony.
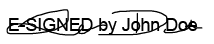
A signature looks like this:
And this is what an initial looks like:

Settings in Smart Flows
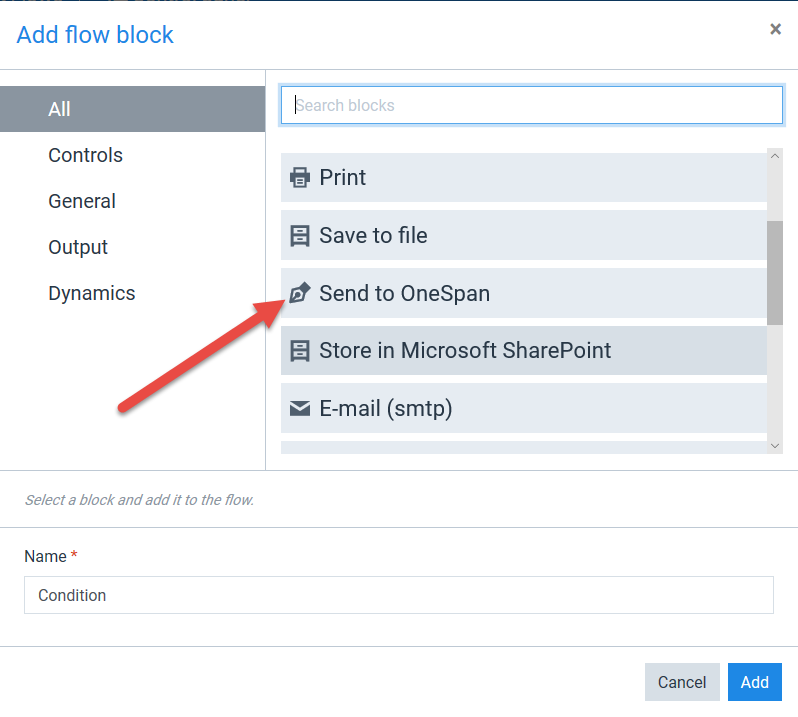
To send a document to OneSpan Sign from a Smart Flow, simply add the block Send to OneSpan.
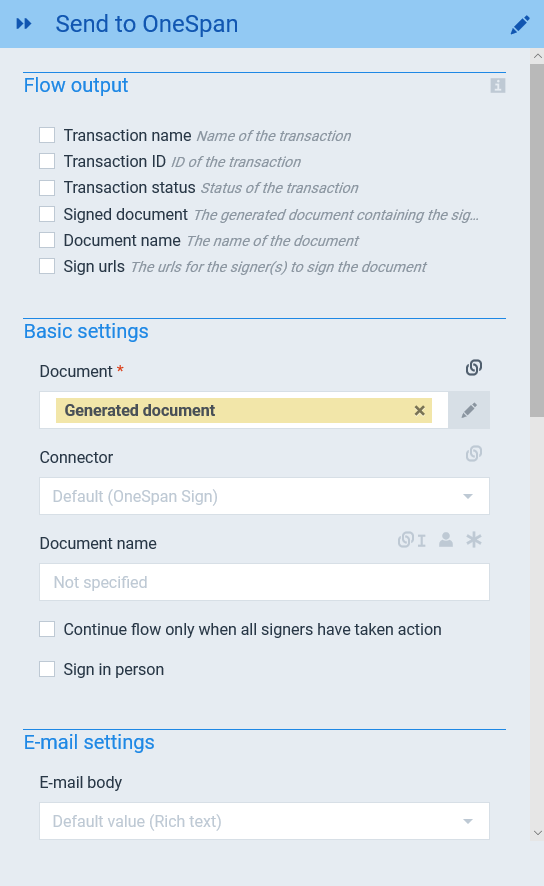
The Send to OneSpan is then part of the Smart Flow and can be configured by selecting it.
Flow Output
This section contains all the output elements of the Send to OneSpan block. Some of them could then be used as input element in subsequent steps of the flow.
-
Transaction Name - Name of the transaction. If not specified in the Transaction Setting, defaulted to the name of the template with a timestamp
-
Transaction ID - ID of the transaction. If not specified, auto-generated identifier
-
Transaction Status - Status of the transaction.
-
Signed Document - The generated document containing the signature
-
Document Name - The name of the document
-
Sign URLs - The URLs for the signer(s) to sign the document. (Only when Sign in person is checked)
Basic Settings
-
Document - Document to be signed.
-
Connector - Connector of type OneSpan (must be previously configured from the Control Panel → Connectors)
-
Document Name - Name of the document. If not specified, defaulted to the name of the template with a timestamp. The document name is used in communications to the signer and sender.
-
Continue flow only when all signers have taken action - If checked, the flow will wait until all signers take action (sign, opt-out or decline) before resuming.
-
Sign in person- If checked, sign url available for the signer in the flow results.
E-mail settings
By default, a OneSpan Sign account is configured to send an e-mail to a signer with a link allowing that signer to sign the document. When sending a document for signature using a Smart Flow, you have the option the provide content for a section of that e-mail.
-
E-mail body - You select if the content is provided by a Rich text control, a document or from the execution of a template.
-
E-mail message - Rich text control (available only when selected e-mail body is Rich text) allowing the user to enter some free text. Outputs from previous steps can be used as well.
-
E-mail document - Document selection (available only when selected e-mail body is Document)
-
E-mail template - Template selection (available only when selected e-mail body is Template)
Transaction settings
In this section, you can provide information to be linked to that specific electronic signature transaction (for tracking purposes) and configure some additional transactions parameters.
-
Transaction name - The name of the transaction.
-
Transaction description - The description of the transaction
-
Expiry date - Use to specify a date after which the transaction can no longer be signed
-
Transaction timezone - Timezone in which the signer is located. Used to calculated expiration date and provided significant reminders (if configured)
-
Transaction language - Used to set the language of e-mail(s) sent to signer(s), and also the language of signing ceremony user interface on the OneSpan Sign platform.
Reminder settings
By checking the option, you can configure reminders for the signer(s).
Days until the first reminder Number of days, from the date the transaction was created, until the first reminder is sent.
Repeat the reminder When checked, the reminder is repeated, using the configured number of days, until the expiration of the transaction (or if the signer actually sign the document).
Sertifi
Concept
When you generate a document that contains a Sertifi electronic signature, one of two things will happen:
-
Either you get a link that redirects you to the signing procedure. This is called direct link.
-
Either an e-mail is sent to the party that needs to sign the document. This is called sign by e-mail.
You can insert multiple signatures in the same document, but you cannot mix direct link with sign by e-mail signatures.
Settings
Type
There are 2 types of signatures.
-
Full name, where the signer uses his/her full name to sign.
-
Initials, where the signer uses his/her initials to sign.
There are a further 6 Sertifi elements you can include.
-
Small text box, where the signer can include some text.
-
Large signature box, where the signer has more room for signing.
-
Custom text box - Date, where the date of signing will be included.
-
Custom text box - Time, where the time of signing will be included.
-
Custom - Large text box, where the signer can include some more text.
-
Custom text box - Company, where the signer can include his company name.
-
Custom text box - Title, where the signer can include his title.
Signer settings
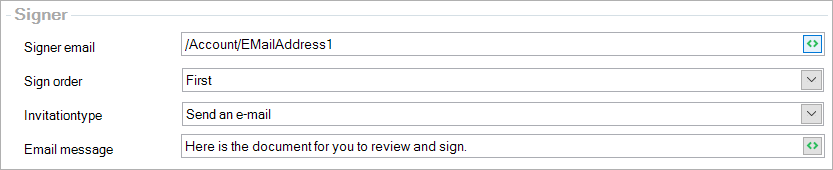
You can adjust a few settings regarding the signer:
-
Signer e-mail: manually type and e-mail address or choose a field that contains an e-mail address. This address will be used by Sertifi to send invitations and confirmations to.
-
Sign order: you can choose who gets to sign the document First, and who can sign it Second (after the First signers have all signed it). Furthermore, you can also choose to deliver this document to someone without asking them to sign for it.
-
Invitation type: either Send an e-mail or Use direct link, where Smart Flows will provide the link in the document feedback.
-
E-mail message: manually type a message or include a field of which the value will be included in the e-mail.
Formatting settings
There are a few formatting settings you can adjust:

-
Alignment: onto which corner the element will be anchored.
-
Field type: this is where you select the type of Sertifi element you wish to include.
Others
The Other tab is used for various purposes.
Removing blank paragraphs
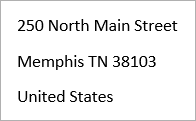
Check the box Remove the paragraph this mapping is in when the value is not specified or blank if you want to prevent blank lines from appearing in this mapping.

For instance, this is very useful when dealing with addresses. Typically, addresses are input in address lines, but not every line is always used:
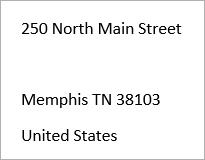
Turning on this setting fixes this:
Creating hyperlinks
Check the box Create a hyperlink to render your mapping as a clickable hyperlink. The mapping will still contain whatever is in it, but you can define a URL that it links to when you select it.

Insert the URL you want in the Hyperlink Target text box, or select the button in the text box to insert a field's value for the hyperlink target. You can also use an expression.
You can change what is shown when hovering over the link in the Screentip text box. You can insert a field's value by clicking the button in the text box, or again, use an expression.
E-mail hyperlink
If you want to create an e-mail hyperlink, follow these steps:
-
Create a pseudo-field of type Text.
-
Give it the value concat('mailto://',${field with link}), where ${field with link} is the field that contains the link.
-
Then, use this created field as the Hyperlink Target by selecting it from the data set after clicking the button inside the Hyperlink Target text box.
By adding the mailto://, the field is specified to be an e-mail link.
Converting case
Check the box Apply advanced case-convert rules to change the casing of certain letters in a text.

The following options are available:
-
Don't change: the text stays as it is.
-
Sentence case: everything is converted to lowercase, except the first letter and every letter following a dot.
-
lowercase: everything is converted to lowercase.
-
UPPERCASE: everything is converted to uppercase.
-
Capitalize Each Word: everything is converted to lowercase except the first letter of each word.
-
TOGGLE CASE: invert the case of each character.
Formatting Numbers & Dates
In the Format tab of a mapping's formatting settings, there are quite a few numbers & dates options - this page explains those options in detail.
Format as number
In the Format tab, you can select Number:
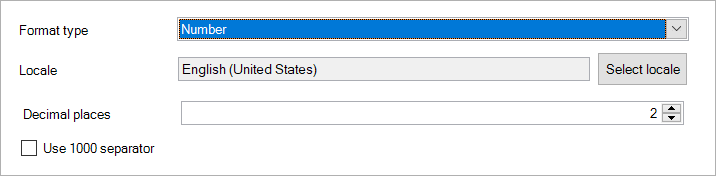
Here, you can set the number of decimal places and whether to use a 1000 separator. You can also set the Format Locale, which is explained below.
Select Percentage instead of Number to format your field as a percentage:
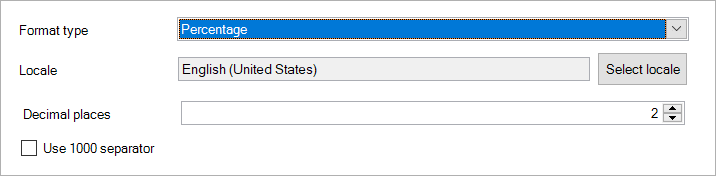
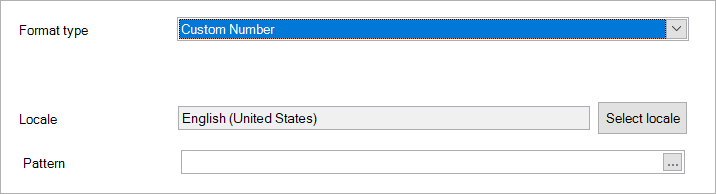
You can also select Custom Number, which allows you to customize the number formatting:
If you want to make your own custom pattern, please read the information on this page.
For custom date formatting, 'u' is used for year in the custom date pattern, instead of y. The lowercase y is a calendar year pattern, and the uppercase Y is a week year pattern.
Format as currency
In the Format tab, you can select Currency:
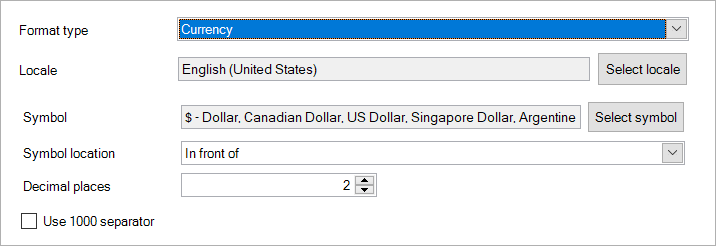
Here, you can set the number of decimal places and whether to use a 1000 separator. You can choose the symbol to use, and whether to show it before or after the number. You can also set the Format Locale, which is explained below.
You can also select Custom Number, which contains options for formatting as a custom currency as well:
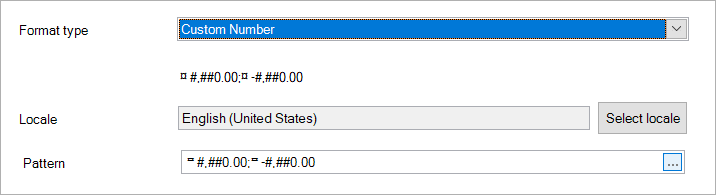
Format as date/time
In the Format tab, you can select Date:
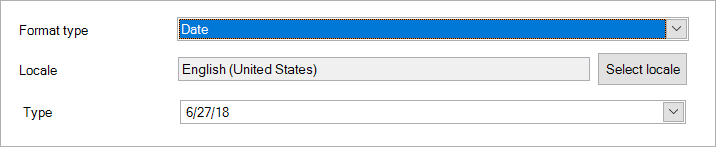
Here, you can choose how you want your date to be formatted. You can also set the Format Locale, which is explained below.
You can also select Time, which you can use for formatting times:

Select DateTime if you want to include the time as well as the date:
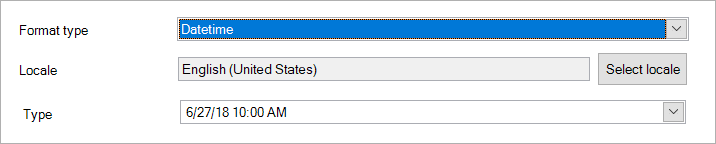
Finally, you can select Custom Date, which allows you to customize the formatting:
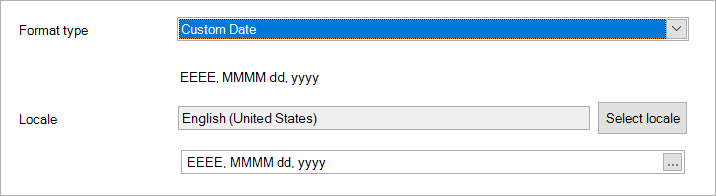
If you want to make your own custom pattern, please read the information on this page.
Locale
A locale is a set of parameters that defines the user's language, country and any special variant preferences. Smart Flows uses these parameters to interpret or output data in a certain way.
Document locale
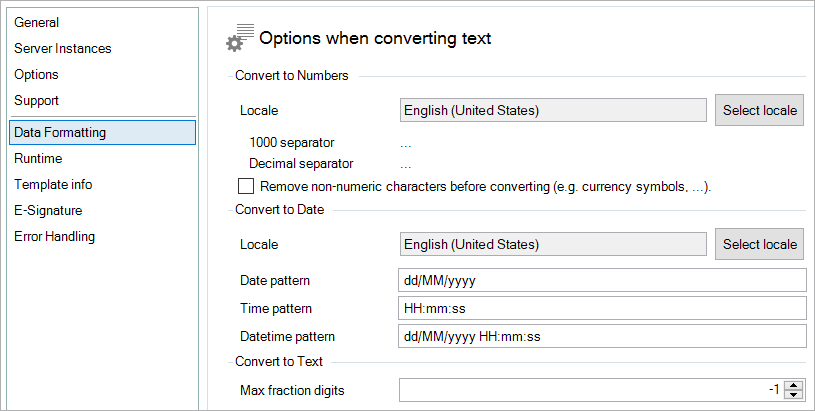
The document locale determines how input data is converted to usable numbers/dates/times. Setting your document locale correctly is very important, as this effectively tells the add-in how it should treat (for instance) a comma or a dot. Some languages use a comma as a 1000 separator and a dot as a decimal separator, while other languages do it the other way around.
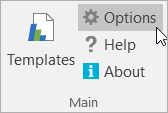
Setting the document locale can be done in the Smart Flows options, data formatting tab. You can access the options by clicking Options in the Smart Flows ribbon:
Format locale
The format locale determines the formatting of your output. For instance, when you choose to format your field as a Number, the locale then decides which symbols will be used for the 1000 separator and decimal separator.
Difference between document locale and format locale
Simply put, the document locale determines how your input data is interpreted, while the format locale determines the formatting of your output. In other words, input data is converted to a usable number/date, after which you decide how it looks in the final document.
Supported locales
This page shows which locales are supported by Smart Flows.
Examples
We'll use the following example to explain the difference between the document locale and formate locale:
-
This is our input data: 10,000.25
-
In the mapping settings' Format tab, we choose to use a 1000 separator and 2 decimal places
Then, we use the following document locale and formate locale:
-
Document locale: el_GR (Greek, Greece)
-
1000 separator: . (dot)
-
Decimal separator: , (comma)
-
-
Format locale: en_GB (English, United Kingdom)
-
1000 separator: , (comma)
-
Decimal separator: . (dot)
-
The document locale is wrongly set to Greek - it's wrong because the input data uses a comma for the 1000 separator and a dot for the decimal separator, whereas the Greek locale is the other way around. Now that the input data is processed incorrectly, the format locale doesn't matter - it won't ever be shown correctly.
To show you how important the correct locale is, here is the result of processing the input data as Greek and outputting it as English: 100,002,500.00. This is completely wrong!
Here's an example, using the same input data but a different document locale:
-
Document locale: en_GB (English, United Kingdom)
-
1000 separator: , (comma)
-
Decimal separator: . (dot)
-
-
Format locale: en_GB (English, United Kingdom)
-
1000 separator: , (comma)
-
Decimal separator: . (dot)
-
This document locale is correct, as our input data uses the same 1000 and decimal separator as the document locale. Here's the result of this locale setup: 10,000.25. That's how we wanted it!
Now that the document locale is correct, we can use a different format locale to format the output according to the user's preference. For instance, we're setting up a template for use in Dutch-speaking Belgium, so we use the following locale:
-
Format locale: nl_BE (Dutch, Belgium)
-
1000 separator: . (dot)
-
Decimal separator: , (comma)
-
Here's the result of the output: 10.000,25. Notice how this differs from the input data (10,000.25) only in the 1000 and decimal separators.
What you can do
Now that you know how the document locale and format locale work, you should try and match the document locale to the input data. This ensures that Smart Flows uses the correct values. Once you have that set up properly, you can decide how you want to output your numbers/dates. Using a different format locale is most useful when working with multiple countries that use different 1000 and/or decimal separators.
Number patterns
This page explains how to define a pattern to output a certain number in a certain way. You specify the pattern according to the rules and elements specified below.
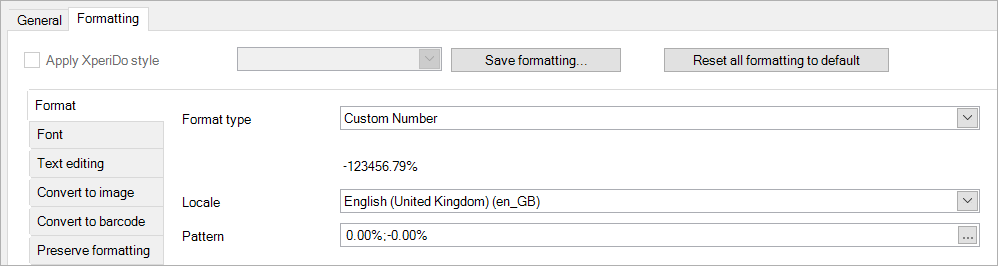
You can specify custom number patterns in the formatNumber functions, or in the custom number option as described on this page:
Elements of a pattern
A pattern consists of numerical elements and, optionally, static elements. Numerical elements represent a digit, a currency sign, a percentage, a decimal separator etc. Static elements are parts you can include yourself, such as words.
Location of elements
Some elements can only be used in a specific location inside the pattern. Here are the locations:
-
Prefix - everything that comes before the number
-
Number - the number itself
-
Suffix - everything that comes after the number
For instance, in '€12' the euro sign is the prefix. In '12 dollars', dollars is the suffix.
Numerical elements
|
symbol |
meaning |
location |
extra info |
|---|---|---|---|
|
0 |
forced digit |
number |
Forced means that even if it's zero, it will appear. |
|
# |
unforced digit |
number |
Unforced means that this digit will not be shown if it's zero and is at the beginning or the end of a number. |
|
. |
decimal separator |
number |
|
|
, |
grouping separator |
number |
Also known as 1000 separator. |
|
E |
mantissa & exponent separator in scientific notation |
number |
|
|
; |
subpattern separator |
in between 2 subpatterns (see Subpatterns) |
|
|
% |
percentage |
prefix or suffix |
Including this will multiply the number by 100. |
|
‰ (\u2030) |
per mille |
prefix or suffix |
Including this will multiple the number by 1000. |
|
¤ (\u00A4) |
currency symbol |
prefix or suffix |
The used symbol depends on the locale as set on the Smart Flows server. If you use formatNumberR, you can specify the locale to use. |
Static elements
You can use both symbols and letters as static elements. You can use the following symbols by putting them directly in the pattern:
/ * - + & ! ( ) { } [ ] , . ; : < > _ - # @
If you want to use a ' (apostrophe), you need to put 2 of them, like this:
''
If you want to use letters, you need to put them in between apostrophes, like this:
'a' 'dollars' 'a fistful of dollars'
Defining a pattern
In the mapping window
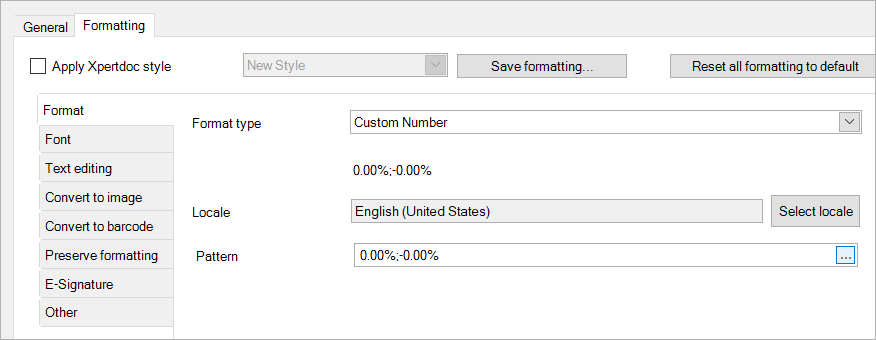
When you have a number in a field, or as the output of an expression, you can use the custom number option in the Format tab of the mapping window to specify a pattern:
In an expression
Defining a pattern in an expression is necessary for the formatNumber and formatNumberR functions:
formatNumber(512.4568,'##.##')formatNumber(512.4568,'000,000.000')
As always with expressions, you need to put strings (such as a number pattern) in between ' ' (apostrophes). This, however, makes it a bit harder to use letters in your patterns, as you can't simply use apostrophes, since those are used to delineate the beginning and ending of the pattern in an expression.
To remedy this, you can escape your apostrophes by putting a \ (backslash) in front of them. So, instead of...
## 'dollars'
...you type this:
## \'dollars\'
It may look a bit strange, but it will definitely get the job done. Here's an example of the above pattern: Notice the apostrophe before and after the entire pattern:
formatNumber(512,'## \'dollars\'')
Subpatterns
A pattern can consist of 2 subpatterns: one for the positive representation and one for the negative representation.
The negative subpattern is optional. If you don't include it, the localized minus sign (usually - ) is used in front of the positive representation to represent negative numbers.
Specifying a negative subpattern is done after putting a ; following the positive subpattern. If there is an explicit negative subpattern, it serves only to specify the negative prefix and suffix. The number of digits, minimal digits, and other characteristics are all the same as the positive pattern. That means that "#,##0.0#;#" produces precisely the same behavior as "#,##0.0#;#,##0.0#".
For instance, '##.##;°' will output °30.33 (for a value of -30.33).
Font
The Font tab in Smart Flows, is a feature that bears similarity to the font options in Microsoft Word. The Font tab in Smart Flows is not designed to replace Microsoft Word's styling options, but rather to complement them. A key point to note, is that users are encouraged to utilize Microsoft Word's options and can seamlessly use all of its styling tools within Smart Flows.
The Font tab is used to change the look of the mapped field. This is very similar to Microsoft Word's font options.
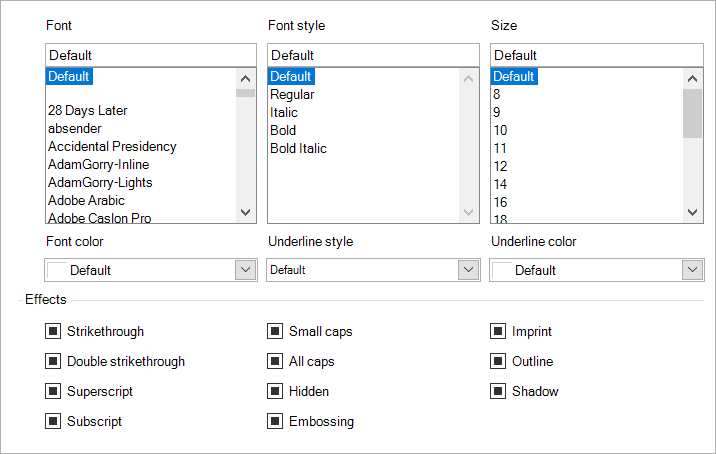
In here, you can change a mapped field's look by changing each setting to your liking.
The Font tab is not intended to replace Microsoft Word's styling options. In fact, we recommend that you use Microsoft Word's styling options as much as possible for your styling needs. The font tab comes in handy when working with conditional styling and formatting, where you, for example, display negative monetary values in red.
Inheritance
If you leave a setting on Default, the value for that setting is inherited from Microsoft Word. This means that every value you set explicitly here overwrites Microsoft Word's setting.
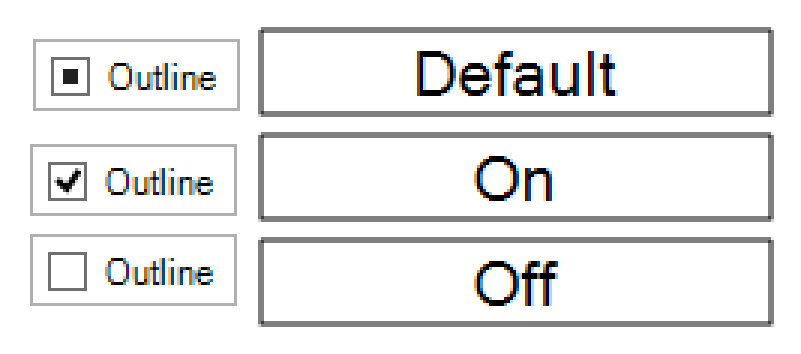
For the effects, you can either turn them off, on or set them to default:
Styling with Microsoft Word
When styling your template, Microsoft Word doesn't differentiate between plain text and Smart Flows mappings. This means that you can use every styling tool there is available in Microsoft Word on Smart Flows' mappings.
You can add custom fonts other than those available in Microsoft Word. These custom fonts should be added as assets in OFT or TTF file format. You can use these assets in Template Builder.
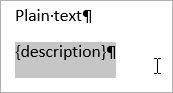
To change the look of your mapping, simply select it like you would select plain text:
Then, apply the look you want:

This also applies to tables, where you can use Microsoft Word's table design tools to change the look of your tables, even if they include loops and groups:

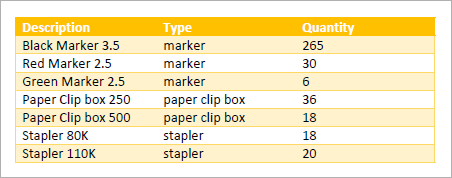
The applied style is a banded style where every other row gets a different background color. Smart Flows keeps that style intact: