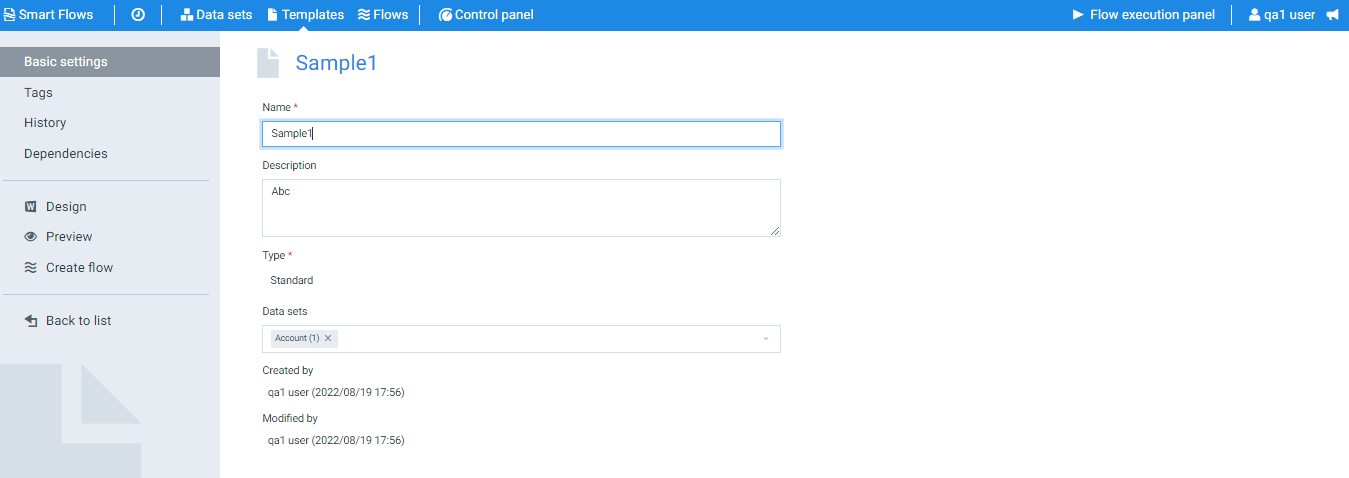
Templates serve as blueprints for your documents. You can create templates in the Project Console and design them using the Template Builder add-in for Microsoft Word. Each template is a '.docx' Word document enhanced with Experlogix functionality. The process of creating and using a template generally involves the following steps:
-
Creating a template for detailed information.
-
(Optional) Attach one or more data sets to it.
-
Design the template with the Template Builder Word add-in. For more details, please refer to the Template Builder user manual.
-
Create a flow based on the template.
-
End users can now run the flow to generate documents.
Filter
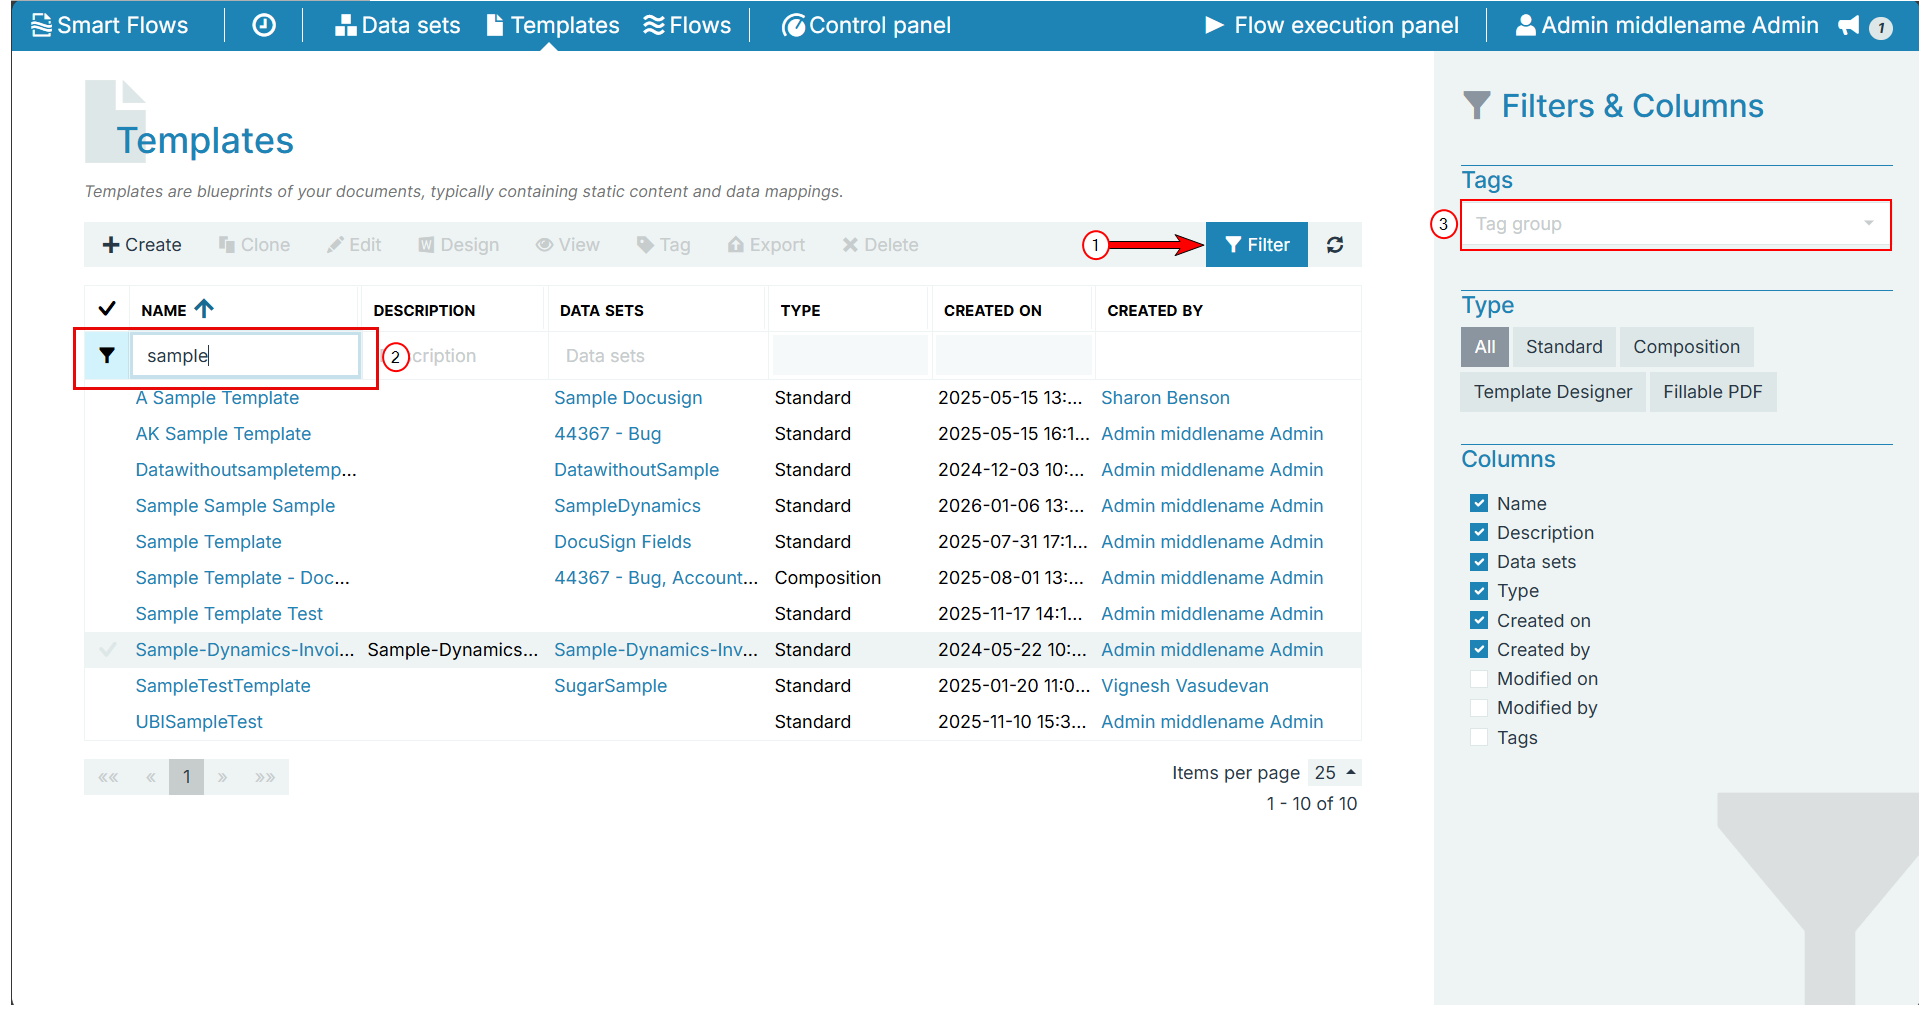
You can filter the template list to adhere only to specific criteria.
-
Select Filter.
-
In the Name field, enter a template name.
All the templates matching the 'Name' are displayed.
-
Further, you can select the tags in the Tag group dropdown menu. For more details, please refer to Tags.
History
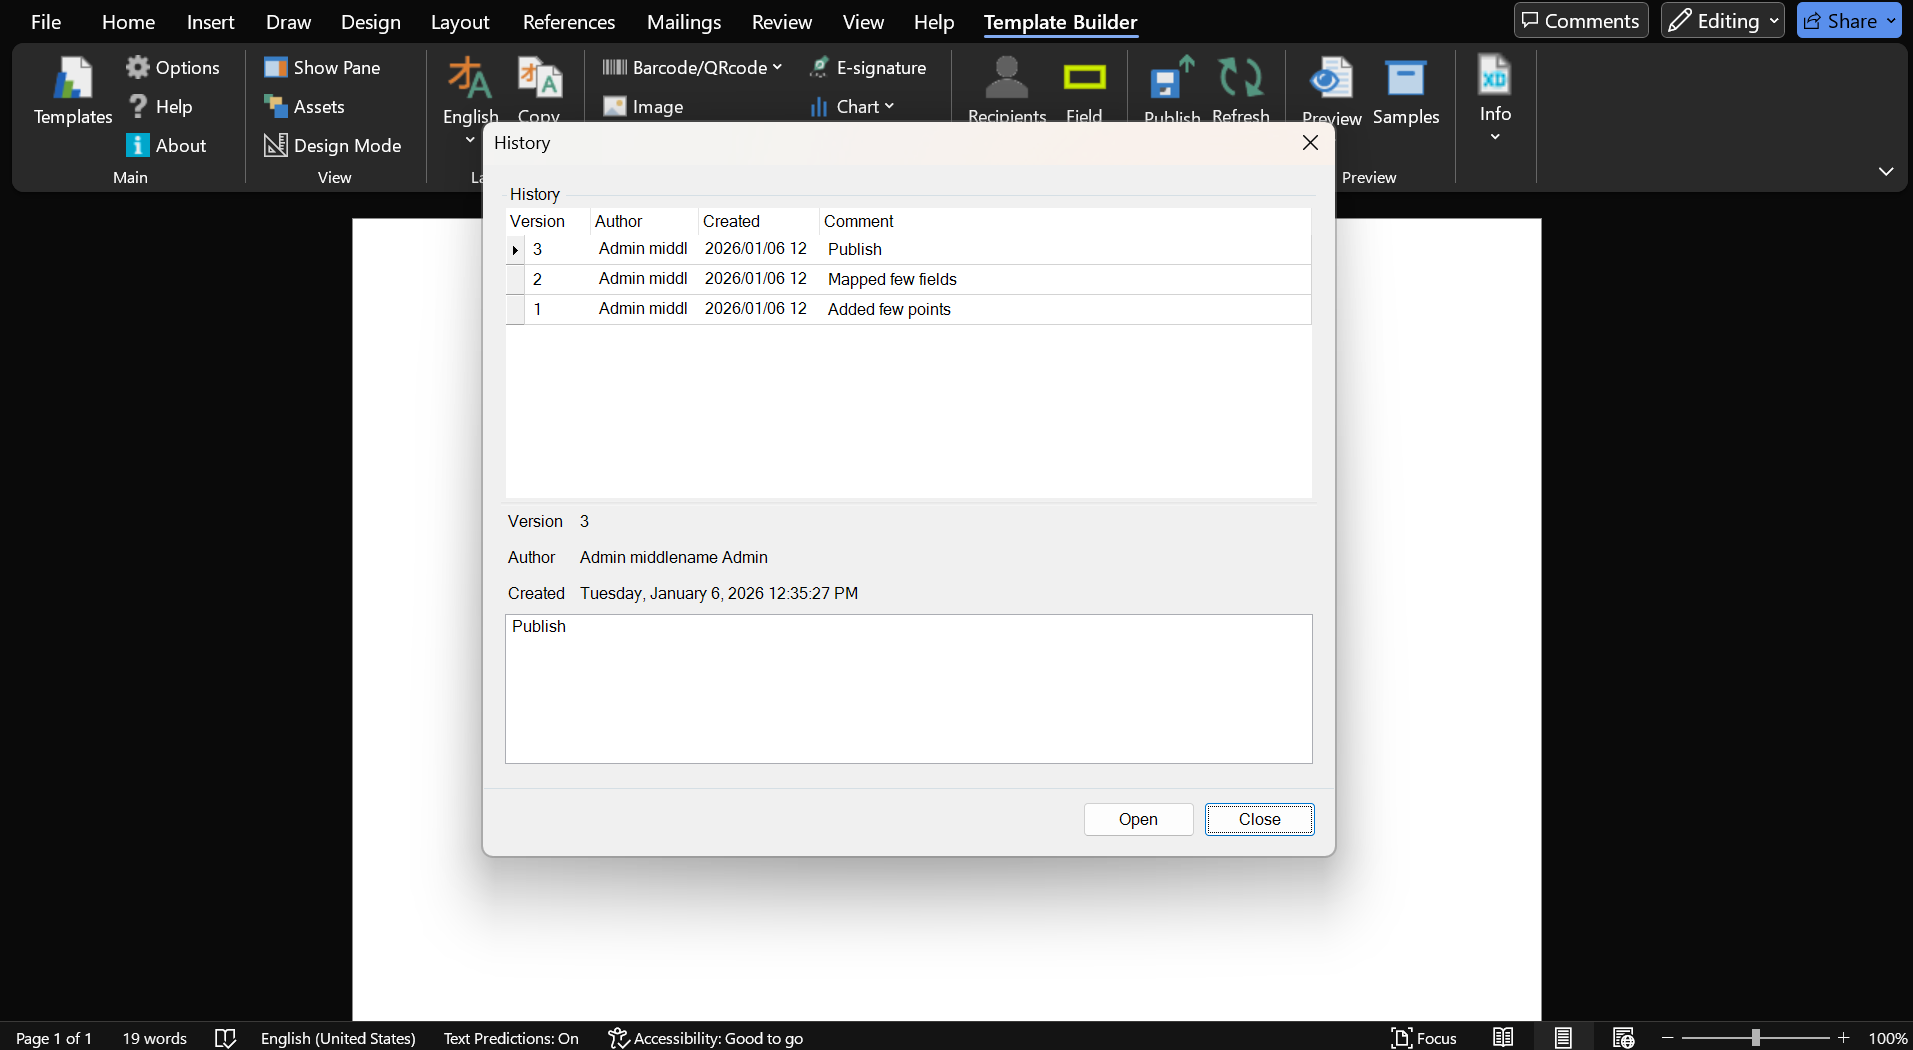
Publishing a template from the Word add-in creates a new version. The 'History' tab lists version details such as number, author, comments, size, date, and design.
Dependencies
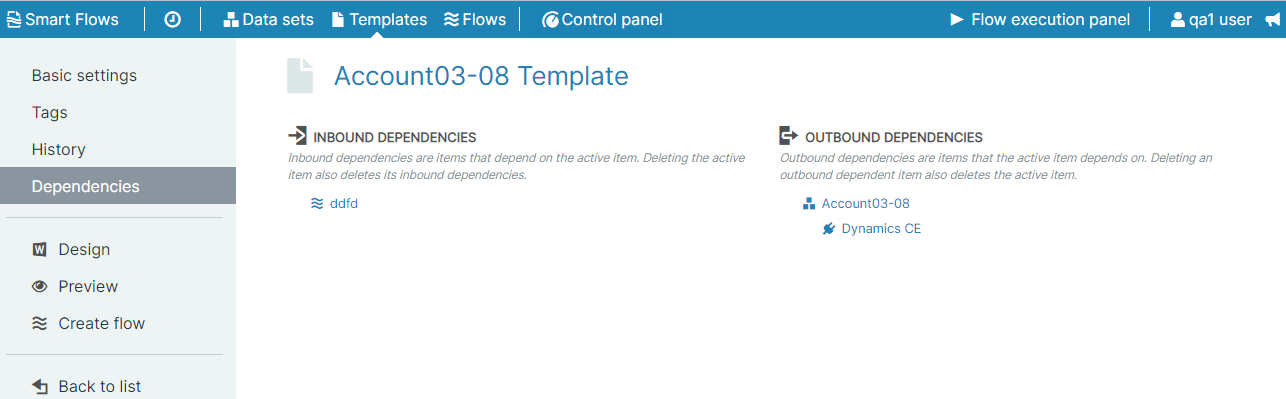
Dependencies are of two types:
Inbound Dependencies: Items that depend on the active item. If you delete the active item, it automatically deletes its inbound dependencies.
Outbound Dependencies: Items that the active item depend on. If you delete an outbound dependent item, it deletes the active item.
Document Zones
While designing a template, you must organize the template into four document zones in Smart Flows. The table below provides details for each zone.
Every template should only contain the zone where it's used for. For example, a Body template should not contain a header or a footer.
|
Document Zone |
Description |
|---|---|
|
Header |
The header zone is the space at the top of each page. The content in the header zone repeats on every page of the generated document, which makes it ideal for the company name and logo. In Microsoft Word, make sure only the first page displays a header. Do not enable the options for ‘Different First Page’ or ‘Different Odd & Even Pages. 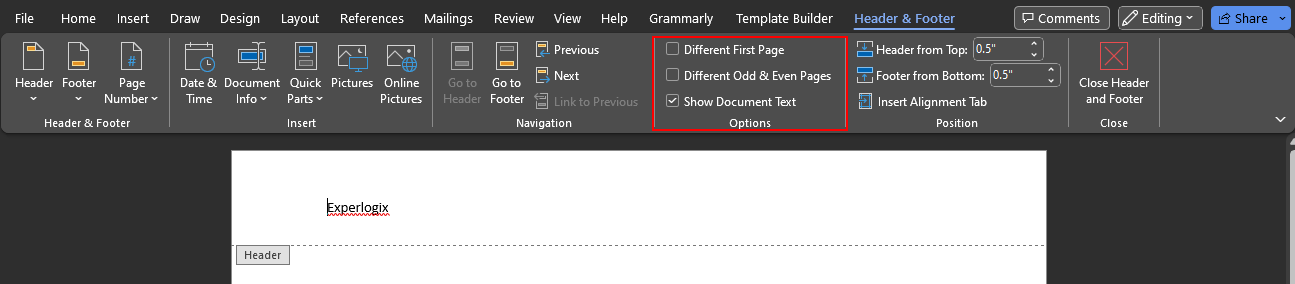
|
|
Body |
The body zone features the main content of the template. If the content added to the body template exceeds the available space in the body zone, additional pages are created in the resulting document. |
|
Insert |
The insert zone is at the back of the generated document. This zone is useful for adding complete documents to your template, such as the terms and conditions of a sale. |
|
Footer |
The footer zone is the space at the bottom of each page. The content is repeated on every page of the generated document, making it ideal for adding contact details or page numbers. In Microsoft Word, make sure only the first page displays a header. Do not enable the options for ‘Different First Page’ or ‘Different Odd & Even Pages. 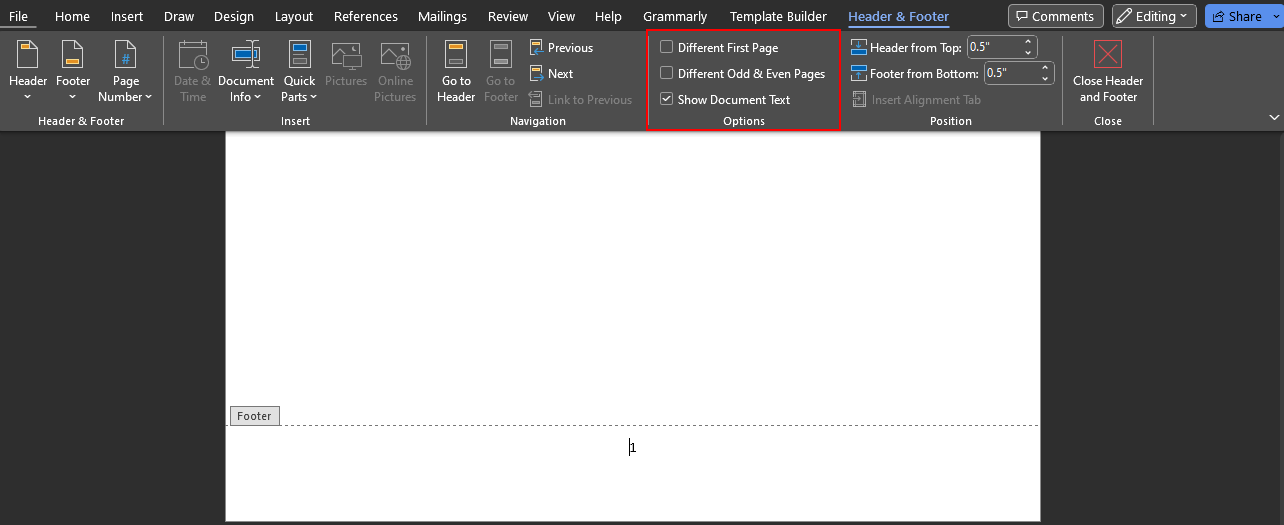
|
Preview
-
In the Template detail view, select Preview.
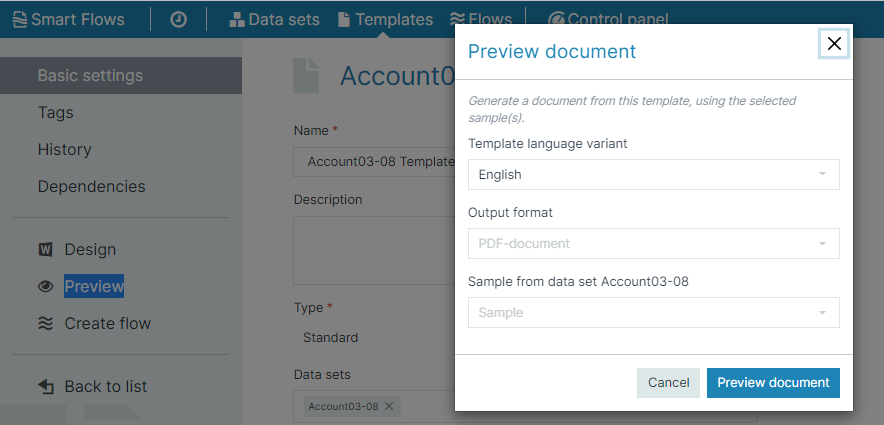
-
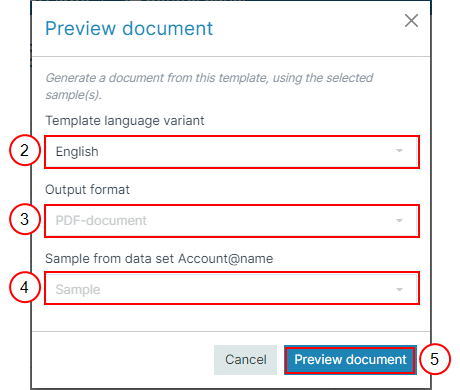
In the Template language variant dropdown menu, select the language.
-
In the Output format dropdown menu, select the format you want to preview your document.
-
In the Sample from data set dropdown menu, select the sample you want to preview.
It generates a PDF file using the data from the samples you selected.
Template preview PDF/UA compliance test
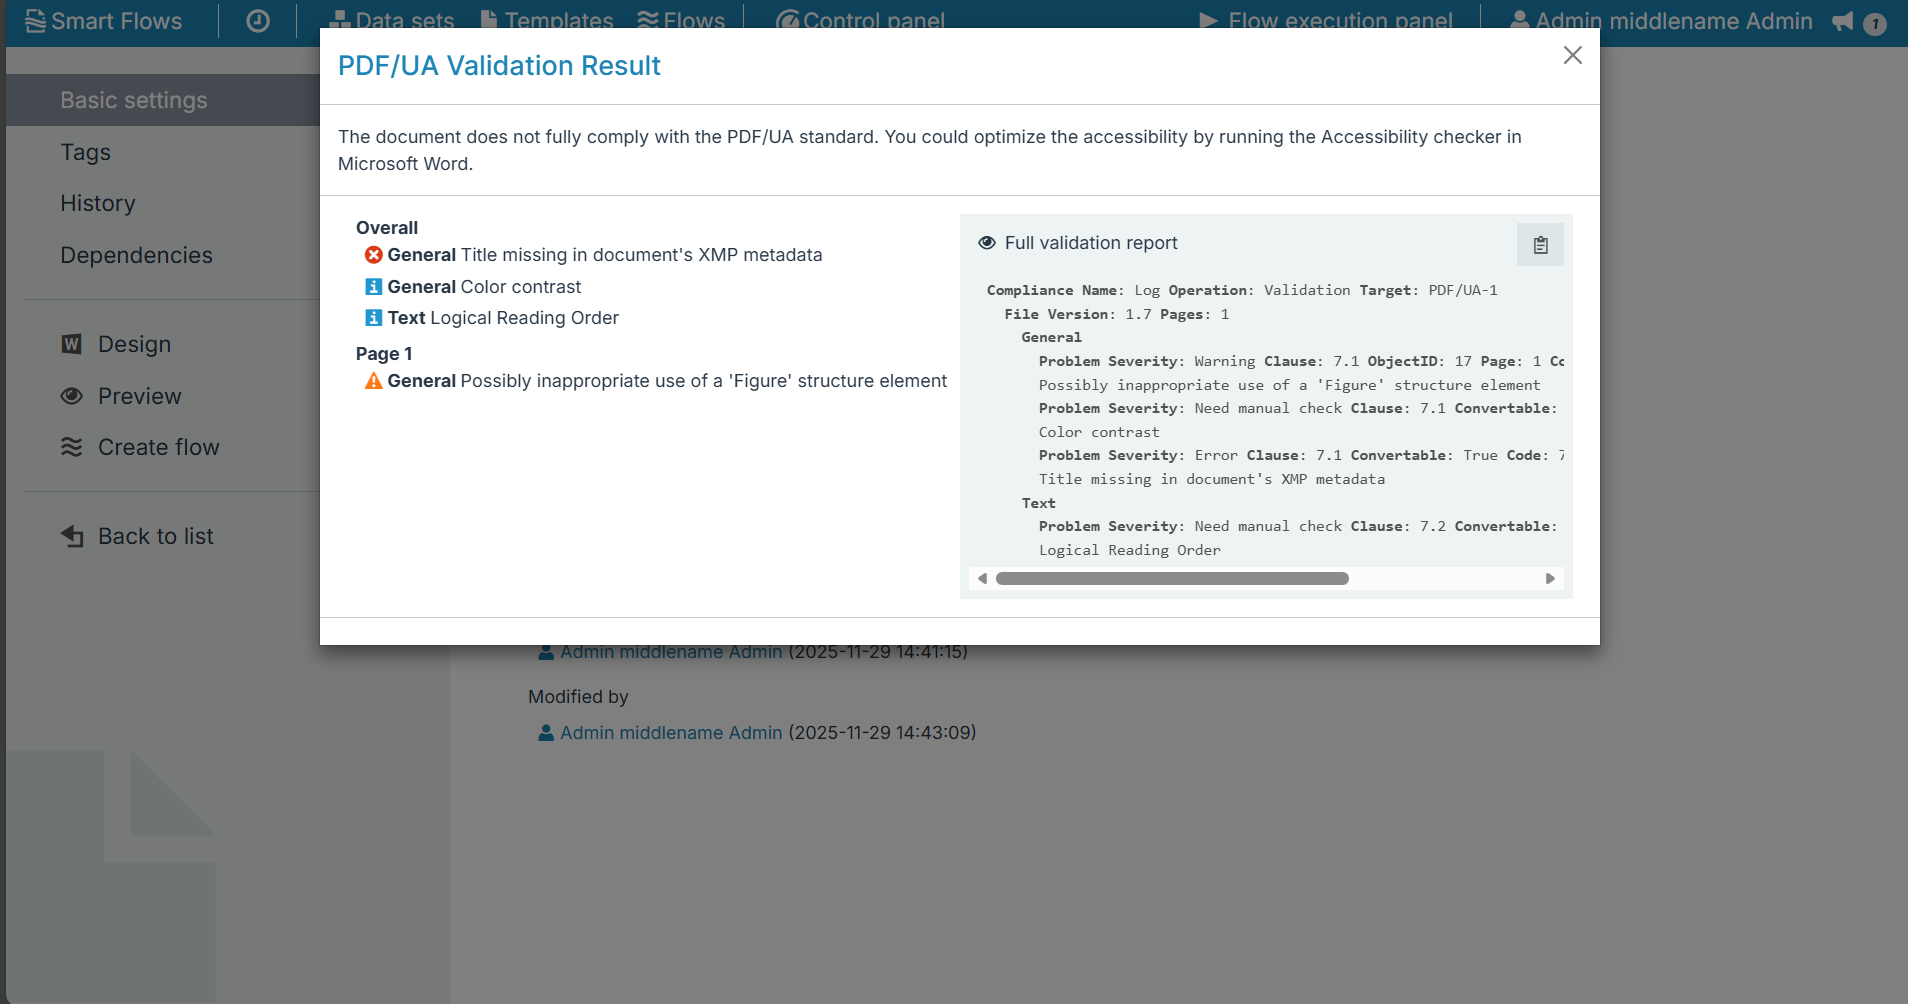
Integration of a PDF/UA compliance in the Preview section of the Project Console, users can quickly verify whether their templates meet accessibility requirements. This feature provides a detailed compliance report, highlights issues that need correction, and offers guidance on optimizing accessibility. If the compliance test passes successfully, the template is automatically downloaded into your system. If the compliance test fails, a detailed report is provided.
-
Select Preview.
-
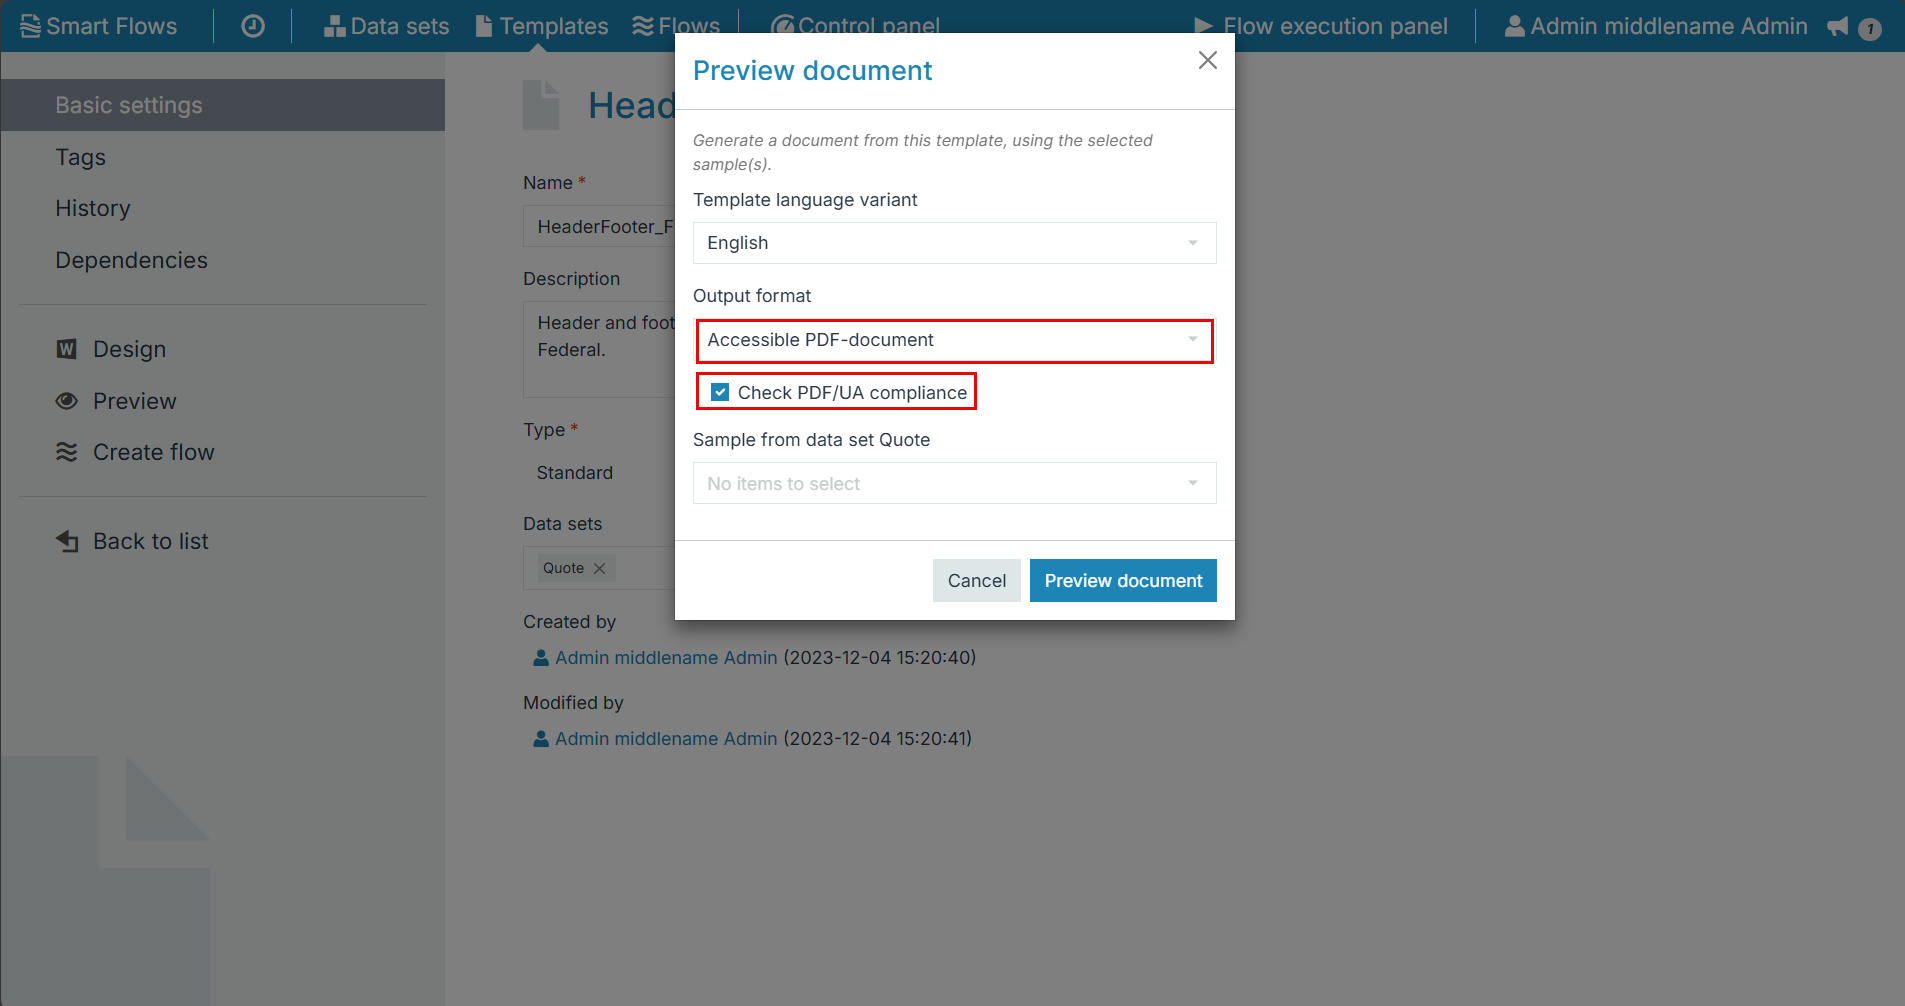
In the Preview Document, select Accessible PDF-document for Output Format.
-
Check the option below for PDF/UA compliance.
-
Select Preview Document.
If the compliance test passes successfully, the template is automatically downloaded into your system.
If the compliance test fails, a detailed report is displayed.
Template Title Requirement
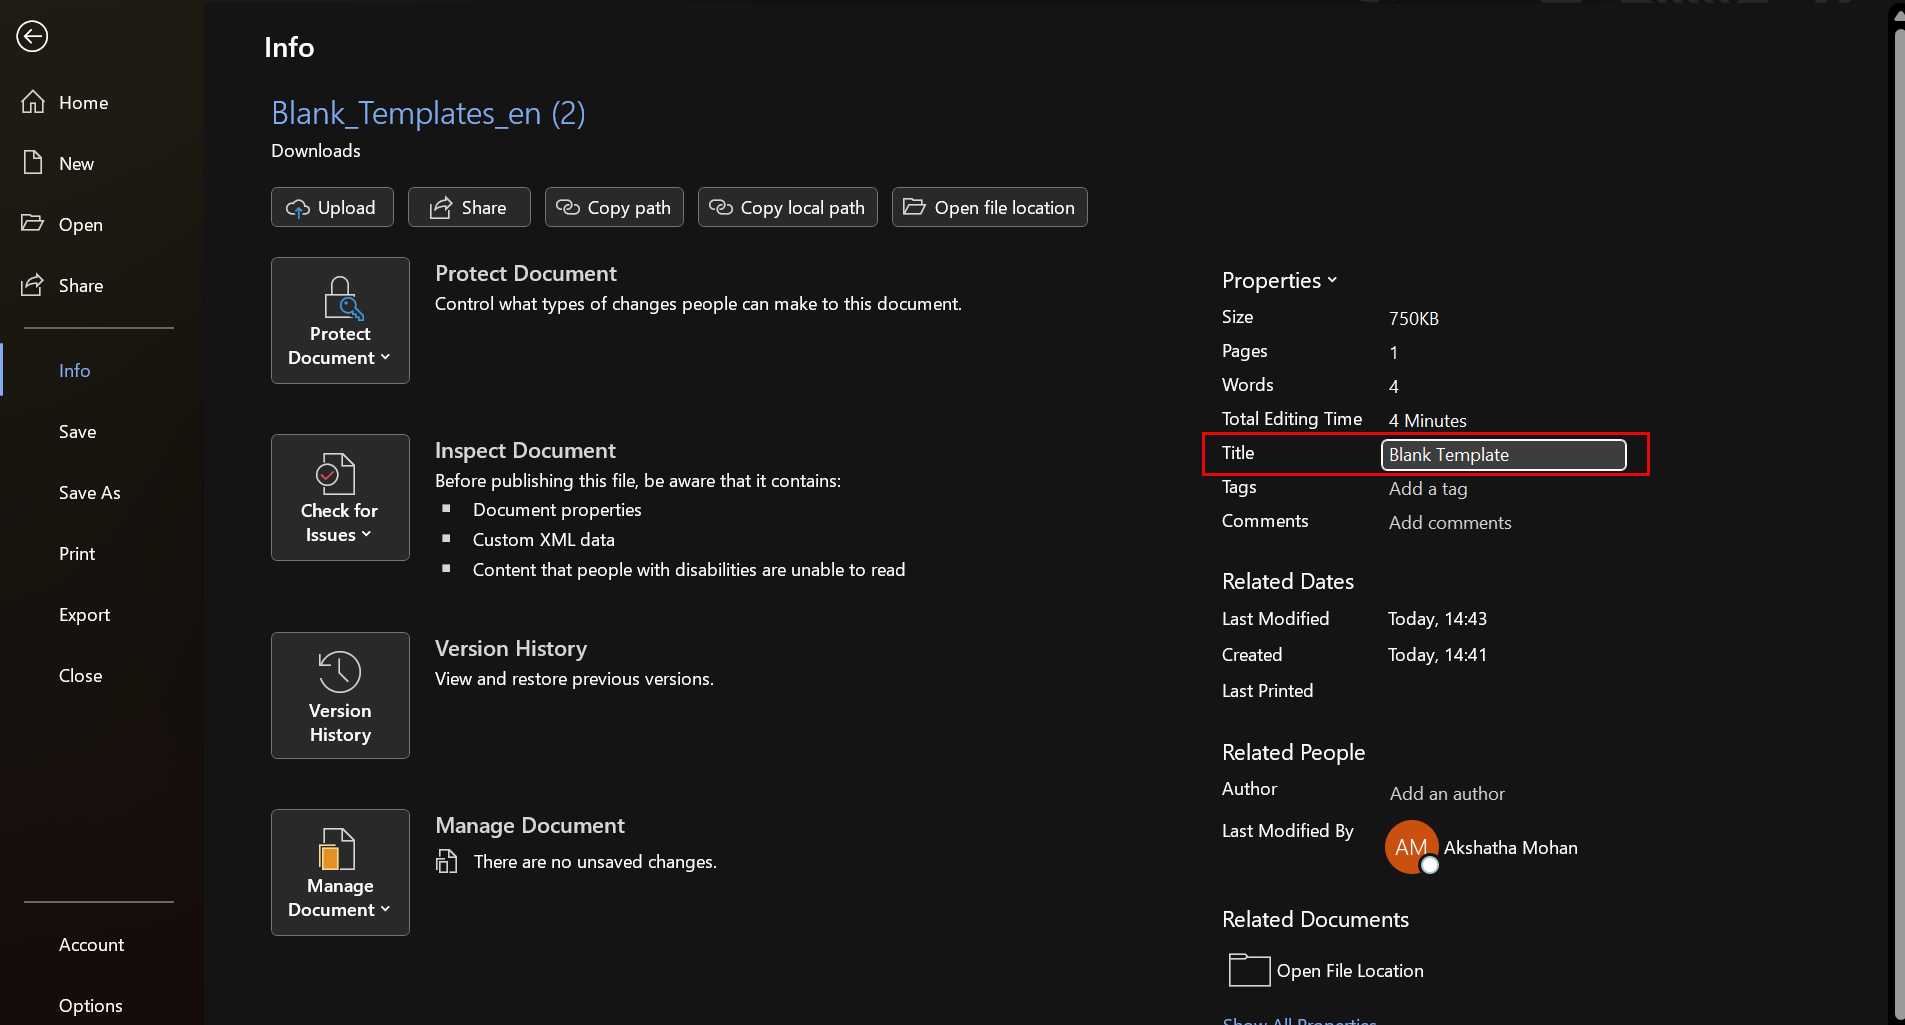
By default, the 'Template Title' is empty This will cause the compliance test to fail. Be sure to provide a Template Title before running the test.
Creating a template
Templates are blueprints of your documents. A template is a .docx Word document enhanced with Experlogix functionality. Users can create a template in the Project Console and build them in the ExperlogixTemplate Builder add-in for Microsoft Word. This page describes the basic steps for creating a template in the Project Console.
Steps for creating a Template:
Note: You can also access the Template section by clicking on the Template tab in the Navigation Bar.
-
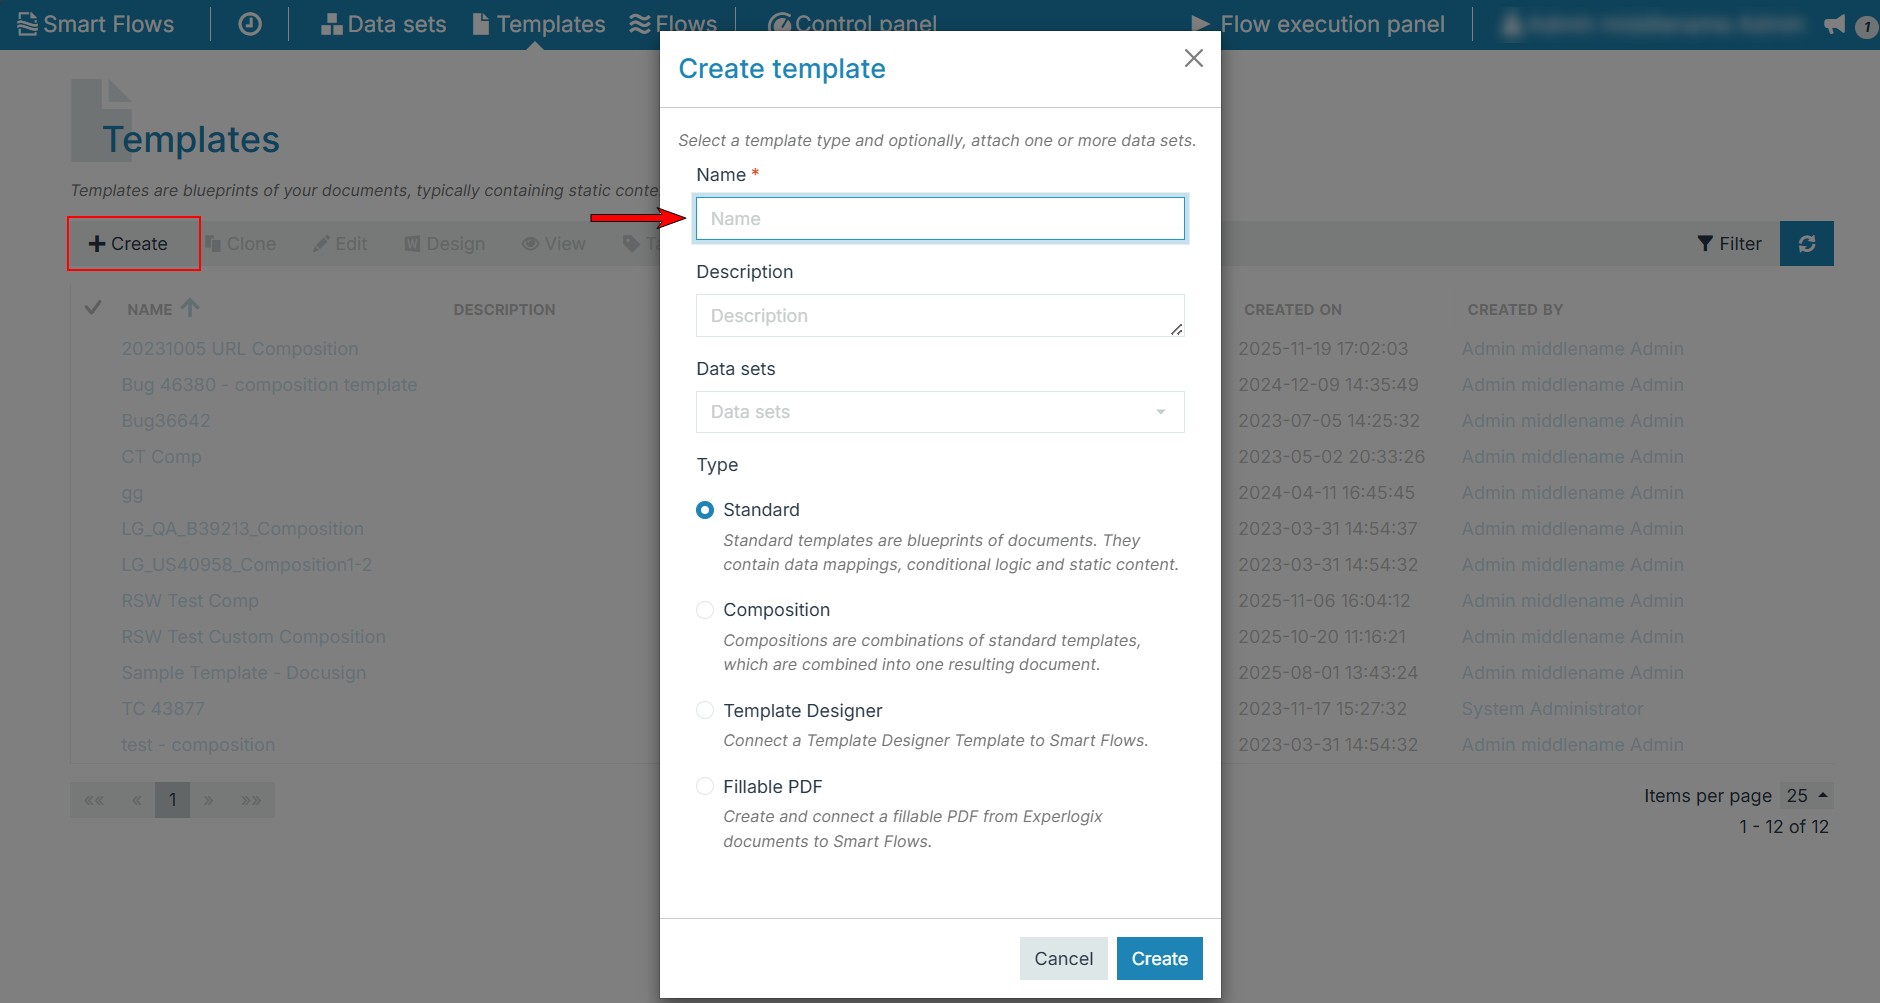
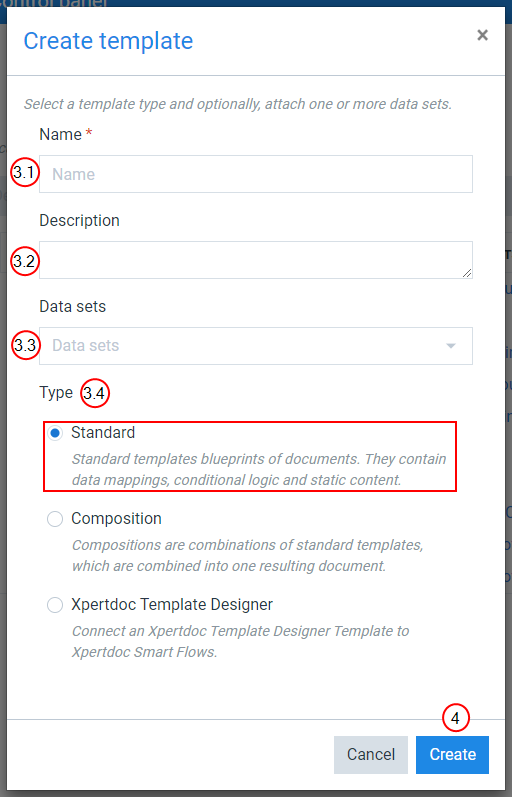
In the Project Console, select Template > Create.
-
In the Name field, input the name of the template.
-
(Optional) In the Description field, input a description for the template.
-
(Optional) In the dropdown menu, select the Data sets you want to use for your template.
Decision Point
There are three types of templates - Standard, Compositions, and ExperlogixProject Console.
-
Standard templates are used to convert one template into one document.
-
Compositions templates are combinations of standard templates. In the composition template, multiple templates are merged into one document. You can re-use standard templates by using them in multiple compositions. You can even use compositions in other compositions.
-
ExperlogixProject Console is connected to ExperlogixSmart Flows.
You can select here your desired template Type.
-
Select your desired Type of template (the system selects the Standard template by default).
-
Select Create.
The Create template window no longer displays. The List view refreshes to display your new template.
You are redirected to the Template Builder, which allows you to design the layout of your template in Microsoft Word.