
The Add to Docusign Envelope flow block allows the end users to add a document to an existing envelope and configure additional properties of the envelope. This envelope can be an envelope already existing in the Docusign account or created and saved in a draft version upfront using the Create empty DocuSign Envelope flow block.
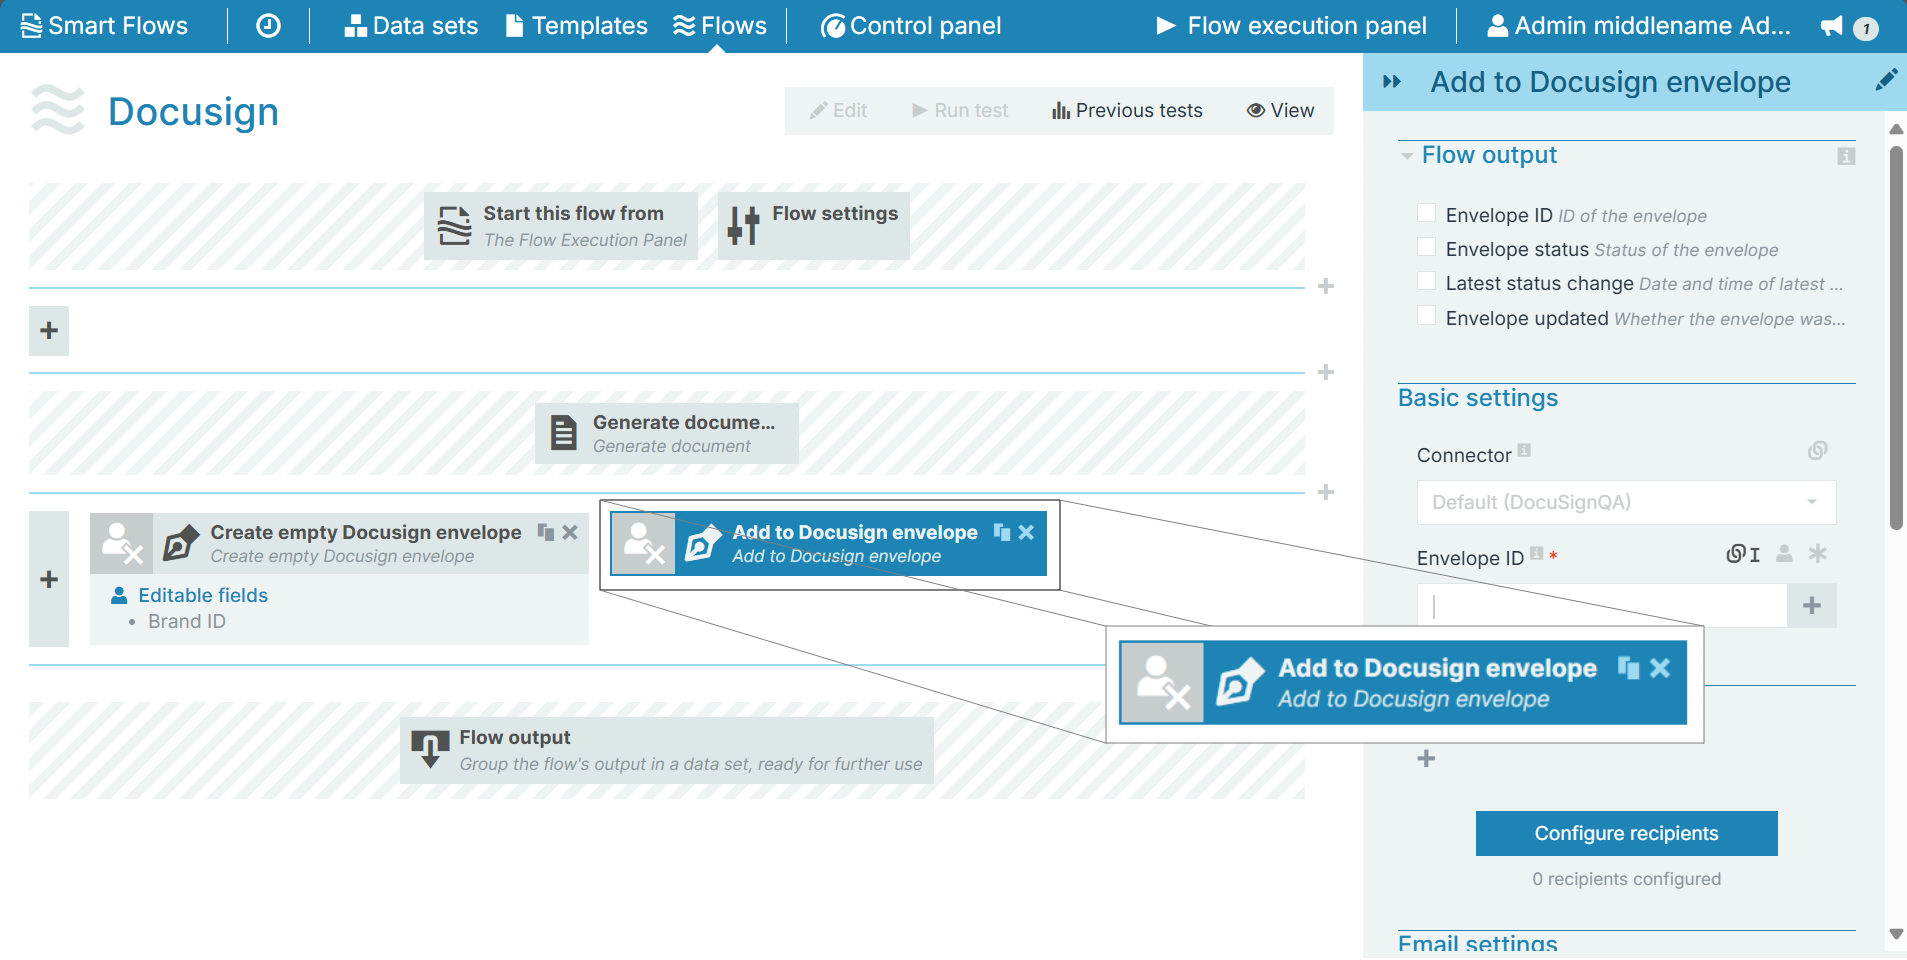
This flow block is enabled only for advanced flows.
Flow Block Parameters
The dropdown menus below provide all of the flow block's configuration options with detailed information and recommendations to help you configure your flow block.
Flow block customization buttons
You can further customize your flow block's parameters in several ways
-

-

-

Flow output
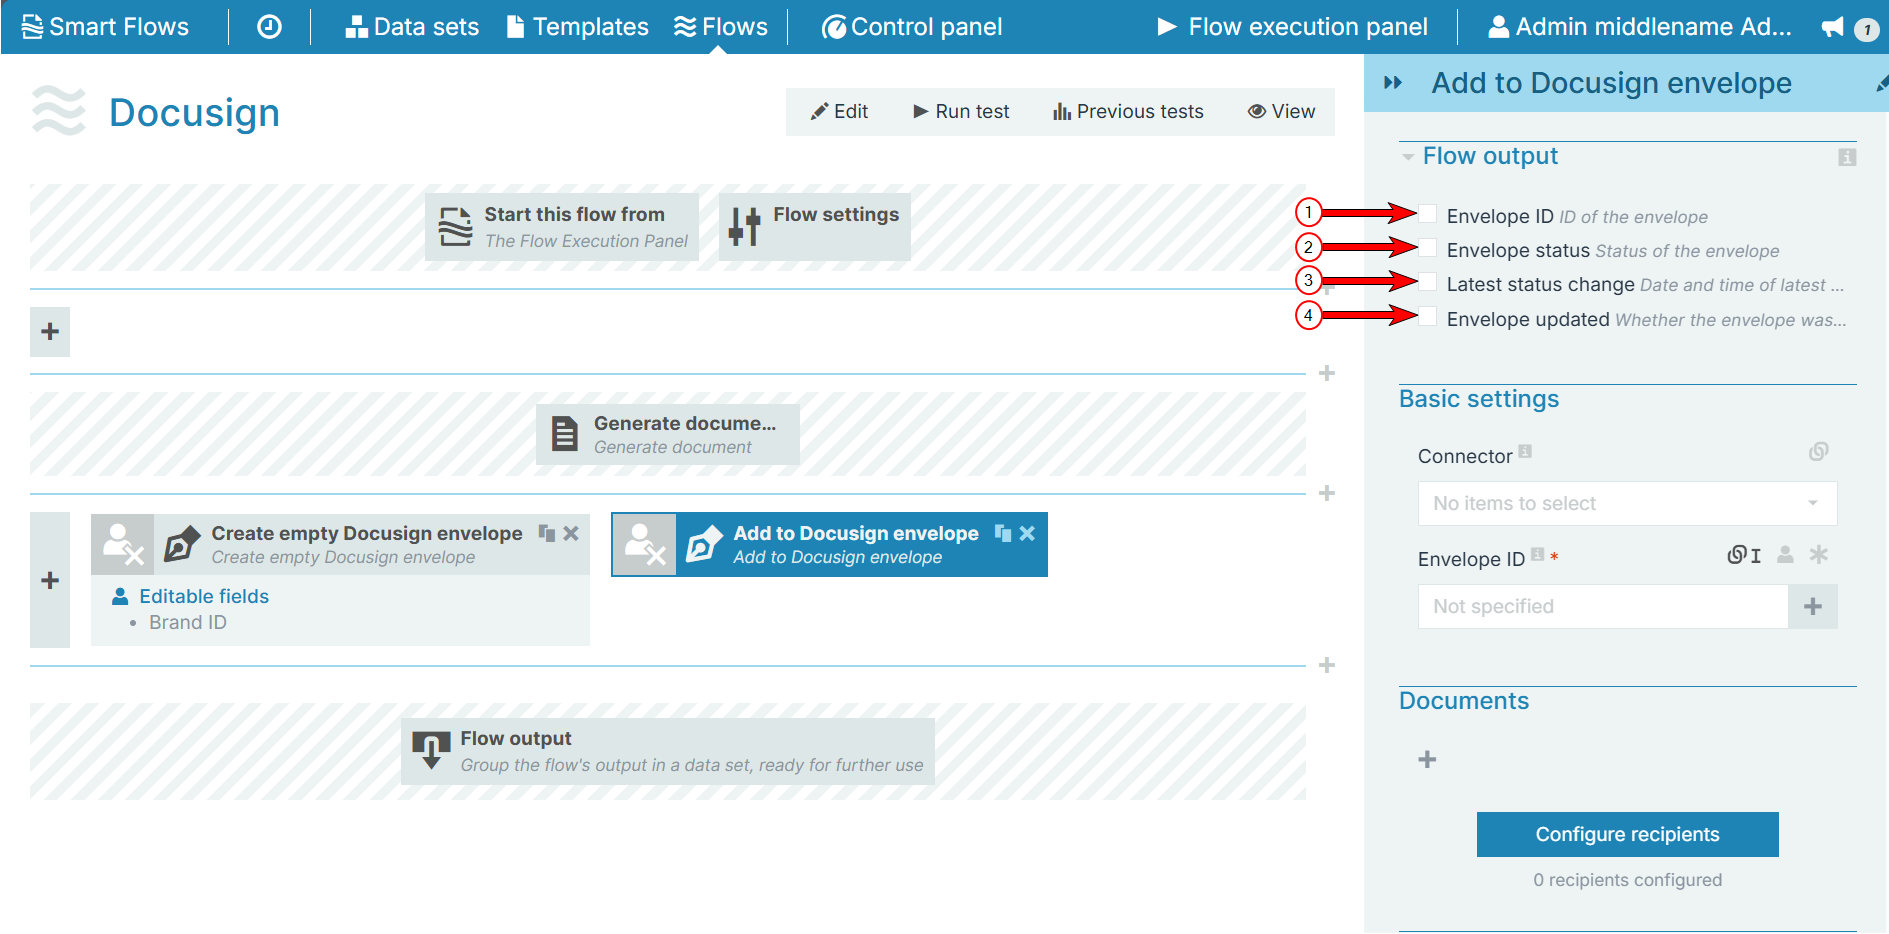
The Flow Output section shows all the output parameters that are available for the block. When checked, the value of the output parameter are presented to the user who is executing the flow. Each setting that composes this output information is described in detail below:
|
Index No. |
Field name |
Description |
|---|---|---|
|
1 |
Envelope ID |
When checked, the Envelope ID value displays during the flow execution. |
|
2 |
Envelope status |
When checked, the initial status of the envelope displays during the flow execution. For more information, refer to Docusign statuses. |
|
3 |
Latest status change |
When checked, the date and time of the latest status change displays for the user during the flow execution. |
|
4 |
Envelope updated |
When checked, a Boolean value indicating whether the envelope is updated or not Docusign. |
Basic settings
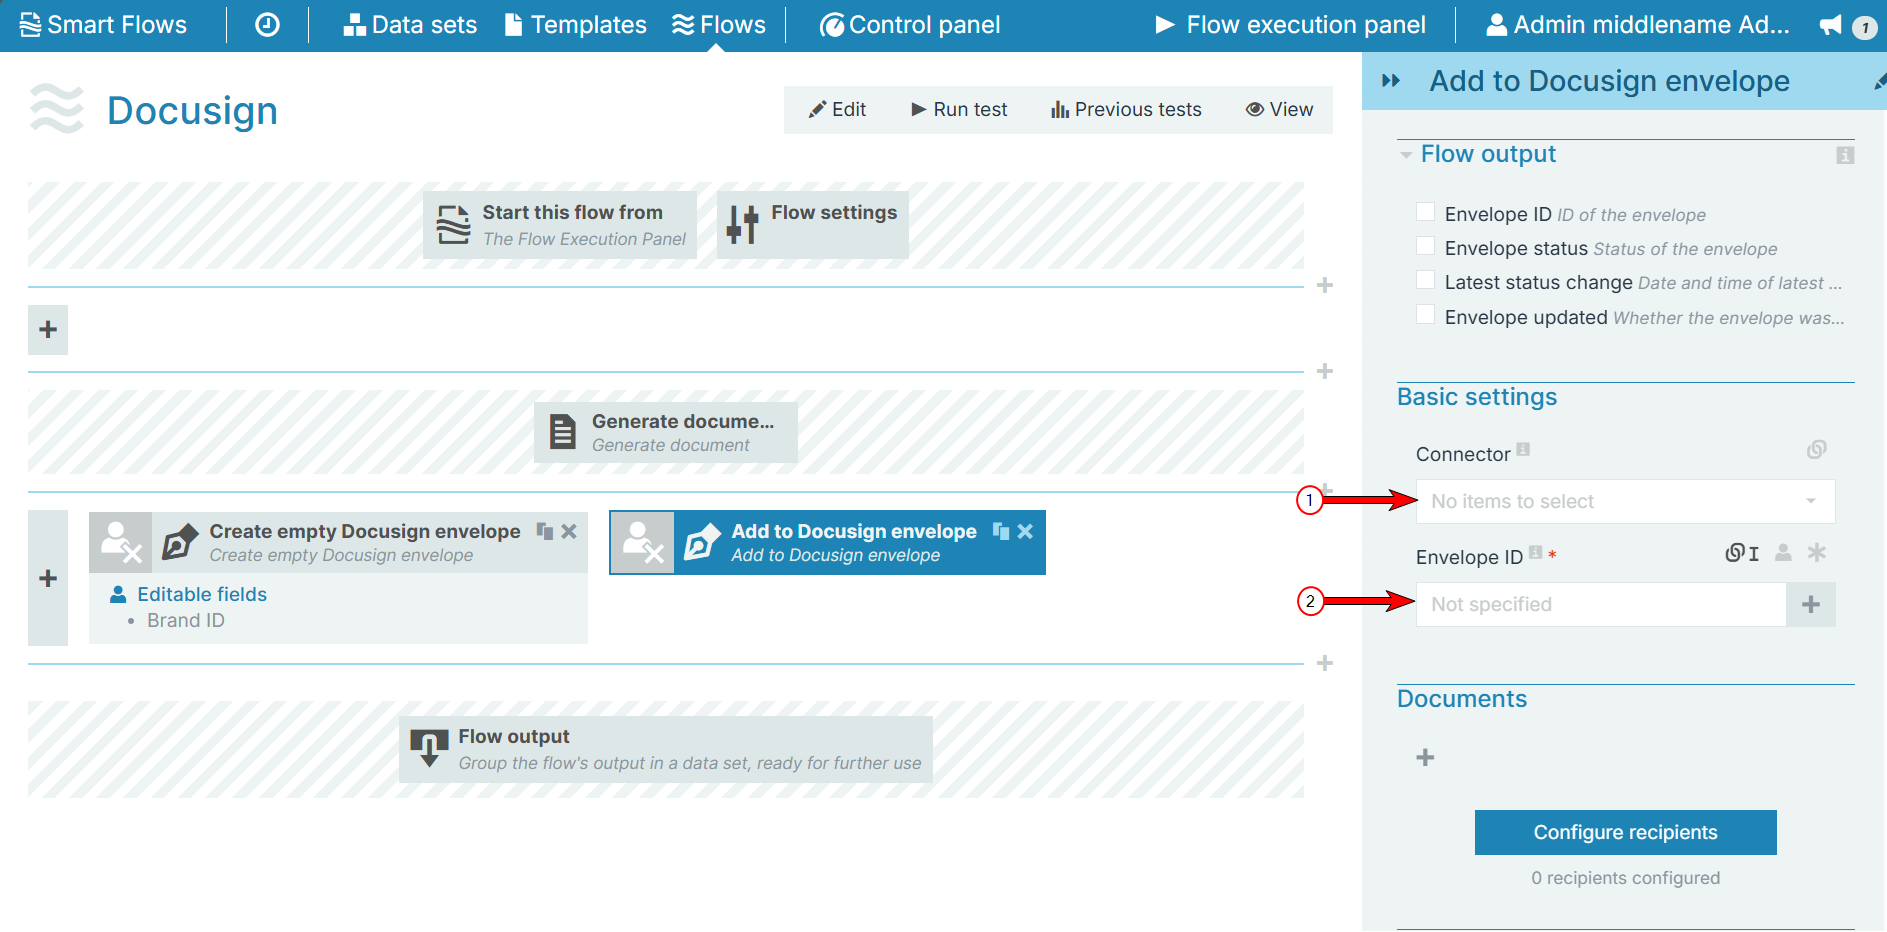
The Basic settings section allows you to select the Docusign connector and provide an 'id' to the envelope.
|
Index No. |
Field name |
Description |
|---|---|---|
|
1 |
Connector |
Select a connector from the drop-down menu. If the field is left blank, then the default connector is used. |
|
2 |
Envelop ID |
Provides the Envelope ID so that the user can add the document and update the envelope settings as needed. |
Documents
The Documents section allows you to add a document to the envelope and provide a name for it.
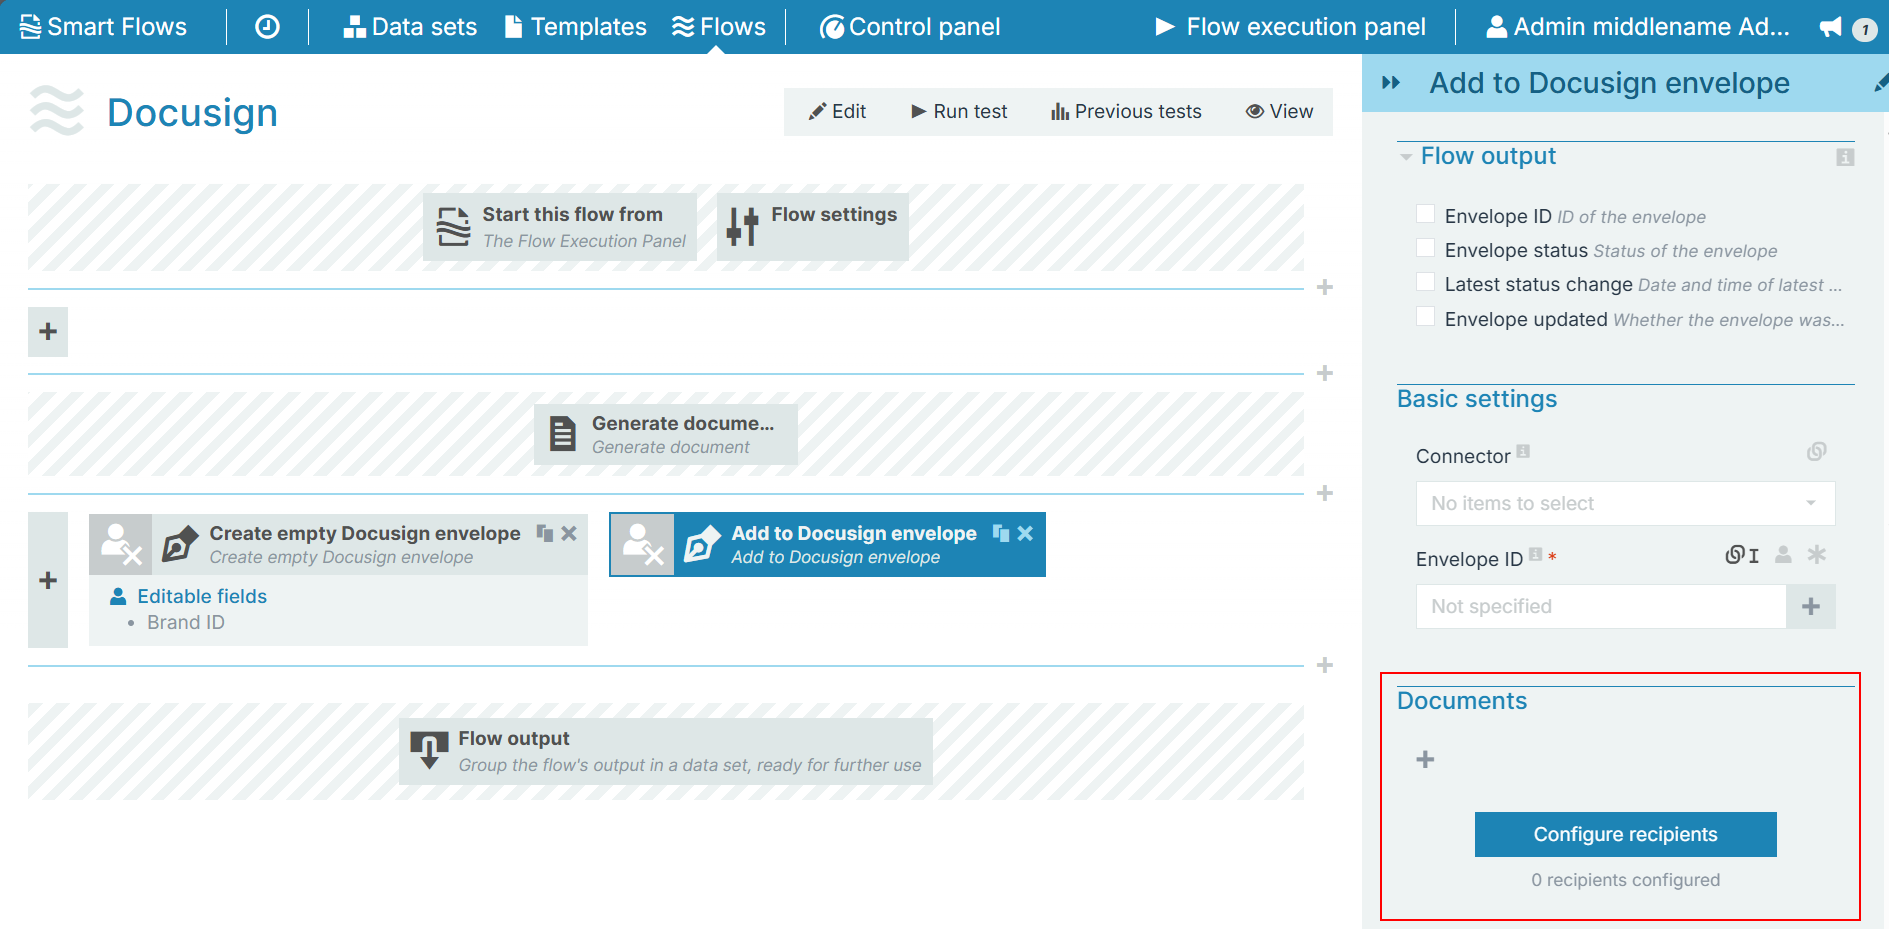
Select the '+' icon to select a new document to add. You can add multiple documents to the envelope as needed.
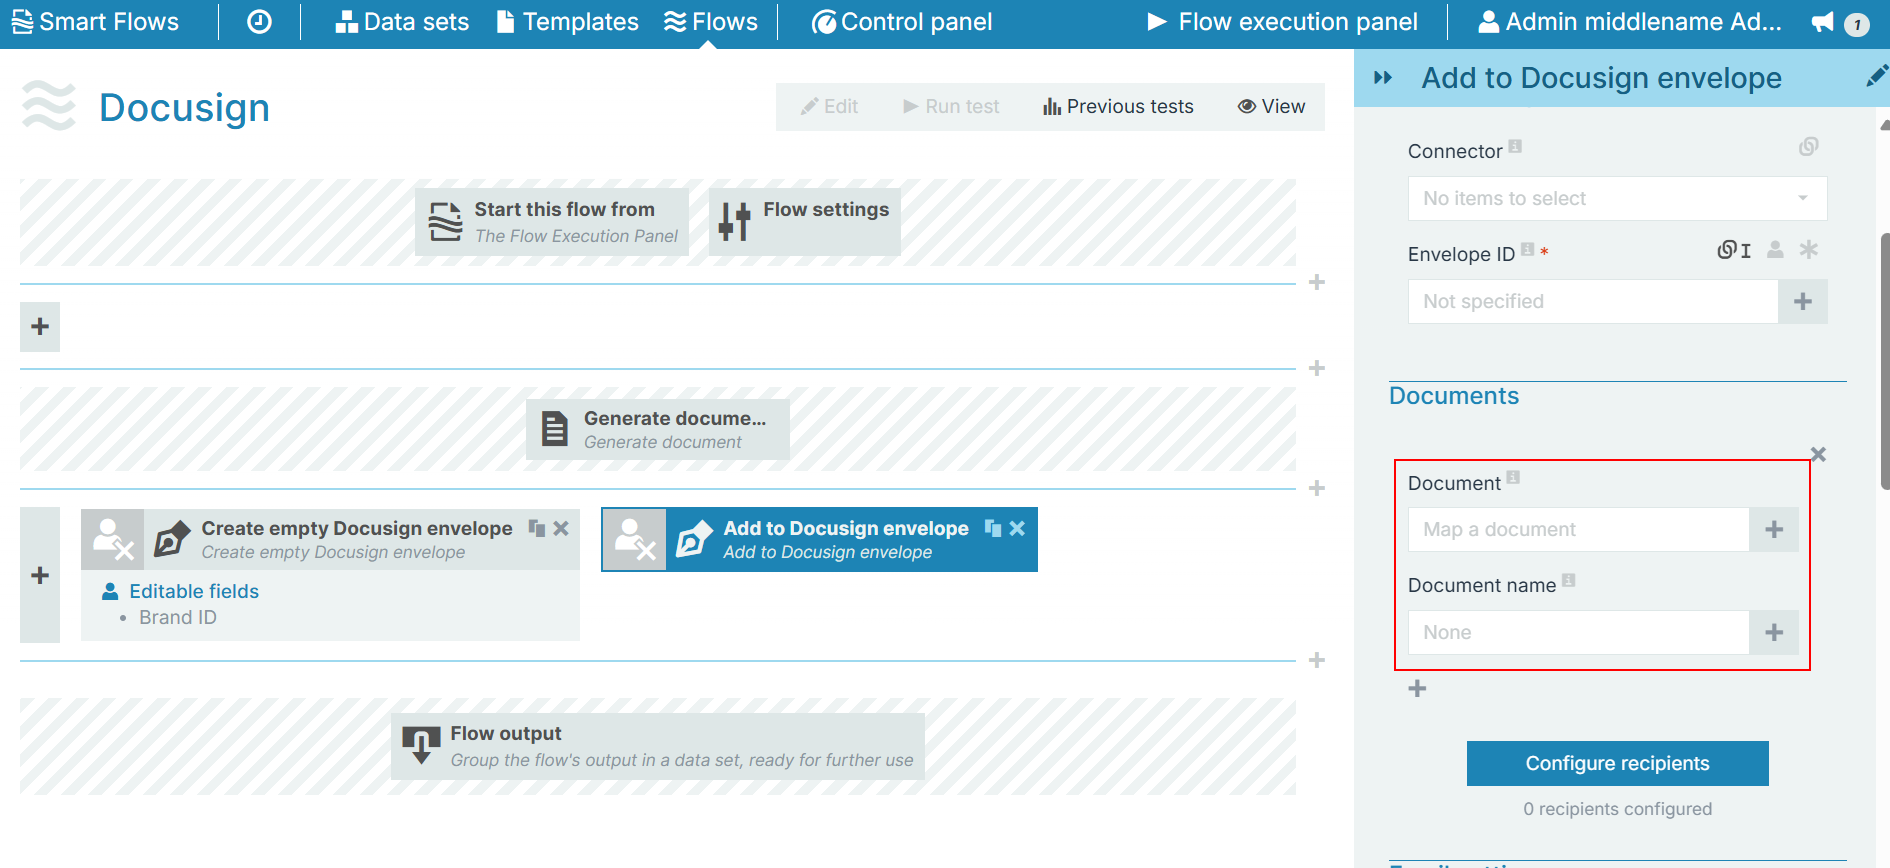
Configure recipients
Designers can select the Configure recipients button to open the Configure recipients dialog, where they can map the recipient(s) of an email defined in Template Builder within Flow Builder based on the e-mail recipient's role, overwriting the e-mail recipient(s) defined in Template Builder.
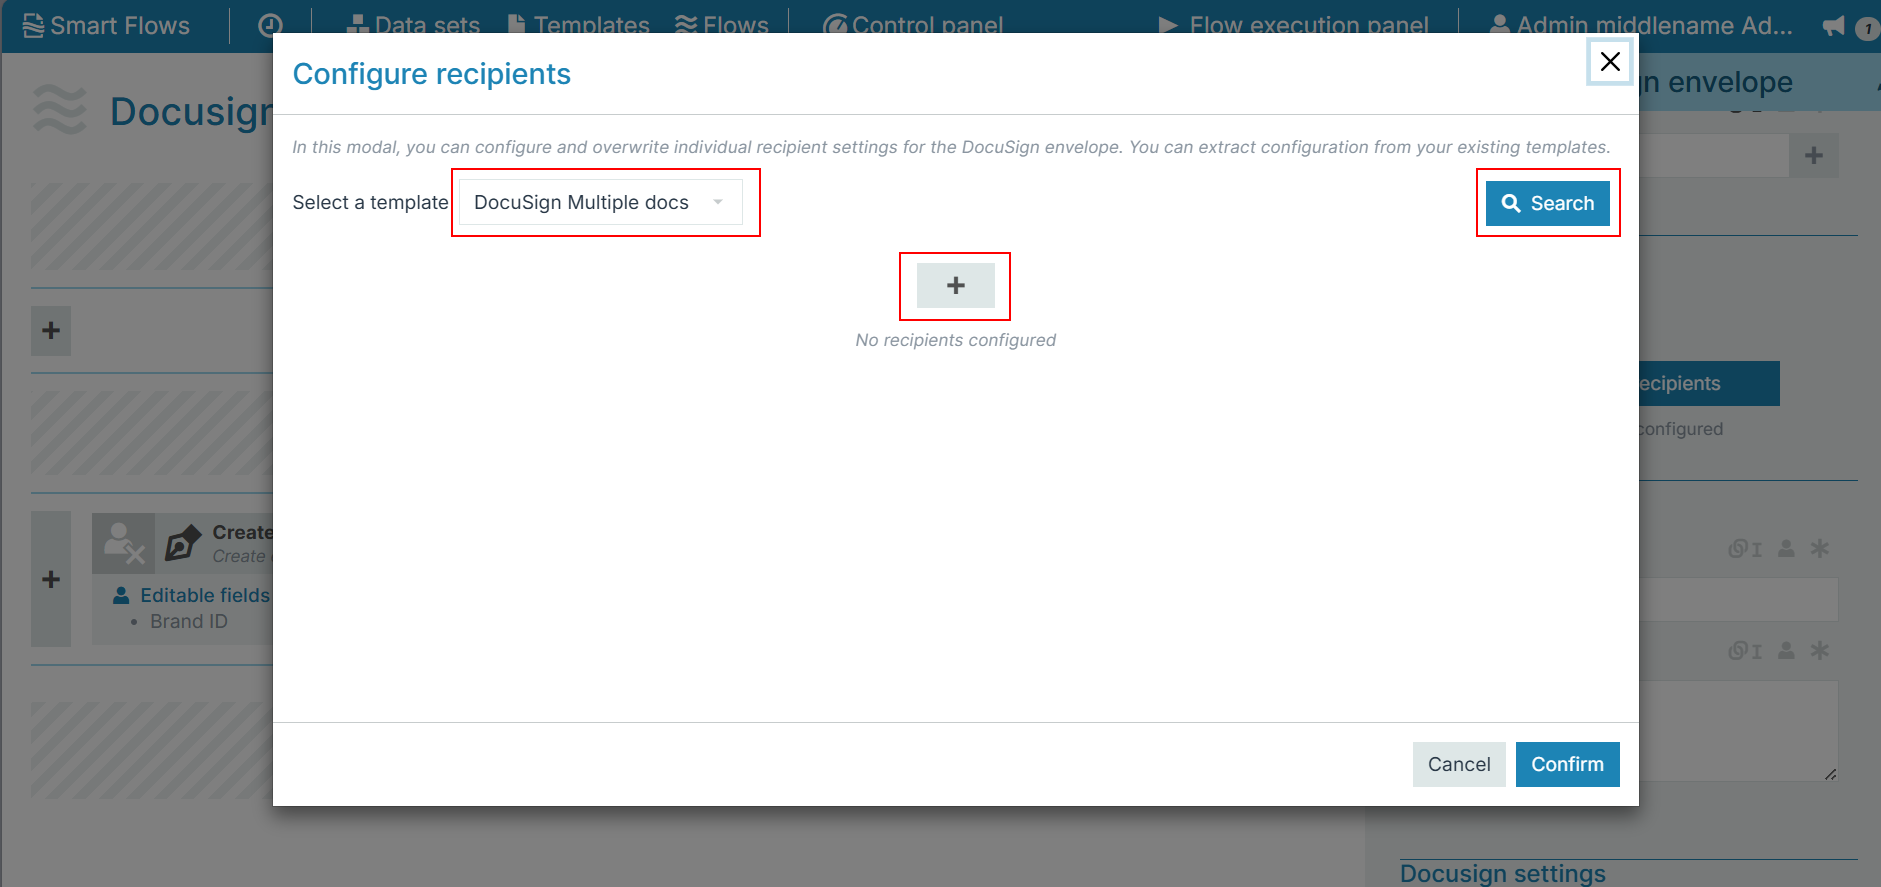
Designers can
-
Search for signers within the template. A list of the signers is displayed after the user selects the Search button
-
Use the + button to configure additional recipients
-
View all the templates used in a flow from the Select a template dropdown if recipients have not been configured
Designers can configure the following settings for multiple e-mail recipients in the Configure recipients dialog:
-
Recipient settings
-
Authentication settings
-
E-mail settings
Recipient settings
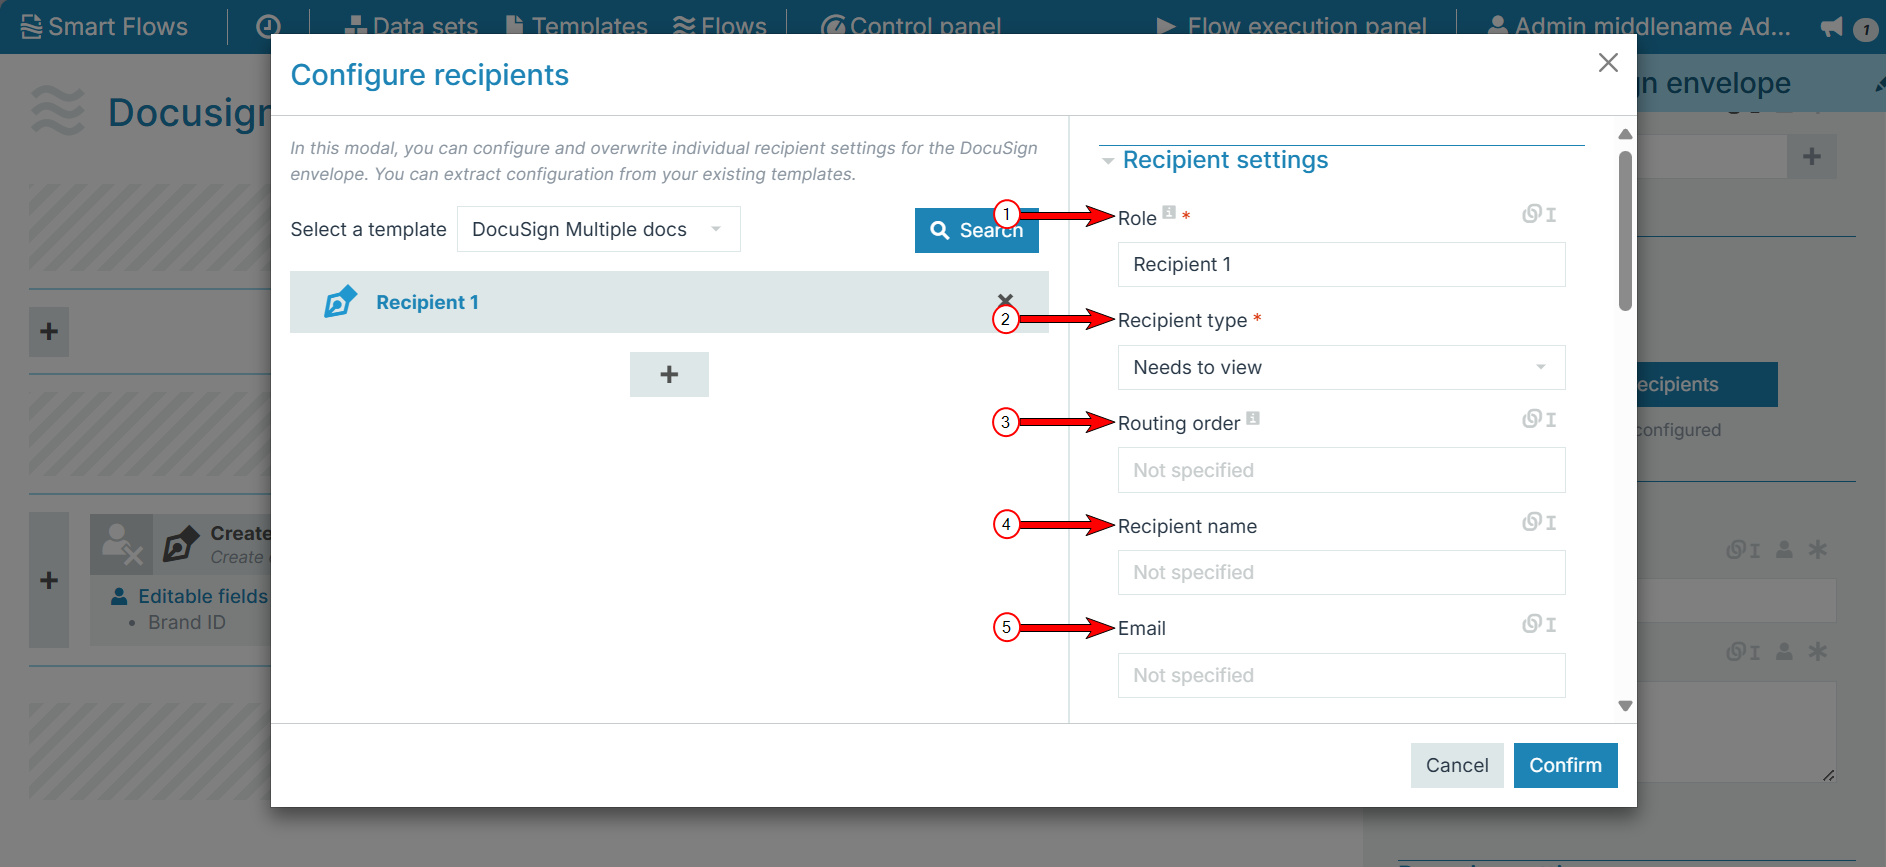
|
Index No. |
Field name |
Description |
|---|---|---|
|
1 |
Role |
Identifies the different types of recipients (for example, seller, buyer, and notary) who need to sign the document. |
|
2 |
Recipient type |
|
|
3 |
Routing order |
The order in which the recipient(s) are asked to sign or view the document. |
|
4 |
Recipient name |
The name of the recipient of the document. |
|
5 |
|
The e-mail address of the recipient of the document. |
Use SMS Delivery
|
Index.No |
Field Name |
Description |
|---|---|---|
|
1. |
Country code |
Provide the country code of your contact number. |
|
2. |
Phone number |
Provide your recipient's contact number. |
If you choose a mapped field, such as an address or email ID, for the Country code and Phone number, the Flow Execution Panel will display an error during runtime. To prevent this, make sure to provide valid values for these fields.
Authentication settings
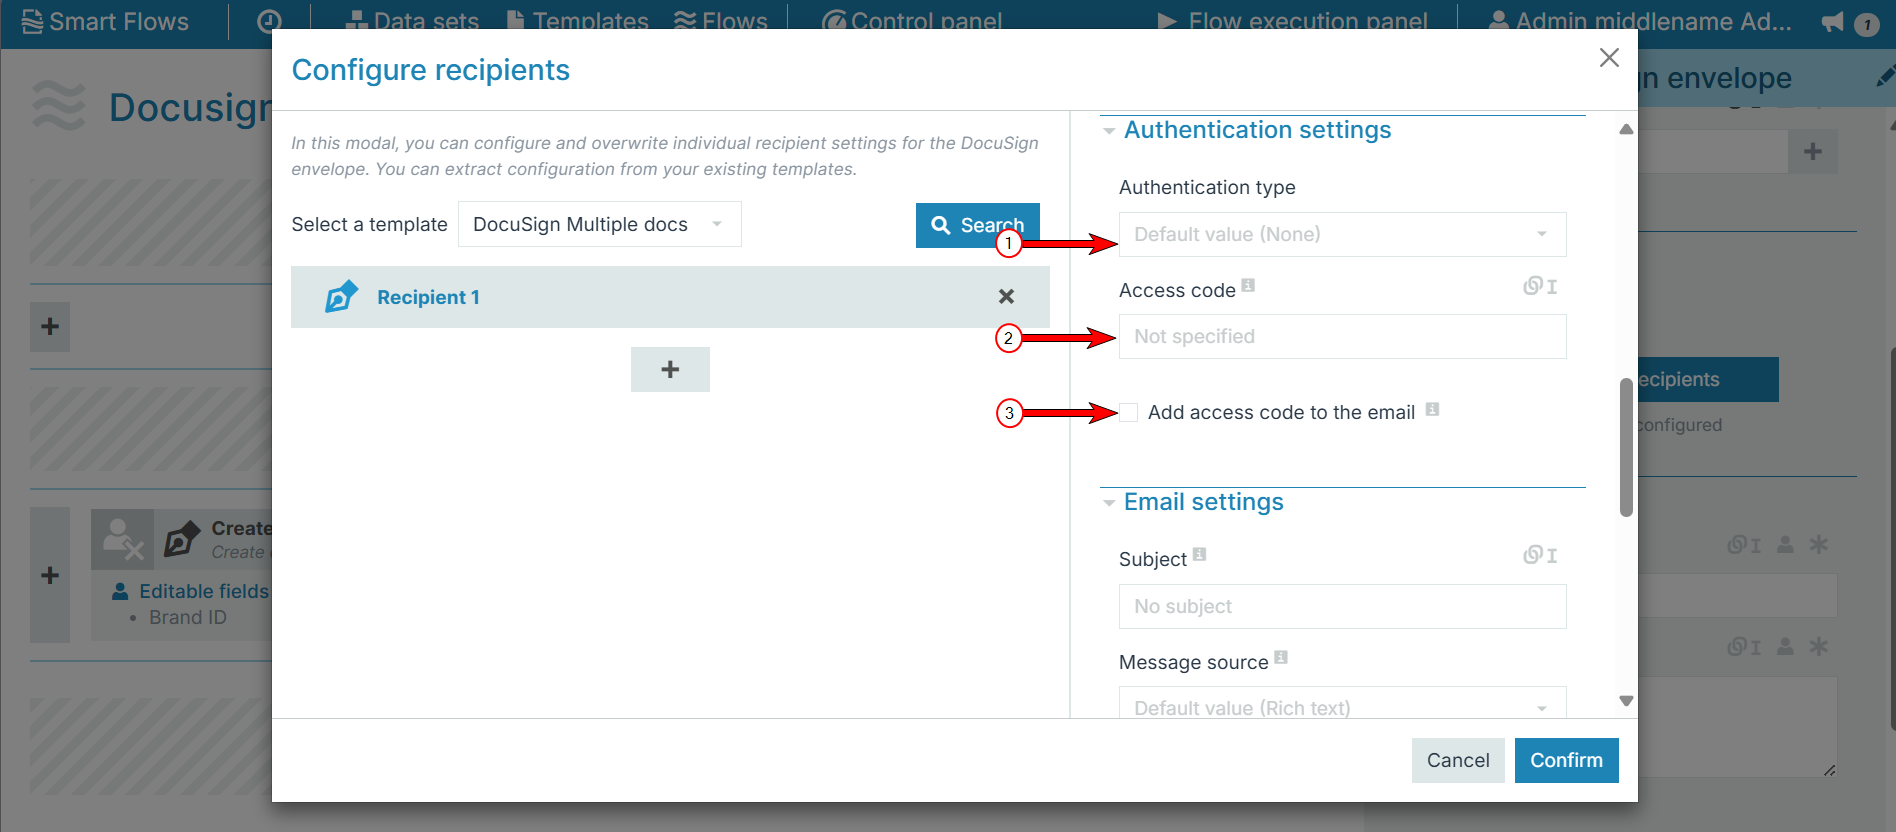
Designers can configure identity verification methods for individual signers in Smart Flows when sending documents to Docusign, leveraging Docusign's native identity verification methods.
From Smart Flows release 4.24.0 onwards, only users with the correct Docusign license will be able to access ID verification and ID check. For more information on ID verification and how Docusign supports it, please see ID Verification.
Designers can select the preferred verification method for the signing process from the following authentication settings options. Designers can also enable identity verification or ID Check for individual signers and then choose an identity verification method.
|
Index No. |
Field name |
Description |
|---|---|---|
|
1 |
Authentication type
|
|
|
1a |
Phone authentication numbers |
Displays only if 'Phone Authentication' is selected. Allows sender to input required phone number(s). |
|
1b |
Identity verification |
Displays only if 'Identity Verification' is selected.
|
|
2 |
Access code |
The code that the signer must enter before they can sign a document. |
|
3 |
Add access code to the email |
When checked, the access code provided in the previous text box will be part of the e-mail send to the document recipient. |
Email settings
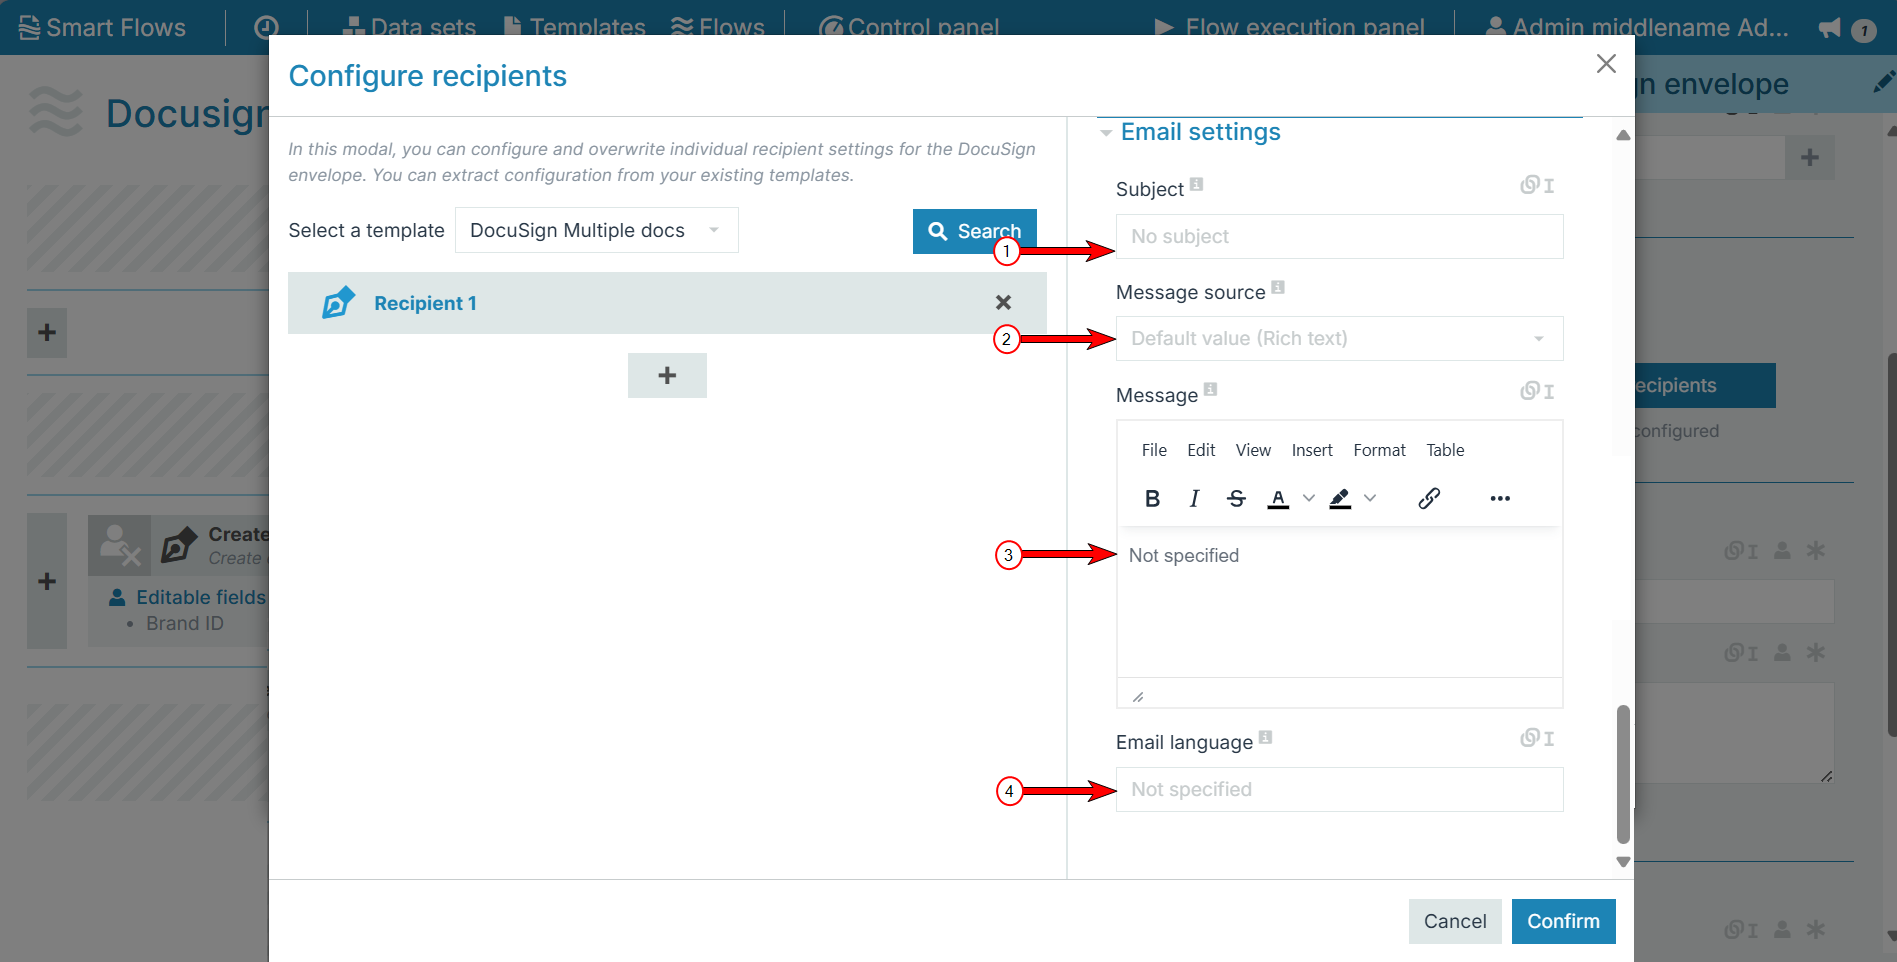
|
Index No. |
File Name |
Description |
|---|---|---|
|
1 |
Subject |
The e-mail subject for recipient e-mails. |
|
2 |
Message source |
|
|
3 |
Message |
The e-mail message in HTML or plain text.
|
|
4 |
Email language |
Defines the language of the e-mail that Docusign sends to the recipient. This setting will not be applied if the document signer has set an alternative preferred language in their Docusign account. |
Email settings
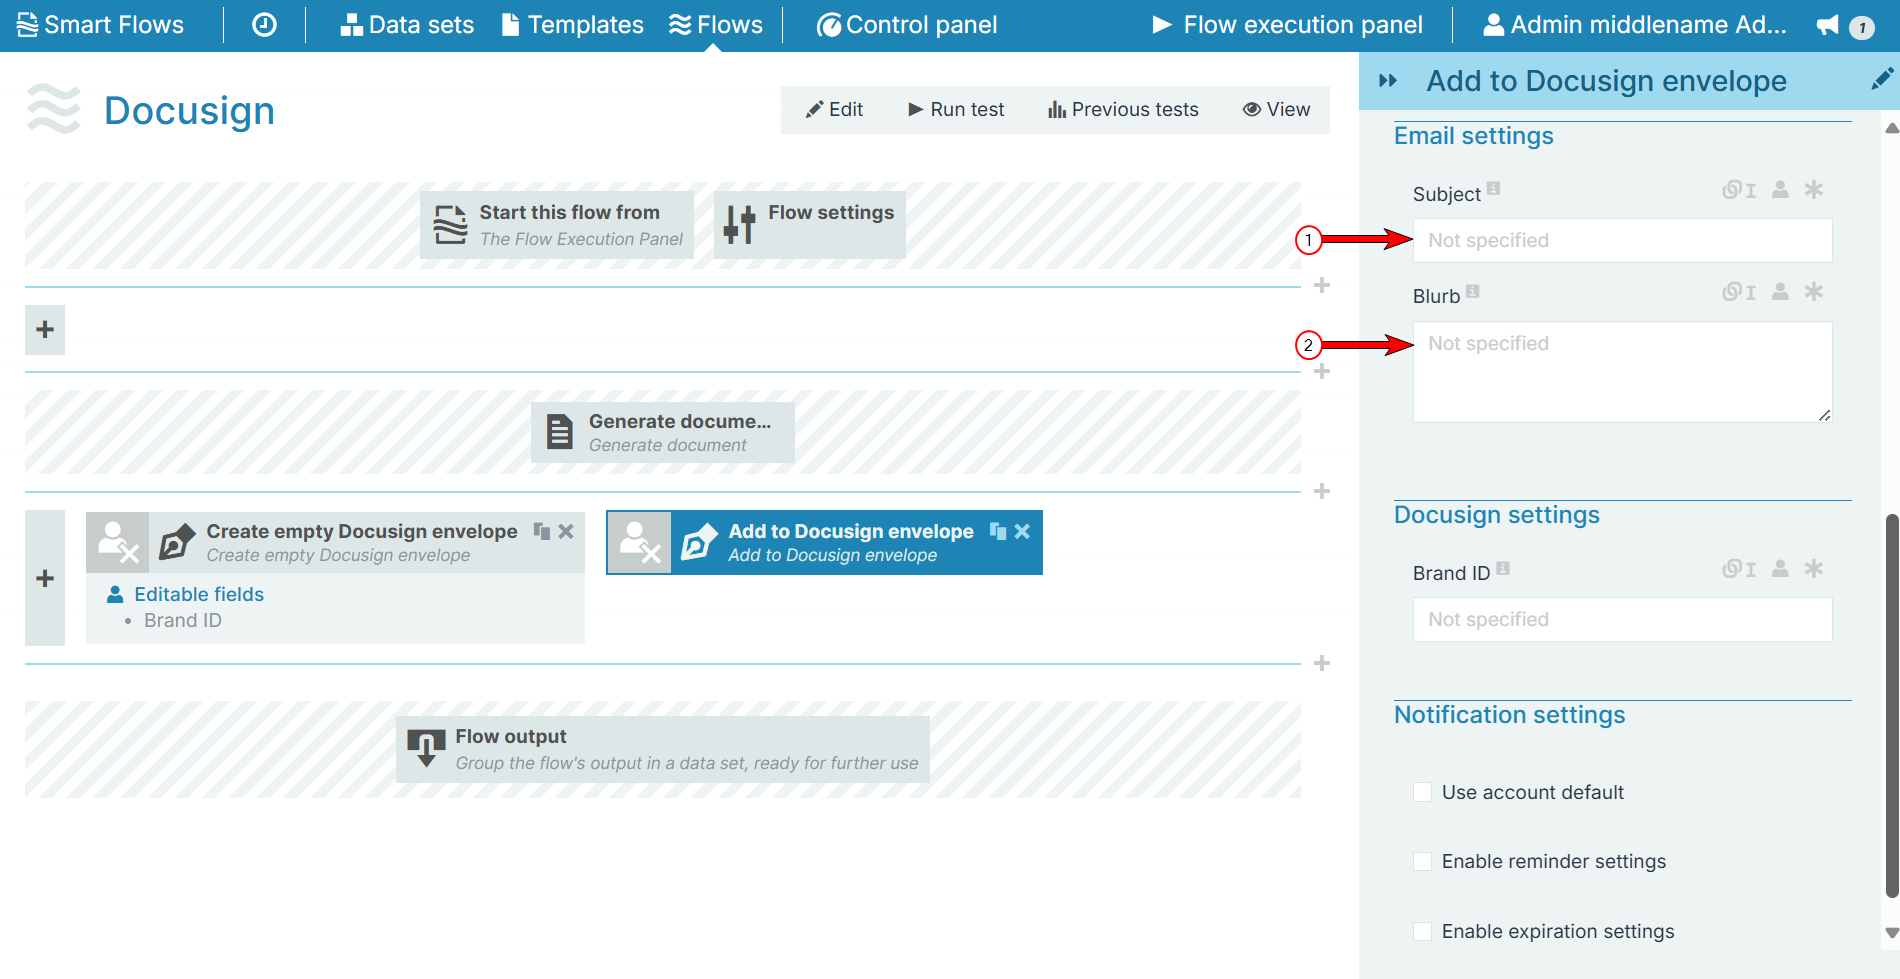
The Email settings section allows you to specify a common subject and message for the emails sent to all the signers.
|
Index No. |
Field name |
Description |
|---|---|---|
|
1 |
Subject |
The Subject field allows users to replace the default Docusign email subject. |
|
2 |
Blurb |
Fills in the body of the email. |
Docusign settings
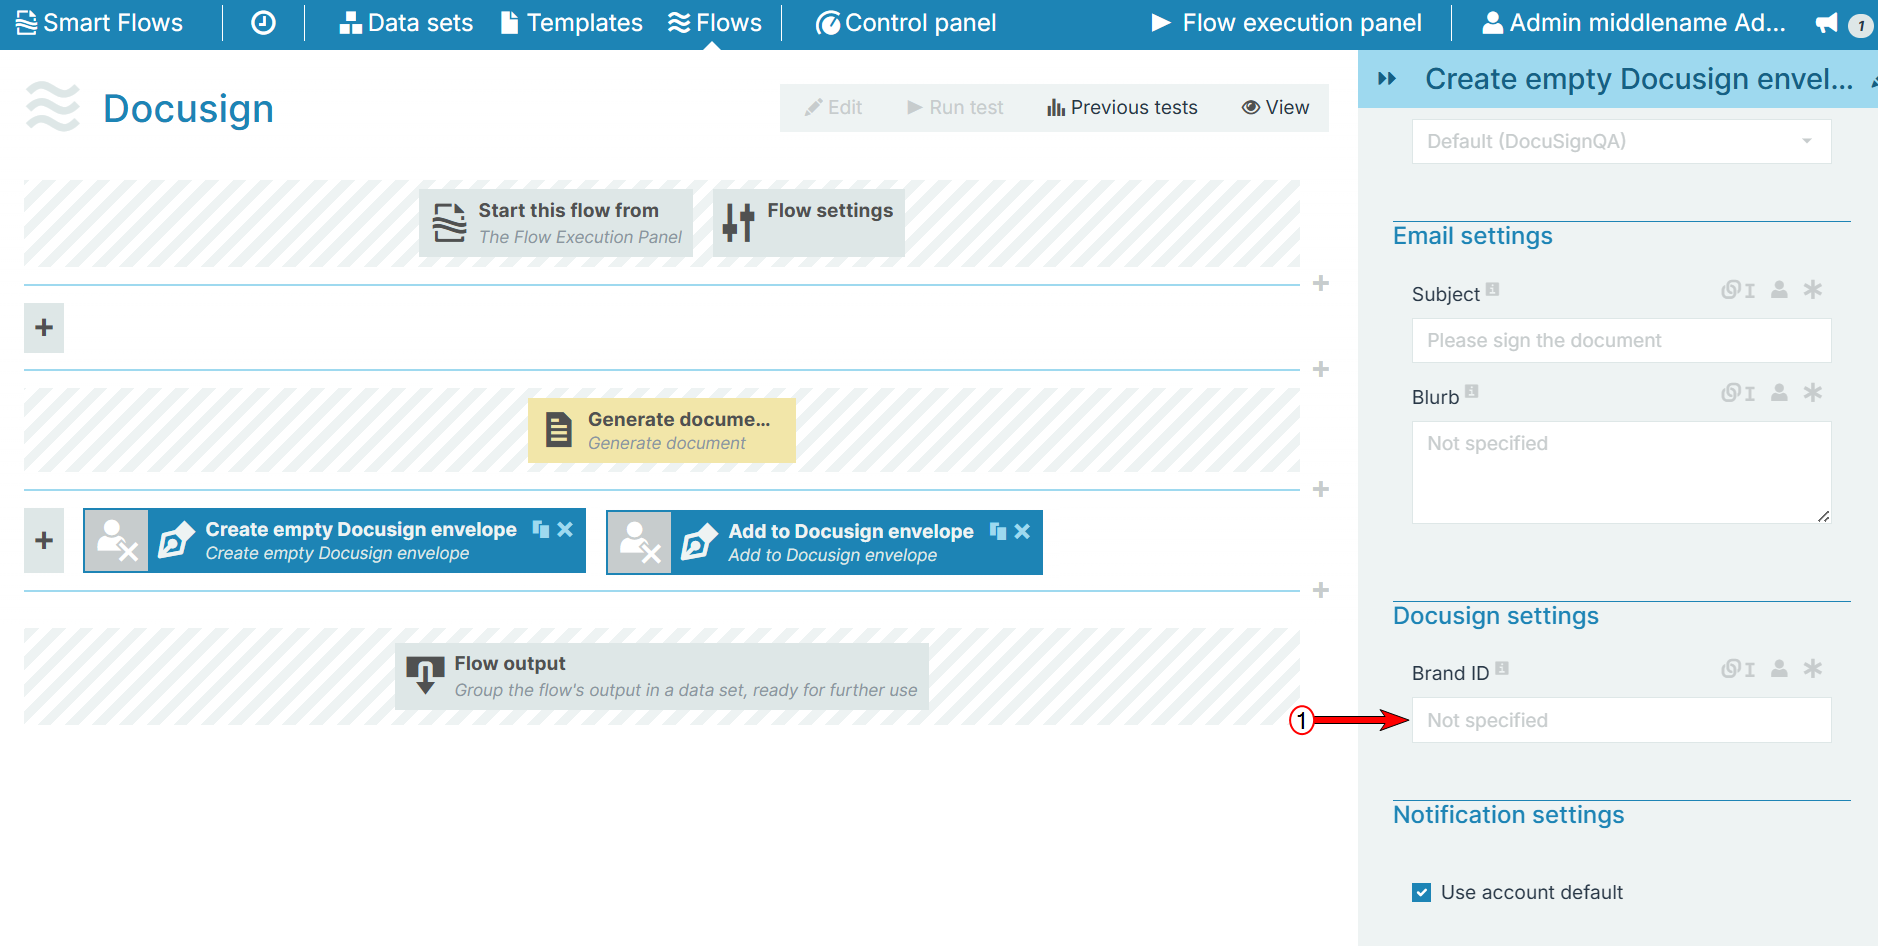
The Docusign settings allow you to provide or select a Brand ID while creating the envelope.
|
Field name |
Description |
|---|---|
|
Brand ID |
Select or provide the Brand ID to the envelope. |
Notification settings
The Notification settings section allows you set reminders for specific actions to signers and set expiration time for each envelope.
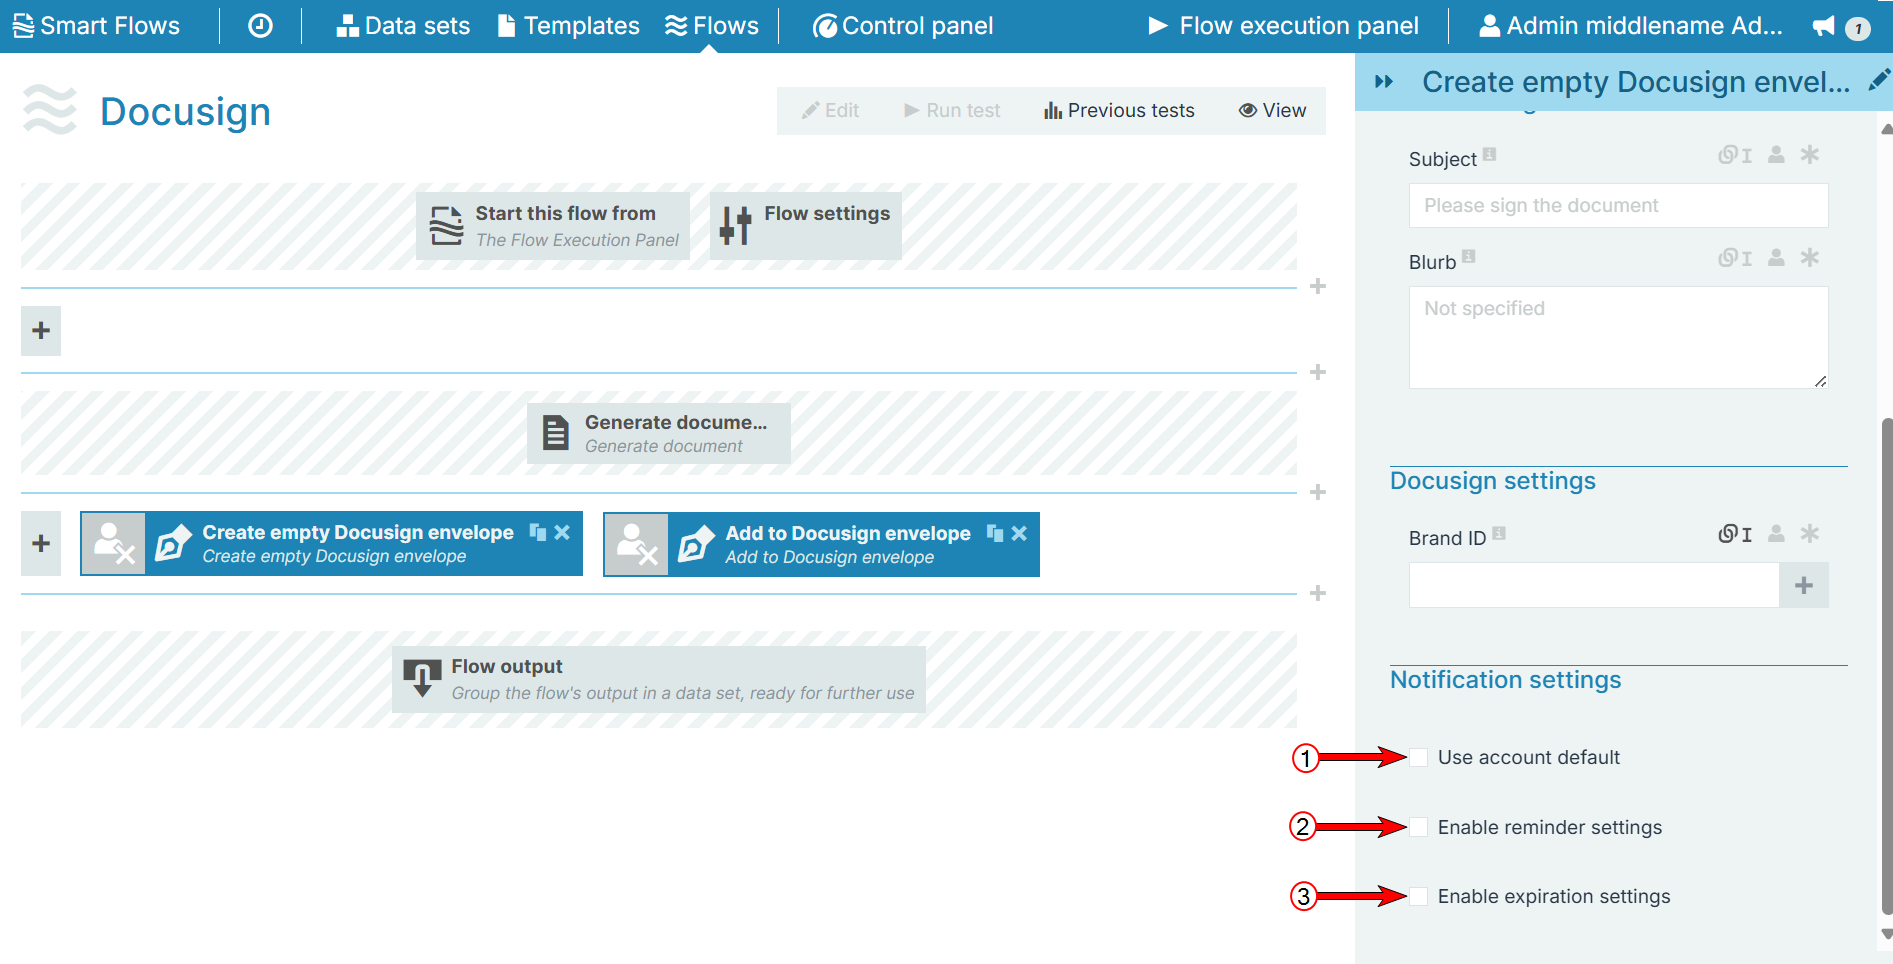
|
Index No. |
Field name |
Description |
|---|---|---|
|
1 |
Use account default |
Check this option to use the default notification settings from the Docusign account. In case you check this option, the other two options are not applicable and hence, they disappear automatically. |
|
2 |
Enable reminder settings |
Check this option to send reminders to the signers along with the following two options: 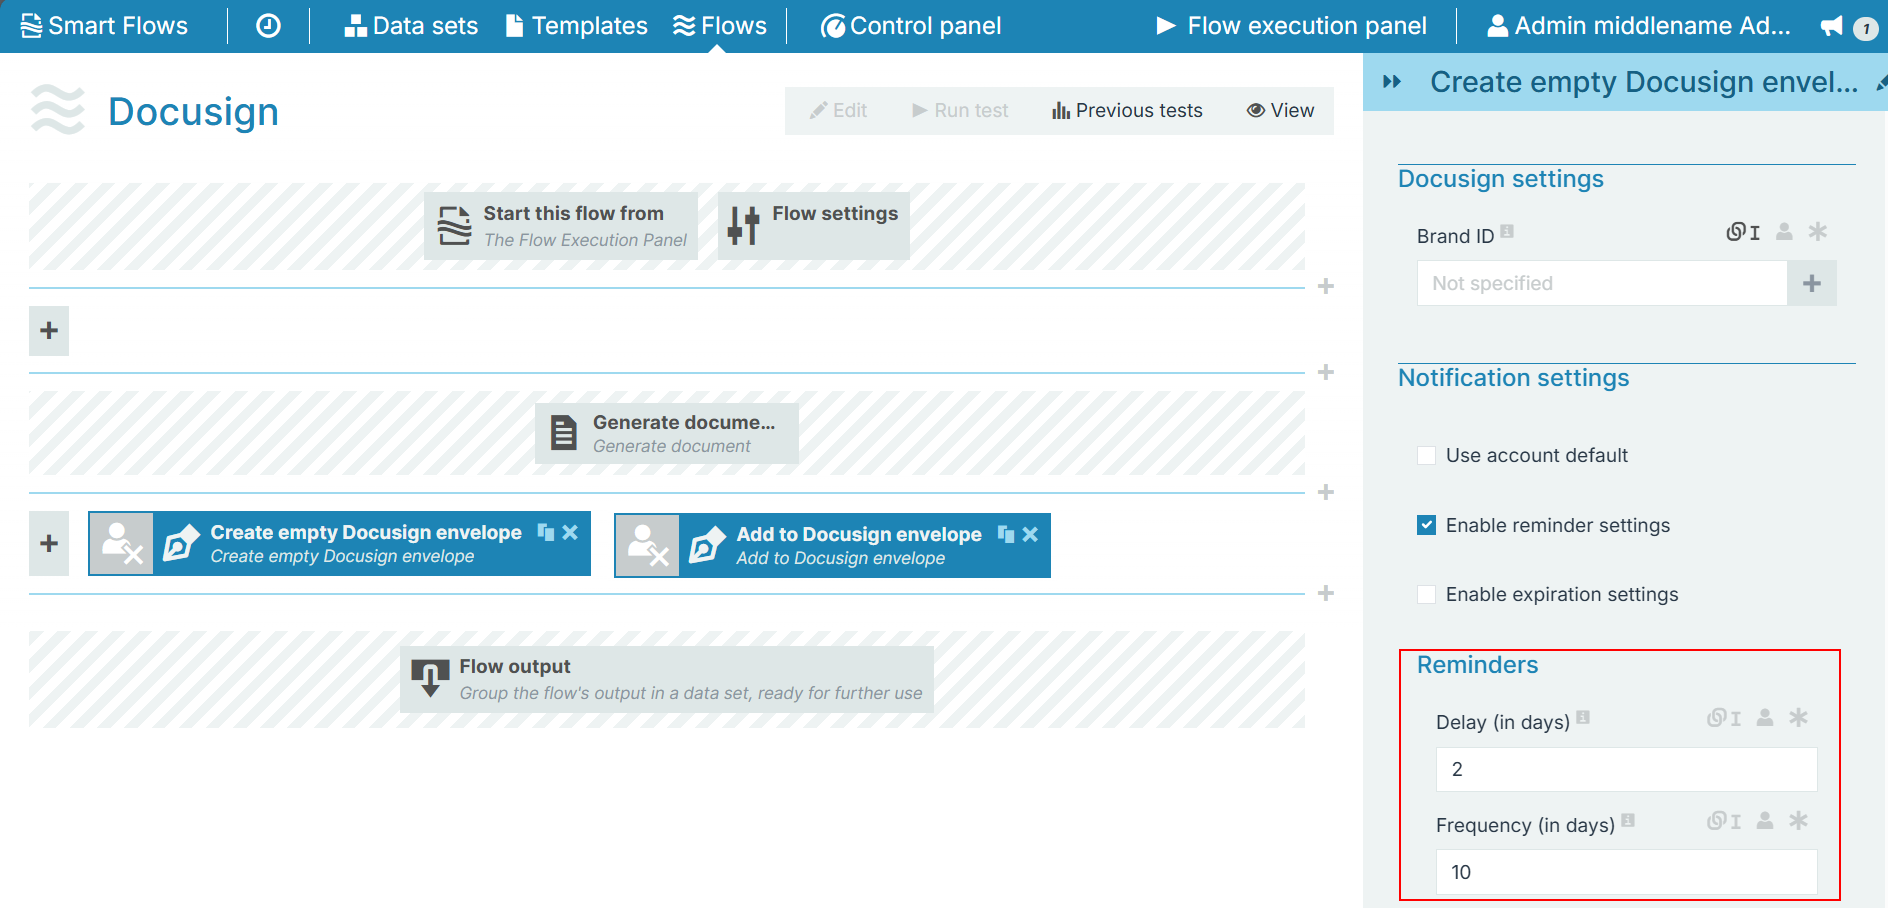
In case if these fields are left blank, then the flow considers the values mentioned in the respective Docusign connector server. |
|
3 |
Enable expiration settings |
Check this option to set up envelope expiration time along with the following options: 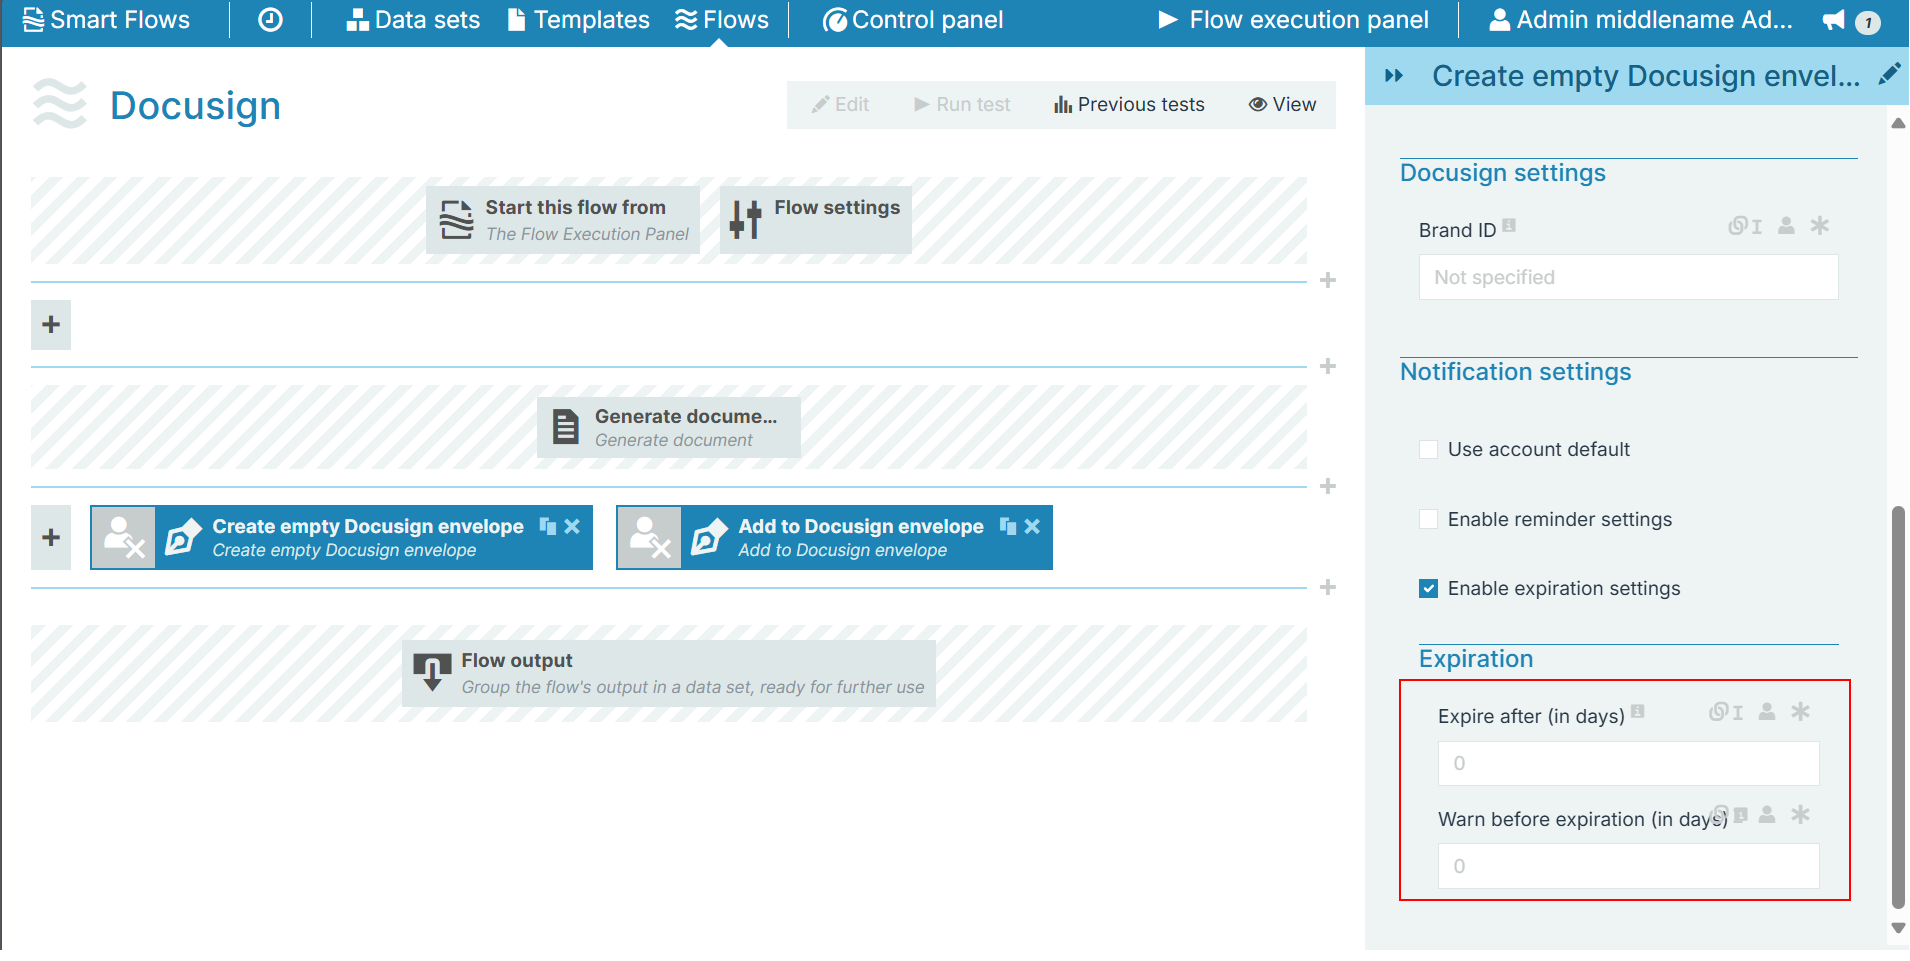
|