
Samples are test records tied to a data set that let designers preview how data will appear in a document before building templates or flows.
About Samples
A data set only describes the structure of your data. To see real data in a template or a flow, you need a sample. A sample contains data that matches the structure of the data set.
Use samples to:
-
Preview your templates in Template Builder. For more information, see Previews and Samples for Template Builder.
-
Test your flows in the Flow Builder.
-
Check which data the fields and relations selected in the data set Builder return.
A data set can have multiple samples, so you can preview and test with different data.
You manage samples on the Samples tab of a data set. From the list, you can Create, Edit, View, and Delete samples.
Samples List View
You manage the samples of a data set on its Samples tab. All sample tasks start here: creating, editing, viewing, and deleting samples.
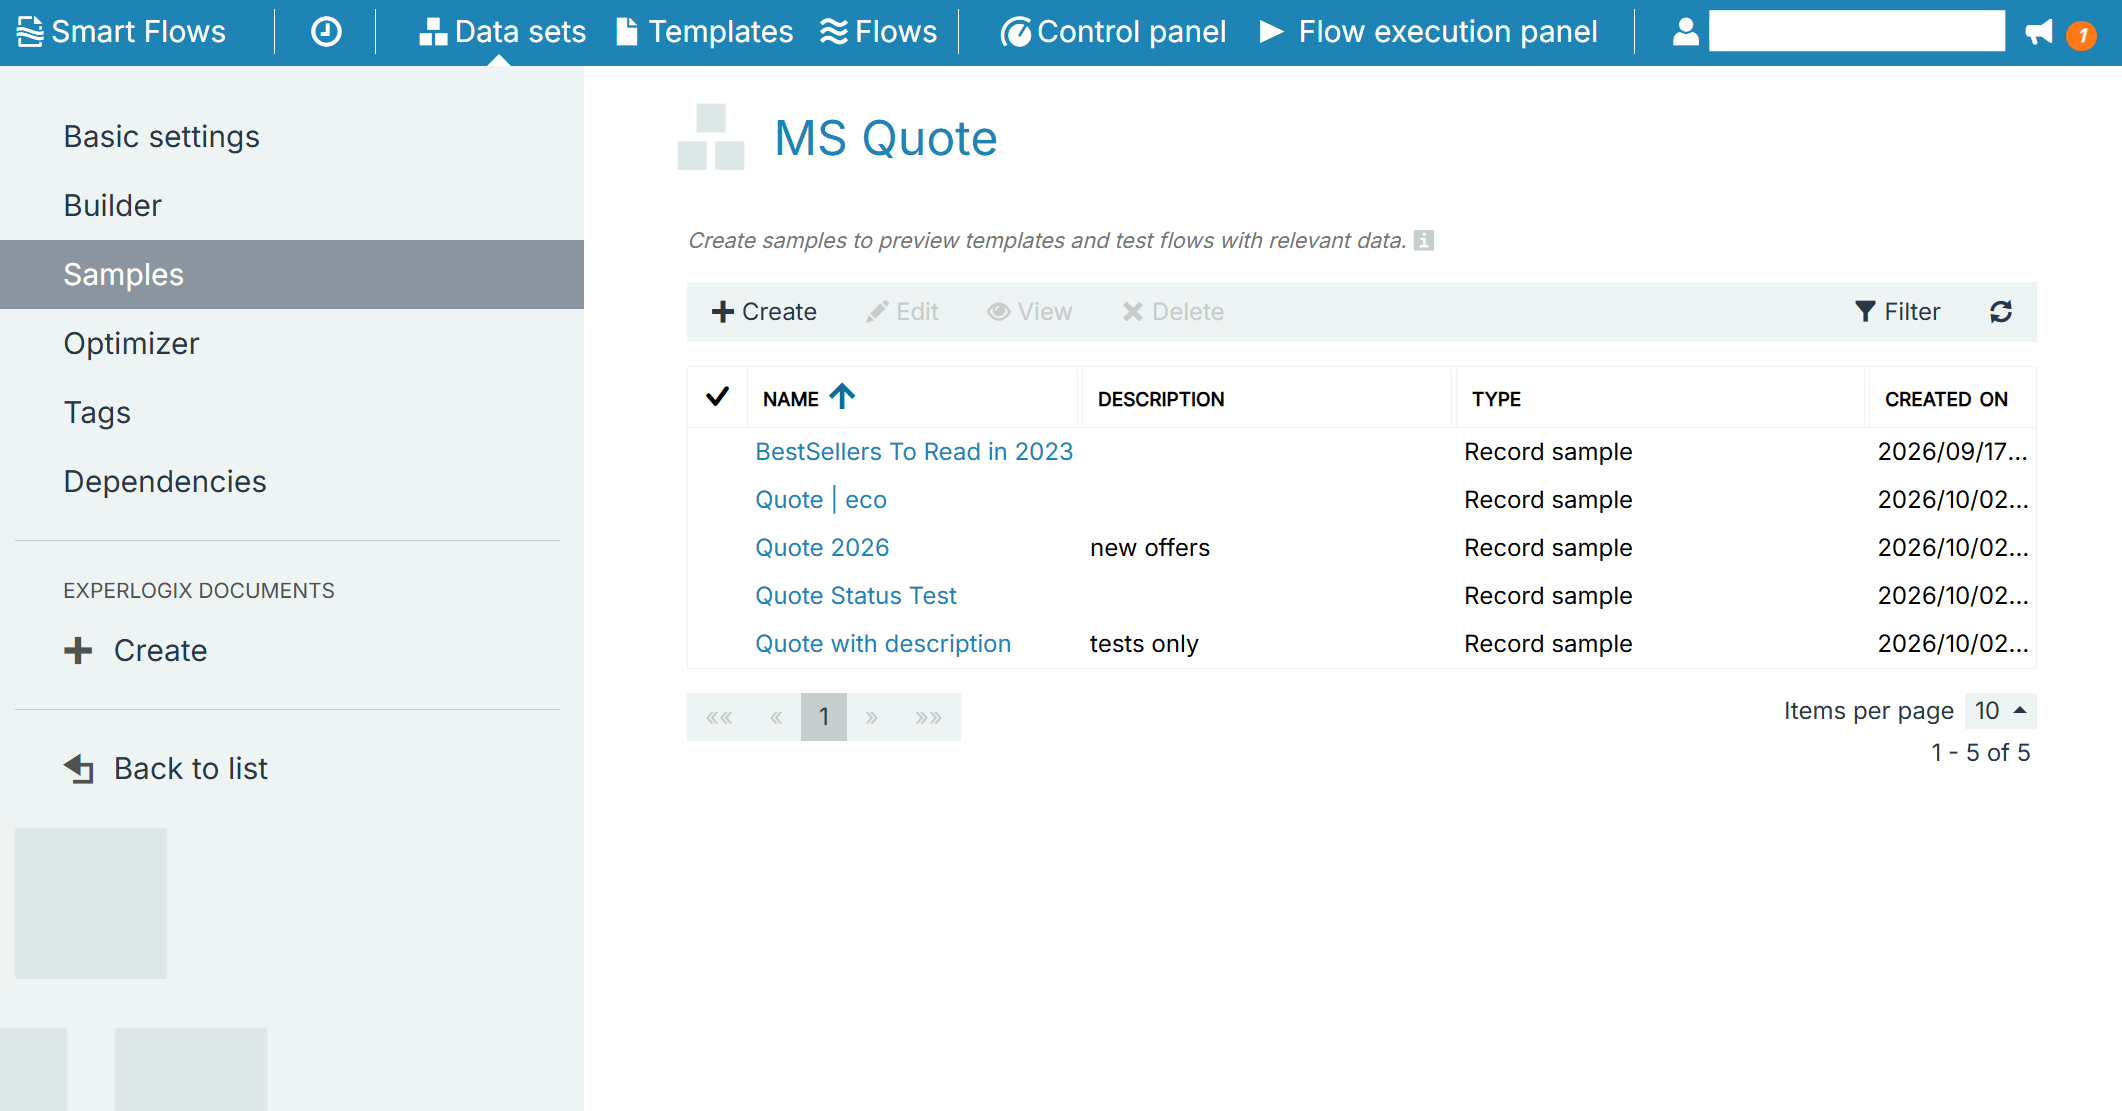
Opening the Samples List
-
In the Project Console, select Data sets.
-
Select a data set.
-
Select the Samples tab.
The list shows all samples of the data set. To see which sample types exist, select the info icon next to the description at the top of the tab.
The Samples tab is not available for DocuSign data sets.
Actions
|
Action |
Description |
|---|---|
|
Create |
Opens the Create sample dialog. See Creating a Sample. |
|
Edit |
Opens the Edit sample dialog for the selected sample, where you can change its name, description, and data. You can also select the sample name. |
|
View |
Shows the data of the selected sample in the View sample window. From there, you can search the data, copy it to the clipboard, or download it. |
|
Delete |
Deletes the selected samples. You can select multiple samples. |
|
Import in Experlogix Documents |
Imports the selected samples into Experlogix Documents. Available only for Experlogix Documents data sets. |
|
Filter |
Shows filter fields above the columns, so you can filter the list by name, description, or user. |
|
Refresh |
Reloads the list. |
Edit and View are available when one sample is selected. Delete and Import in Experlogix Documents are available when one or more samples are selected.
Sample Types
|
Sample type |
Description |
|---|---|
|
Record sample |
A sample defined by a reference to a record. The data is retrieved from the record every time, so the sample is always up to date. Used by standard data sets, including Experlogix CPQ data sets. |
|
Published local sample |
A sample of a standard data set that contains a local copy of the data instead of a reference. It is created and published from Template Builder, or created in the Project Console by editing a record sample. Not updated automatically. |
|
XML sample |
A sample defined by an XML file. Used by schema data sets. |
|
Custom sample |
A sample created by filling in the fields of a custom data set. |
|
Smart Form sample |
A sample defined by a filled Smart Form instance. Used by Smart Form data sets. |
|
Web Form sample |
A sample created by filling in the Web Form of an Experlogix Documents Web Form data set. |
|
Experlogix Documents JSON sample |
A sample defined by JSON file. Used by Experlogix Documents JSON data sets. |
Create Samples in Project Console
Create Sample (general steps)
Creating a Sample within a data set is a crucial step in the design phase of Smart Flows. It offers a preview of how data is structured and will appear in your final documents. This process not only facilitates a better understanding of the data's practical application, but it also enables designers to refine and optimize the data set to meet specific requirements.
To create a sample:
-
In the Samples list view, select Create.
The Create sample dialog is displayed. -
In the Name field, enter a name for the sample.
-
(Optional) In the Description field, enter a description.
-
Provide the sample data. The options depend on the data set type, see the sections below.
-
Select Create.
Record Sample (Standard Data Sets)
To create a record sample:
-
In the Create sample dialog, open the Reference dropdown and type to search for the record. If the Name field is empty, the name of the selected record is used.
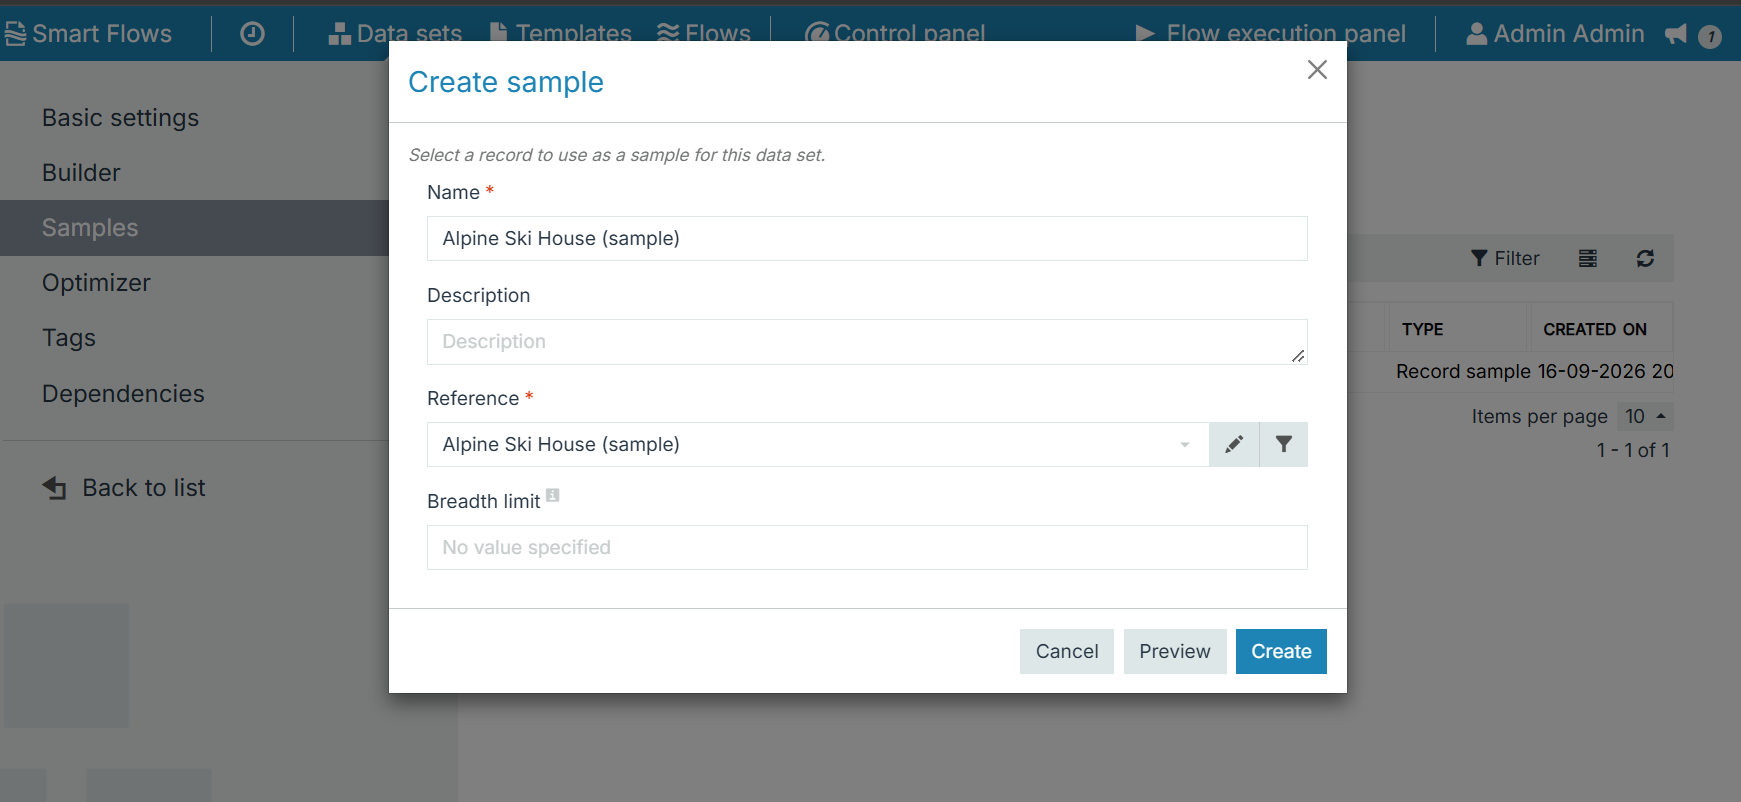
-
(Optional) In Breadth limit, enter the maximum number of records retrieved for 1:N relations. This field is displayed only when it is enabled for your project.
-
(Optional) Select Preview to see the data of the sample before you create it.
-
Select Create.
Filtering Records by a Property
For Microsoft Dynamics 365 CE, Microsoft Dynamics 365 Finance & Operations, Salesforce, and SugarAI data sets, you can find a record by the value of one of its fields, for example the city of an account.
-
Select the filter icon next to the Reference field.
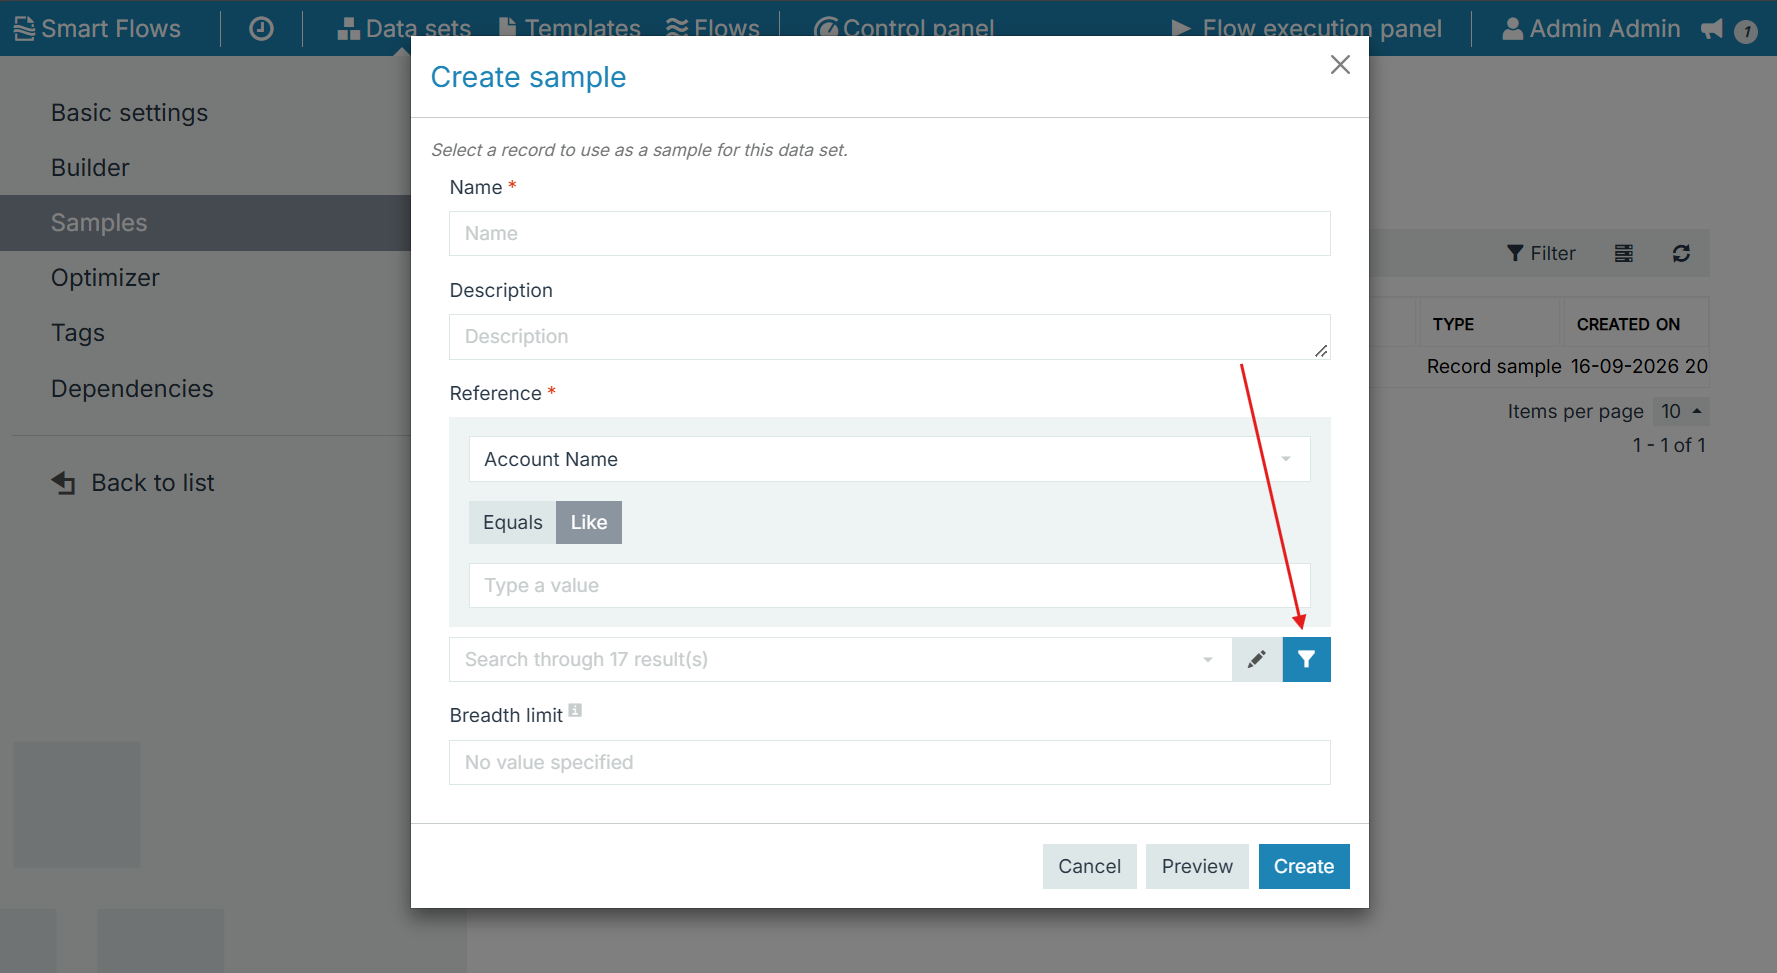
-
In Pick a property to filter by, select a field of the primary entity.
-
Select Equals to find exact matches, or Like to find partial matches.
-
In Type a value, enter the value.
-
Open the Reference dropdown and select the record. The value of the selected property is shown under each record name.
Creating a Local Copy
To change the data of a record sample, select Edit (pencil icon) next to the Reference field. A local copy of the record data is created, which you can change before you select Create.
The edited sample becomes a Published local sample and is no longer updated from the record.
XML and JSON Data Set Samples
Applies to schema data sets and to Experlogix Documents JSON data sets.
In the Create sample dialog, choose how to provide the data:
-
Sample file: Select the file to upload. For schema use an XML file. For Experlogix Documents JSON data sets, upload a JSON file. If the Name field is empty, the file name is used.
-
Edit: Type or paste the data. Select Pretty Print to format the XML or JSON so the hierarchy is easier to read.
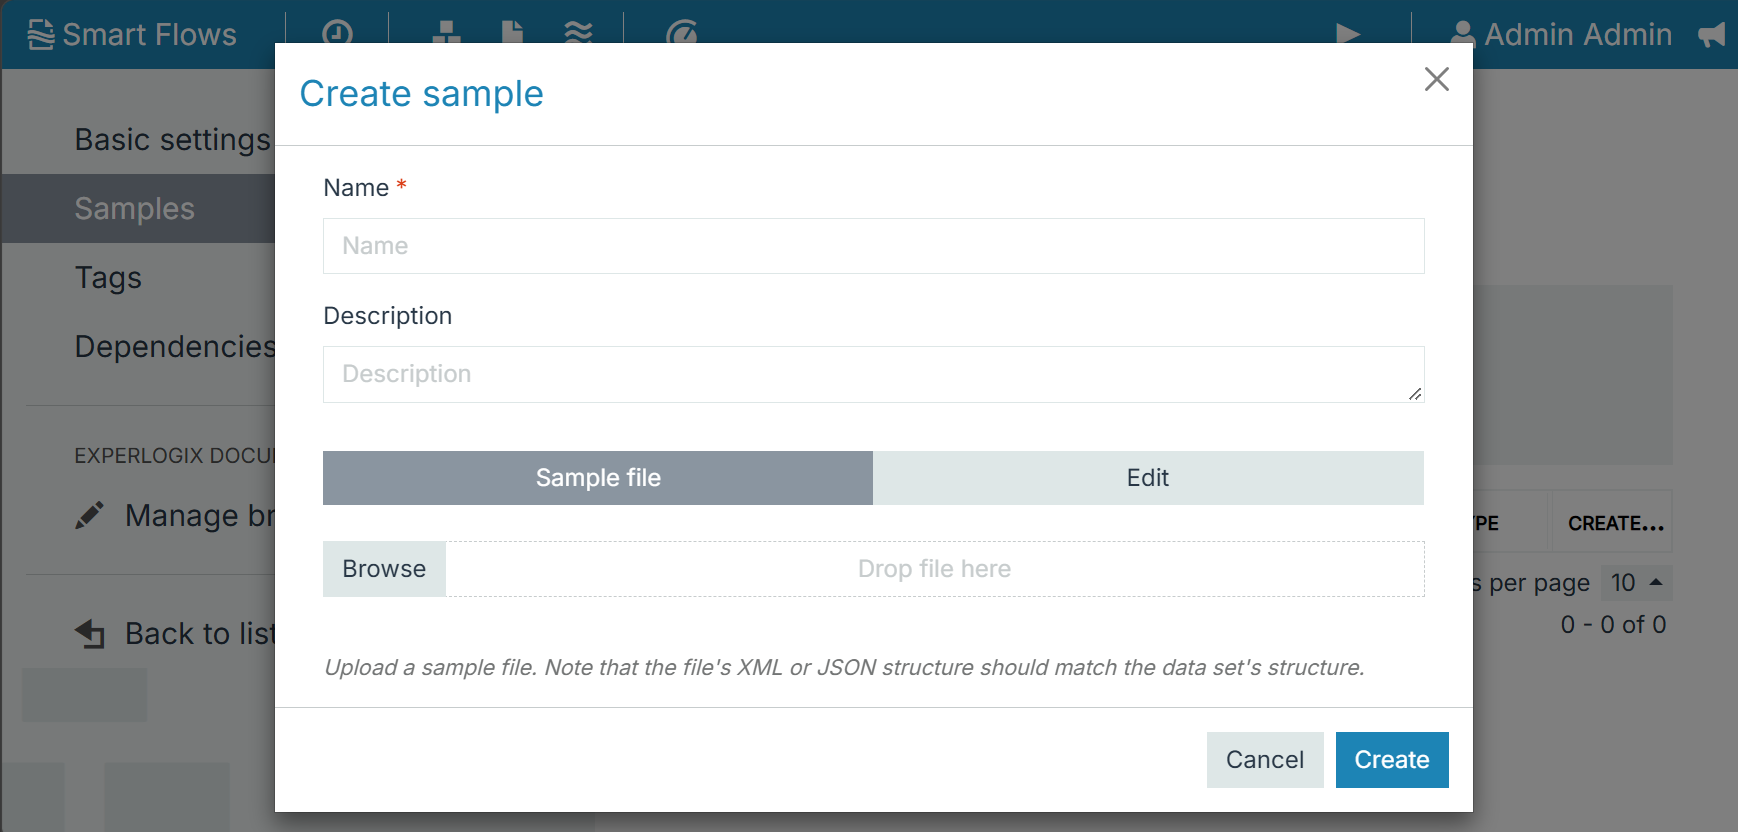
You can upload a file and then select Edit to review or change its content before you select Create.
The structure of the data must match the structure of the data set.
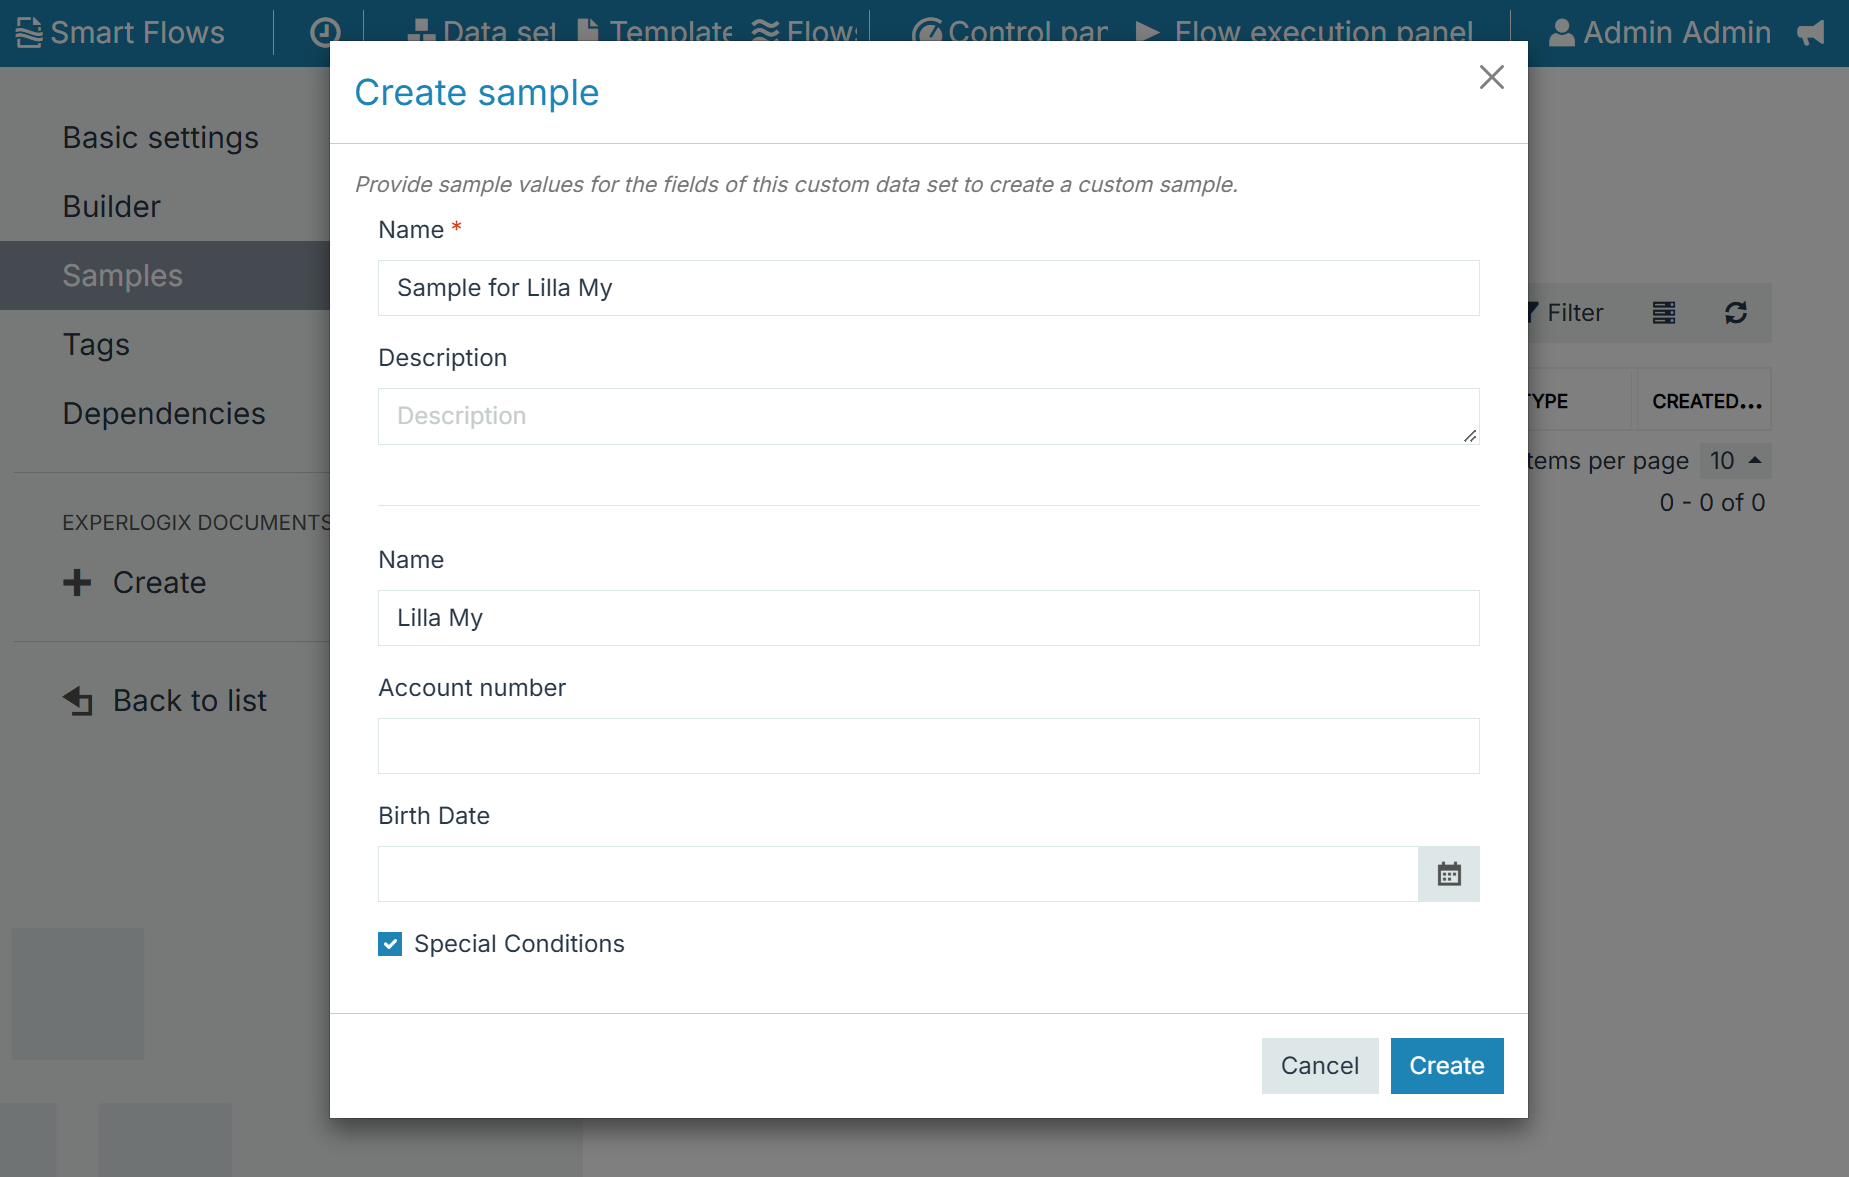
Custom Data Set Samples
In the Create sample dialog, the fields of the custom data set are displayed. Enter a value for each field, and then select Create.
Smart Form Data Set Samples
In the Create sample dialog, the Smart Form is displayed. If you are prompted, sign in to Xpertdoc Portal. Fill in the form, and then select Create. The form is validated before the sample is created.
Experlogix Documents Form Data Set Samples
In the Create sample dialog, the web form is displayed. Fill in the form, and then select Create.
To use samples in Experlogix Documents, select one or more samples in the list and select Import in Experlogix Documents. This action is available for all Experlogix Documents data sets.
Experlogix CPQ Data Set Samples
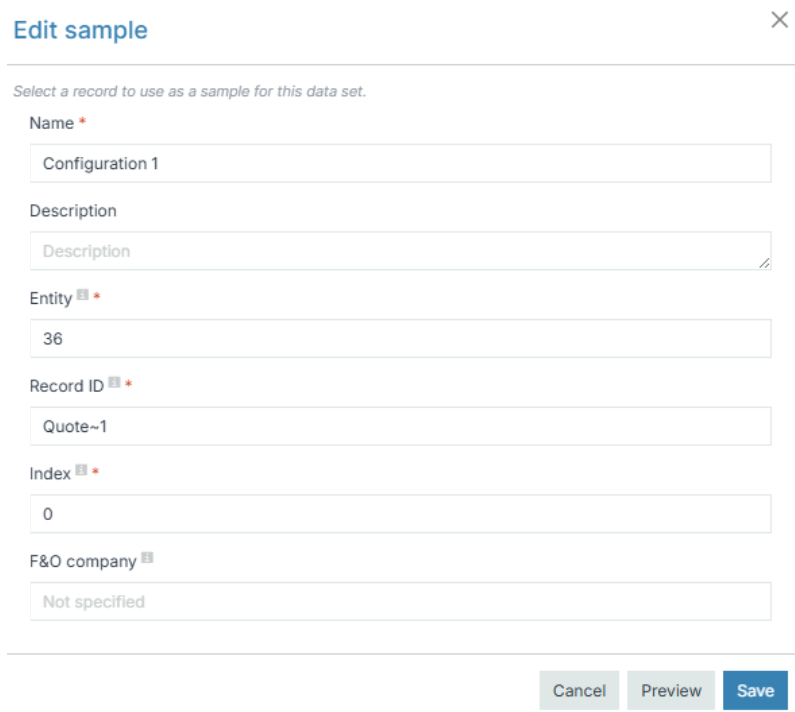
In the Create sample dialog, select an Entry mode:
-
Select: In Configuration link, select the record that contains the configuration data. In Configuration, select the configuration to use.
-
Manual: Enter the values yourself:
-
Entity: The entity of the record that contains the configuration data.
-
Record ID: The ID of that record.
-
Index: The position of the configuration on the record, starting at 0.
-
(Optional) Microsoft Dynamics 365 F&O company: Required only in Microsoft Dynamics 365 Finance & Operations environments with multiple companies.
-
Select Preview to check the data, and then select Create.
Extracting the Entity ID and Index from the Web Configurator URL
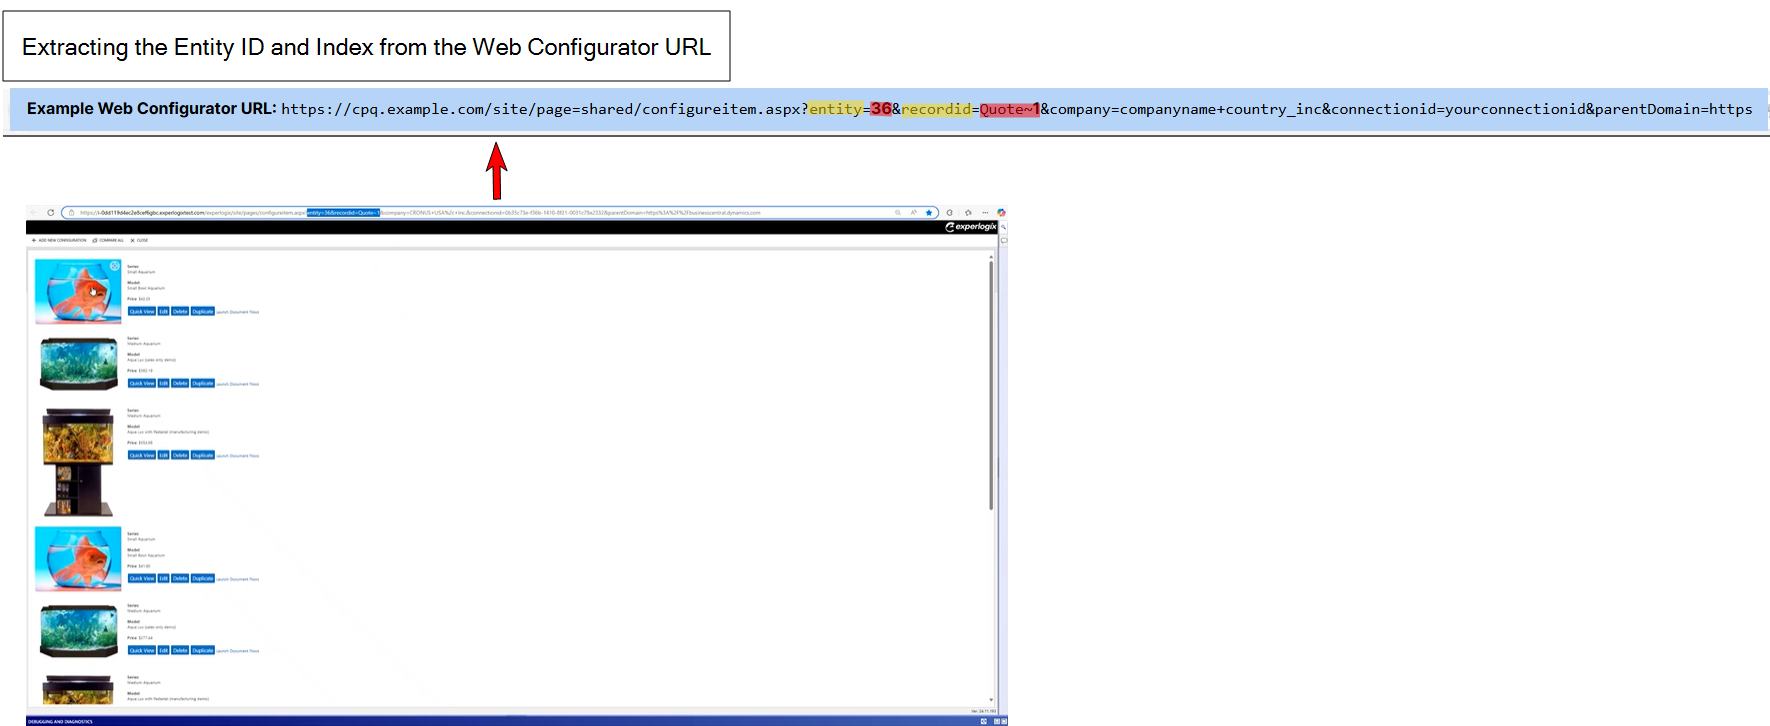
When you launch the CPQ configuration from your Configurator, the URL contains parameters such as the entity ID and the recordid you can use to create samples. So, when you open the Web Configurator from your connector system, you can use the URL in your address bar to extract the required values to create your sample. For example, you might see something like:
Example Web Configurator URL: https://cpq.example.com/site/page=shared/configureitem.aspx?entity=36&recordid=Quote~1&company=companyname+country_inc&connectionid=yourconnectionid&parentDomain=https
-
Entity ID
-
The unique identifier for the entity.
-
In this example, the entity value is 36.
-
-
Recordid
-
Indicates the type of record being referenced and the unique identifier for that record type.
-
In this example, the record type is Quote, and the value for recordid for that quote is 1.
-
Identifying your Index Value
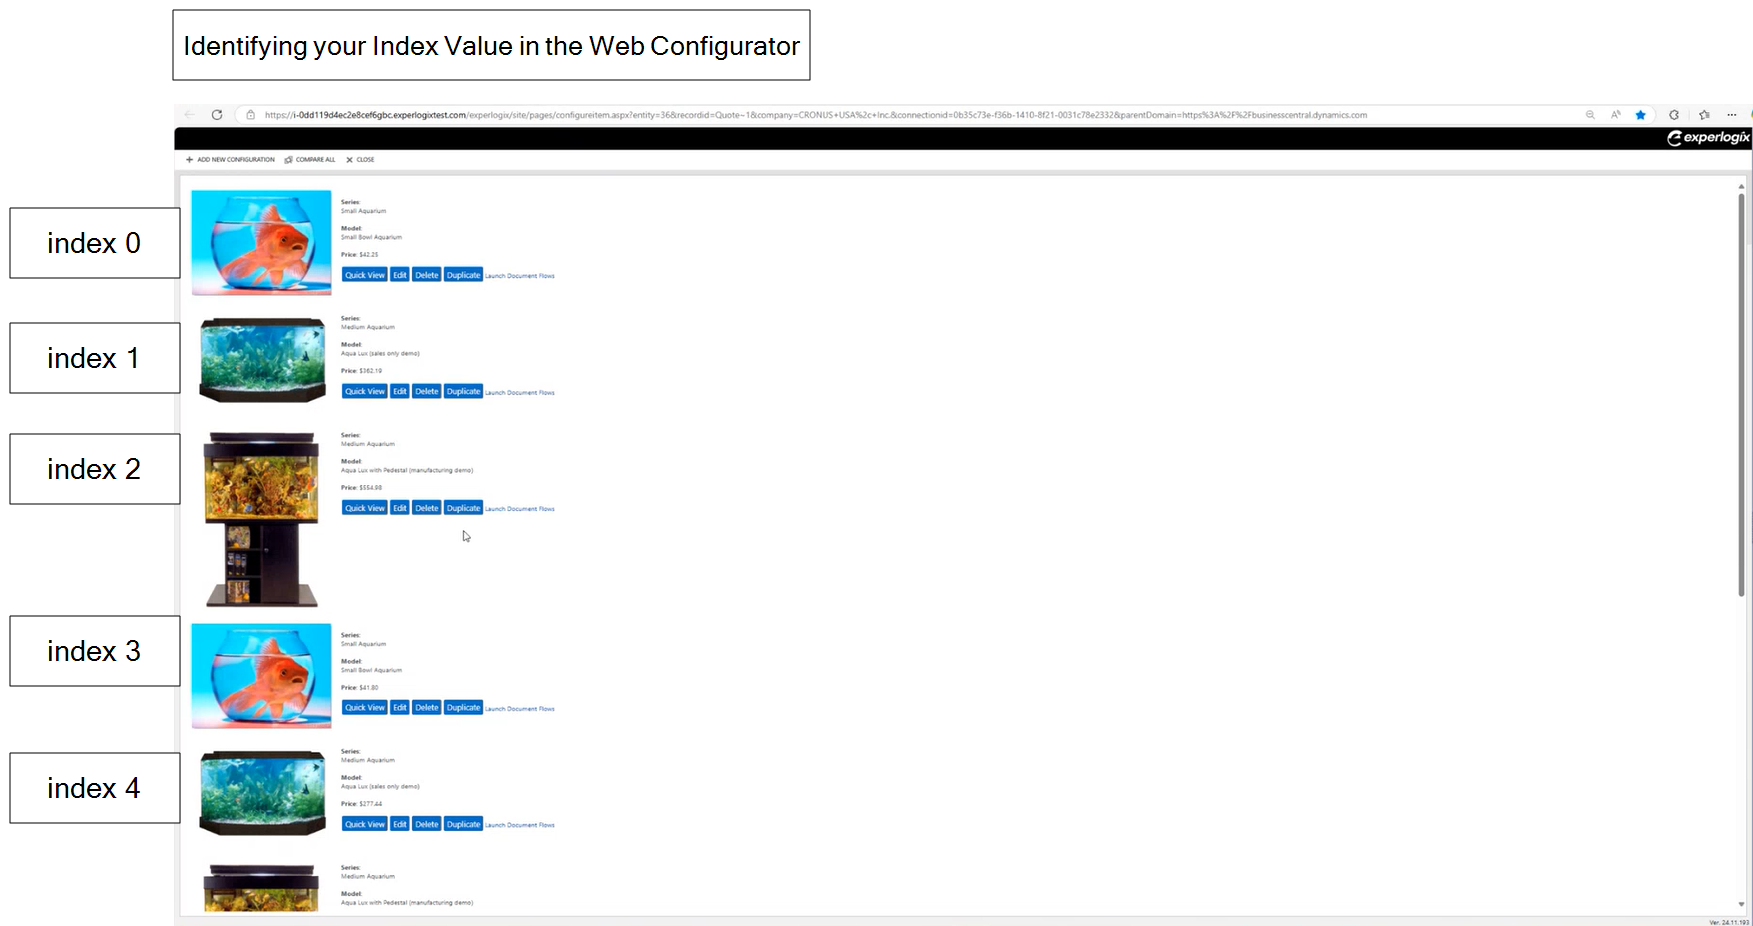
The CPQ connector uses zero-based indexing for configurations. In the Web Configurator, this means:
-
The first configuration is indexed as 0.
-
The second configuration is indexed as 1.
-
The third configuration is indexed as 2, and so on.
Previewing Samples in the Builder
On the Builder tab of a standard data set, you can check which data your current selection of fields and relations returns.
-
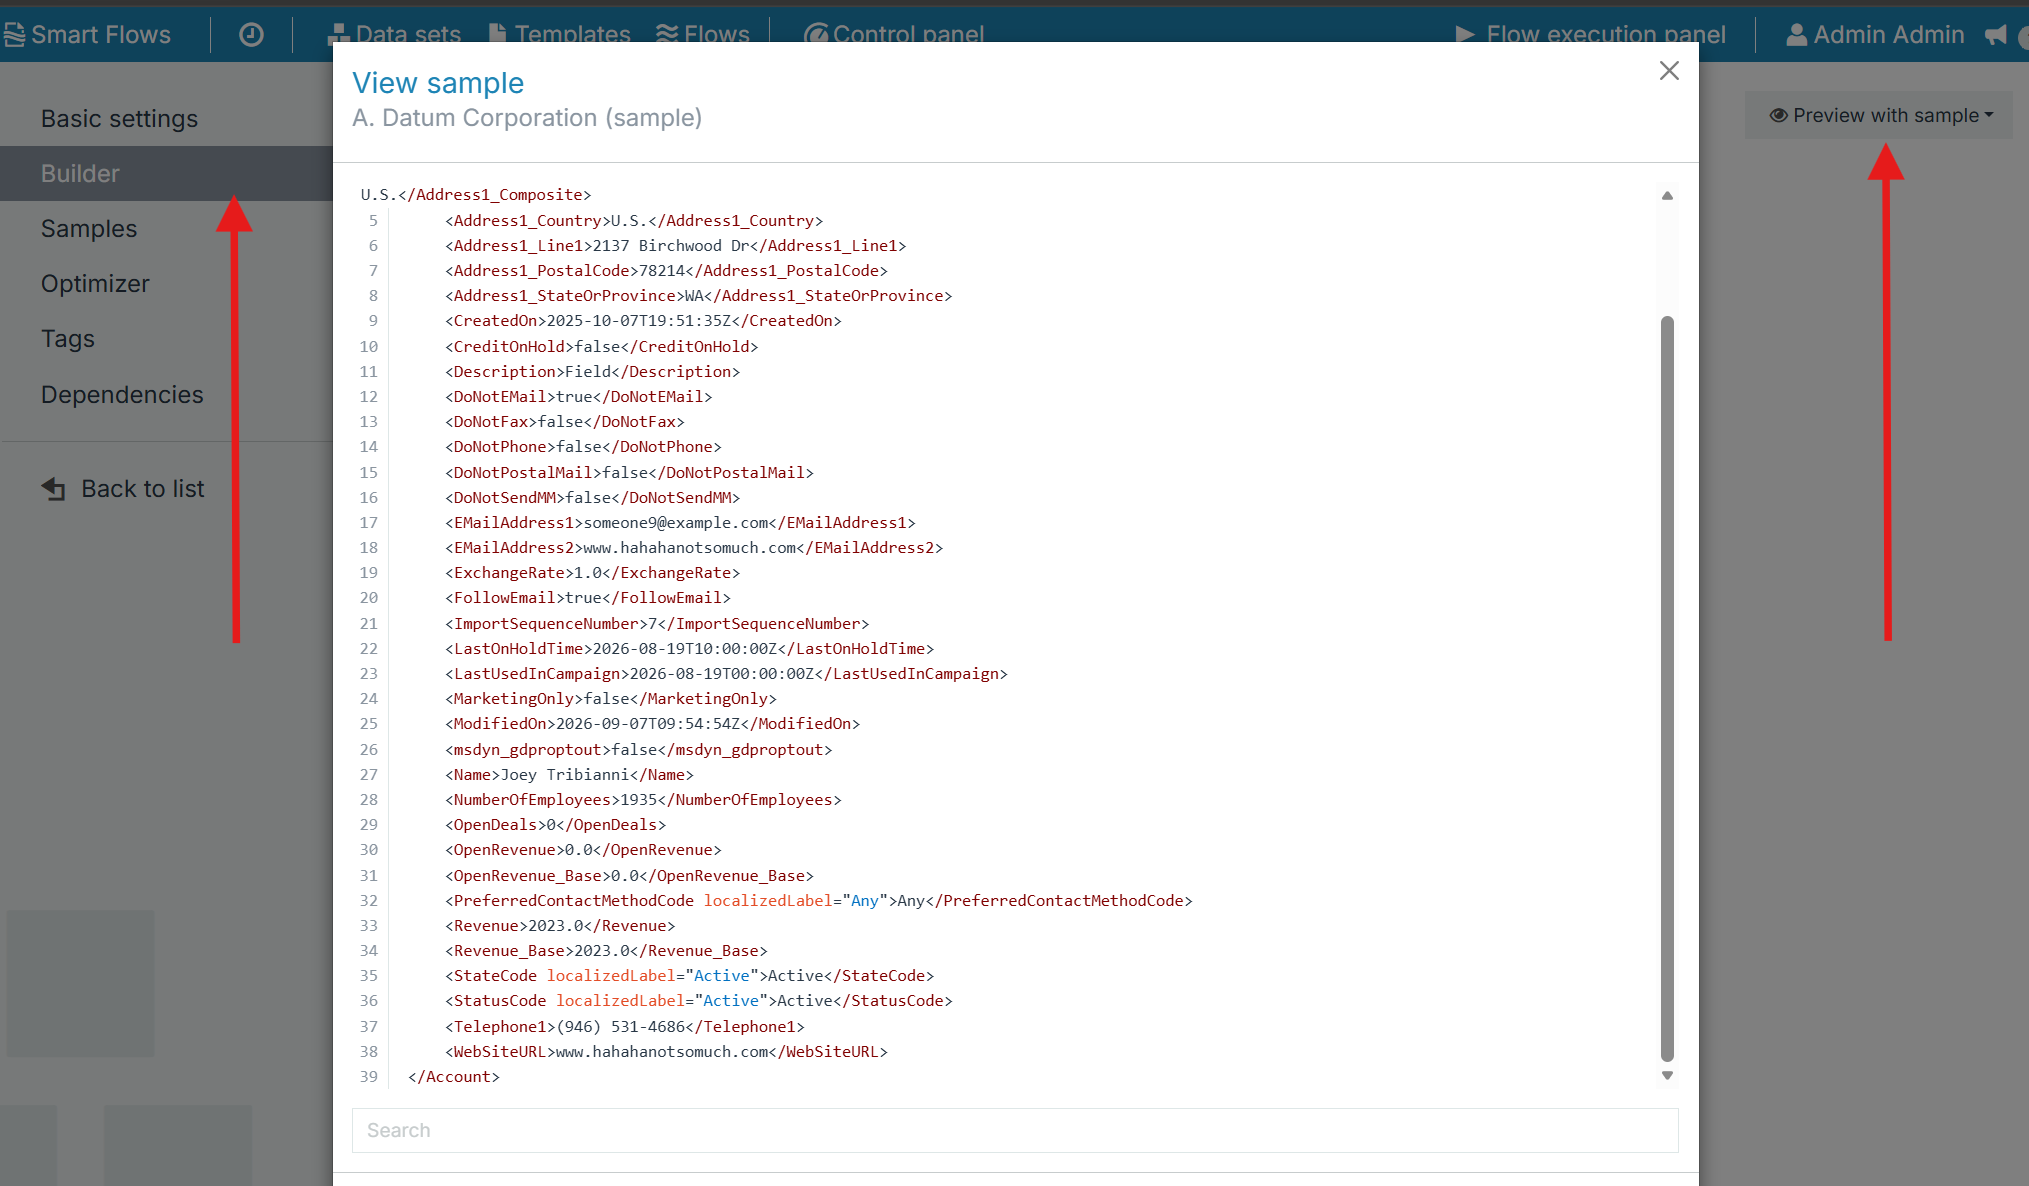
In the upper-right corner of the Builder tab, select Preview with sample.
-
Select a sample. The View sample window displays the data of the sample, based on the fields and relations currently selected in the Builder, including changes that are not saved yet.
Adding a Sample from the Builder
-
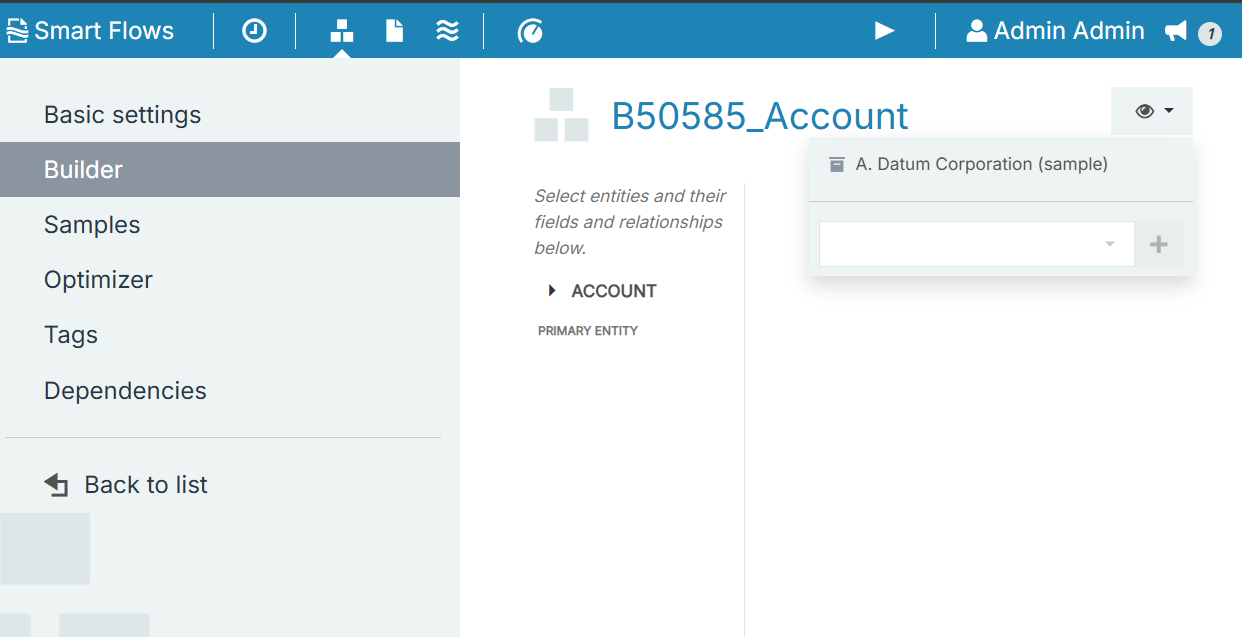
Select Preview with sample, and then select Add.
-
Type to search for a record and select it.
-
Select the + icon next to the field. A record sample is created with the name of the record.
For Experlogix CPQ data sets, Add opens the Create sample dialog.