
Understand what data sets are, how they are structured, and the tools available for working with them in Project Console.
Data Sets
To be added
Data Sets Tab Overview
The Flows tab provides access to a list of your project’s connected data sets and allows Admins and Designers to configure and manipulate their data sets. You can also optimize your data sets in this tab as well as check your dependencies. The topics below provide an overview of the Data sets tab in the Project Console of Smart Flows.
Data Set structure
Entities
Data sets consist of one or more entities, each with their own fields:
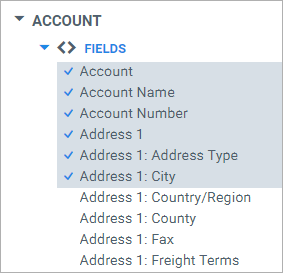
We call them entities here at Experlogix, but you may find other names:
-
Modules (in Sugar)
-
Objects (in Salesforce)
-
Entities (in Dynamics)
-
Tables (in certain database types)
A data set always starts from one entity, which is called the primary entity. The primary entity defines which flows your end users can see when generating documents. In the context of flows, this entity is the primary entity of the flow.
For instance, a flow with Account as the primary entity will only be available for CRM end users when they select an Account record.
Relations
You can include other entities in your data set by linking them to the primary entity via a relation. There are 3 types of relations:
-
1:N relations
-
N:1 relations
-
N:N relations
In a 1:N relation (one-to-many), one entity is linked to one or more instances of another entity. For instance: 1 Account with 4 Contacts that belong to that account.
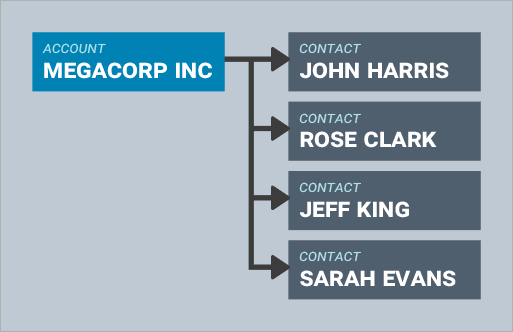
An N:1 relation (many-to-one) is the same, but in the other direction. For instance, starting from Contact and linking to the Account to which it belongs.

Finally, N:N relations (many-to-many) are relations where both entities can link to multiple instances of the other entity. For instance: 1 Quote with 3 Products, and 1 Product that is used in 4 Quotes.
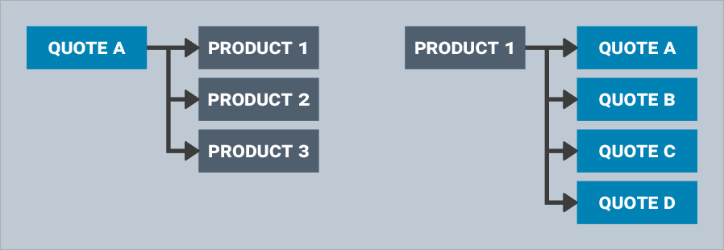
These relations are almost always broken down into 1:N and N:1 via an in-between entity, such as QuoteProduct. So you can select them in 2 steps: link to the in-between entity via 1:N, then to the other entity via N:1.

Using the Data Set Builder
The data set builder is where you choose which fields and relations to include in your data set. It consists of 2 columns:
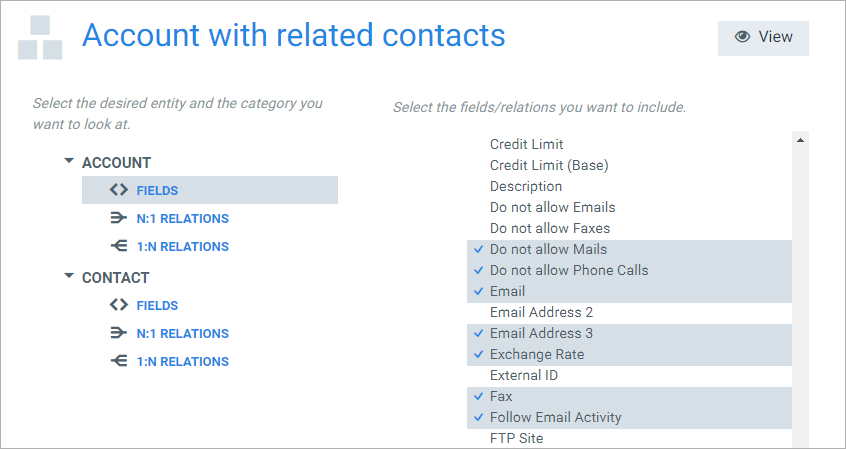
On the left, you select the entity and whether you want to look at its fields, 1:N relations or N:1 relations. Then, on the right, you choose which fields or relations to include.
Fields
By default, every field of an entity is included:
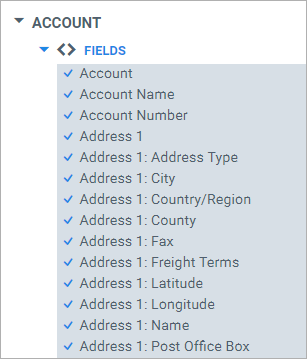
To include/exclude a field, simply select on it. If you want to (de)select all fields, select the (de)select all button in the top right:
Field names
Most CRM systems provide both schema and display names for their fields. It can be easier to find the field you're looking for when you switch the name view.
Advanced fields
Standard data sets have a button named Show advanced fields. Toggling it shows either the advanced or the regular fields.
Advanced fields are all deselected by default, because Smart Flows cannot guarantee that these will work - use them at your own risk.
Relations
To add a relation from one entity to another, select 1:N relation or N:1 relation on the left, and select the desired relation on the right:
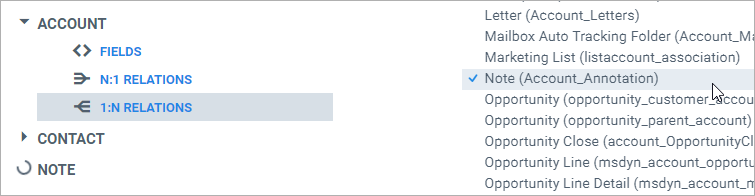
A new entity (if it's not already included in your data set) will be added to the list on the left. You can then select that entity to edit its fields and relations. To remove the relation, select it again.
Note on N:1 relations
Take care when adding a N:1 relation. There's a difference between these two:
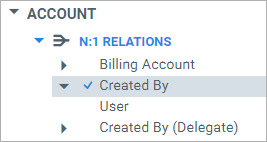
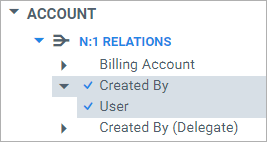
The first screenshot does not include a relation; it only shows a field (Created By), which would give you the user's ID. This can be useful if you don't need all the User's information, but just the ID (or you need this to be an entity reference in CRM). However, if you want the relation, select User, like in the second screenshot.
Data Set Optimizer Tab
The Data set Optimizer tab allows Administrators to optimize their data sets by removing any unused fields in their project. The Optimizer tab has a different appearance depending on whether you’ve already analyzed or optimized your selected data set.
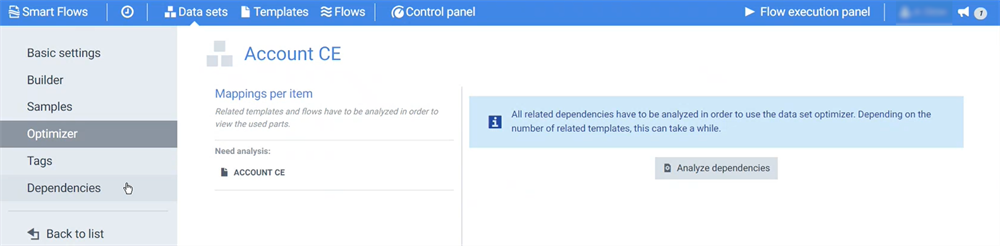
Before analyze dependencies view
The first time you open a data set in the Optimize tab, the Analyze dependencies button is on the right. The Analyze dependencies button triggers the system to review your project dependencies and compile all project templates.
After analyze dependencies view
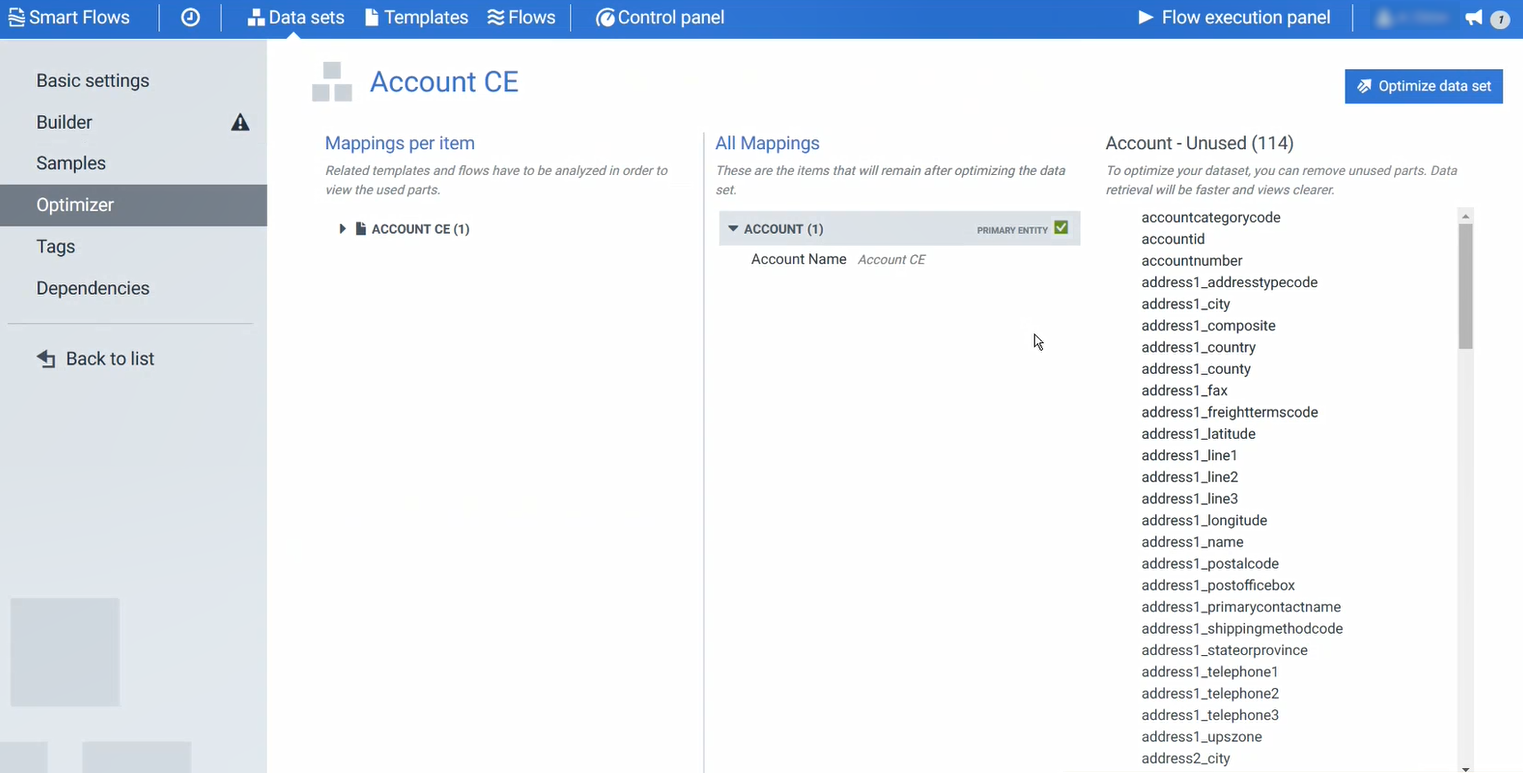
After pressing the Analyze dependencies button, the system updates to provide a view of the mapped and unused data. The data set is ready for optimization via the Optimize data set button.
|
Interface name |
Description |
|---|---|
|
Mapping per item |
This provides an overview of your project's items linked to the selected data set and all in-use fields. The fields are listed based on their dependencies, whether from a flow or a template. |
|
All mappings |
Provides a list of the in-use fields. After you optimize your data set, the fields in this list will remain. |
|
Mapping- Unused(#) |
Provides a list of all unused fields in your data set, which you can remove via the Optimize data set process. |
|
Optimize data set button |
When clicked, activates the data set optimization process and opens the Optimize data set dialog. |
Optimize data set
The Optimize data set window populates with information on the Optimizer tab. Users can immediately optimize their data set based on what is auto-populated or modify the optimization manually.
The Optimize data set modal warns you if you attempt to remove a mapped field from your project. You can also use the Optimize data set modal to attempt to add missing fields to your data set.
After optimize data sets view
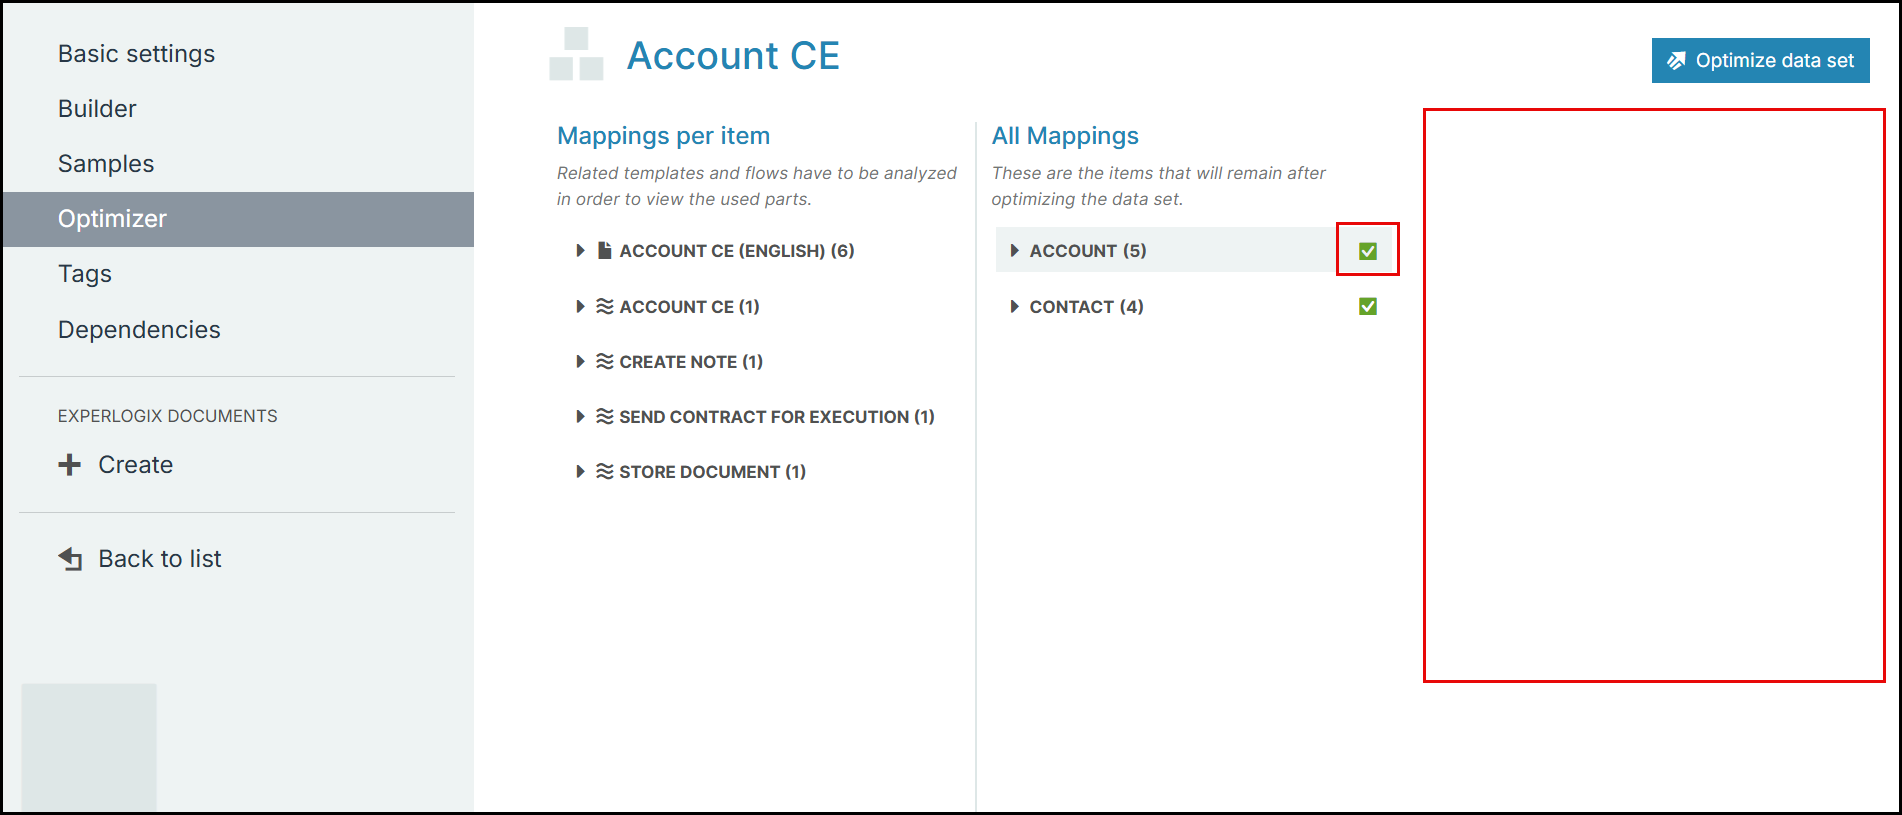
After completing the Optimize data set modal, the primary entity displays a green check mark next to it.
Data Set Optimization
Data set optimization involves letting Smart Flows analyze and remove any unused fields in the project. Removing these unused fields results in faster project performance by eliminating unnecessary content during data retrieval for previews and during flow execution if the field reducer disabled.
You can view the improvement in the project performance before and after optimization by reviewing the analytics data in the Advanced Tab.
-
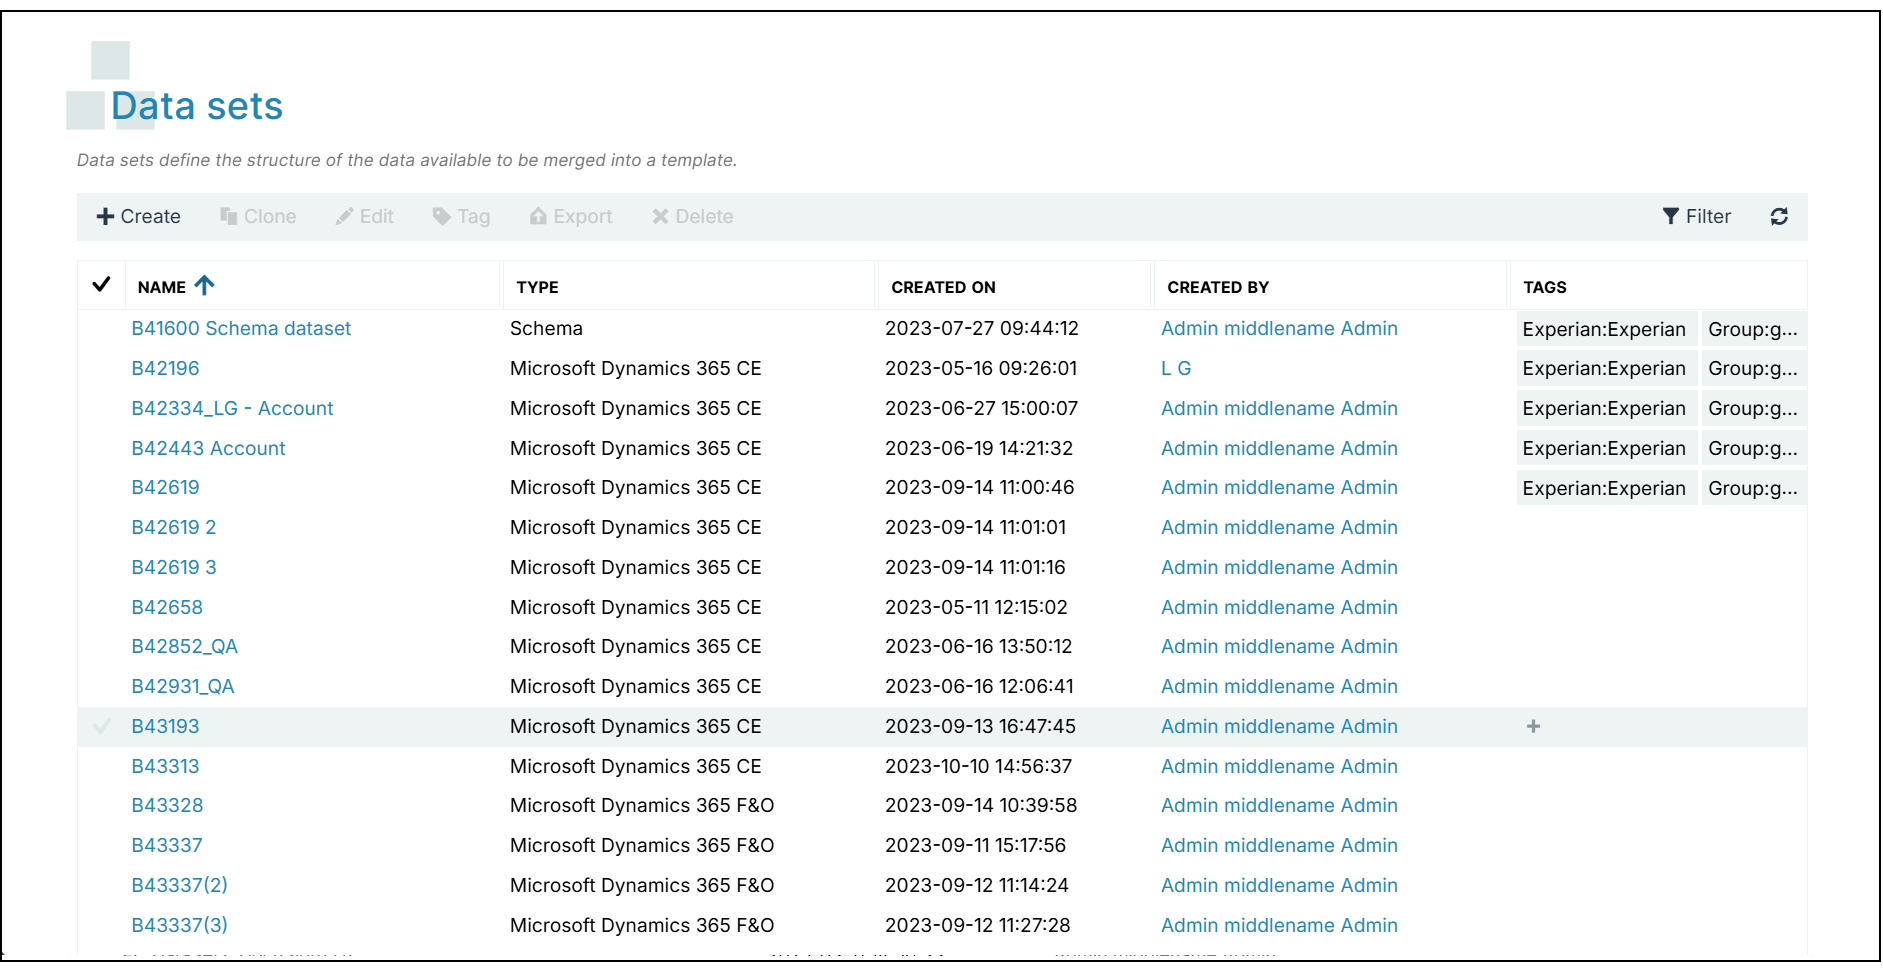
In the Project Console, navigate to Data sets and select a Data set.
-
Select Optimizer.
-
Select Analyze dependencies.
Before optimizing your data set, analyze the dependencies to identify the unused fields.
The analysis process may take a couple of minutes, depending on the size of the data set and how many flows and templates are mapped to the data set.
-
Select Optimize data set.
-
Select Optimize. Before optimizing your data set, you must analyze the dependencies to identify the unused fields.
The page refreshes, and the Mapping- Unsued (#) section no longer displays. The check mark next to PRIMARY ENTITY is displayed in the color green indicating the data set is now optimized.
Create a Condition on a Filtered 1:N Relationship
In a 1:N relation (one-to-many), a Primary entity links to one or more instances of another entity. However, by adding a filter to the 1:N relationship, users can benefit from using all of the data within the data set yet also reduce the total processing time. Once a filter is added, a condition can be set to define when the filter applies.
Conditions display underneath the PRIMARY ENTITY in the Data Set Builder. However, the Filtered 1:N relations row only displays if a filtered relation already exists for the selected primary entity. Designers can toggle conditions ON/OFF to control whether they display when creating templates and additional conditions.
Filtered relations can be cloned to save time.
Add a Filter
-
Create a Data Set.
-
Select Data sets from the Home page.
-
Select a Data Set to filter from the available options.
-
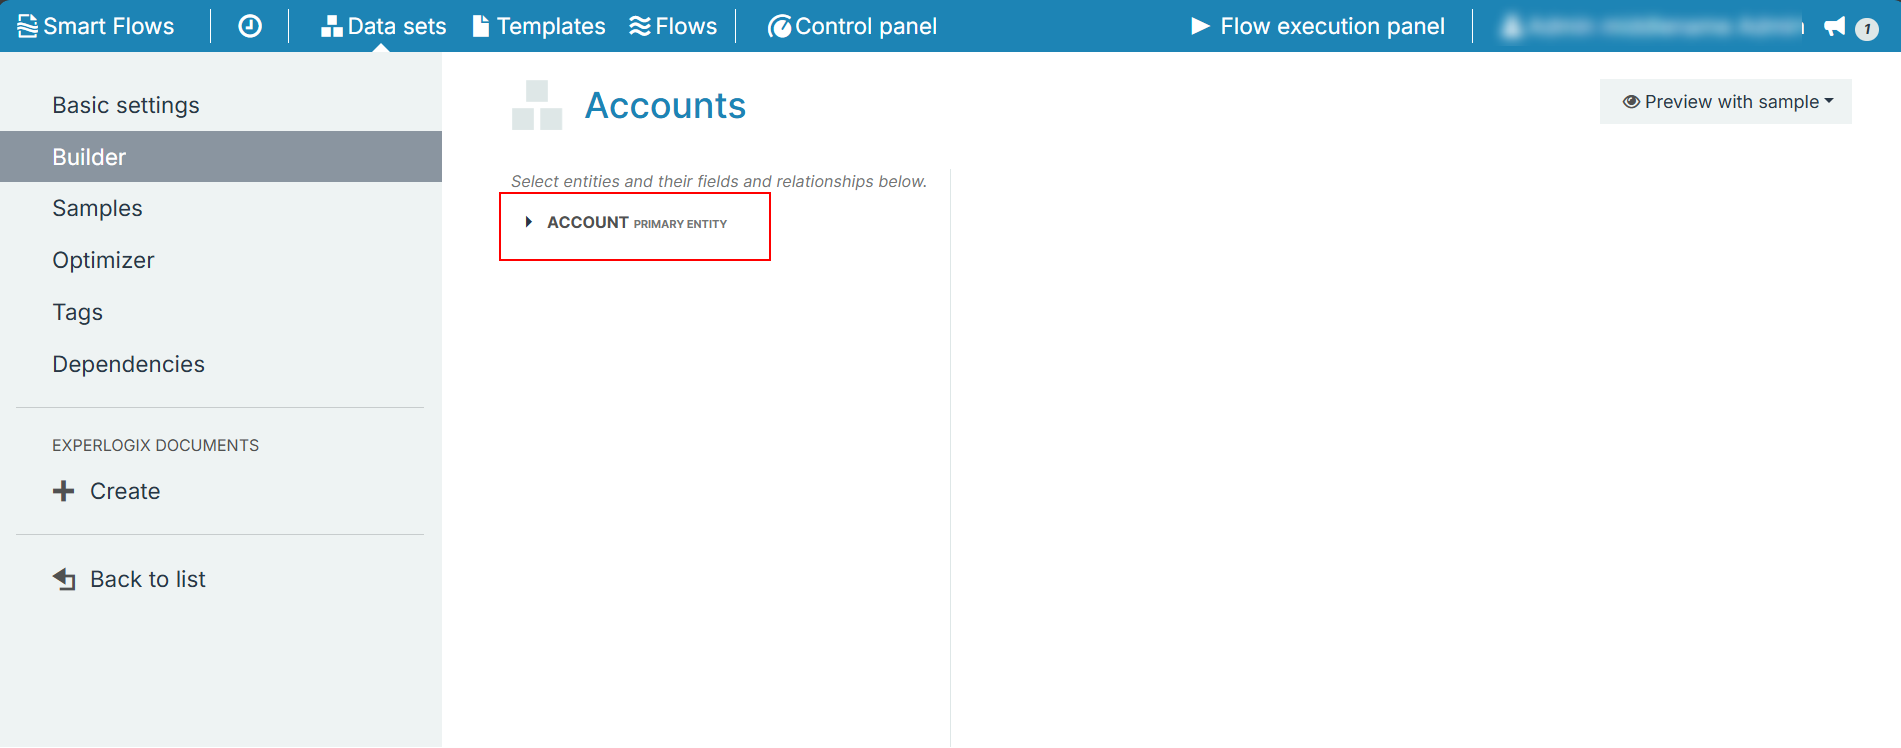
In the Data Set Builder, select the PRIMARY ENTITY button.
The dropdown menu displays.
Configure the Filter
-
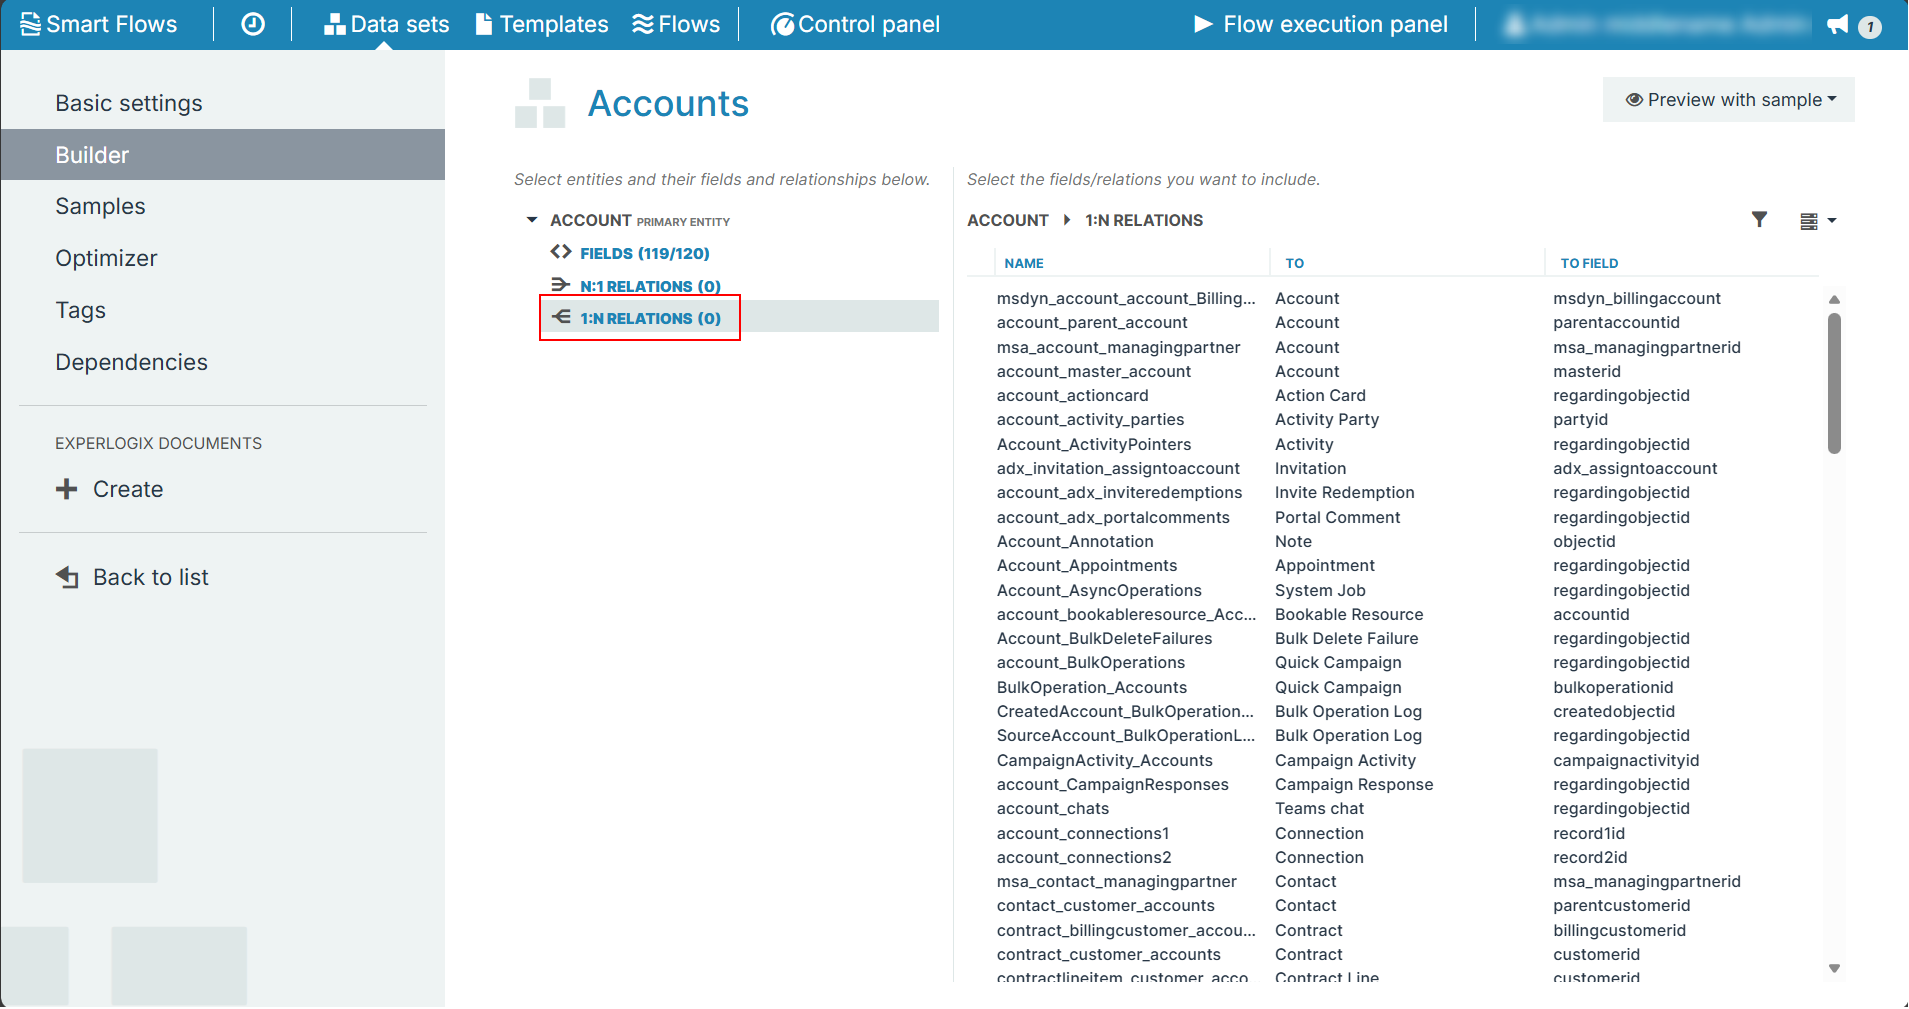
Select the 1:N RELATIONS button.
-
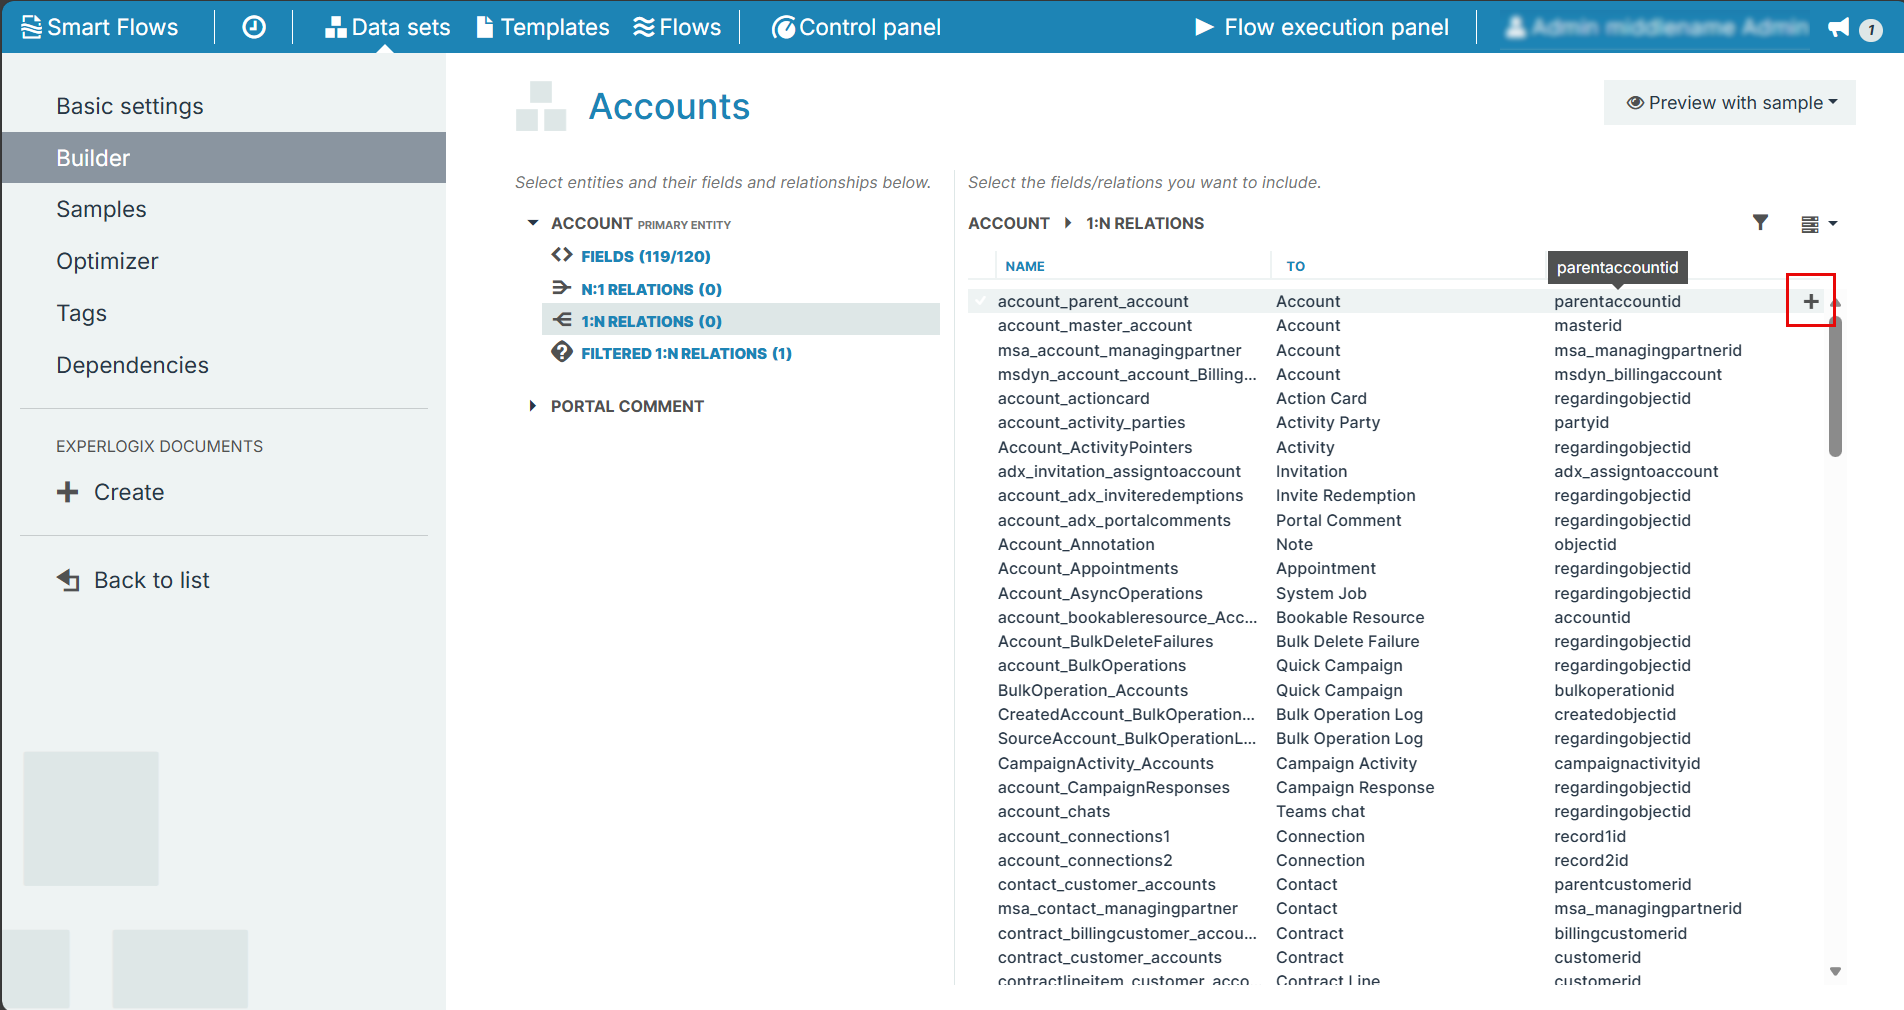
Hover the mouse over the 1:N relation row.
A plus mark(+) displays.
-
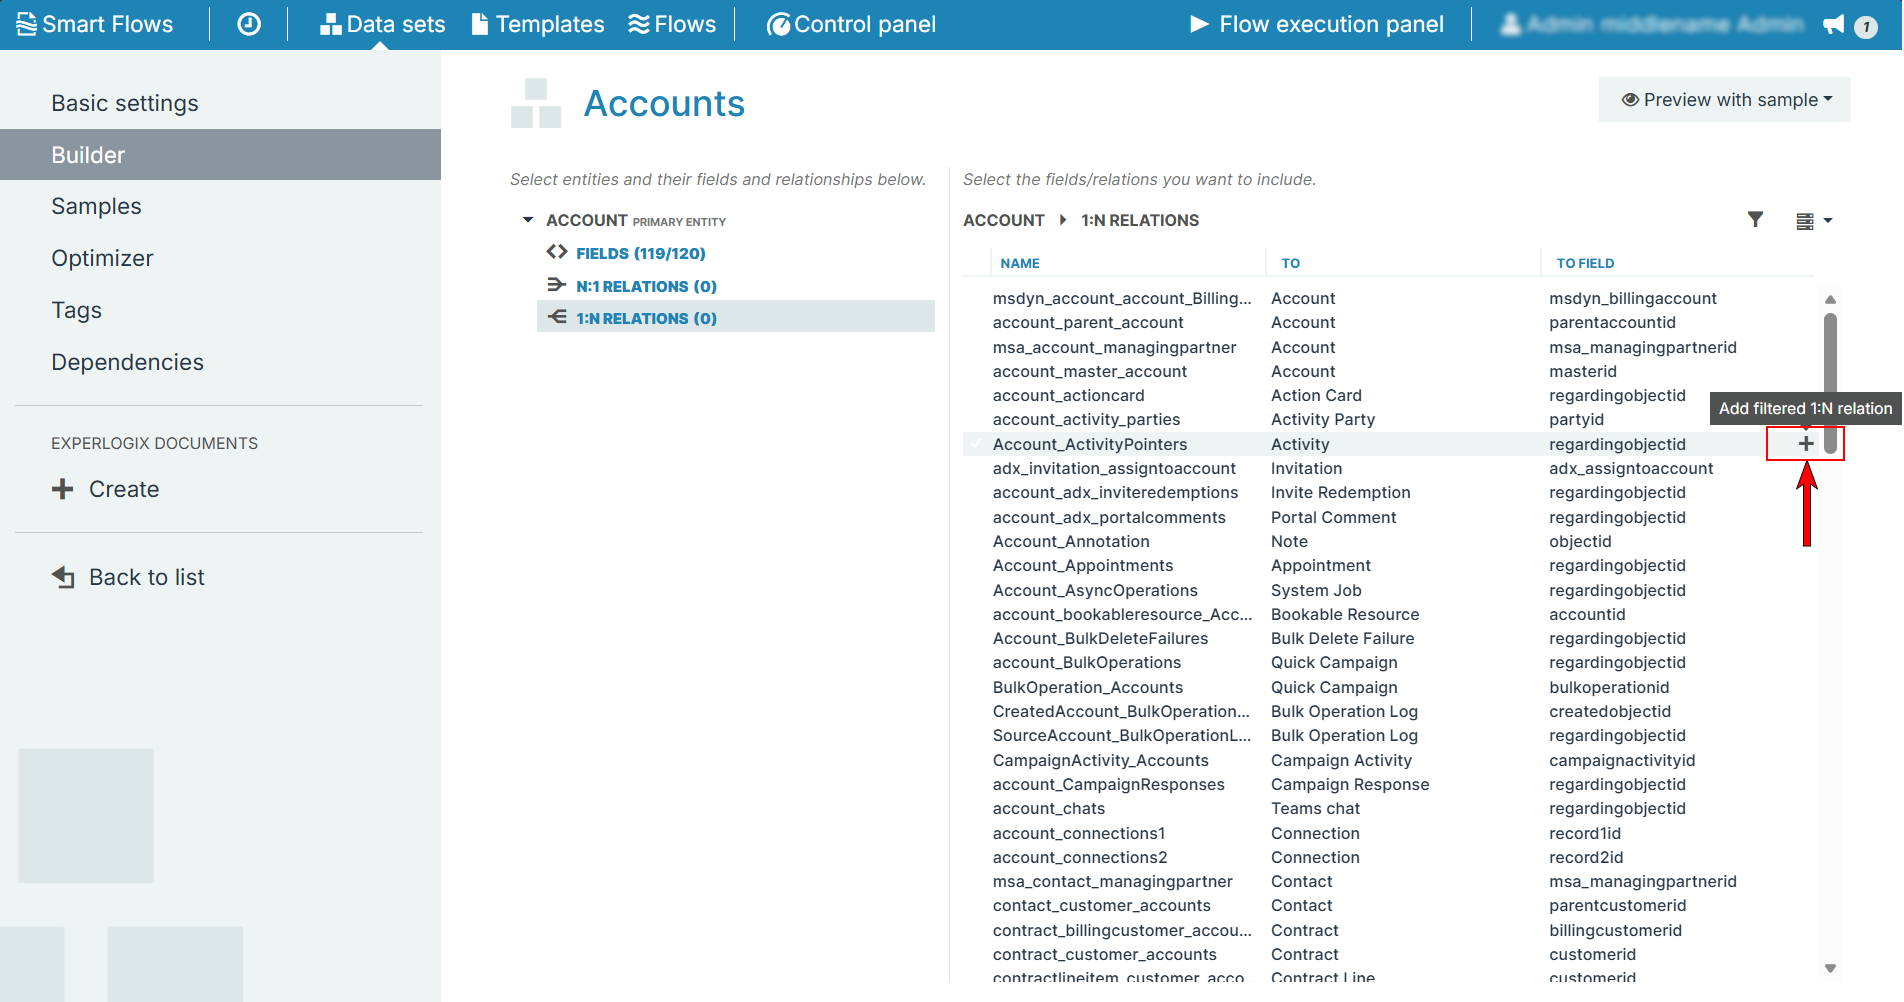
Select the plus mark(+).
The Add filtered 1:N relationship window displays.
-
In the Name field, type in the name for your new 1:N relation.
-
In the System Name field, copy and paste the Name field entry.
-
Select the Confirm button.
The 1:N relation window no longer displays. A new row displays under the primary entity titled filtered 1:N relations.
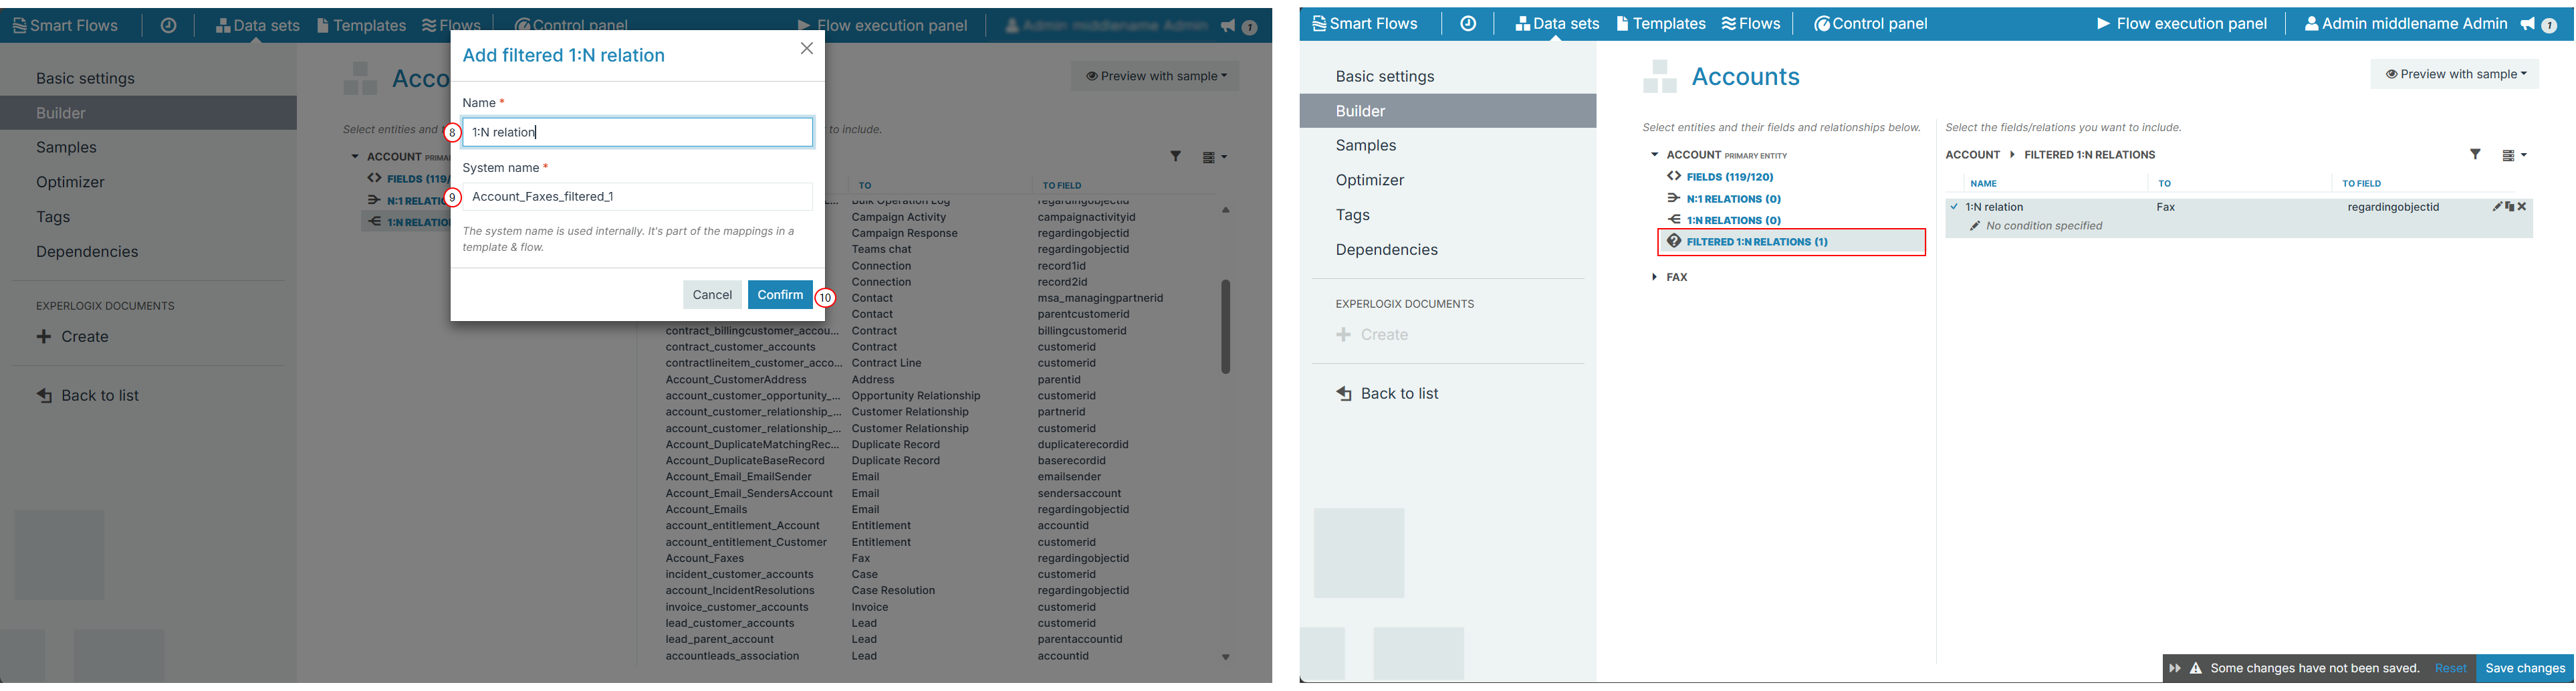
-
Next to the 1:N relation, select the pencil icon to edit the condition.The Condition window displays.
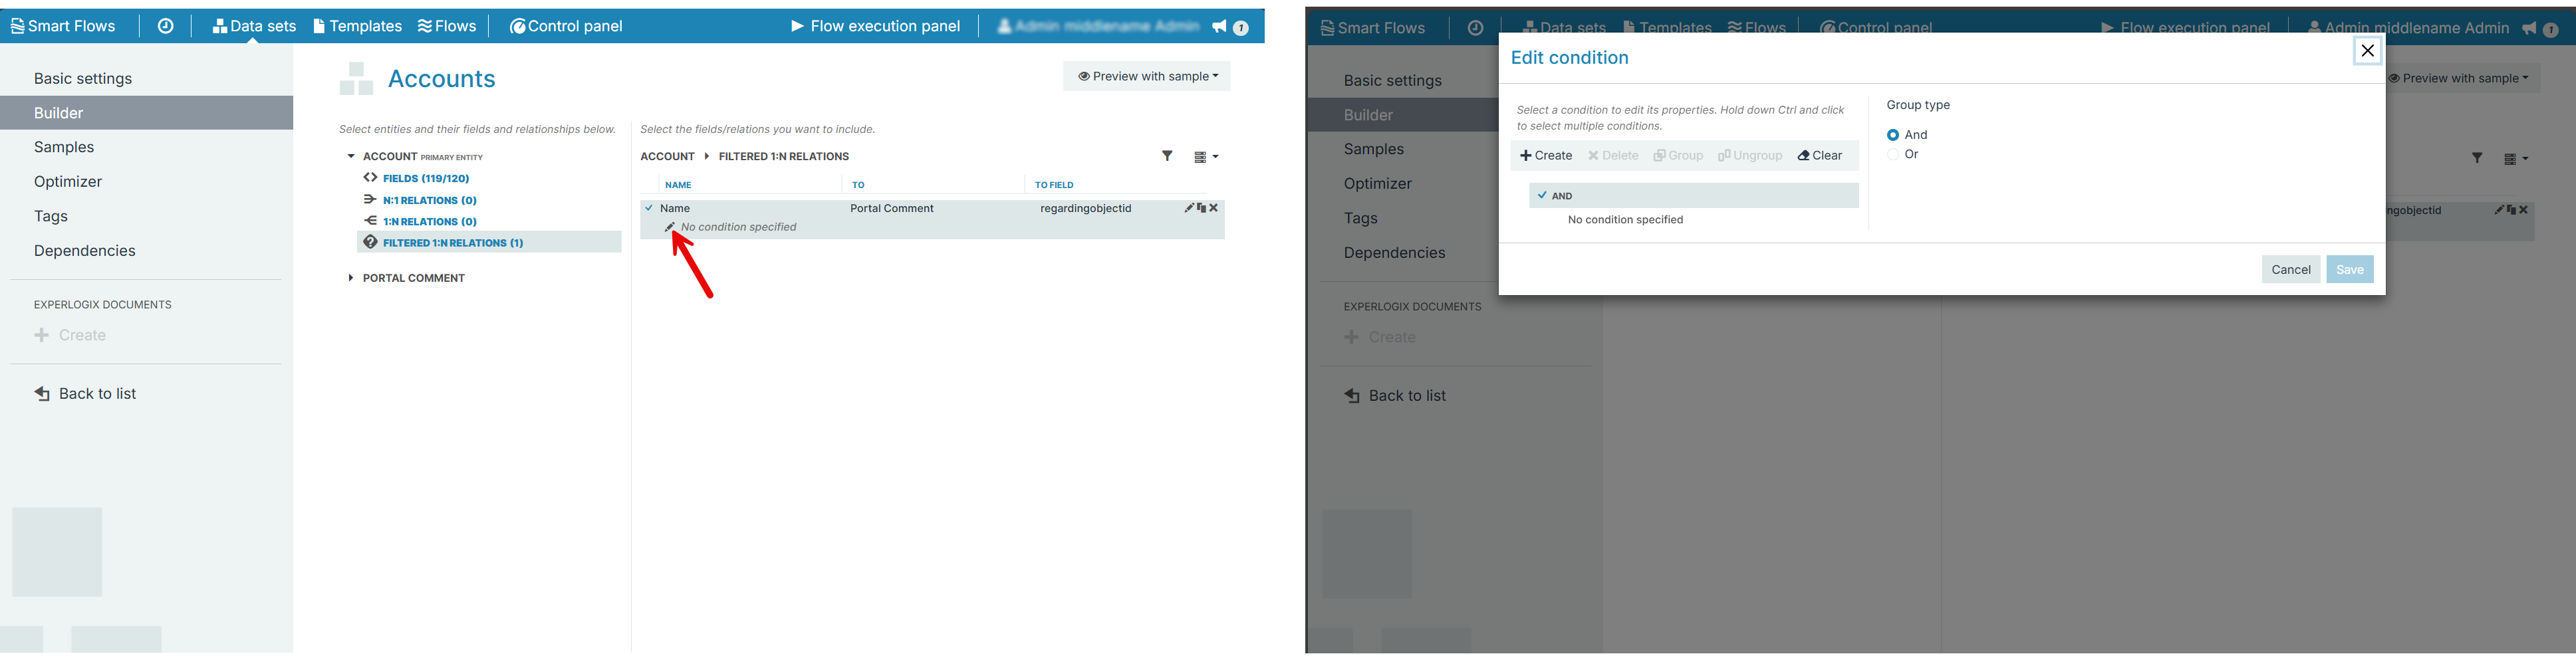
-
Select the Create button to create a new condition.
When creating a condition, you can test your data set and filtered relations by using the "Preview Sample" dropdown in the upper right corner. The data set does not have to be saved, it can be used in the preview stage.
Create a Condition
-
Input the condition criteria.
a. In the Description field, type a description for the condition, such as 'when to use the condition'.
The ‘Search by field of related entity’ is only available in Microsoft Dynamics 365 CE environments.
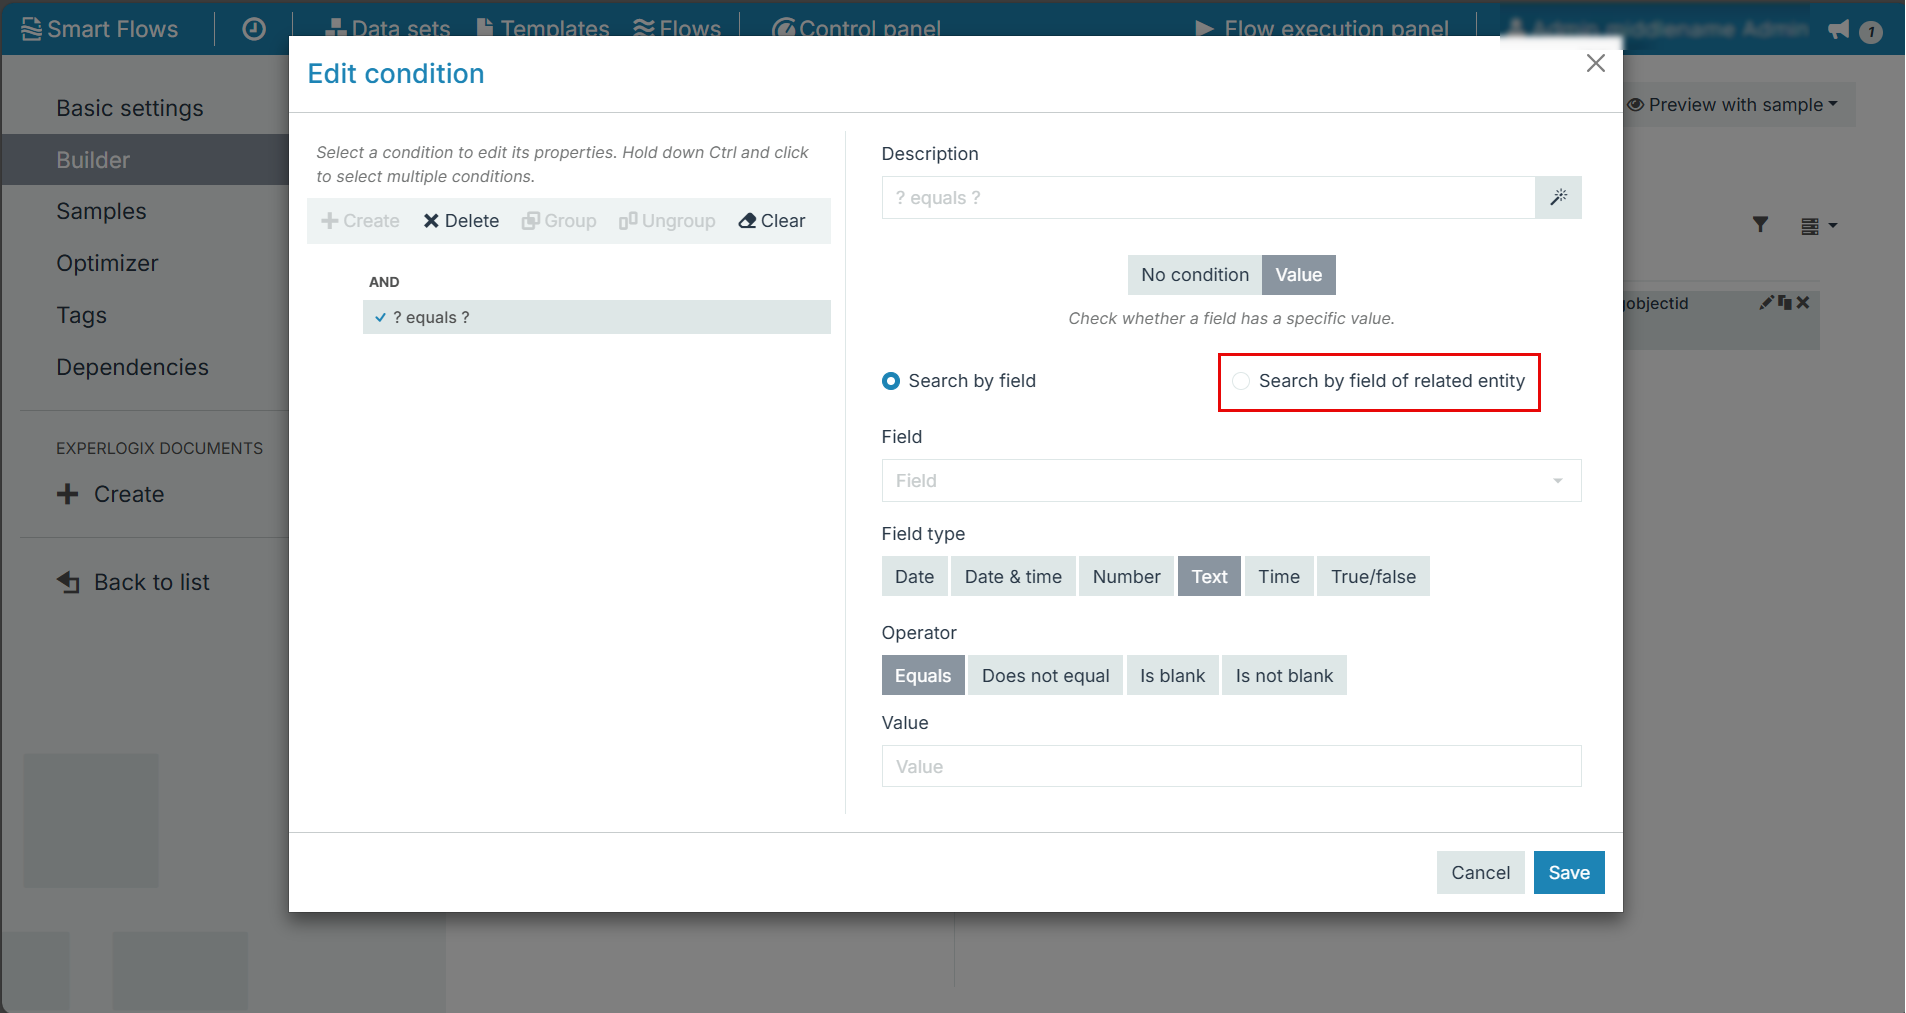
b. In the Field, select the field to filter.
c. In the Field type field, select the type of field.
d. In the Operator field, select the operation to perform data filtering.
e. In the Value field, select the value to filter.
f. Select the Save button.
The Edit condition window no longer displays.
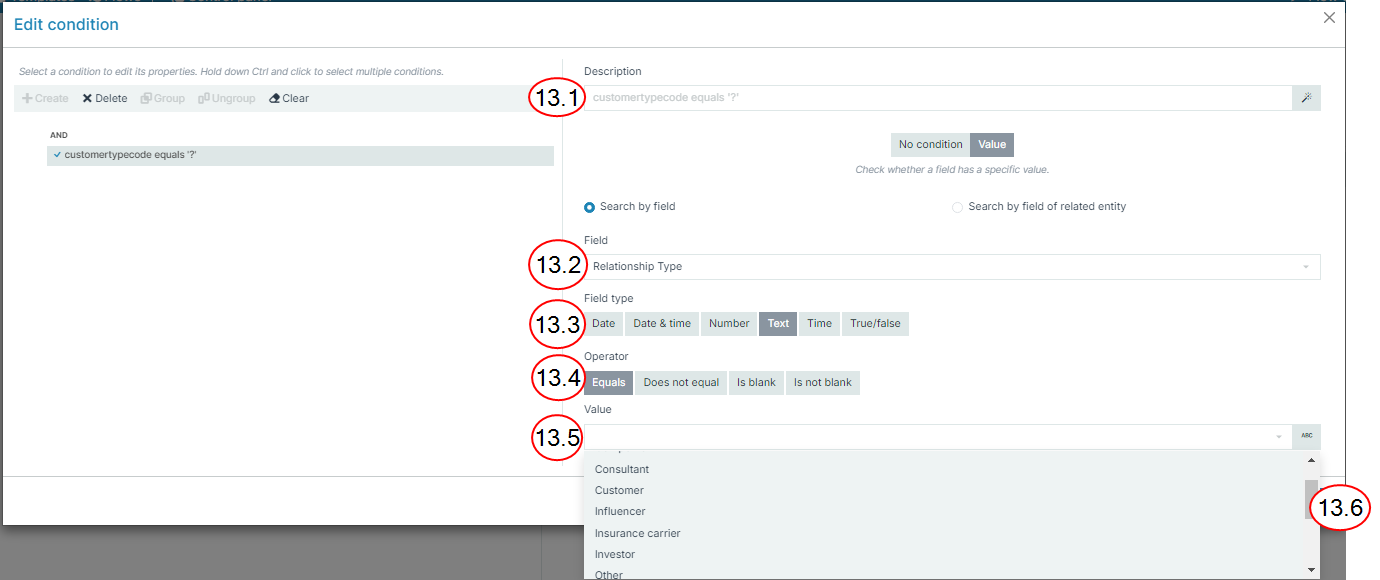
-
Save the changes.
The filtered relation is now available for use within templates and flows in the same manner as other relations.