
Tasks for creating and configuring data sets in Project Console. (intro to be documented)
Creating a Data Set
A data set is a collection of related information that can be used in templates and flows. A data set defines the fields you can use in your flows and map in your templates. This page describes the steps for creating a generic data set.
You can also access the Data sets section by clicking on the Data sets tab in the Navigation Bar.
-
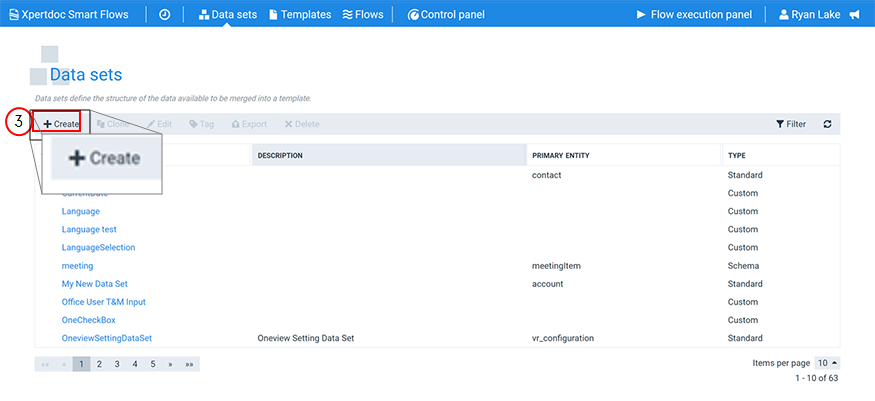
In the Project Console, select Data sets > + Create.
-
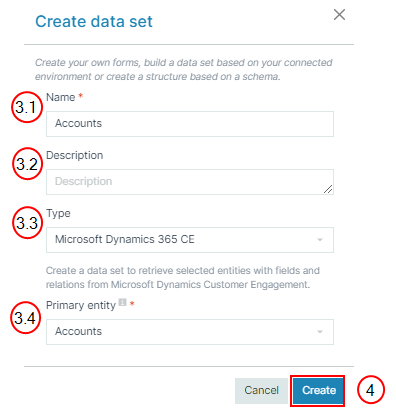
Create the data set.
-
In the Name field, input the name of the data set.
-
(Optional) In the Description field, input a description for the data set.
Decision Point
Standard and Custom data sets can be edited using the Data set builder. Fora Schema data set, you must upload an XML Schema Definition (XSD) file.
-
In the Type dropdown menu, select your desired type of data set.
-
In the Primary entity dropdown menu, select the primary entity of the data set.
The primary entity of a data set is the root element of your data set. You can add related entities in the data set builder. Associated flows will be available for records of the primary entity type.
-
Select Create.
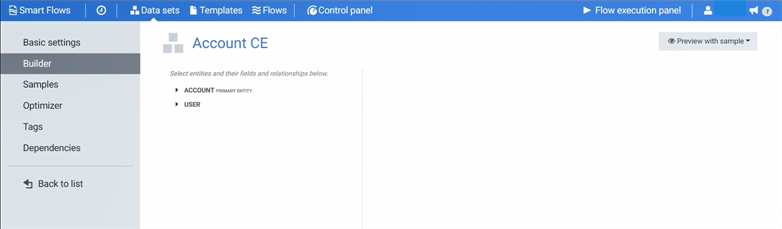
The List view refreshes to display your new data set. You are redirected to the Data Sets builder that allows you to choose the fields and relations you want to include in your data set.
Creating a custom data set
Custom data sets allow you to set the type, name and values of for fields in the data set. This can be used to define or expand features within Smart Flows such as improving Docusign functionality or adding questions for the Get user inputflow block.
-
Log in to your project's Flow Execution Panel > Data sets > +Create.
-
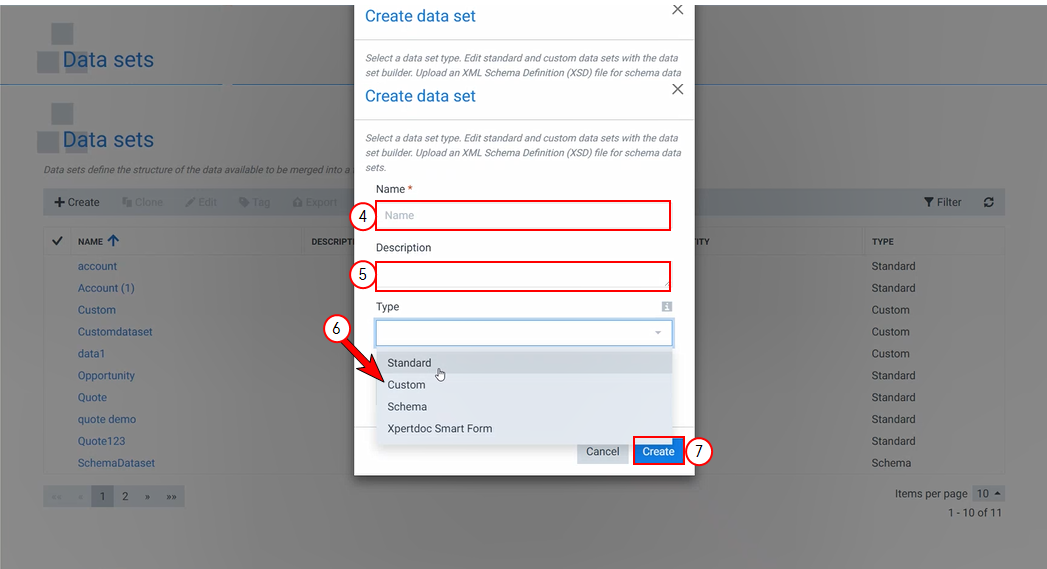
In the Name field, input descriptive name for your data set standard fields.
-
In the Description field, input a description that describes what fields or information is contained in the data set.
-
In the Type dropdown menu, select Custom.
-
Select Create.
Adding fields to a custom data set
-
Select +Create.
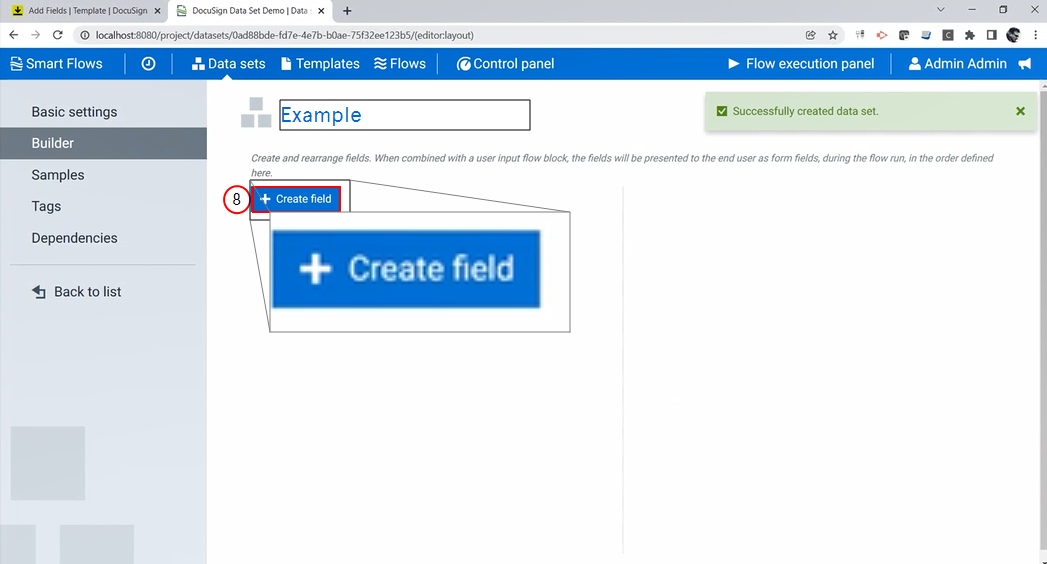
Note: If your using the customer data set for a Get user input function, use the question to ask as the name of the field.
-
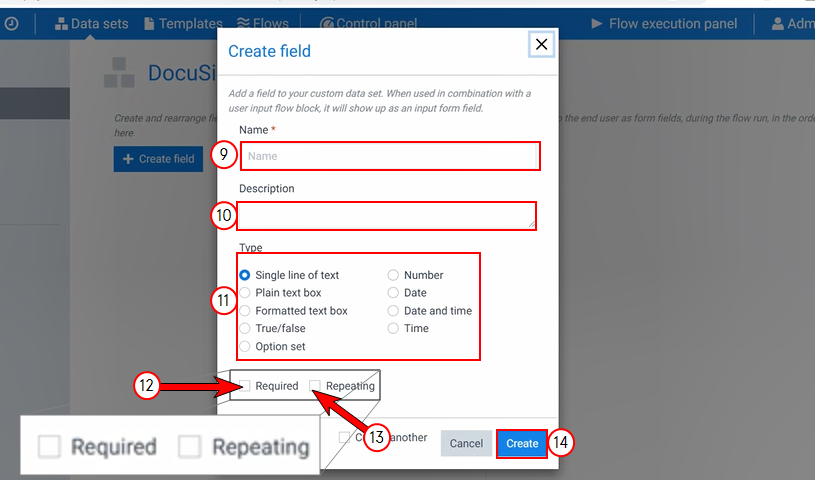
In the Name field, input the name of the field.
-
(Optional) In the Description field, input a helpful guide on what your users should use this field for or what data should be linked to it.
-
Select the field type to add by clicking the bubble next it to it.
-
(Optional) Select whether the field is a required.
-
(Optional) Select whether the field should be repeating.
-
Select Create.
-
Repeat for any additional fields you wish to add.