
Creating an Experlogix CPQ (Preview) connector enables you to integrate Experlogix CPQ with other enterprise applications, such as Microsoft Dynamics 365 BC, allowing you to leverage that data both in Smart Flows and CPQ.
This guide provides step-by-step instructions for setting up the connector within Project Console, including inputting key details and assigning a primary entity. Following these steps, you can streamline your CPQ workflows by leveraging Experlogix CPQ and Document Automation.
Prerequisites
Experlogix CPQ (Preview) Connector Prerequisites
Before running flows within the Configurator and Flow Execution Panel, ensure that:
-
Process Designer: Your Process Design must be set up and validated to ensure it works as expected.
-
Admin Center Setup: You must have created the following in Admin Center. These serve as the minimum requirements; most use cases will already have users in Admin Center.
-
A project in Admin Center.
-
A team with the name
exp-features-default-site. -
An integration for your CPQ connector data source(e.g Microsoft Dynamics 365 CE, Microsoft Dynamics 365 F&O, Microsoft Dynamics 365 BC, or Salesforce. Your integration is a conduit for passing data between your Configurator and Smart Flows environment.
-
A CPQ type integration in Admin Center to connect to your CPQ instance to in Smart Flows.
-
A Client ID and client secret for your smart-flows-document-automation.
-
The Migration URL from your CPQ Configurator site.
-
-
For Salesforce environments only:
-
You must have your Salesforce connector created in Smart Flows before attempting to create an Experlogix CPQ (Preview) connector. See Salesforce for details on creating and configuring a Salesforce connector in Smart Flows.
-
You must enable Individual User Authentication in your Salesforce connector, and you must enable the "Manage the synchronization of users when they log in" in Settings Project Console.
-
-
User Authentication: The user must have previously logged into Flow Execution Panel to establish a valid session. This guarantees that all flows run under a recognized user identity. You can always validate your expected users via the User List view in Project Console. Without user authentication, flow executions will fail due to an inability to validate the user.
-
Proper Configuration Settings: Your Configuration must already be setup with the correct primary entity (e.g., Quote, Configuration, or specific CPQ configuration type) defined, along with accurate values for record IDs and indices. You must already have one more Configurations in your modeling environment/ Web Configurator.
-
Flow Availability: Relevant flows for document generation must already be created.
To create a new Experlogix CPQ (Preview) Connector, you must have
-
A user that has access to at least one organization in Admin Center.
-
In the organization in Admin Center, you need to have a configured CPQ connection.
-
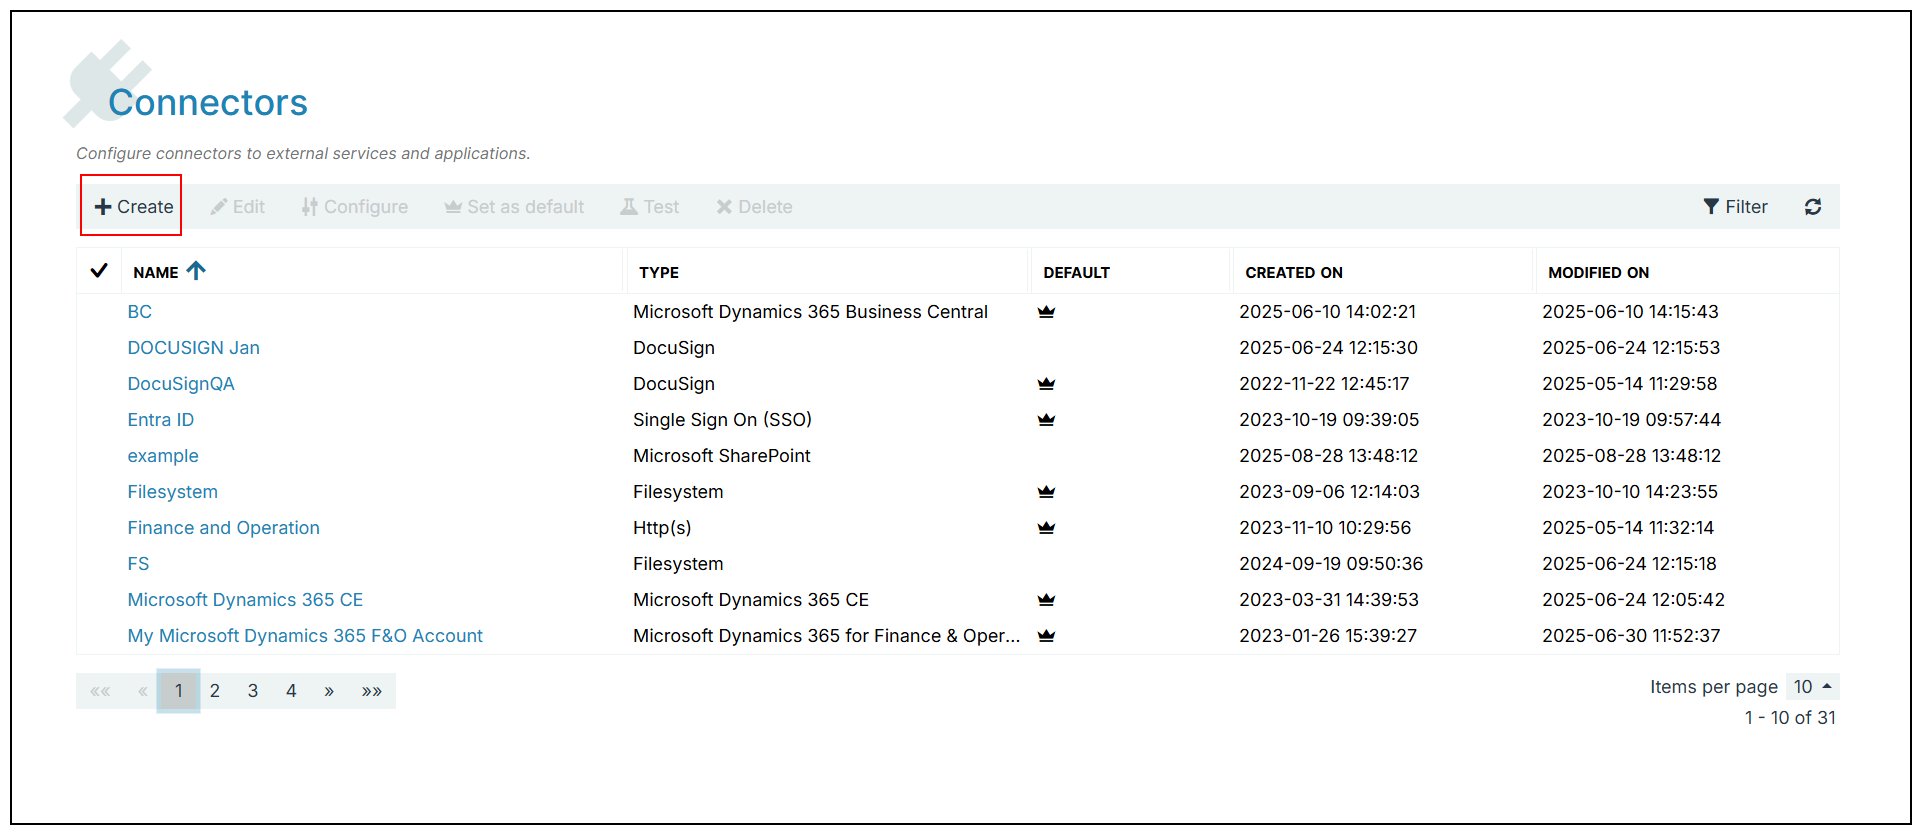
In Project Console, select Control panel > Connectors button > +Create.
-
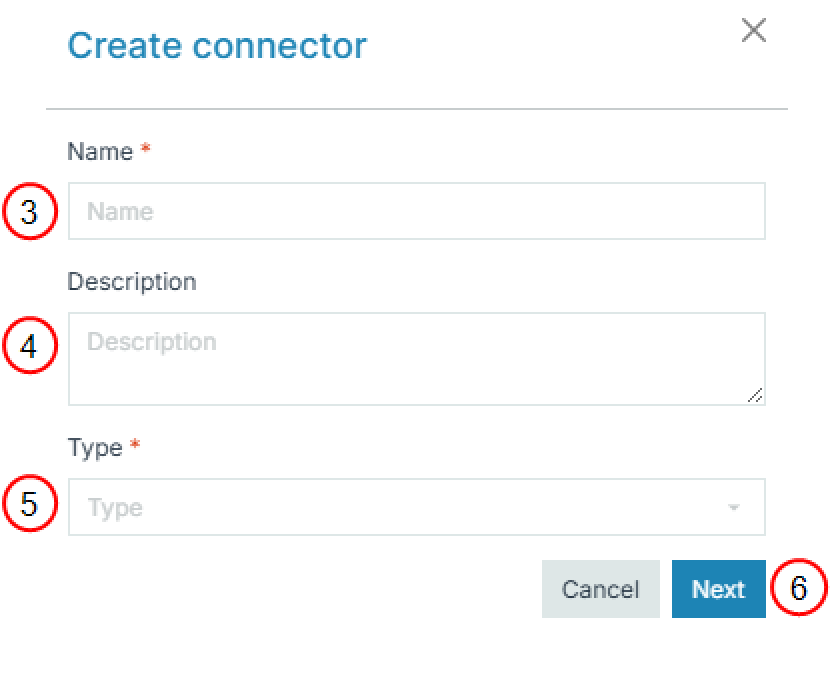
Input the Name of your connector.
-
(Optional) Input a Description for your connector.
-
In the Type dropdown menu, select Experlogix CPQ (Preview).
-
Select the Next button.
-
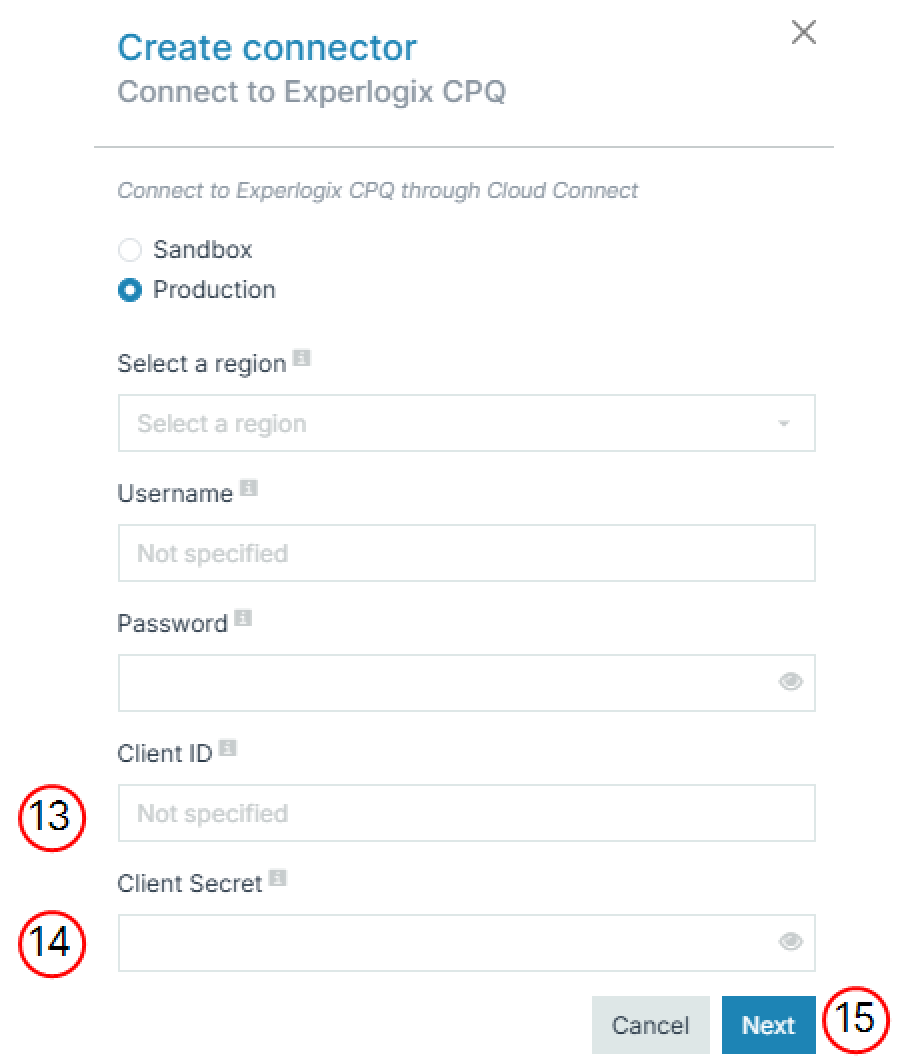
Select Sandbox or Production for your Cloud Connect environment.
If you select Sandbox, the system will dynamically provide the available sandbox environments in the Select a Region.
If you select Production; you'll be presented with different regions such as, APAAC EMEA and NALAM.
-
In the Select a region dropdown, select a region.
-
In the Username field, enter your username.
Your username/user you use for this step must already exist in Admin center with the appropriate permissions to create integrations.
-
In the Password field, enter your password.
-
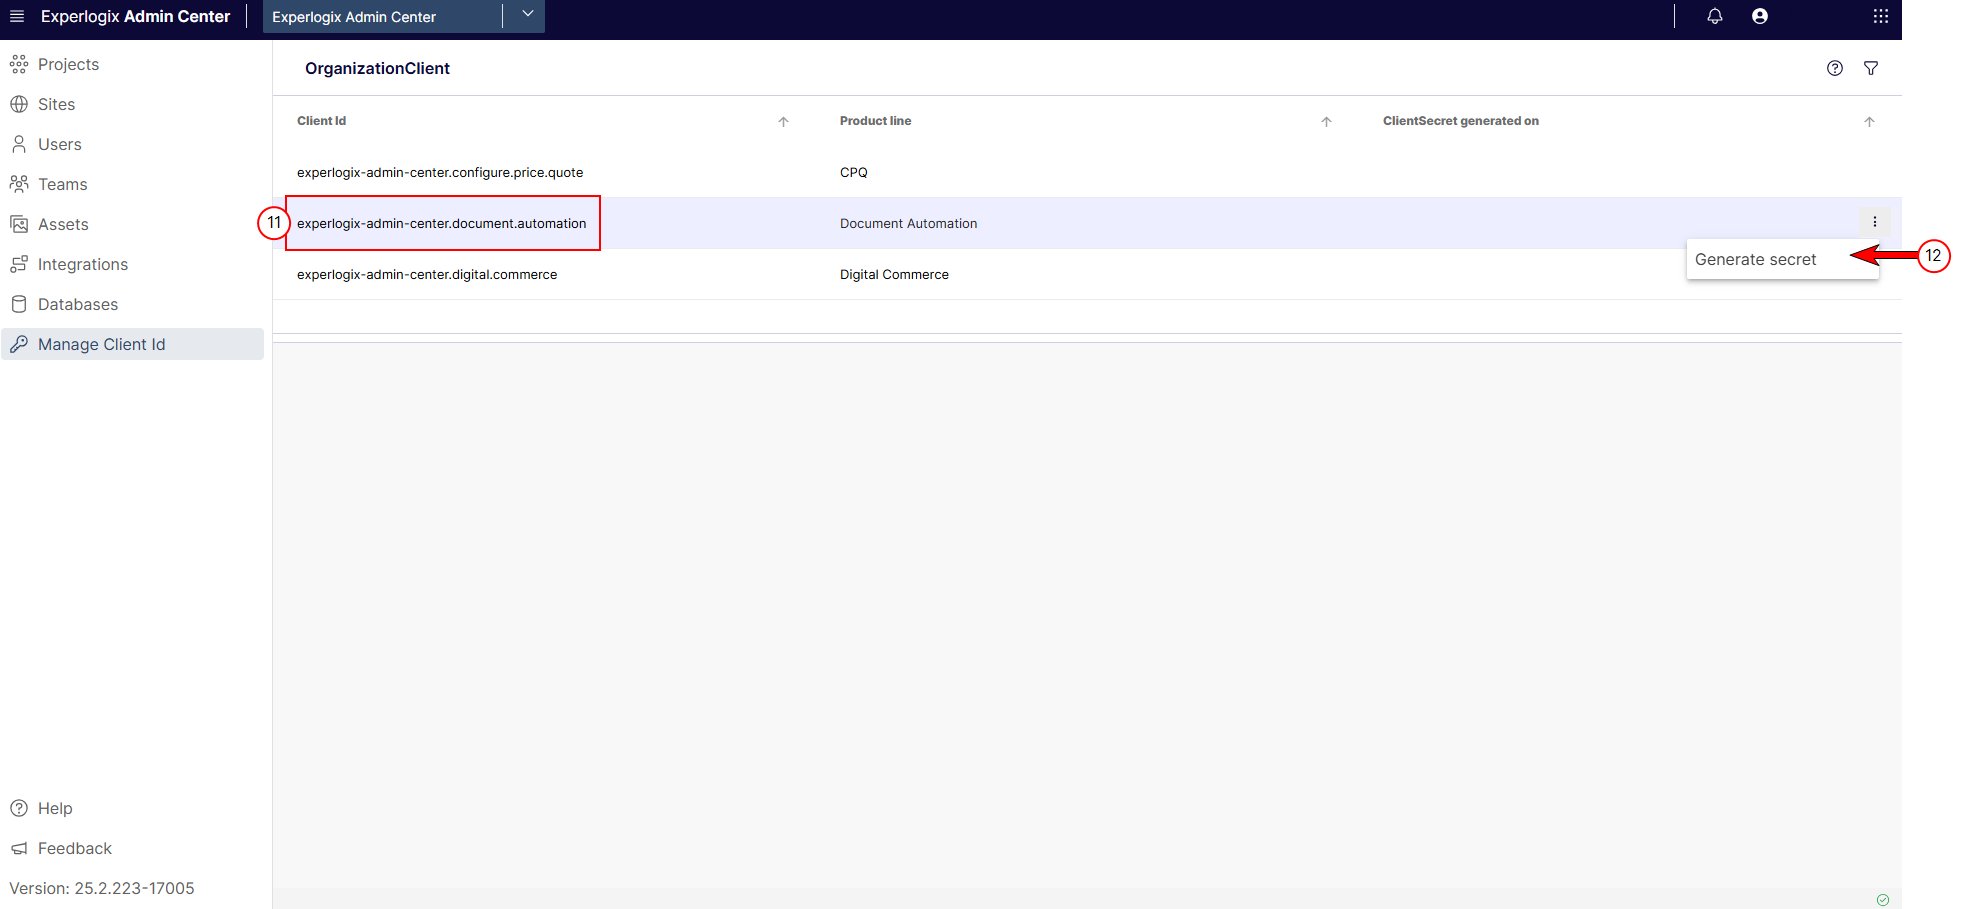
In the Admin Center Manage Client Id page, copy the Client id for your Document Automation Product line and paste to a notepad or similar program.
Naming Schema for Client ID: Organizationname.document.automation
-
Select the ellipsis for your Document Automation Product line and select the Generate secret button.
-
In the Client ID field, enter the Client ID from your Document Automation Product line.
-
In the Client secret field, enter the client secret generated in Step 11.
-
Select Next.
At this point the connector creation experience diverges depending on the number of connections available in Admin Center.
If you only have one Connection ID available on the Integrations page in Admin Center, the connector wizard uses that connection ID. Please skip to Step 17.
If you have more than one connection ID available, please continue to Step 15.
-
In the Organization field, select the organization from Admin Center to use.
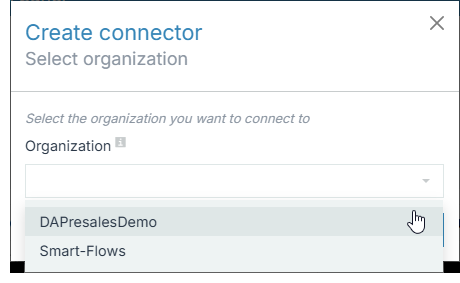
-
Select Next.
If you are unsure which CPQ Integration in Admin Center you want to use for your connector, you can open the Admin Center during the connector creation process to review the available CPQ connections.
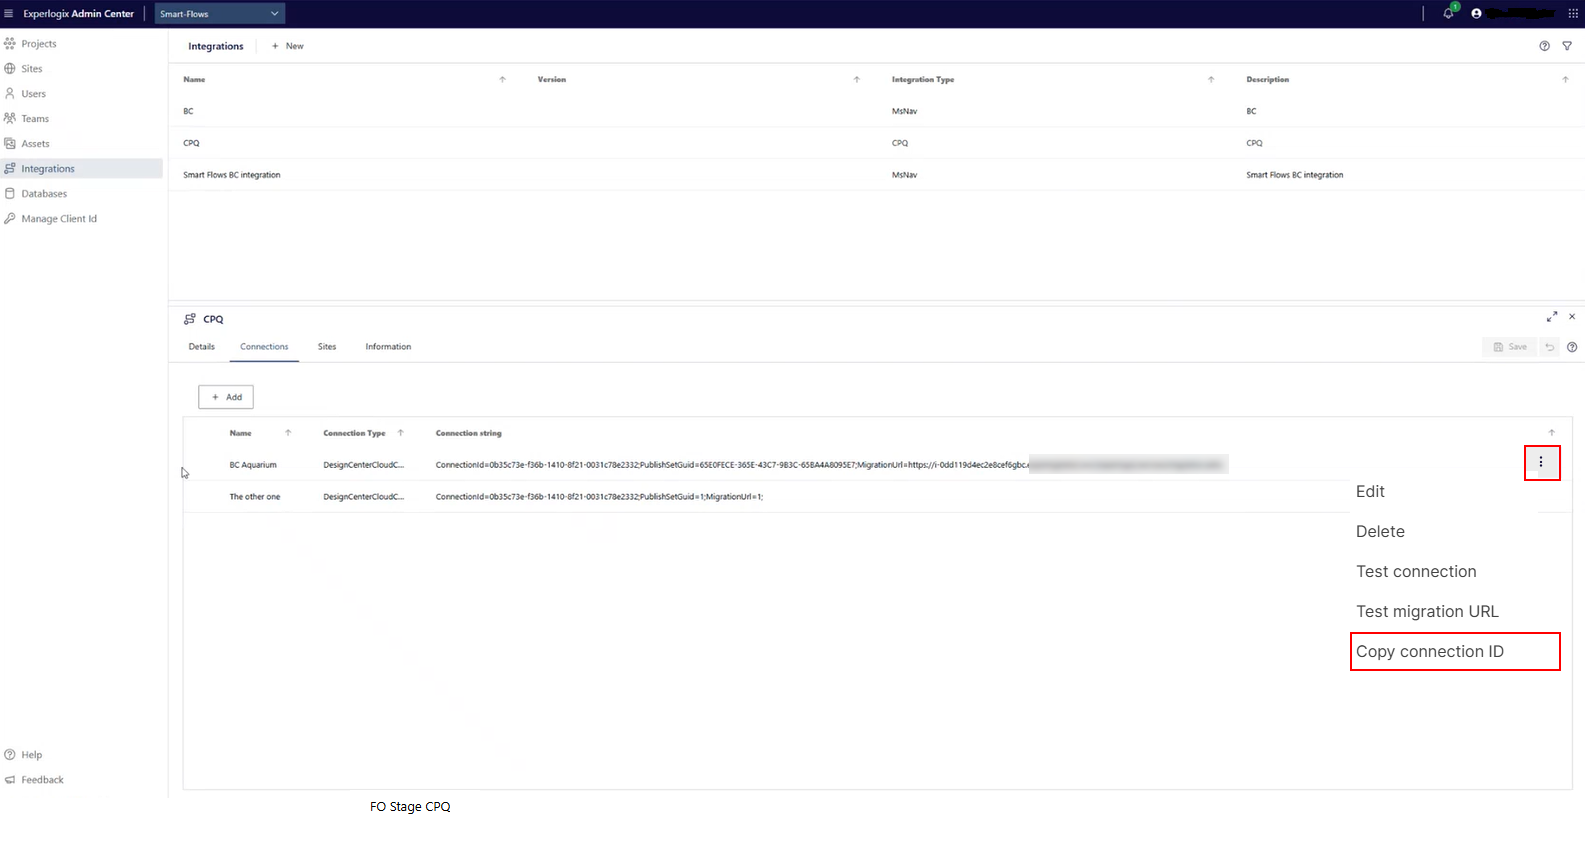
-
In the Integration dropdown, select the desired CPQ integration.
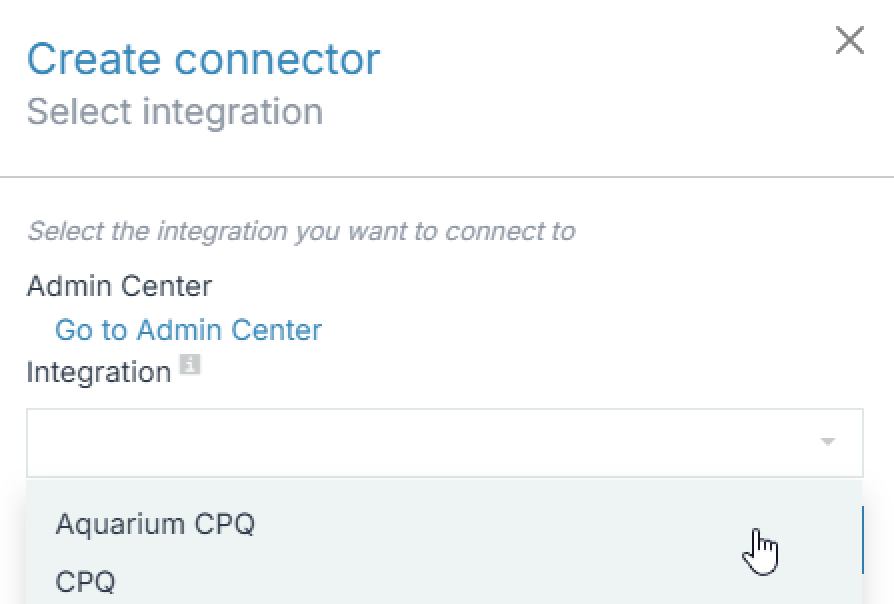
-
Select Next.
-
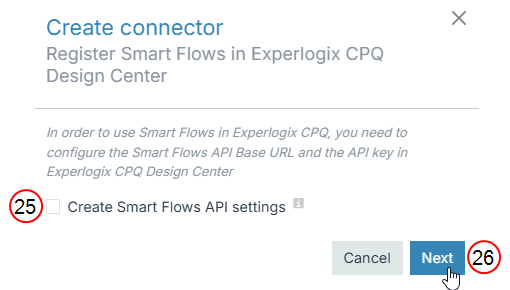
Select the Create Smart Flows API settings checkbox.
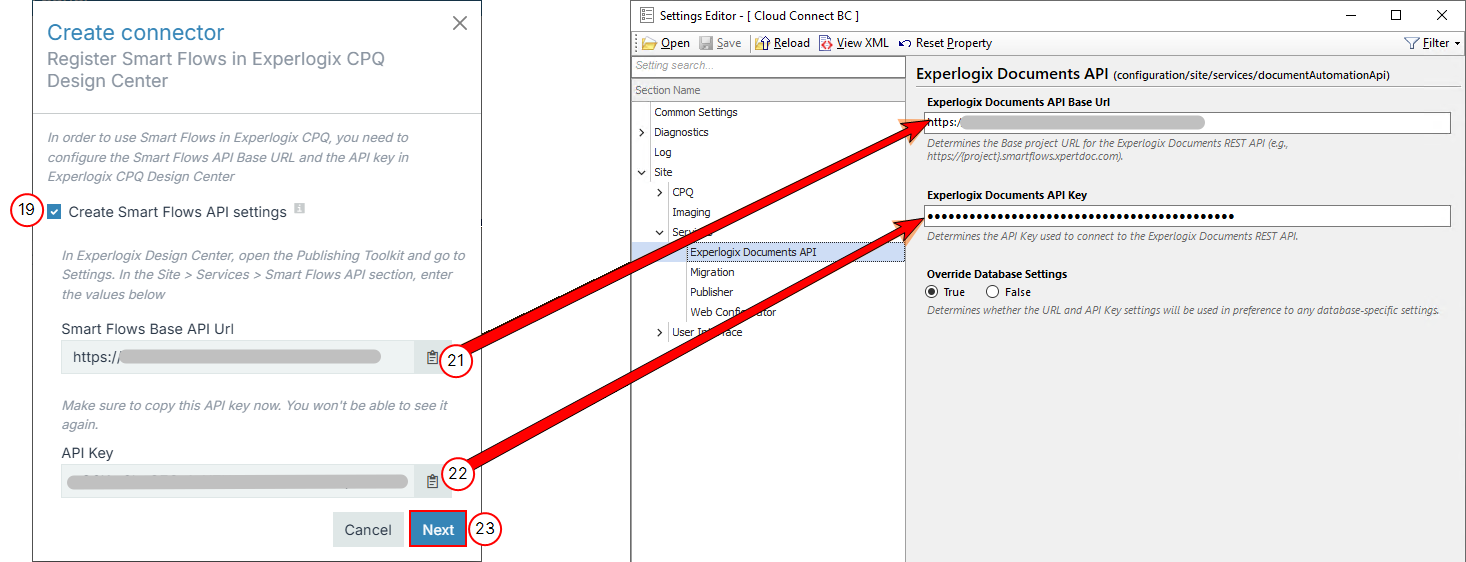
-
Open Design Center's Experlogix Documents API tab. For full details on CPQ and Smart Flows integration.
-
In the Experlogix Documents API Base Url, input your Smart Flows Base API URL.
-
In the Experlogix Documents API Key field, input your API Key.
-
Select the Next button.
The system confirms the successful creation of your Experlogix CPQ (Preview) connector. You can now leverage your CPQ connector in your workflows and start flows from the Web Configurator.
-
To proceed without configuring Smart Flows API settings, uncheck Create Smart Flows API settings.
-
Select Next.
The system confirms the successful creation of your Experlogix CPQ (Preview) connector. You can now leverage your CPQ connector in your workflows without starting flows from the Web Configurator.
The system populates with your Smart Flows Base API URL and the API Key.
Next Steps
-
To continue configuring your Experlogix CPQ (Preview) connector, see Experlogix CPQ Data Set Configuration.
-
To create an Experlogix CPQ (Preview) Sample, see Experlogix CPQ Data Set Configuration.
-
To learn more about the integration between Experlogix Document Automation and CPQ, see Experlogix Documents Smart Flows Integration.