Microsoft Dynamics 365 CE
Unable to install Workflows for Microsoft Dynamics 365 CE
Unable to install Workflows for Microsoft Dynamics 365 CE
Problem: Unable to install the workflows for Microsoft Dynamics 365 CE following an update to Smart Flows version 4.15.x.
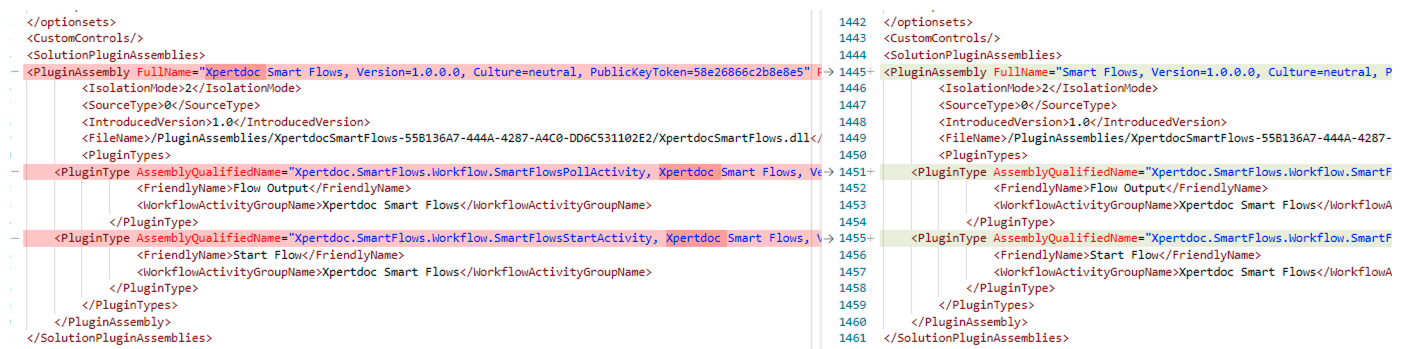
The Smart Flows solution was renamed in the 'Smart Flows 4.15 release'. In versions after the Smart Flows 4.15 release, the assembly name specified in the solution files is Smart Flows. However, as determined by the DLL, the actual name of the assembly is still Xpertdoc Smart Flows. You can find the differences between the customization.xml files for the 4.12 vs. 4.15 versions in the below image.
Solution: Follow the steps below:
-
In the AssemblyInfo.cs file, update the AssemblyTitle to "Smart Flows".
-
Save your changes to the AssemblyInfo.cs file.

-
In the customization.xml and solution.xml files, update the schemaName to remove Xpertdoc and match the FullyQualifiedAssemblyName of the assembly.
-
Save your changes to the customization.xml and solution.xml files.

The Smart Flows workflow solution for Microsoft Dynamics 365 CE is no longer actively maintained. Users are advised to explore other workflow automation options, such as Microsoft Power Automate.
How to Match time zones of Microsoft Dynamics 365 CE with Smart Flows?
How to Match time zones of Microsoft Dynamics 365 CE with Smart Flows?
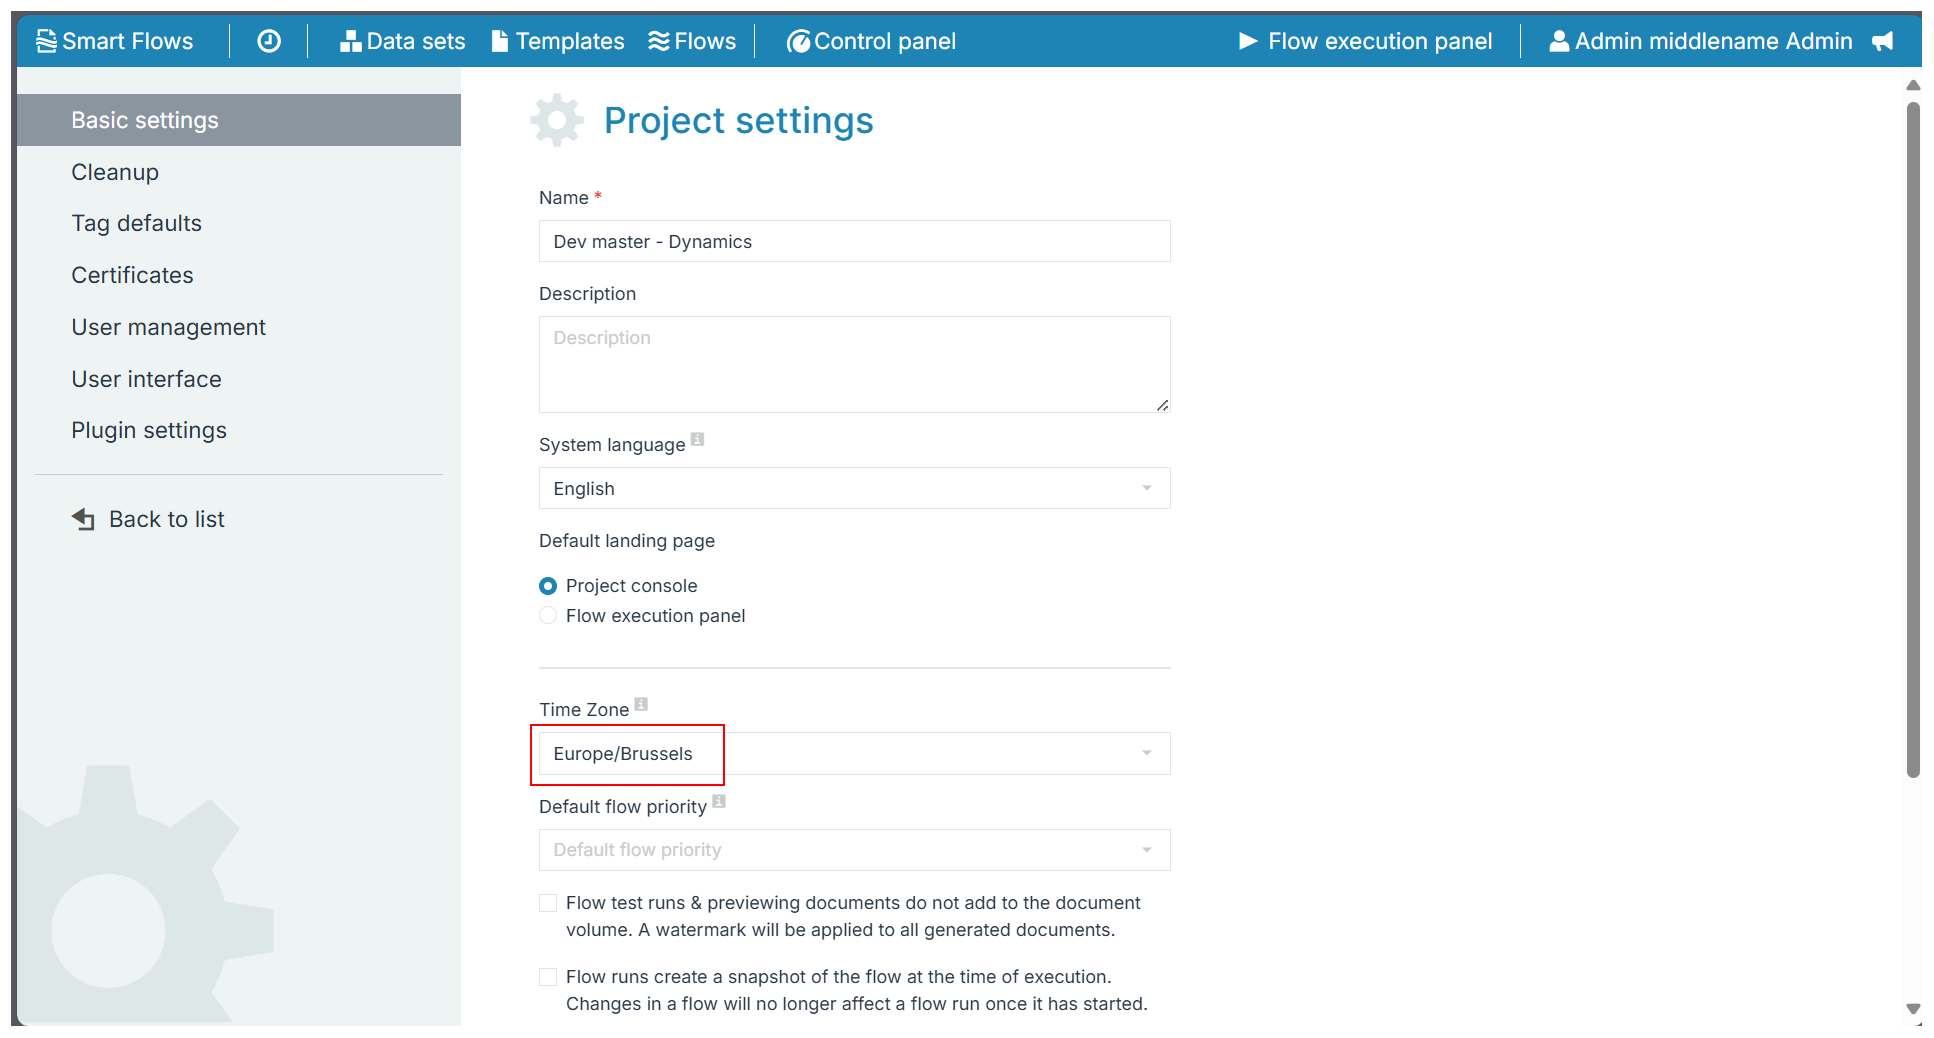
Problem: The date & time displayed in the generated document varies from the date & time displayed in Microsoft Dynamics 365 CEs. This could be caused by a difference in timezone settings for the active user between Microsoft Dynamics 365 CE and Smart Flows.
Solution: Align the timezone settings in both Microsoft Dynamics 365 CE and Smart Flows.
Dynamic 365 CE : Settings > Personalization Settings > General.
Smart Flows : Control Panel > Settings.
The flow is not prompting any questions
The flow is not prompting any questions
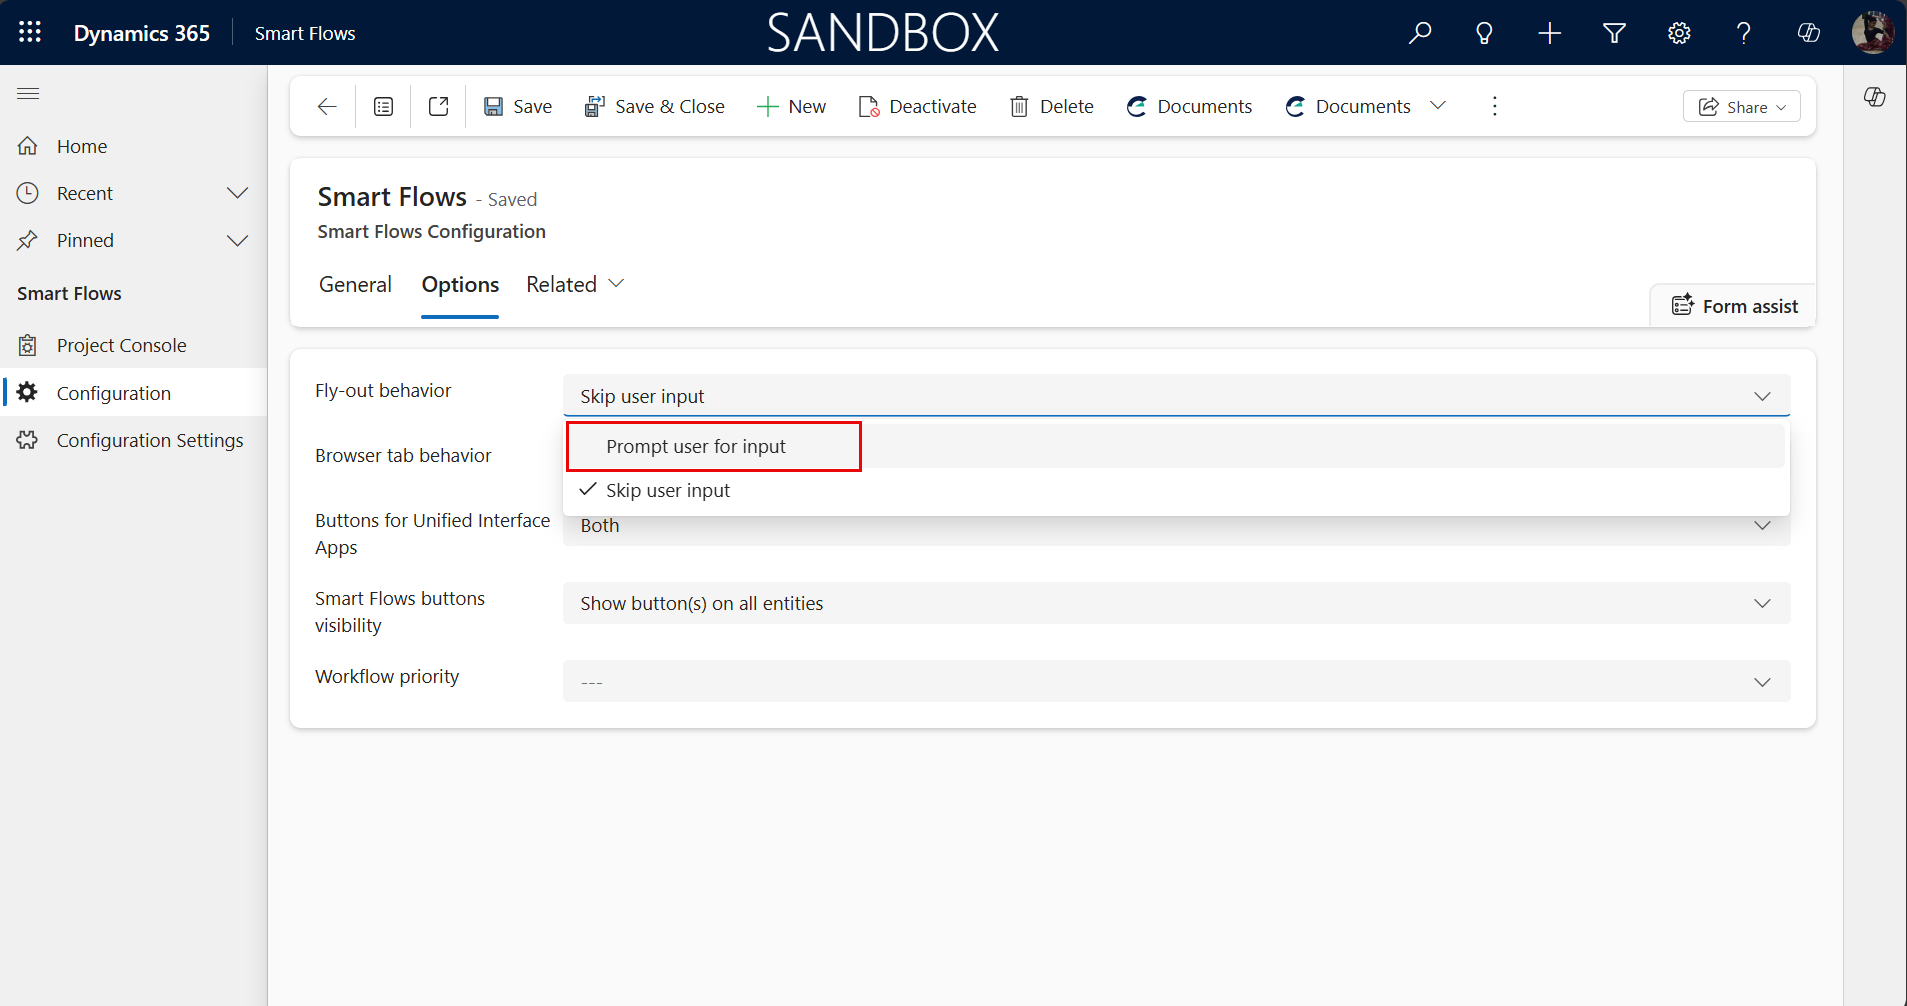
Problem: User is not being prompted for any input when a flow is triggered from the Microsoft Dynamics 365 CE fly-out menu.
Solution: In your CRM, navigate to the Smart Flows Configuration page and update the fly-out behavior to Prompt user for input so that it does not skip the Get user input step.
Access Denied for Anonymous Workflow Users
Access Denied for Anonymous Workflow Users
Problem: From Experlogix Smart Flows 4.19.0, DocuSign and SharePoint connectors have supported Individual User Authentication, which requires all CRM users to be synced with Smart Flows. Any user who is not synced and only has the 'Xpertdoc Smart Flows Workflow Executor' role may receive an Access Denied error when triggering a flow. For more information, see User Types.
Ensure to run a flow from within Microsoft Dynamics 365 CE and only have the Xpertdoc Smart Flows Workflow Executor role.
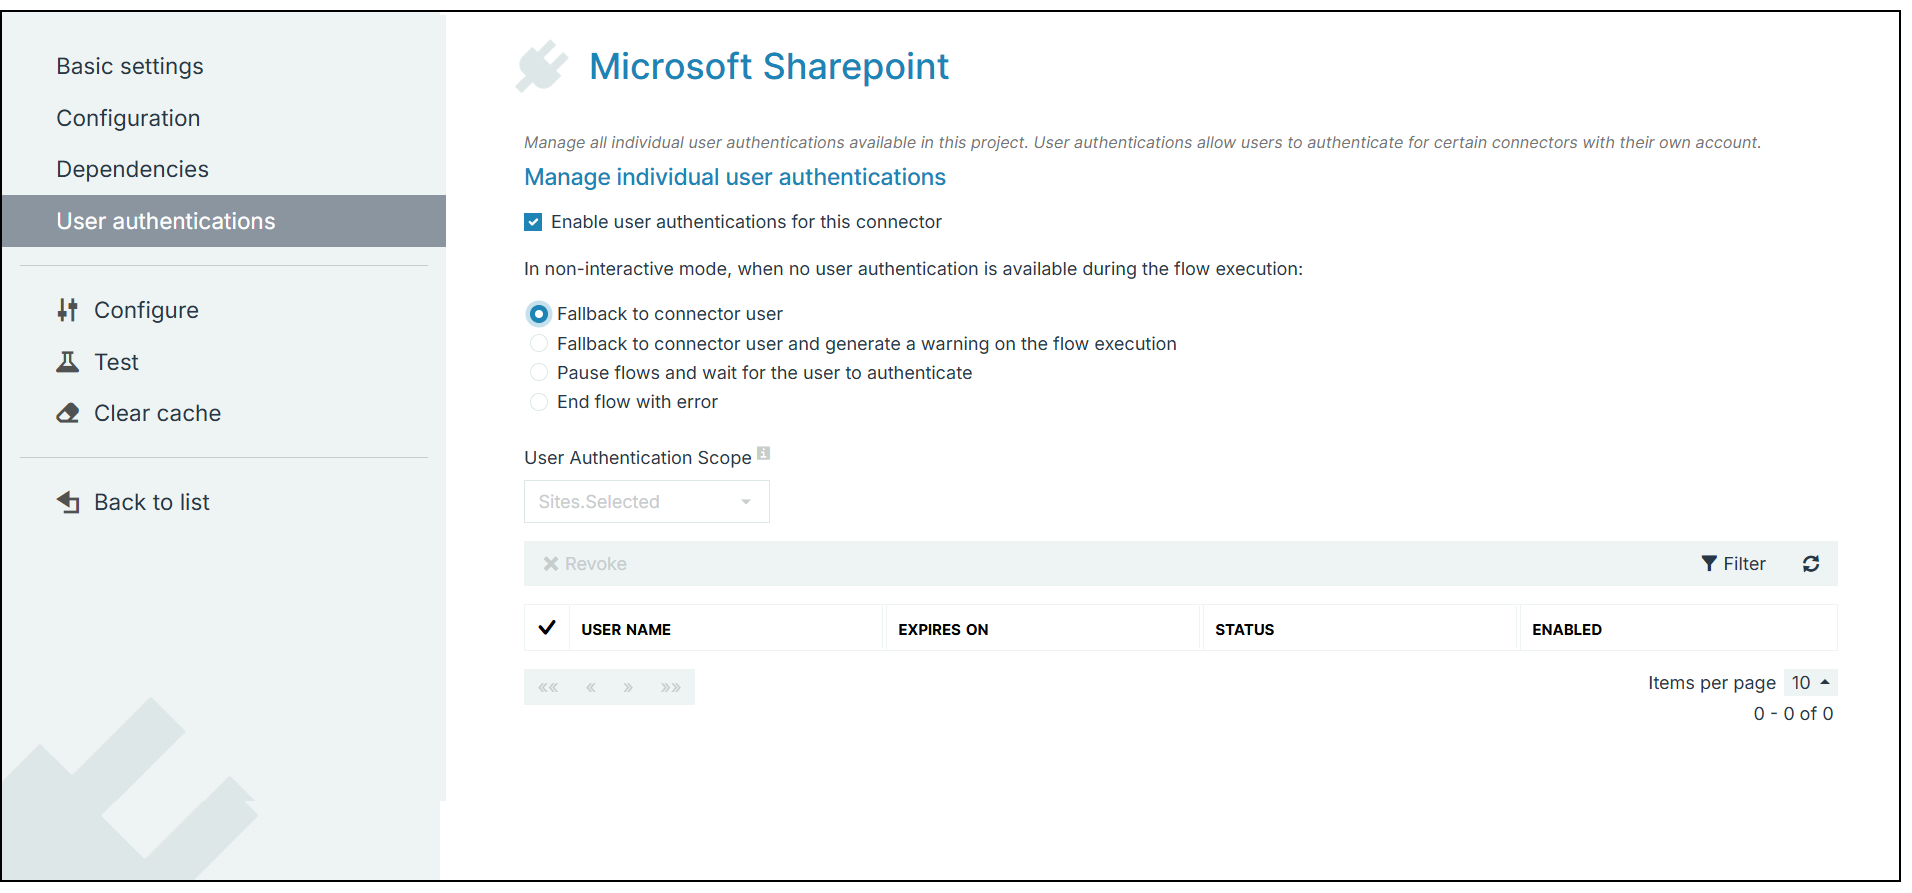
Solution: Enable user authentication for connectors and set "In non-interactive mode, when no user authentication is available during flow execution" to Fallback to connector user.
-
Navigate to Control Panel > Connectors.
-
Select the connector currently providing an access denied error.
-
Under User Authentication, select the checkbox for Enable user authentications for this connector.
-
Ensure that for "In non-interactive mode, when no user authentication is available during flow execution", then Fallback to Connector user is selected.
-
Select Save changes.
-
Repeat Step 2 through Step 5 for any additional affected connectors.
Smart Flows Button(s) Missing in Microsoft Dynamics 365 CE
Smart Flows Button(s) Missing in Microsoft Dynamics 365 CE
Problem: After updating the Smart Flows Core Managed Solution in Microsoft Dynamics 365 CE, the Smart Flows buttons are no longer visible in the record ribbon.
Solution: Check whether the button behavior is set in the Configuration options in Dynamics. If updating this does not resolve the issue, follow the instructions below.
-
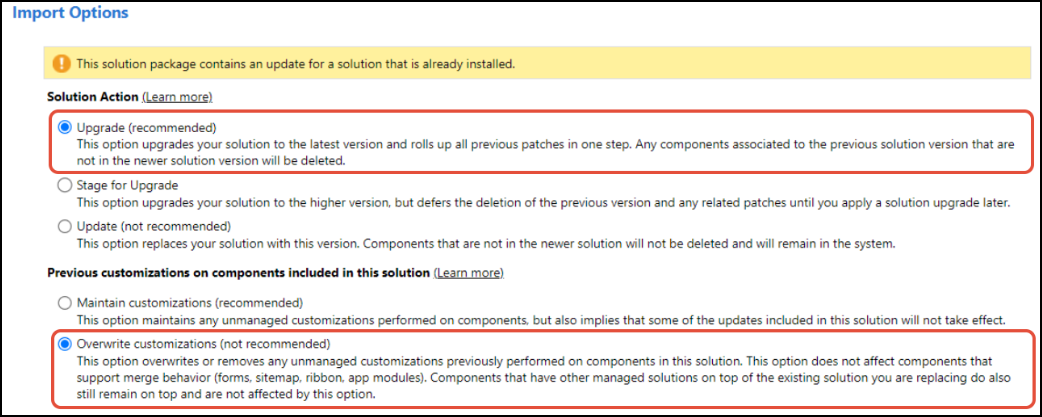
Download and re-import the Core Solution manually from the Download Installers. Ensure you select the version which corresponds to both Smart Flows Server version and Dynamics version (i.e. 4.27 and 9.2).
-
In the import window, select ‘Upgrade (recommended)’ and ‘Overwrite customizations’ when prompted.
Error Identified in Payload – An undeclared property ‘regardingobjectid’
Error Identified in Payload – An undeclared property ‘regardingobjectid’
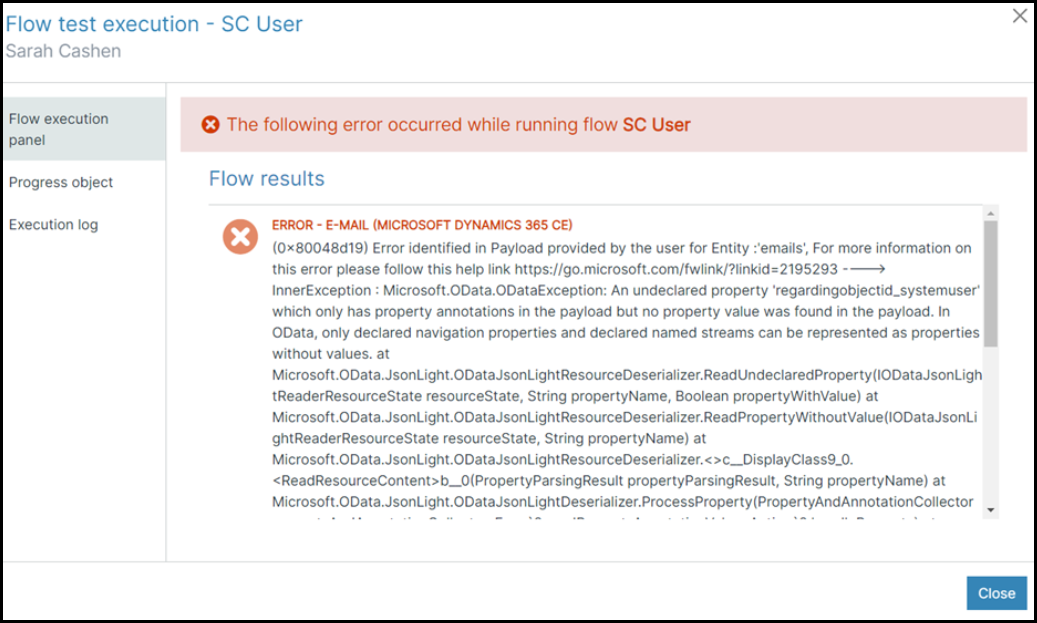
Problem: When linking to a custom entity in the Regarding field of the E-mail (Dynamics) or the Create note flow blocks in Microsoft Dynamics 365 CE, the flow fails with an error shown in the screenshot. The message says that the custom entity (regardingobjectid_xxxxxxx) is not declared in the metadata for the primary entity in the CRM, indicating that the Microsoft Dynamics 365 CE does not recognize the two entities as linked.
Solution: To use the 'Regarding lookup' for a custom entity, 'Activities' must be enabled on the entity in the Dynamics configuration. Once this is enabled, Clear Connector Cache and run the flow again. This resolves the issue.
Microsoft Sharepoint
How to register SharePoint App via PowerShell?
How to register SharePoint App via PowerShell?
Problem: Microsoft enhanced the security measures within administrative governance by altering the default protocols for SharePoint app registration. Thus, site collection administrators can no longer register or update app permissions unless they receive explicit authorization from the SharePoint tenant administrator.
The error message when 'permissions are not configured before creating a new SharePoint connector' or 'reaching out to a new site. created starting mid-August 2023' was: "Your SharePoint tenant admin doesn't allow site collection admin to create an Azure Access Control (ACC) principal. Please contact your SharePoint tenant administrator." For details on the changes, please refer to SharePoint admin control for App registration updates.
Solution: Follow the steps below:
-
In the Windows system, search SharePoint Online Management Shell. If unavailable, download from the SharePoint Online Management Shell download installer page.
-
Make sure your current version is updated to 16.0.23710.12000 or a later version.
-
Open SharePoint Online Management Shell.
-
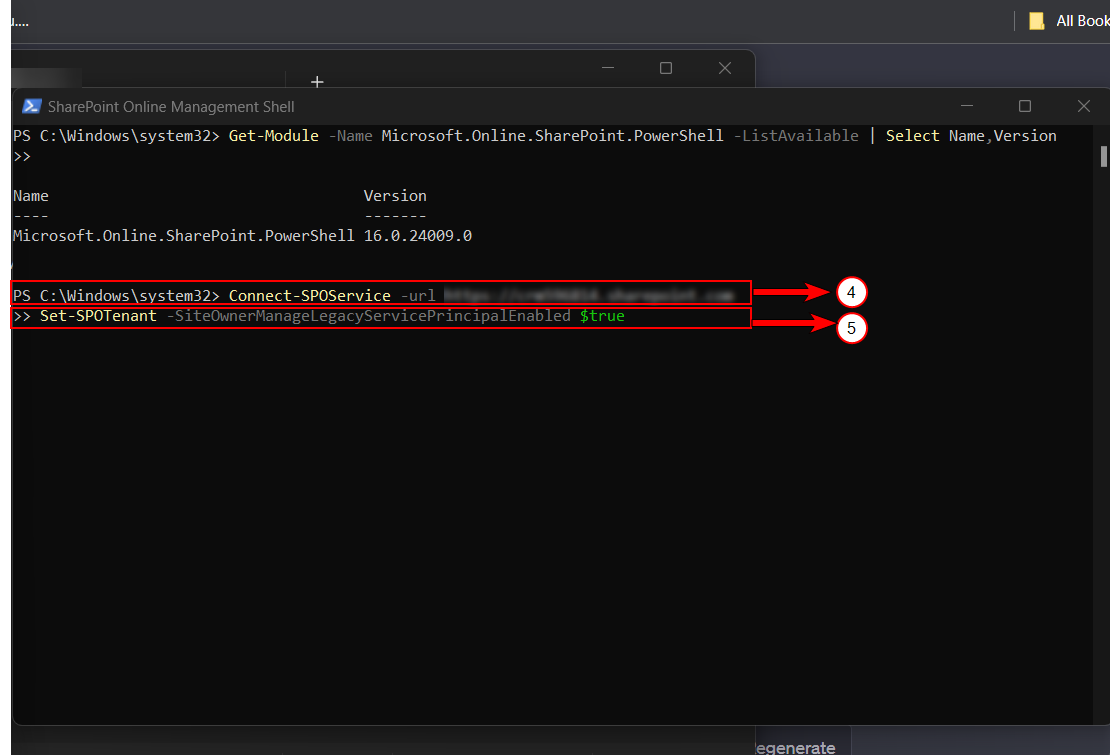
Run Connect-SPOService -url https://{yourTenant}-admin.sharepoint.com command.
You can use this cmdlet to connect to the SharePoint Online service. You need to specify the URL of your SharePoint Online admin center (tenant admin URL) as the parameter to this cmdlet. Replace "https://your-tenant-admin-url" with the actual URL of your SharePoint Online admin center.
-
Run Set-SPOTenant -SiteOwnerManageLegacyServicePrincipalEnabled $true.
You can use this cmdlet to configure settings for the SharePoint Online tenant. In this case, set the SiteOwnerManageLegacyServicePrincipalEnabled property to $true, which allows site owners to manage legacy service principals.
Set-SPOTenant -SiteOwnerManageLegacyServicePrincipalEnabled $true
-
Complete the authentication to update your Azure Access Control permissions.
Salesforce
The Salesforce connector no longer works
The Salesforce connector no longer works
Problem: While attempting to use flows connected to Salesforce, the user receives an error mentioning an expired token. This issue occurs because the Salesforce connector automatically expires after 14 days of inactivity.
Solution: Refresh your Salesforce token.
-
In the Project Console, navigate to Control Panel > Connectors.
-
Select your Salesforce connector in the List view.
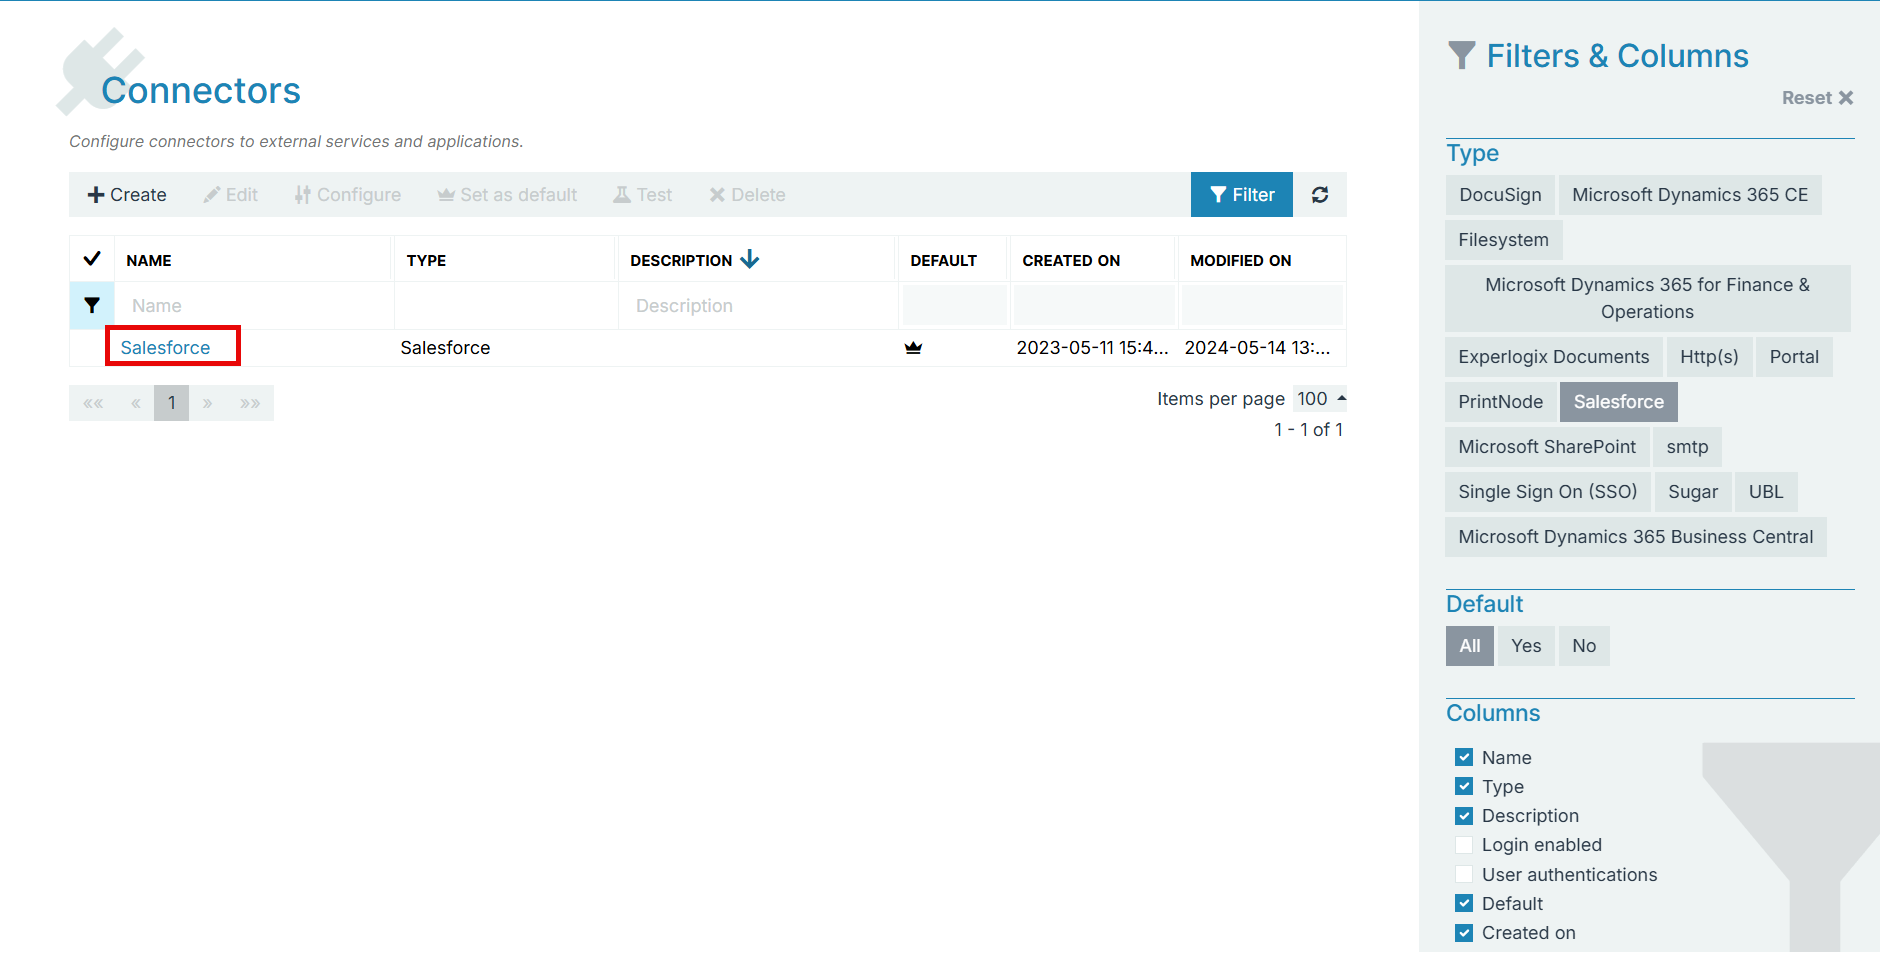
-
Select Configure.
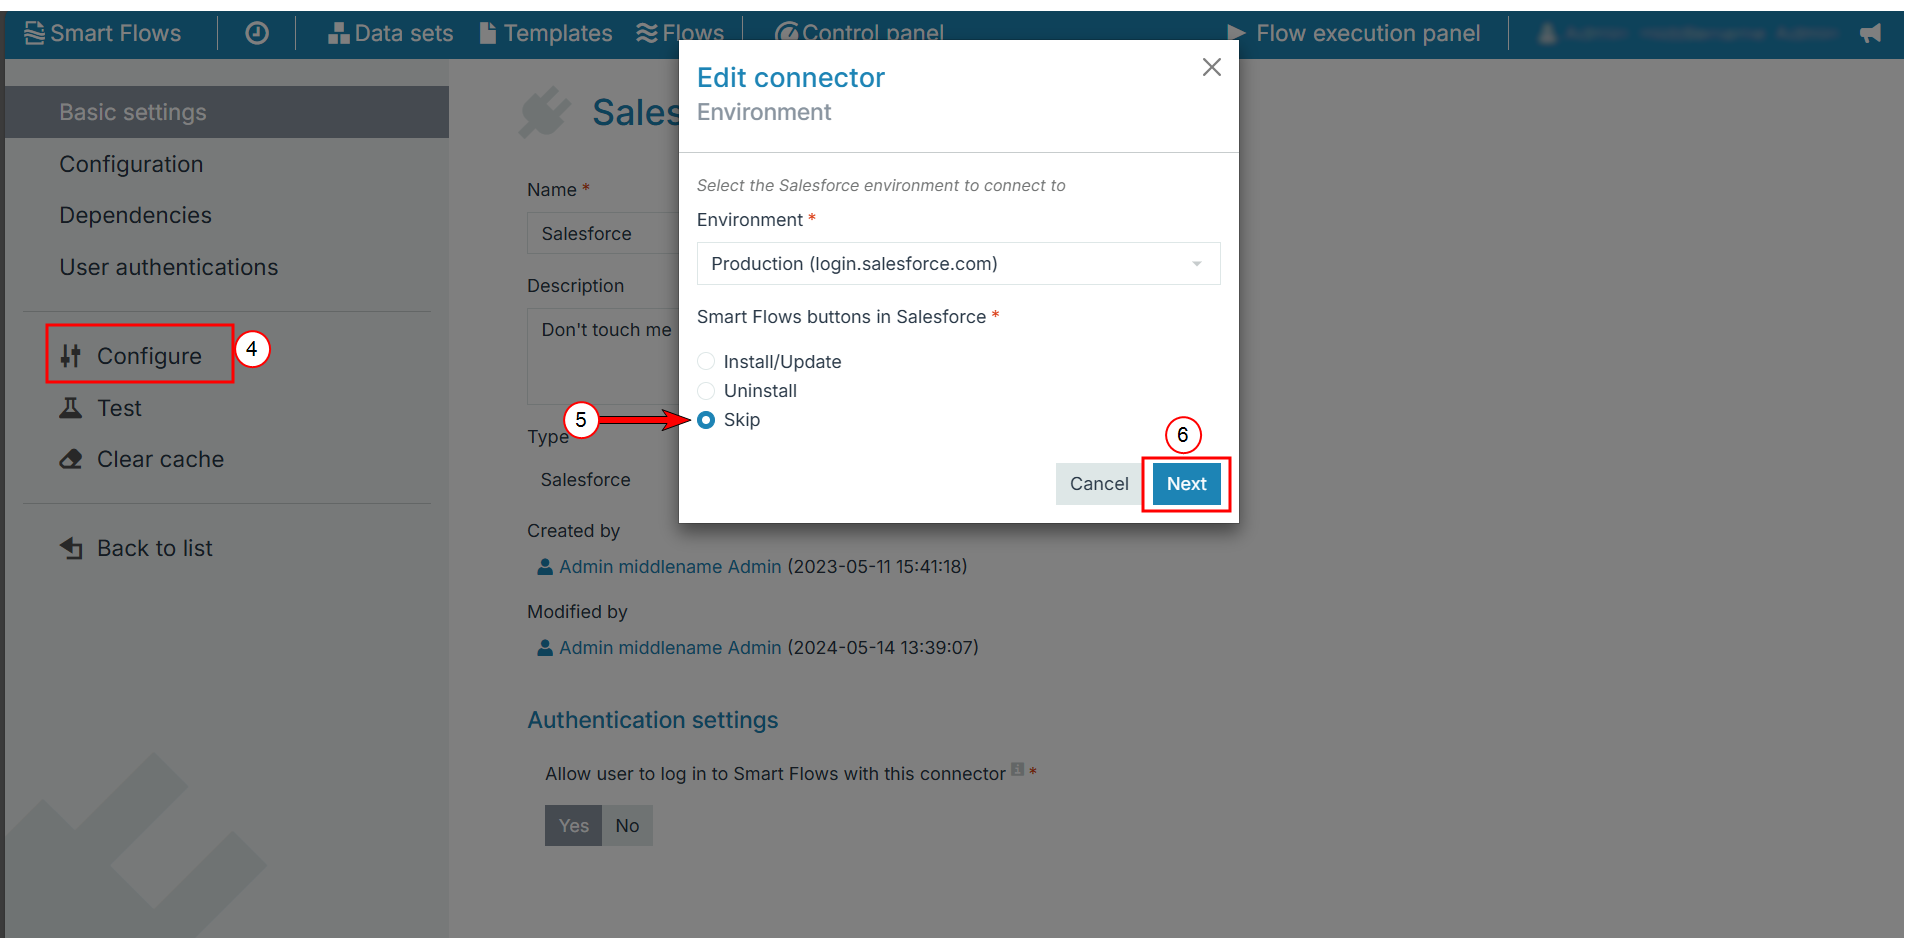
The Edit connector environment window displays.
-
For the Smart Flows buttons in Salesforce option, select Skip.
-
Select Next.
-
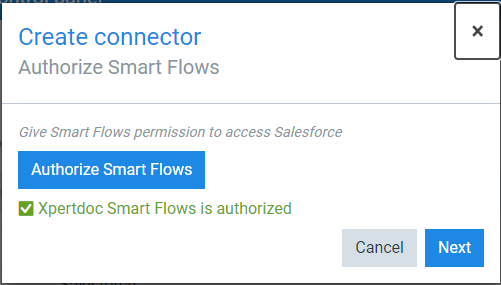
Select Authorize Smart Flows to connect to your Salesforce instance.
The application redirects you to Salesforce for authentication. The Salesforce Allow Access window displays.
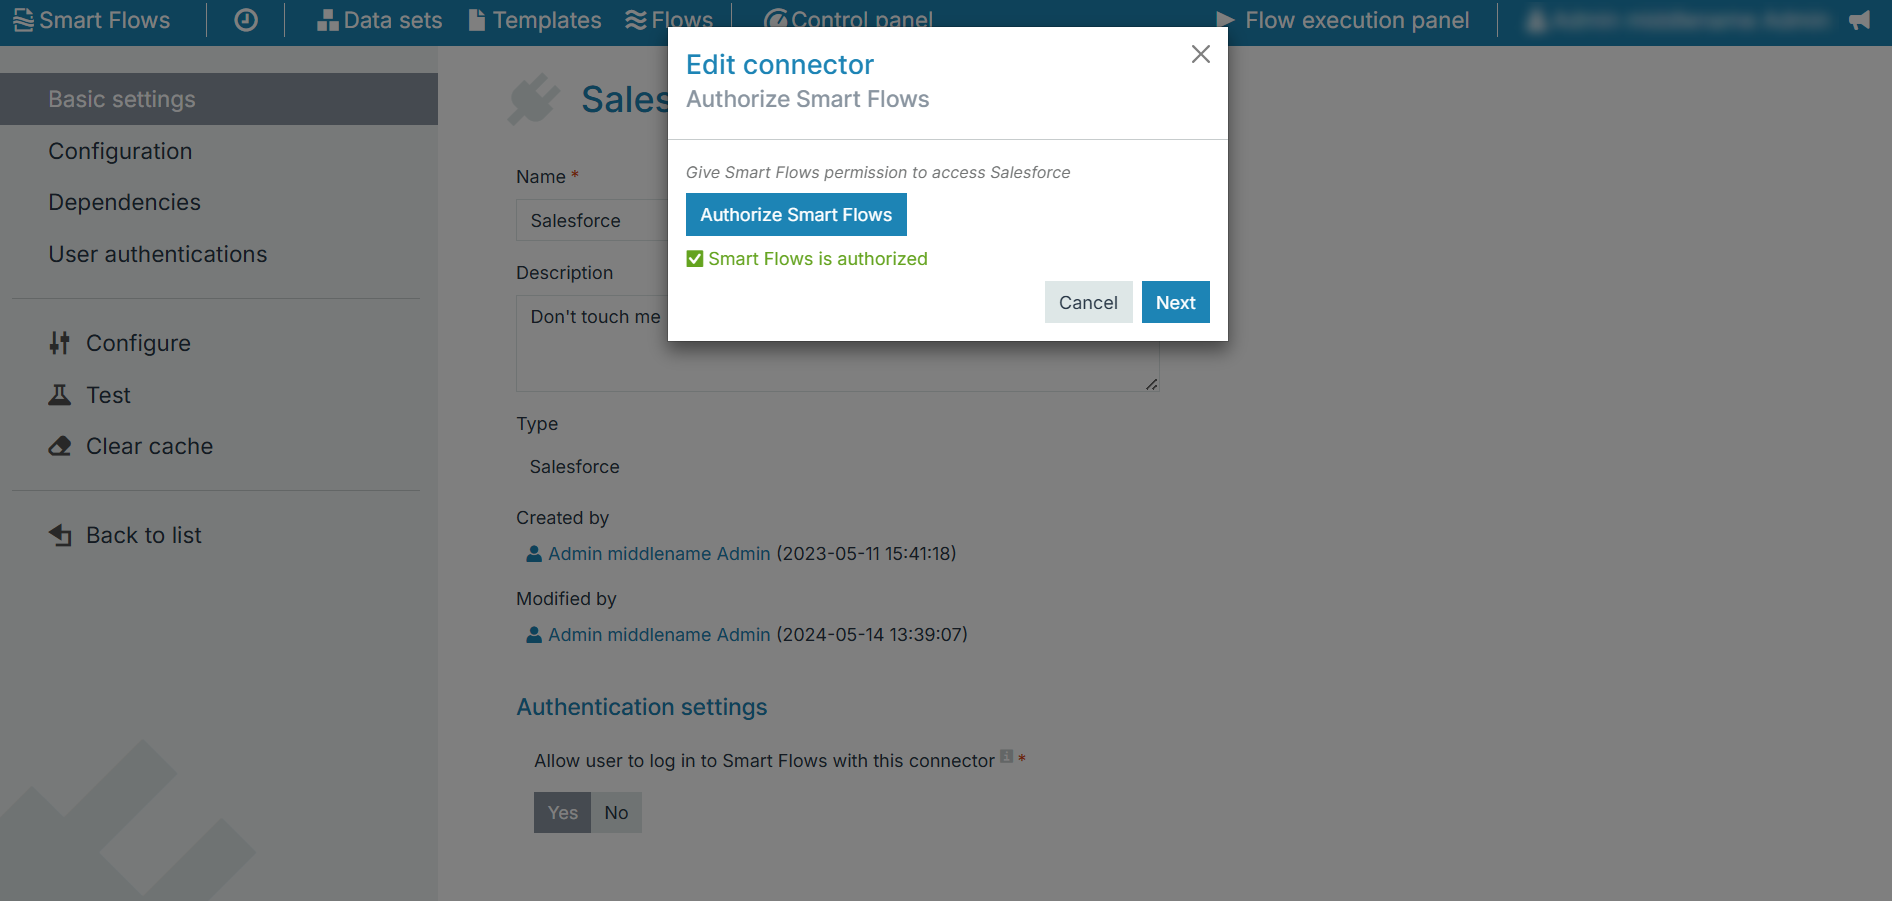
-
If your credentials are valid, select Allow.
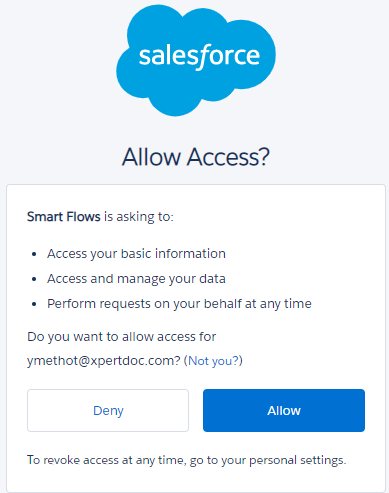
The Smart Flows is authorized message displays under the Authorize Smart Flows button. This confirms that Smart Flows is now allowed to communicate with Salesforce.
-
Select Next.
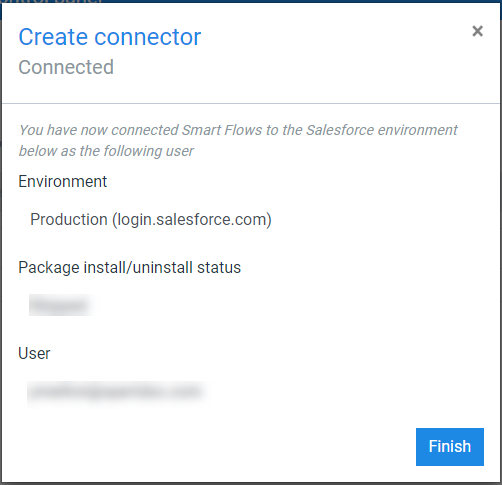
The Create connector Connected window displays.
This window displays a summary of your connector setup.
-
Select Finish.
The Salesforce connector is successfully created.
"No more than 10 columns may be specified in lookupPhoneDialogsAdditionalFields" Error while setting up Salesforce Connector
"No more than 10 columns may be specified in lookupPhoneDialogsAdditionalFields" Error while setting up Salesforce Connector
Problem: When configuring a Salesforce connector, the error message 'No more than 10 columns may be specified in lookupPhoneDialogsAdditionalFields' appears. In other scenarios, the error may reference a different lookup. This issue often arises when Experlogix Document Automation code is injected into the Contacts object in Salesforce.
Salesforce has introduced a restriction that search layouts may contain no more than 10 columns. When Experlogix Smart Flows configures connectors, it replicates the existing Salesforce layouts, adds Experlogix Documents buttons, and re-applies the layouts to Salesforce, including legacy search layouts. If any legacy layout exceeds the 10-column limit, the error message is triggered.
Solution: The problem can be fixed using one of two options:
Option 1: Opt out of activating Experlogix Documents buttons for the Salesforce object (e.g., the Contacts object) that triggers the issue. This approach is suitable if no flows are expected to run from the object referenced in the error message.
Option 2: Reduce the number of columns defined in the search layout referenced in the error message. Follow this procedure:
-
Open the Salesforce tenant that is causing the issue.
-
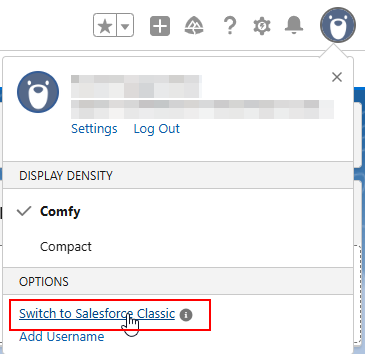
Switch the view to Salesforce Classic.
-
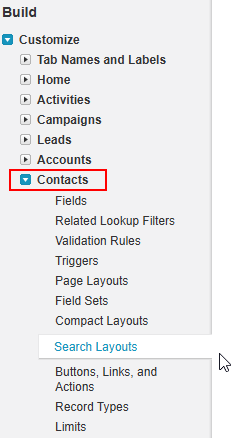
Navigate to Setup > Build > Customize and identify the object that is causing the error (e.g. Contacts).
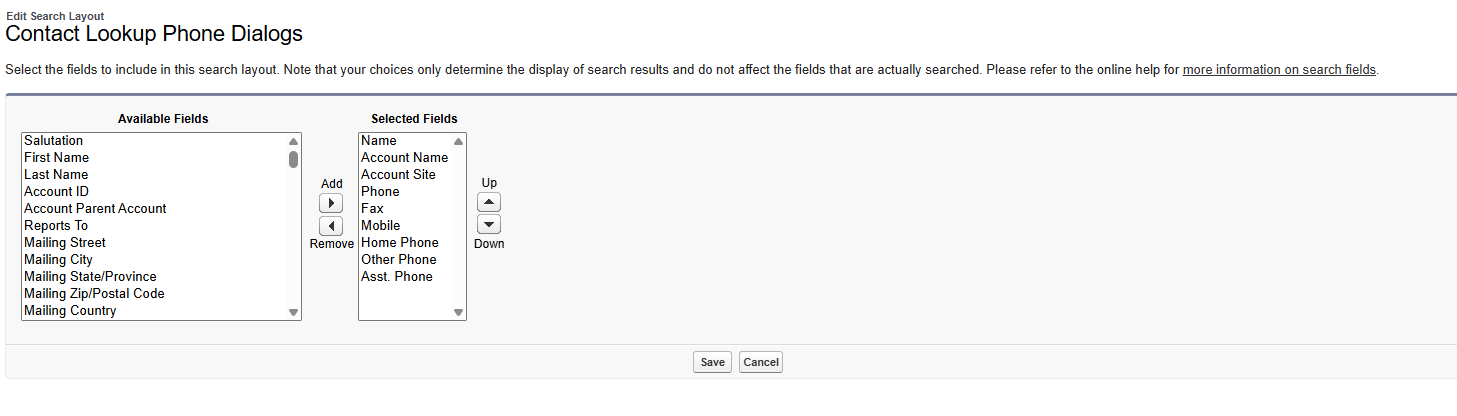
-
Identify the Search Layout that is referenced in the error message (e.g. Lookup Phone Dialogs) and reduce the number of referenced columns to less than 10.
OAuth log-in Error with Salesforce credentials
OAuth log-in Error with Salesforce credentials
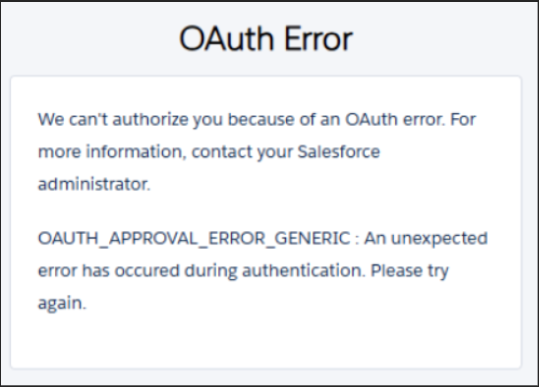
Problem: Some users encounter an 'OAuth error' when attempting log in to the Project Console using their Salesforce credentials. The error screenshot is shared below:
Solution : Follow the steps below:
-
Log in to Salesforce with an admin account.
-
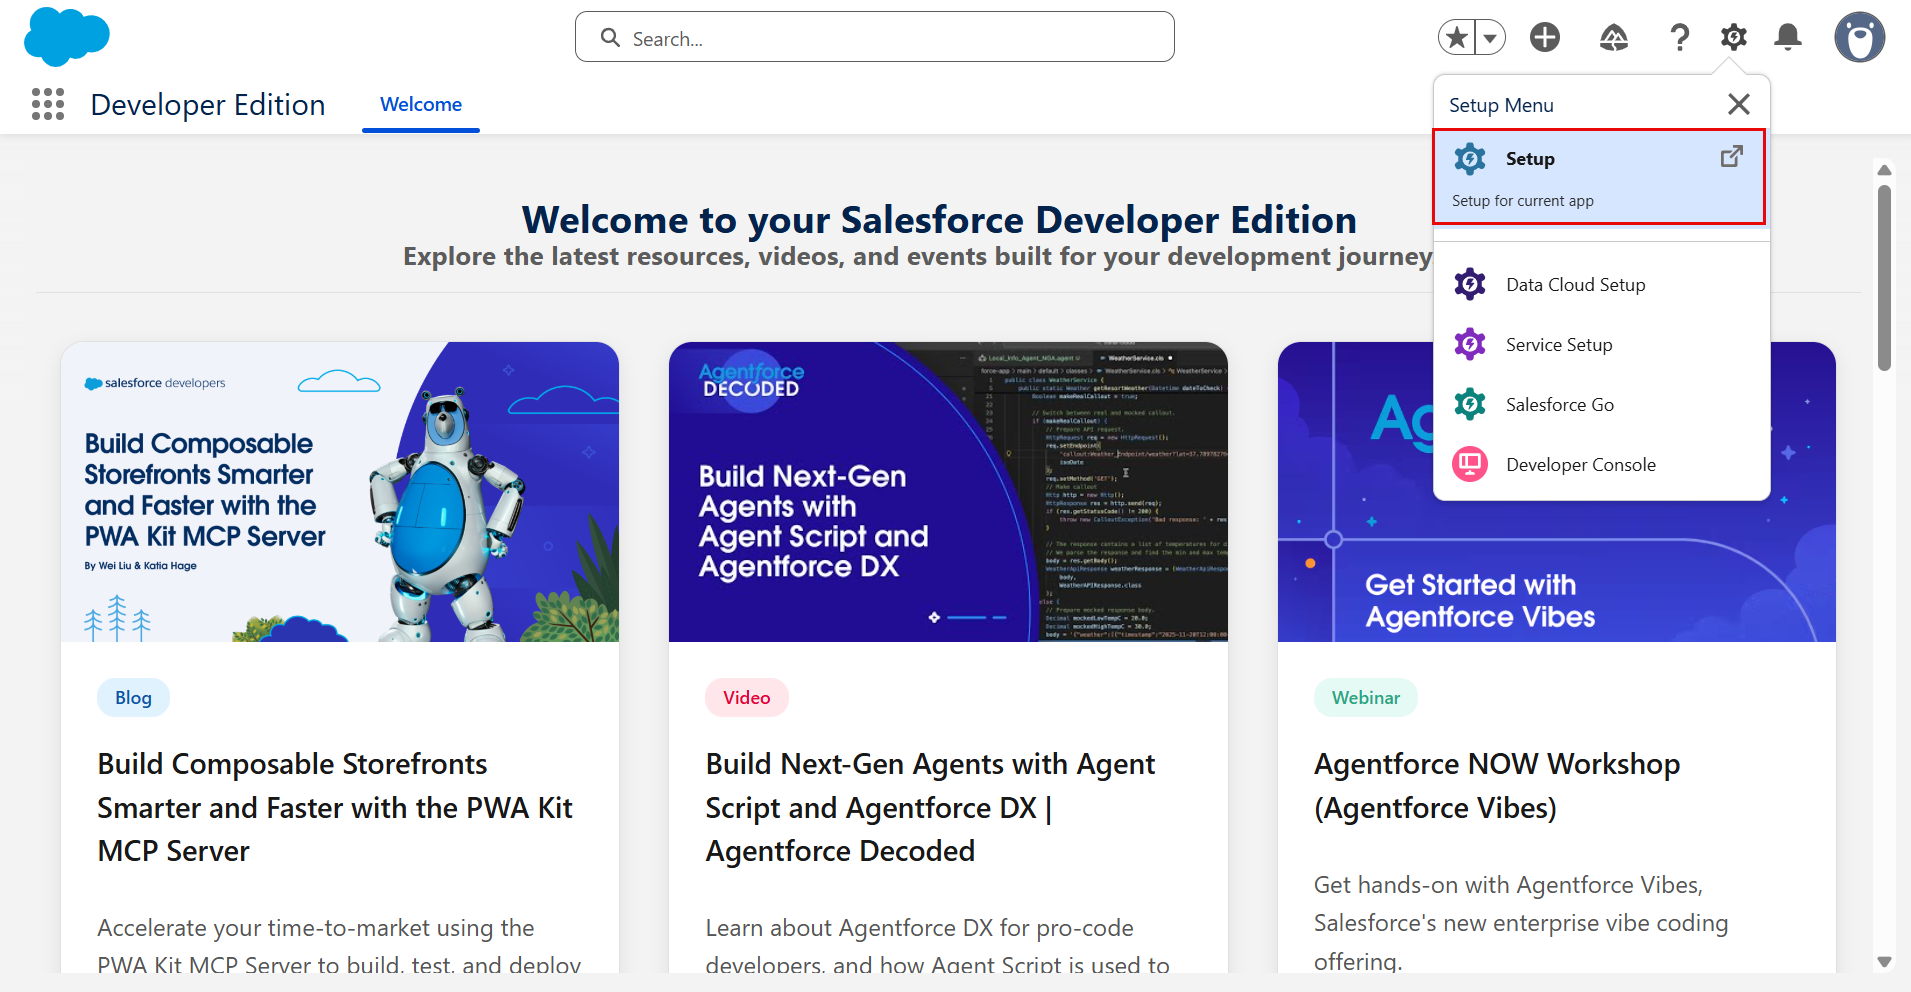
Navigate to Setup (gear icon) > Setup.
-
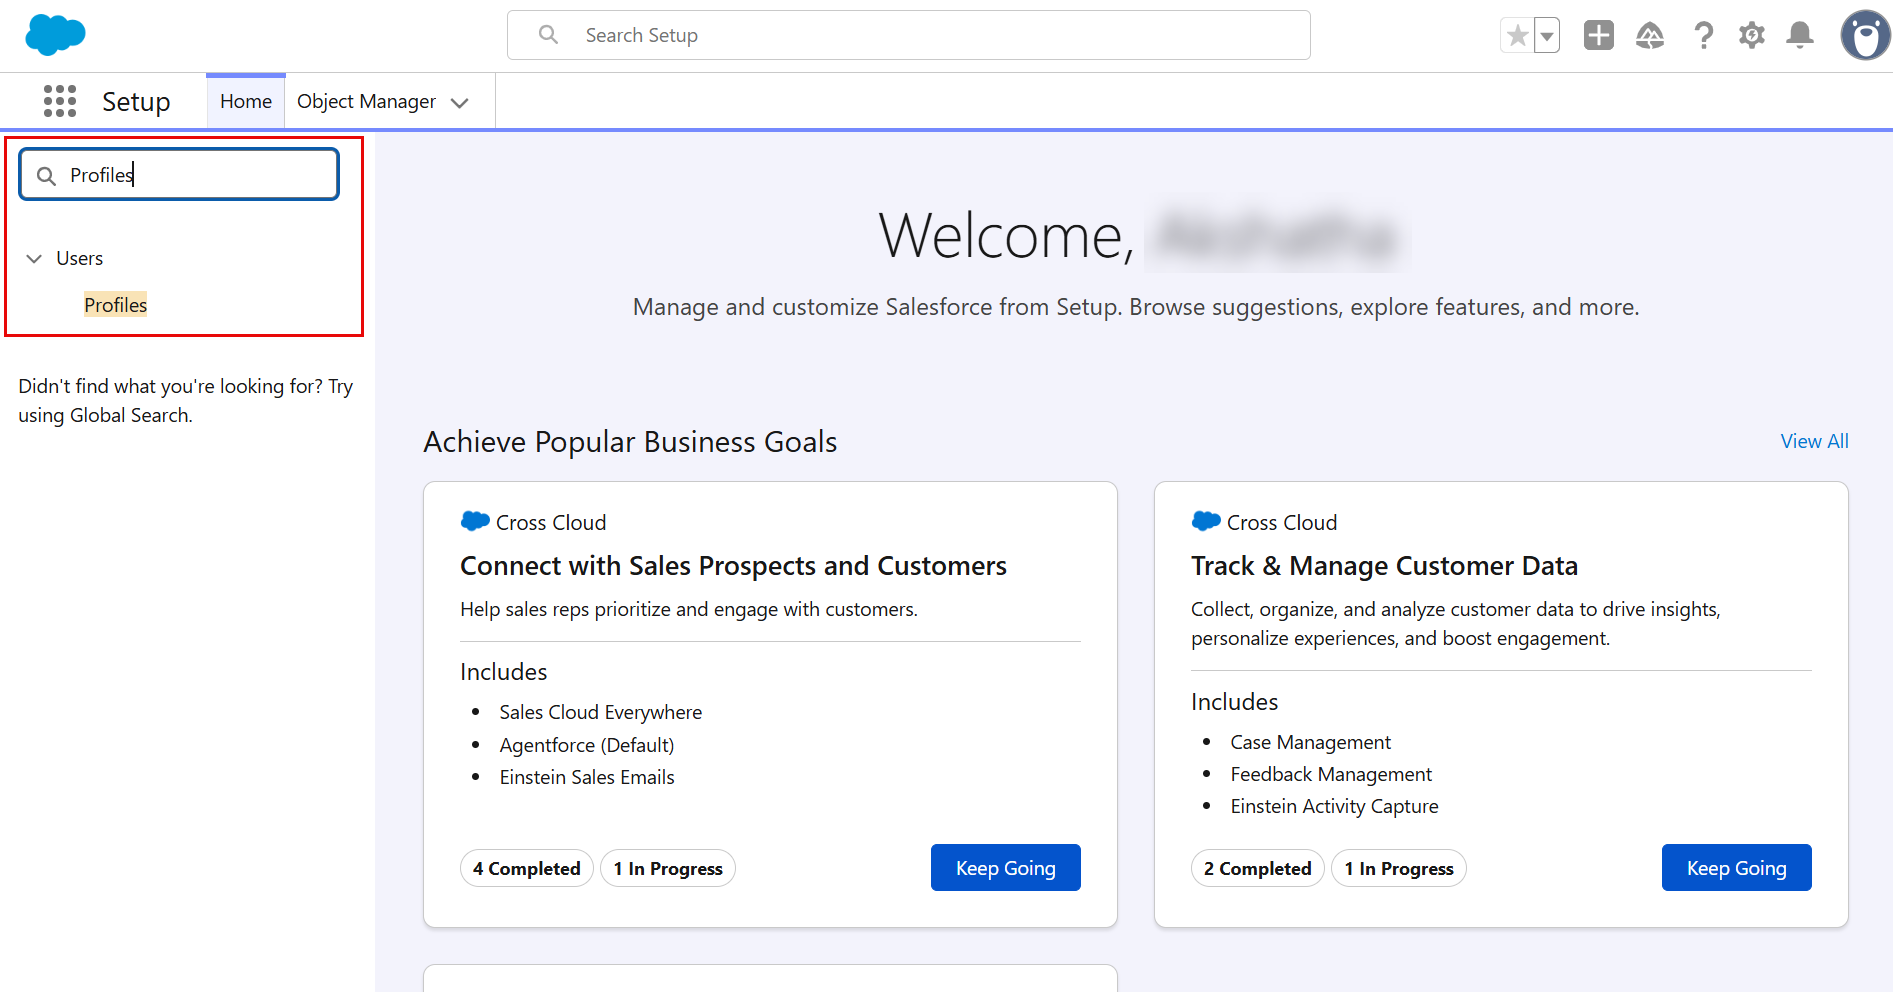
In the Quick Find box, enter 'Profiles'.
-
Open the profile of the user in question.
-
Scroll down to the Administrative Permissions section.
-
Look for Approve Uninstalled Packages in the list and check the 'checkbox' displayed next to the list.

Docusign
SugarCRM
Experlogix Documents
XML Data Set Error
XML Data Set Error
Smart Flows is temporarily not supporting the creation of XML Data sets.
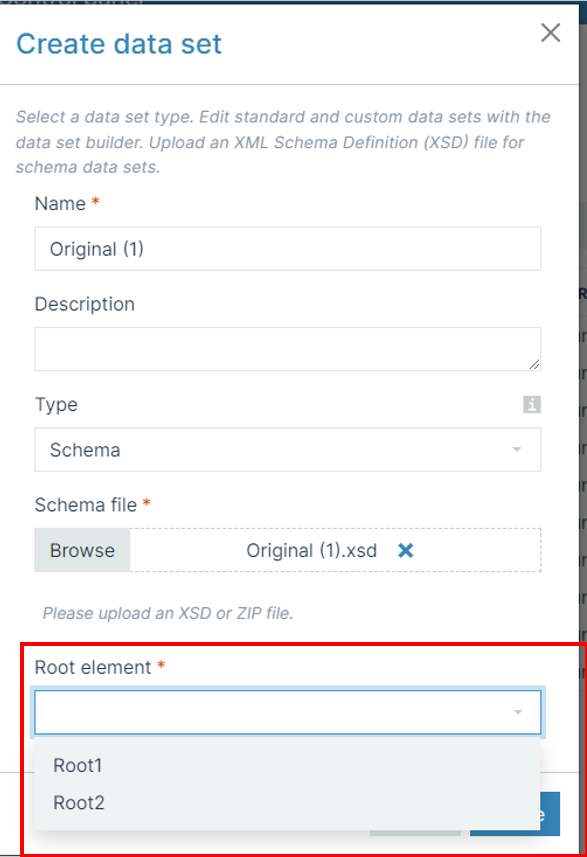
Problem: The user is unable to create an XML Data Set with an XSD schema with multiple potential root elements.
Solution: Smart Flows requires data sets to have one root element. Therefore, if you plan to build an XML data set based on an XSD schema with multiple potential roots, opting for a Smart Flows schema data set will allow you to select an element as the single root element of the data set. This ensures efficient and accurate data conversion in Smart Flows, see Creating a Data Set for more information.