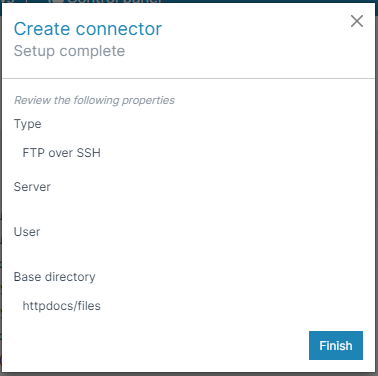
The create connector wizard guides you through the configuration when creating a Filesystem connector. You can create multiple Filesystem-type connectors.
-
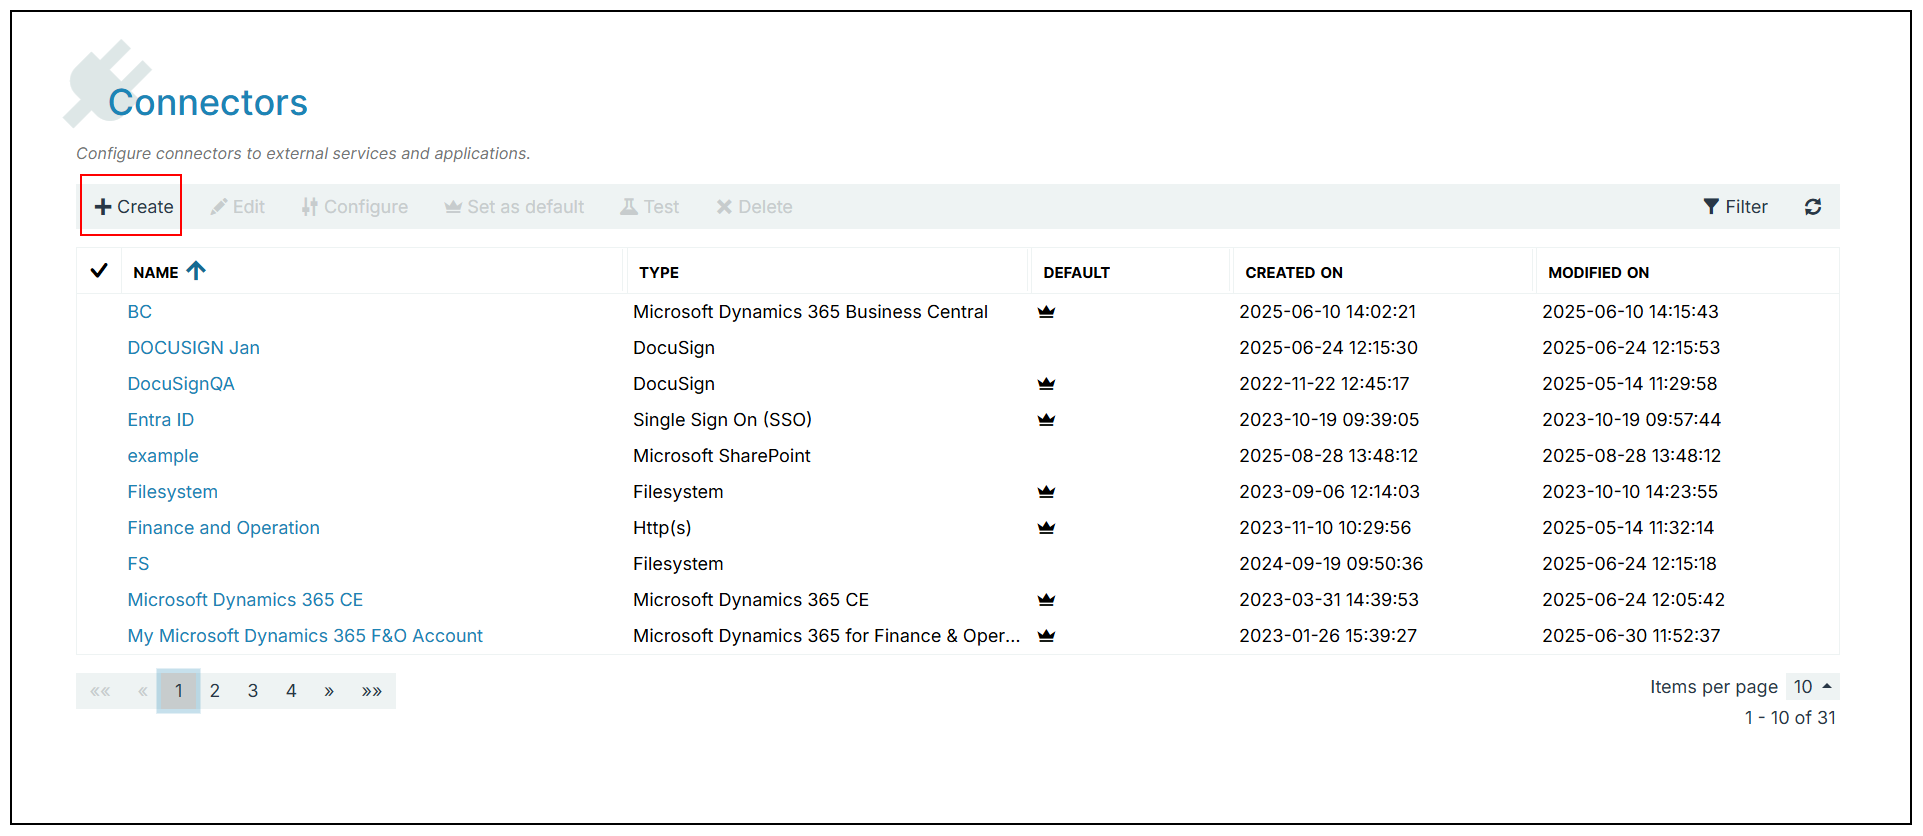
In the Project Console, navigate to Control panel > Connectors > +Create.
-
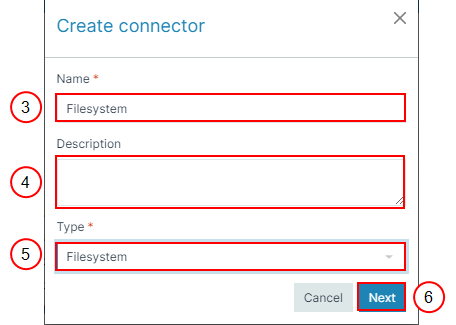
In the Name field, input the Name of your connector.
-
(Optional) In the Description field, input a description for your connector.
-
In the Type dropdown menu, select Filesystem.
-
Select Next.
The Create Connector window displays.
Decision Point
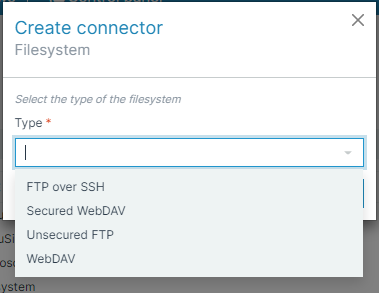
Select the Filesystem type that best suits your needs.
|
Type |
Description |
|---|---|
|
Local filesystem |
Provides access to the local file system of the server. This Filesystem type is disabled on cloud instances. |
|
Unsecured FTP |
Provides access to the files on an FTP server. |
|
FTP over SSH |
Provides access to the files on an SFTP server (SSH or SCP server). |
|
WebDAV |
Provides access to files on a WebDAV server over HTTP. |
|
Secured WebDAV |
Provides access to files on a secure WebDAV server over HTTPS. |
-
In the Type dropdown menu, select the Type of Filesystem.
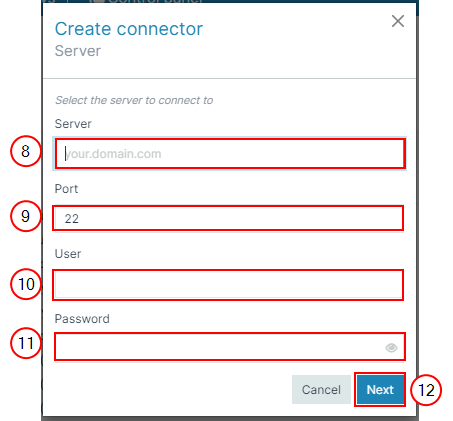
The Create connector Server window displays.
-
(Optional) In the Server field, input the domain name of the server.
-
(Optional) In the Port field, input the port number of the server.
-
(Optional) In the Username field, input the username of the account that has proper access to the Filesystem.
-
(Optional) In the Password field, input the password of the account that has proper access to the Filesystem.
-
Select the blue Next button.
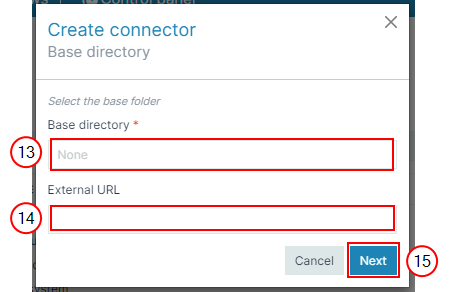
The Base directory window displays.
-
In the Base directory field, input the base directory folder.
If an External URL is set, the system uses this URL to return in the Send to file step.
-
(Optional) In the External URL field, input the External URL.
-
Select Next.
Smart Flows displays a summary of the configuration.
-
Select Finish.