Below is a list of common information requested by the support team when a ticket is submitted. The information provided speeds up the team’s response. If it's an on-premises deployment of Experlogix Smart Flows product, ensure it's up to date and check whether the problem persists.
Get the Experlogix Documents Version Number
Get the Experlogix Documents Version Number
-
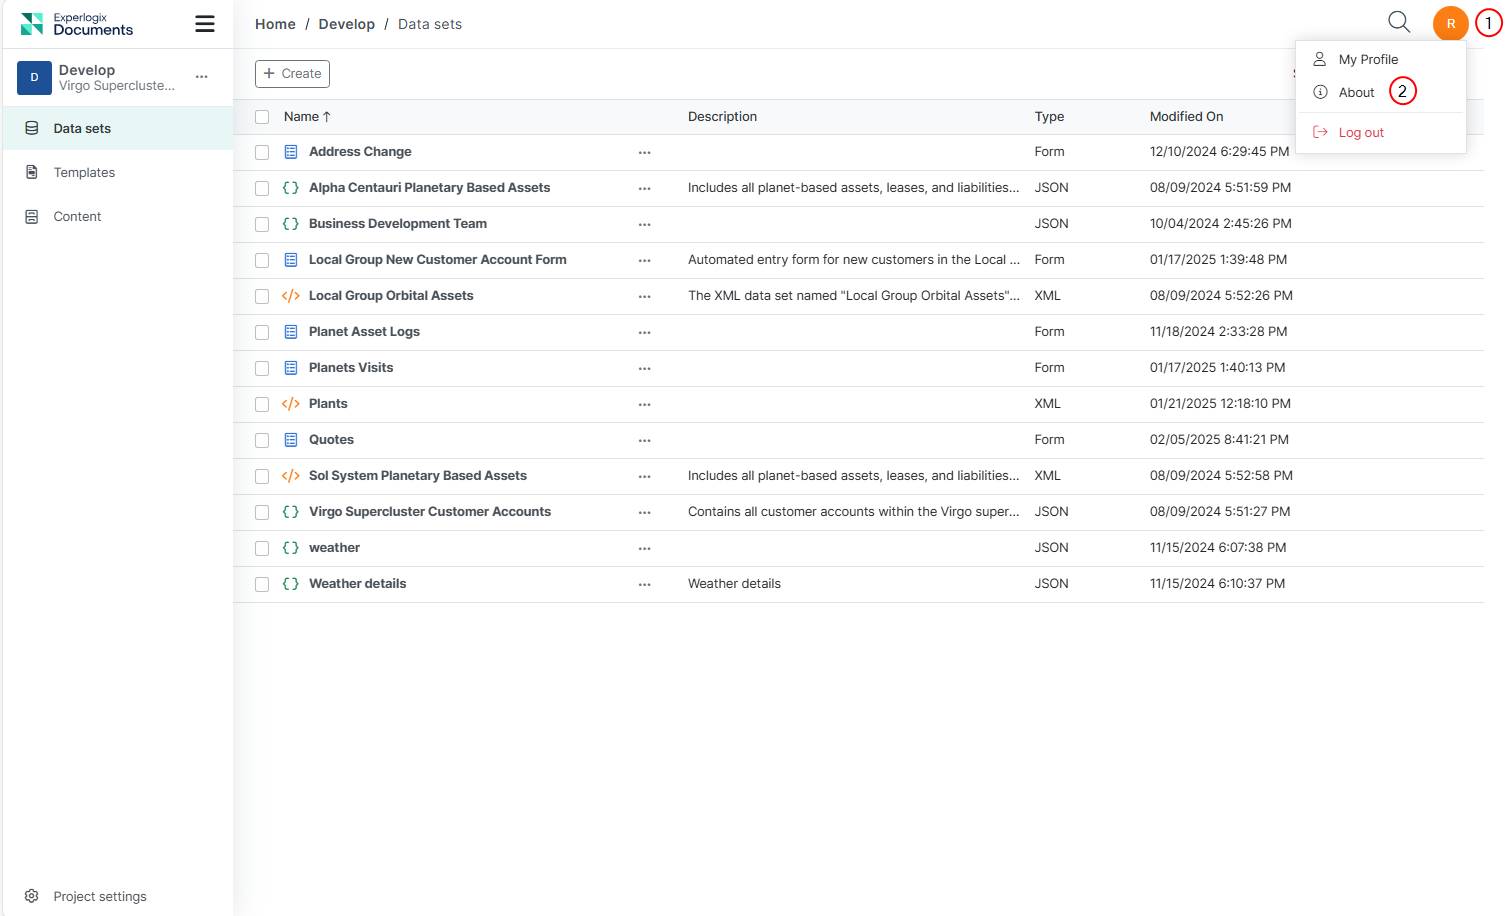
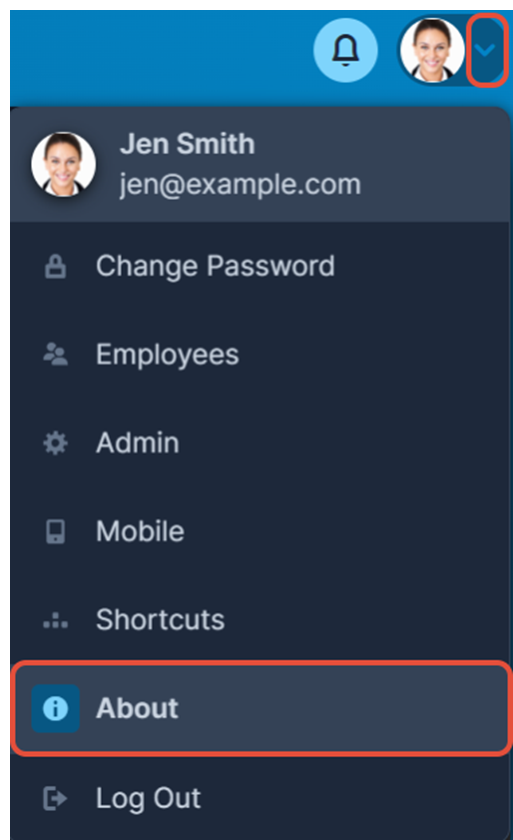
On the Project Dashboard, select your profile icon.
-
Navigate to the About section.
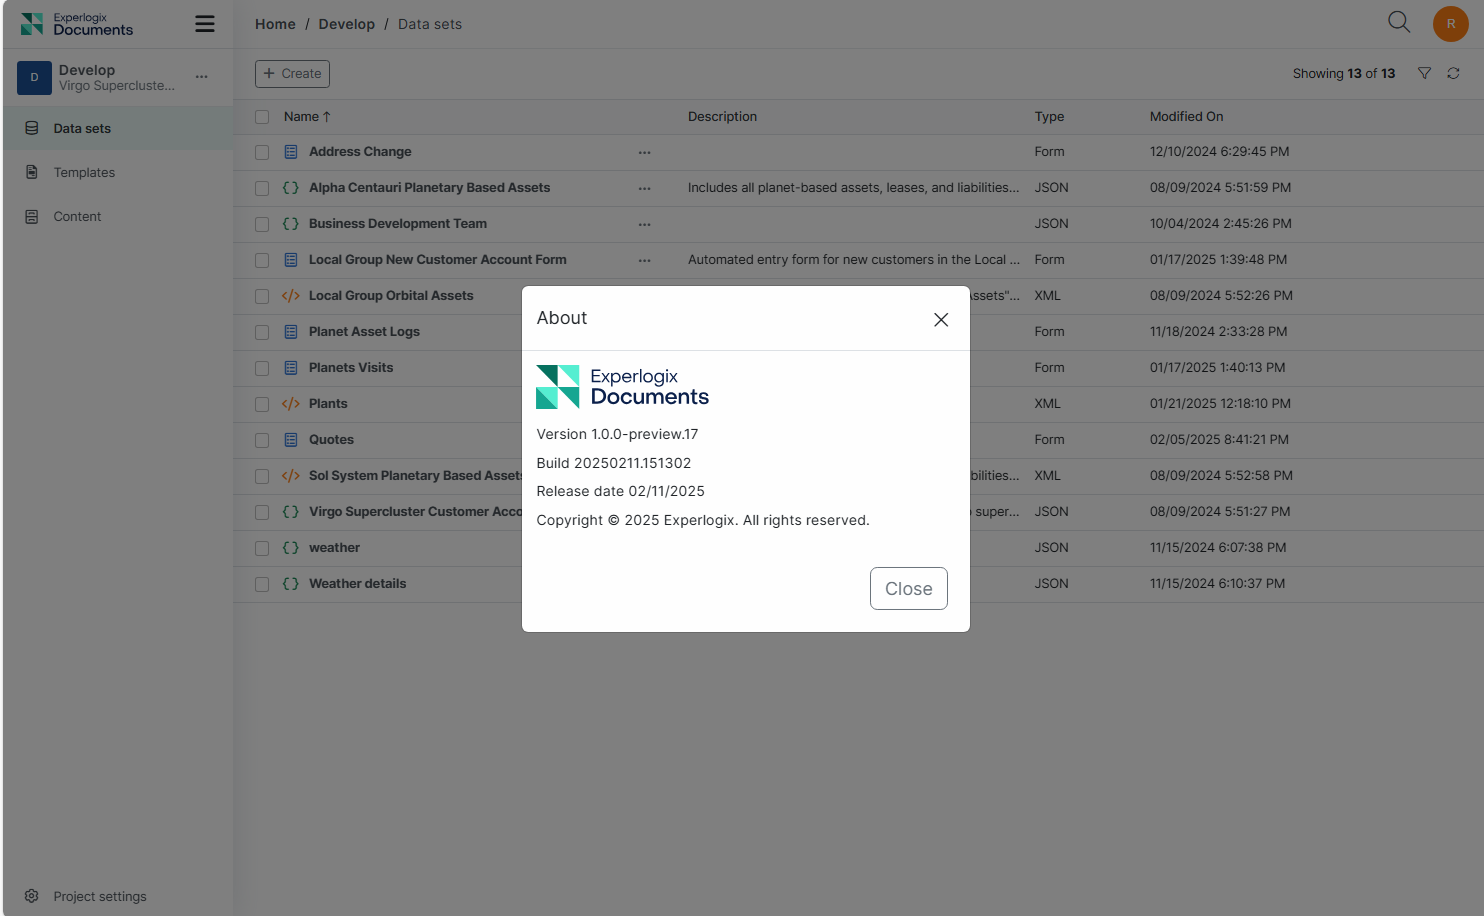
The product details modal displays with the product version.
Get the Experlogix Smart Flows Solution Version in Connected Applications
Get the Experlogix Smart Flows Solution Version in Connected Applications
Microsoft Dynamics 365 CE
-
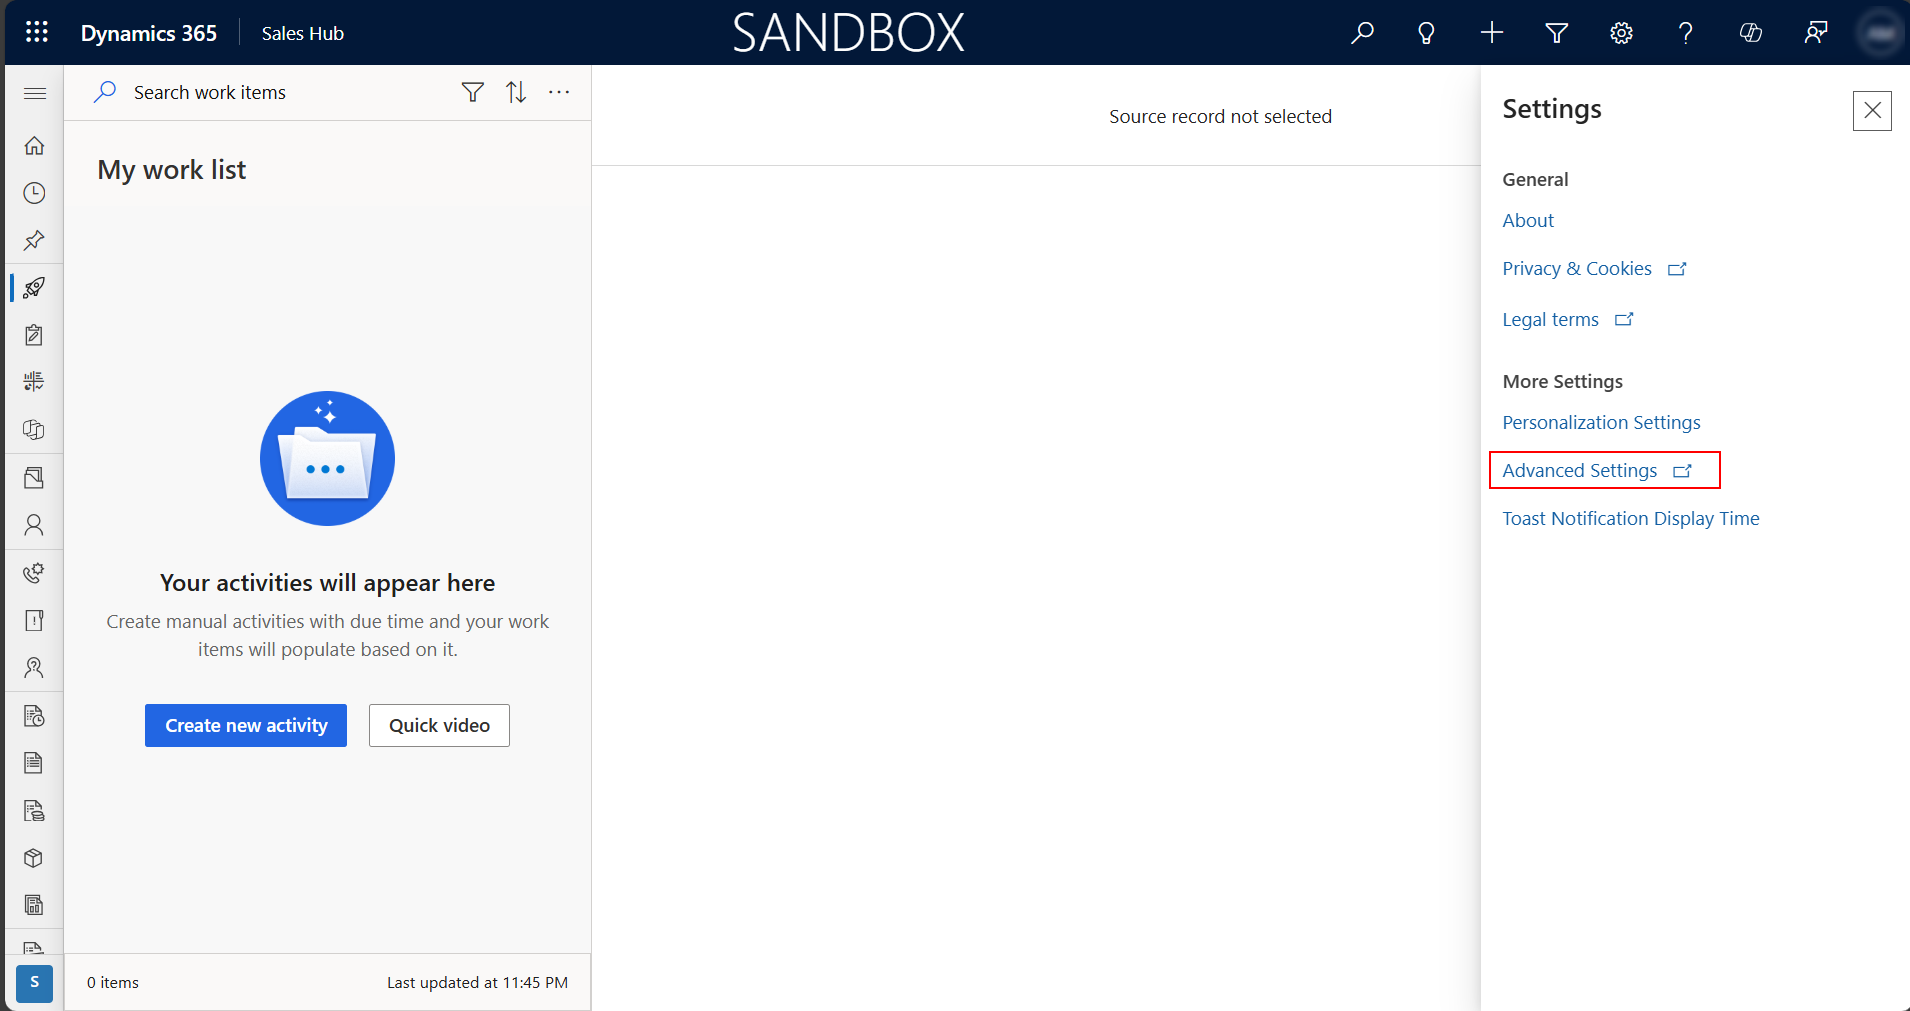
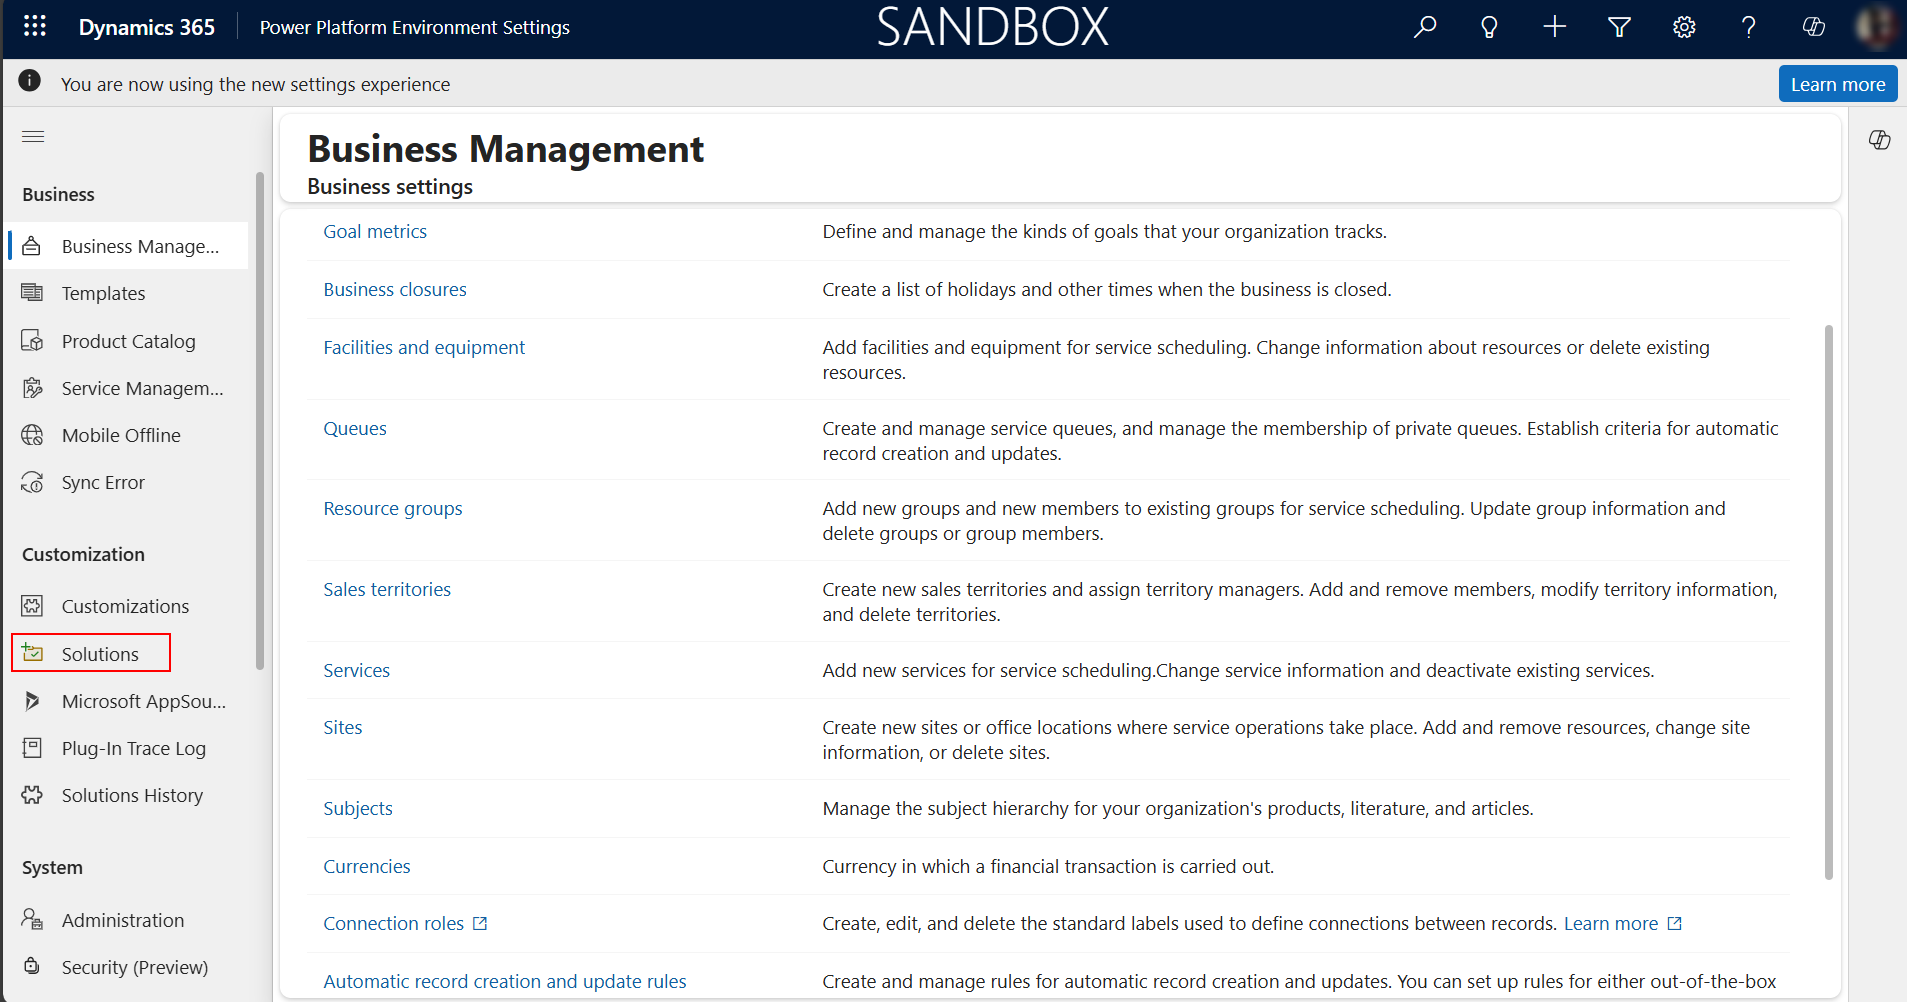
In Microsoft Dynamics 365 CE, navigate to Settings - Advanced Settings.
-
In Microsoft Dynamics 365 CE, navigate to Settings - Advanced Settings.
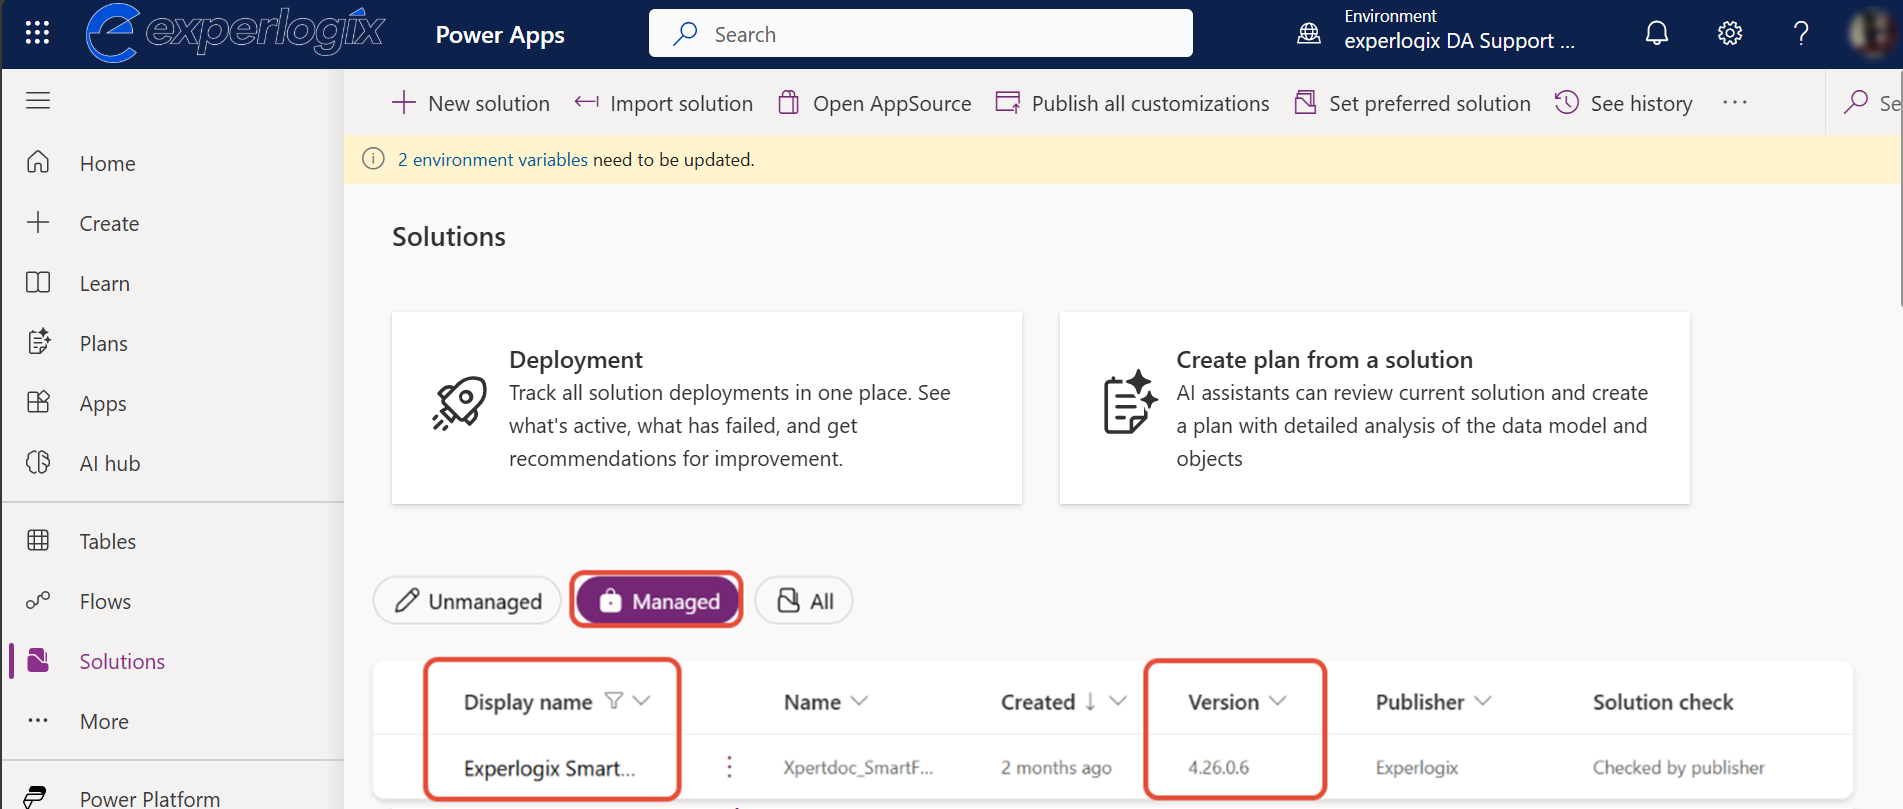
The Power Apps window is displayed with the list of installed solutions.
-
Under Managed section, search for Experlogix Smart Flows > Version.
Microsoft Dynamics 365 BC
-
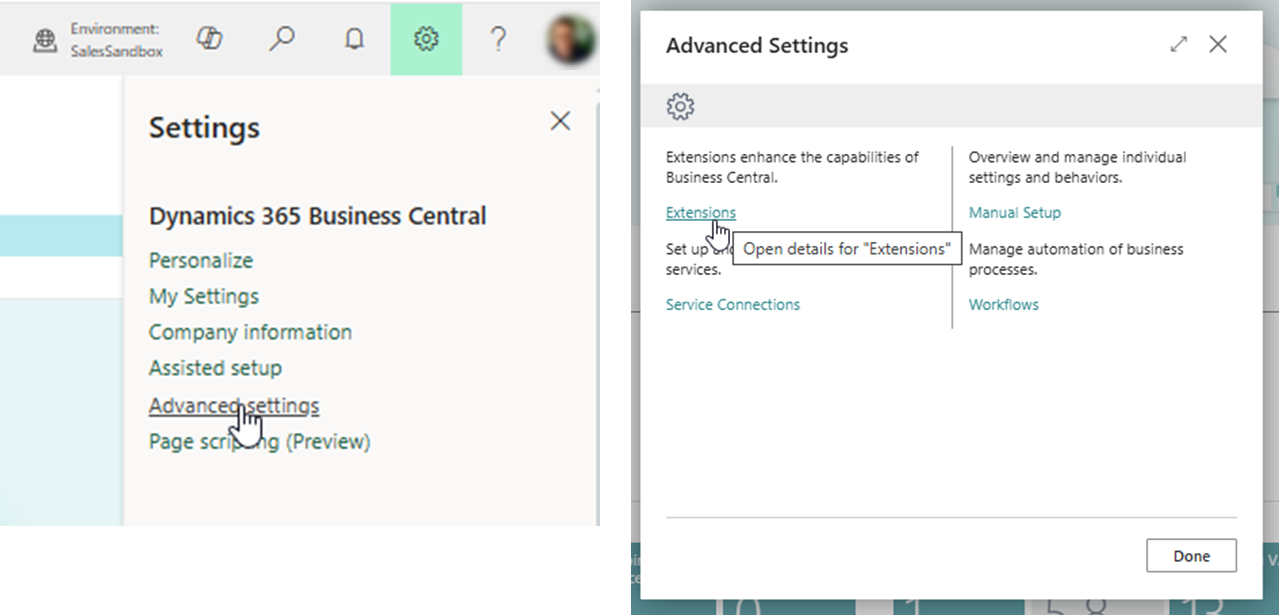
In Microsoft Dynamics 365 Business Central navigate to Settings > Advanced Settings > Extensions.
-
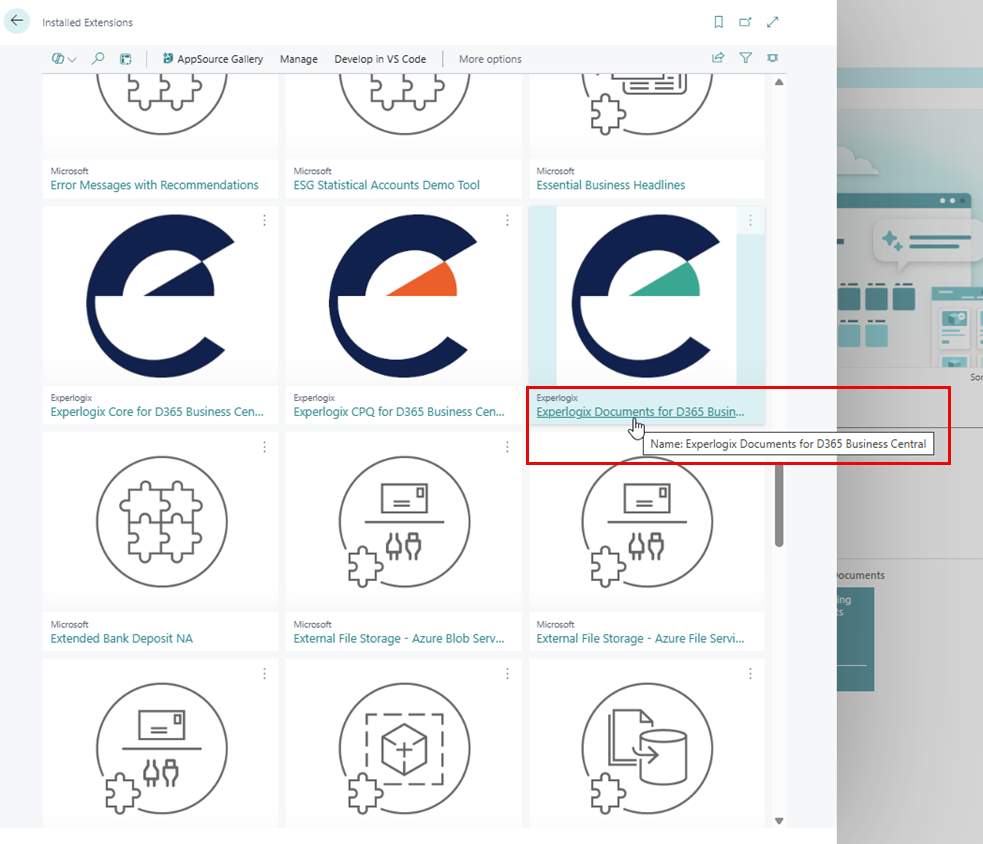
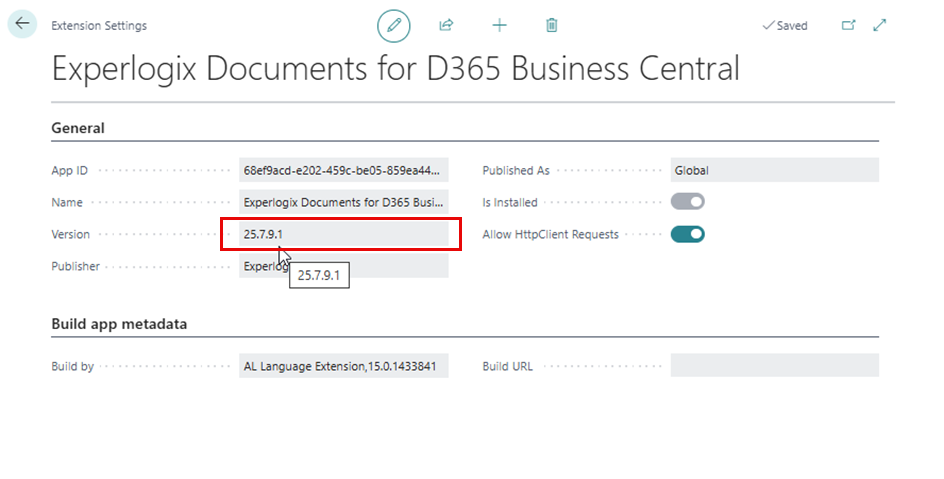
Locate the Experlogix Documents for 'D365 Business Central' extension.
-
Open the extension to see the version number.
SugarCRM
-
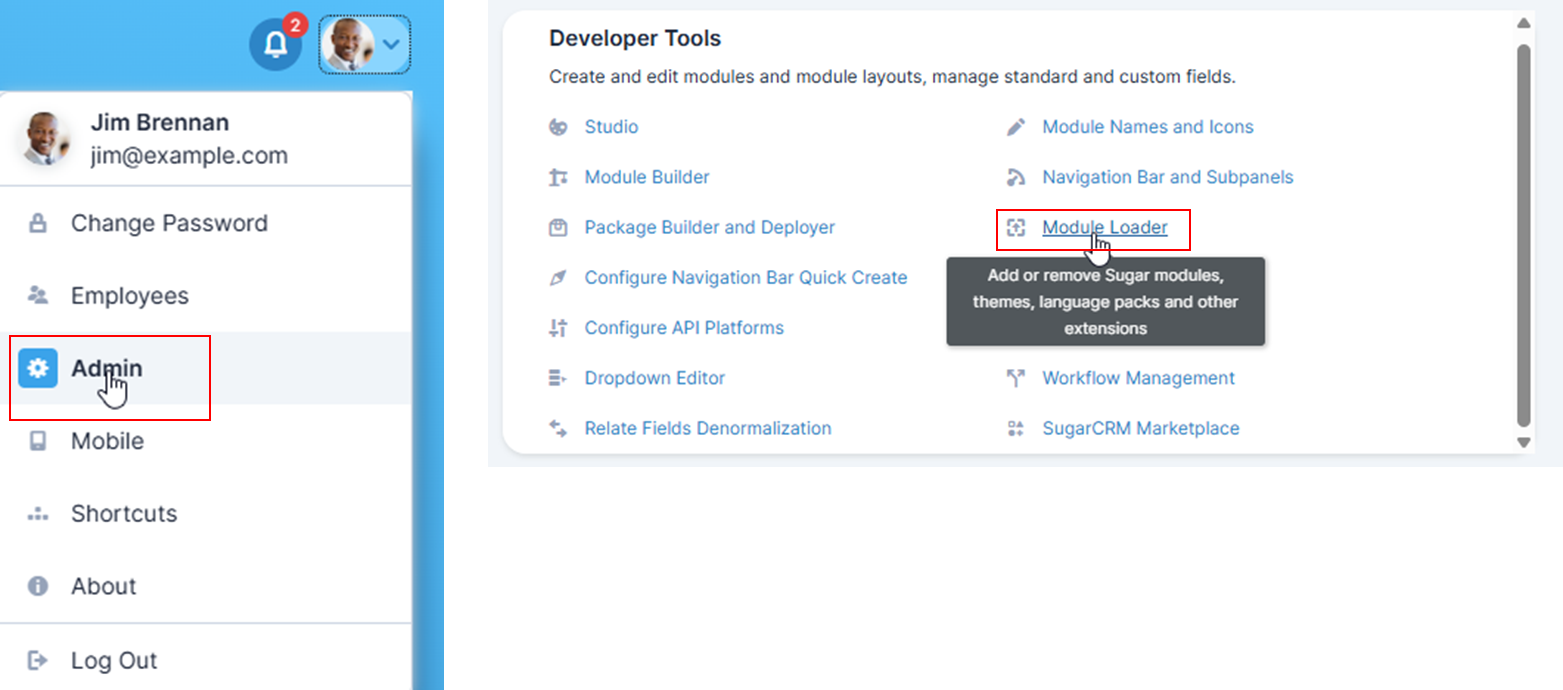
In Sugar CRM navigate to Settings > Admin > Developer Tools > Module Loader.
-
Locate the 'Experlogix Smart Flows' module to view the version number.

Get the CRM/ERP version
Get the CRM/ERP version
Get the exact build version of the CRM/ERP, including both major and minor release numbers. If uncertain, send a screenshot.
Microsoft Dynamics 365 CE
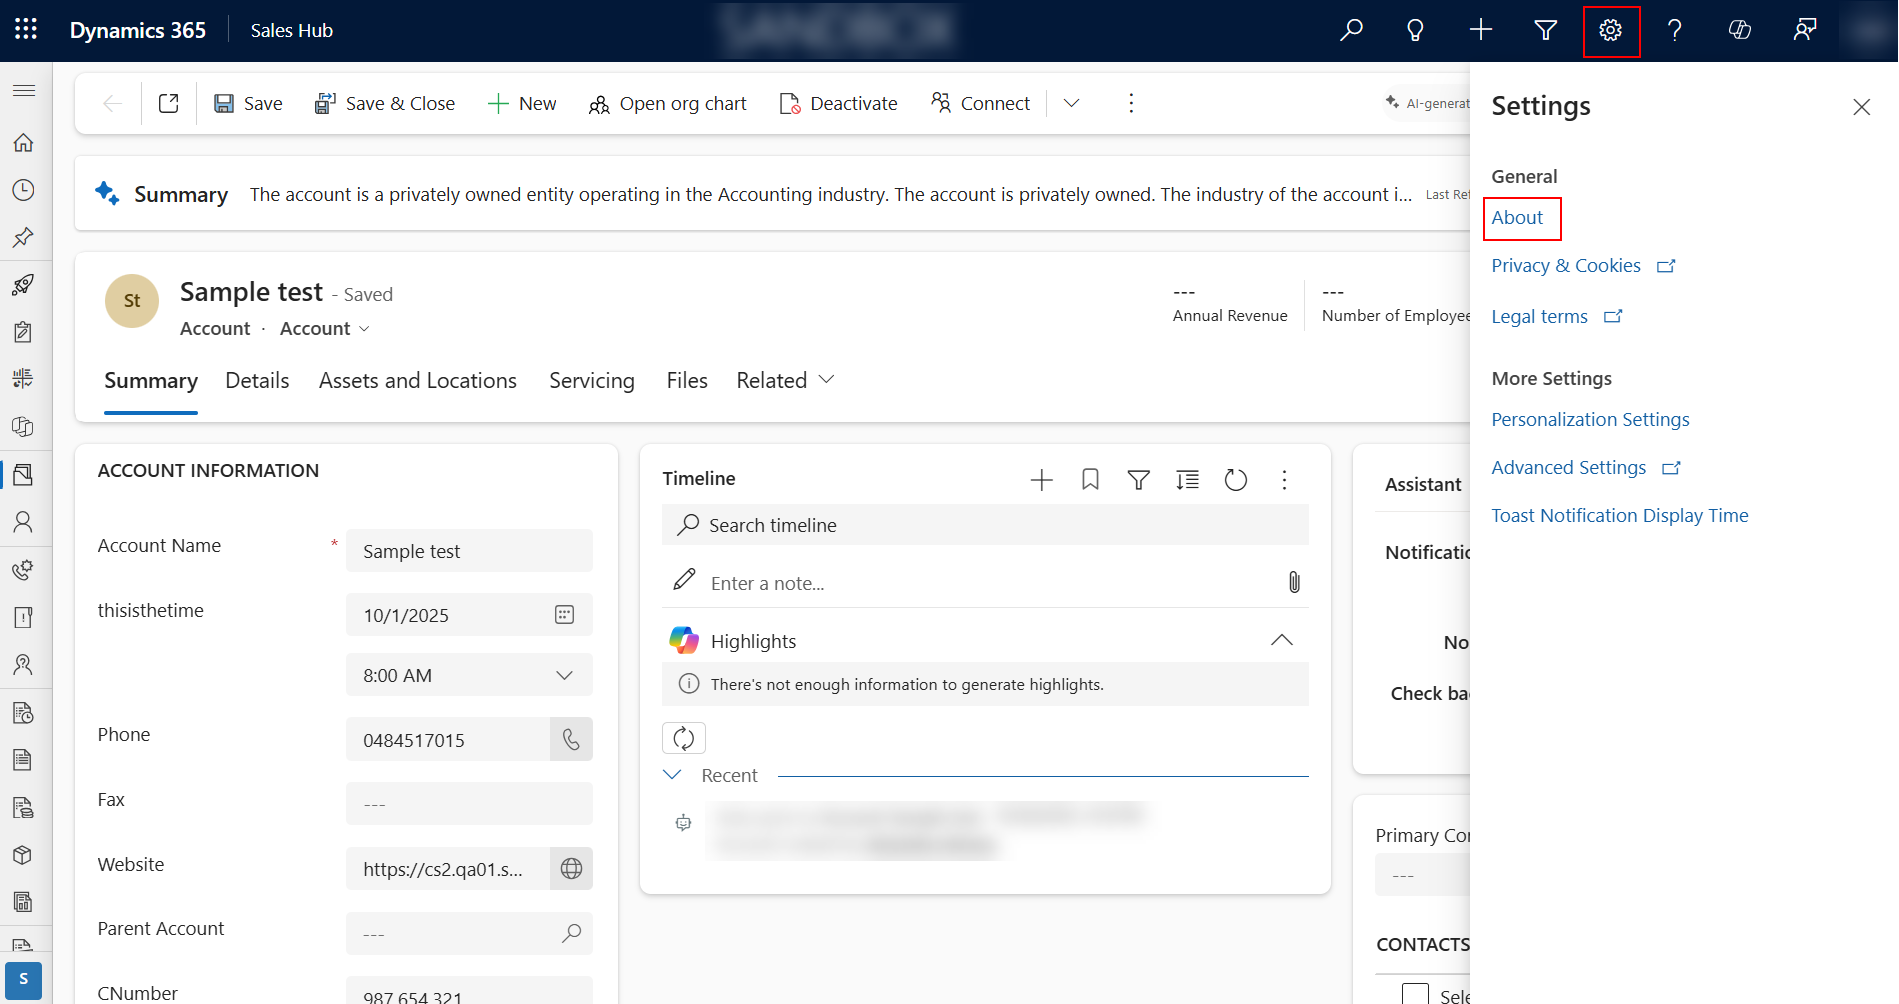
Navigate to Settings > About.
Microsoft Dynamics 365 F&O
-
Go to System Administration.
-
Select License Configuration.
-
The Version Number will be displayed in the module details.
Microsoft Dynamics 365 BC
-
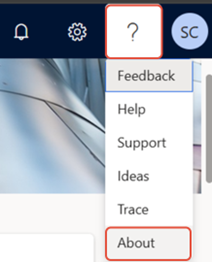
Open Business Central and navigate to Help and Support.
-
Select About.
-
The Version Number will be displayed in the dialog box.
SugarCRM
Salesforce:
-
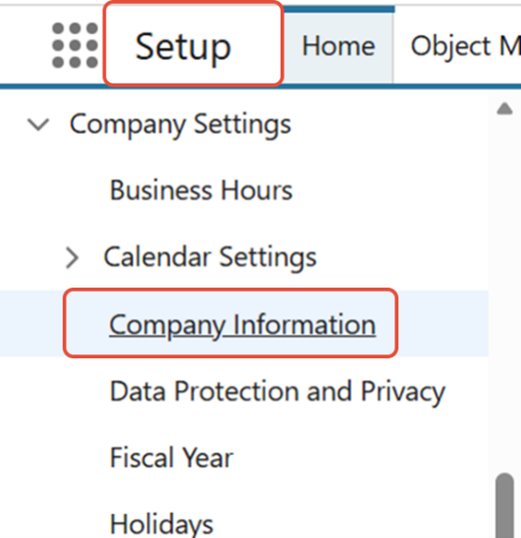
Log in to Salesforce and navigate to Setup.
-
In the Quick Find box, search for Company Information.
-
The Instance and API Version will be displayed in the company information details.
For the most up-to-date instructions, please refer to the documentation provided by the respective system providers:
Retrieve a Flow Run Report
Retrieve a Flow Run Report
The 'flow run report' is required in order to analyze the error message you have encountered.
-
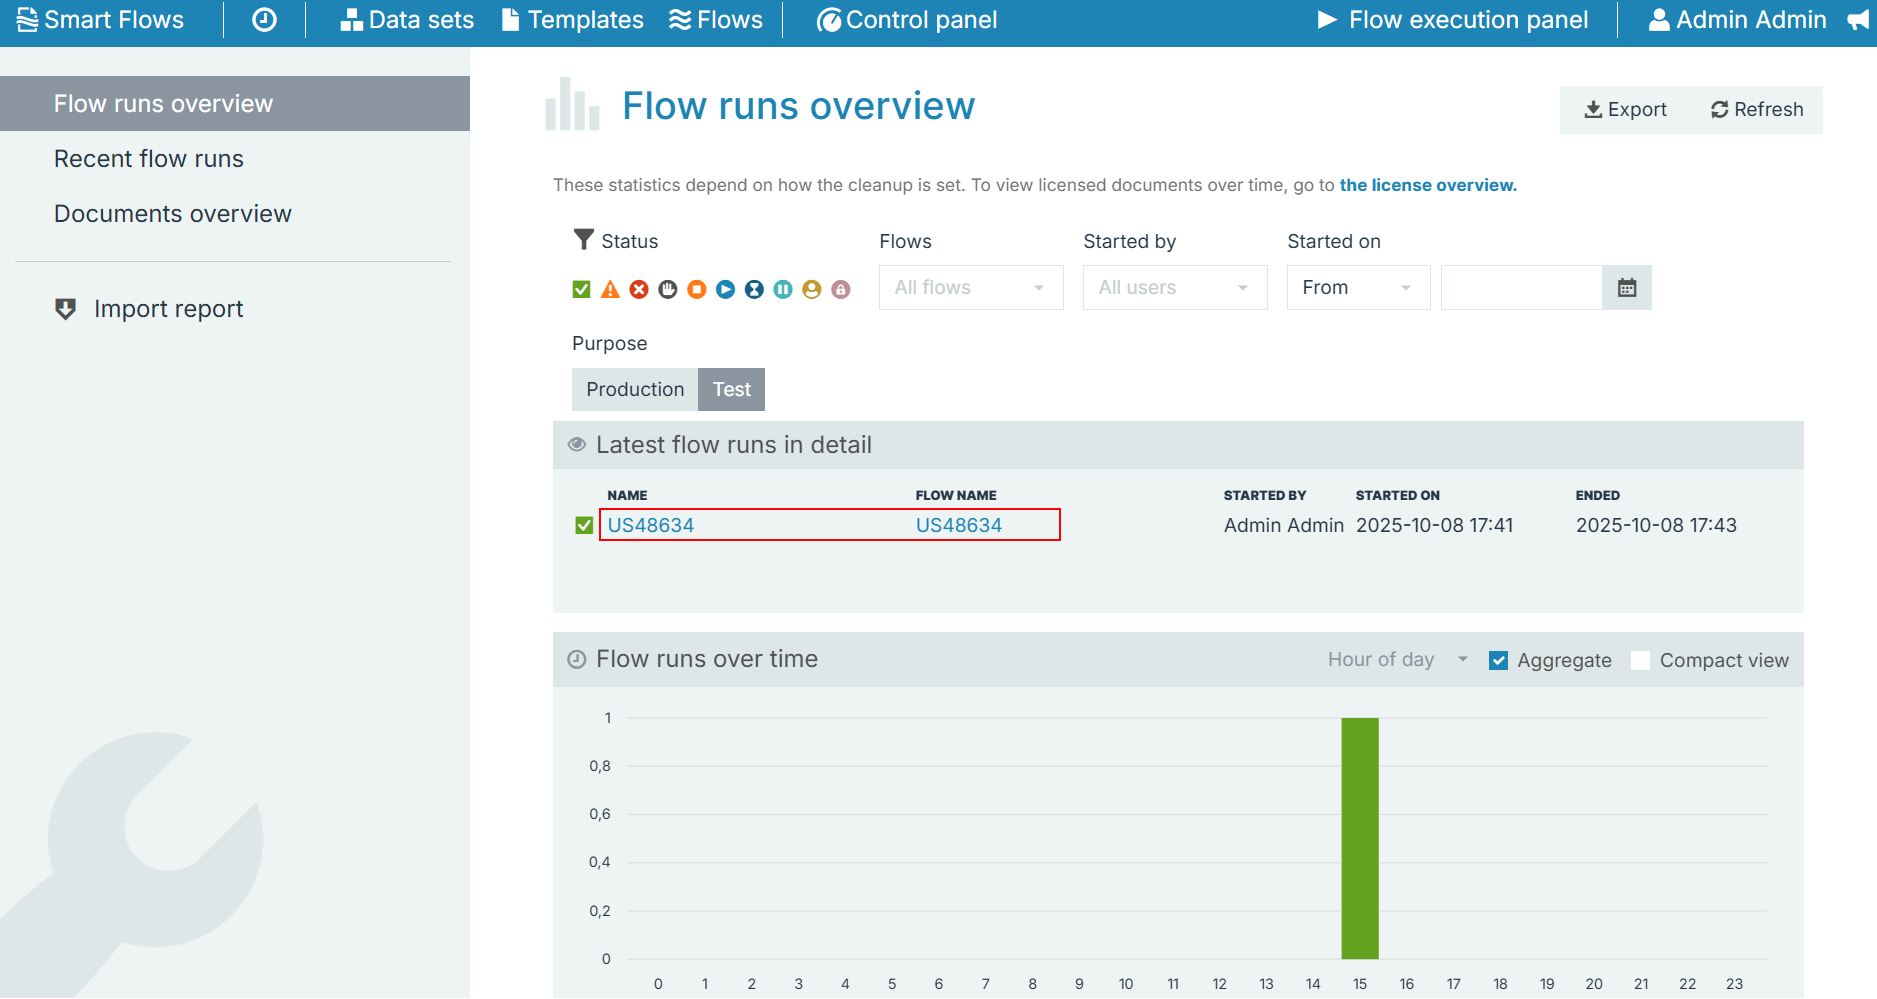
Navigate to Control Panel> Reporting.
-
Select the flow run that requires examination.
-
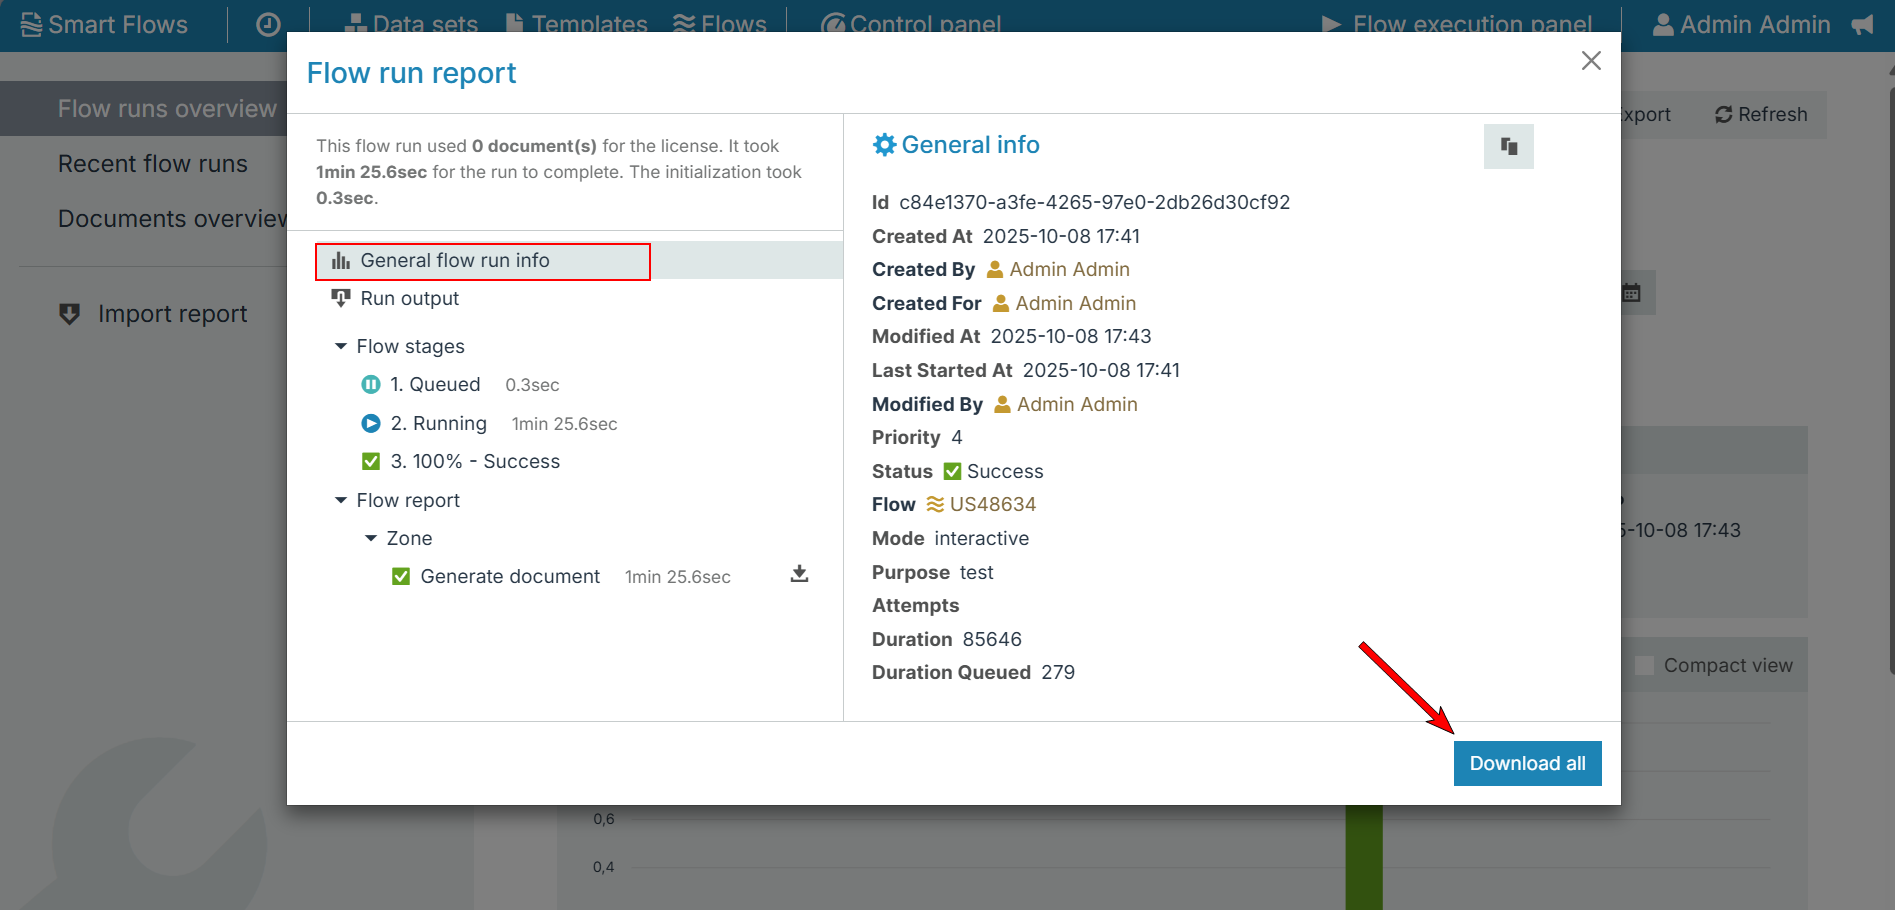
Select Download All.
Retrieve a Flow Export File
Retrieve a Flow Export File
-
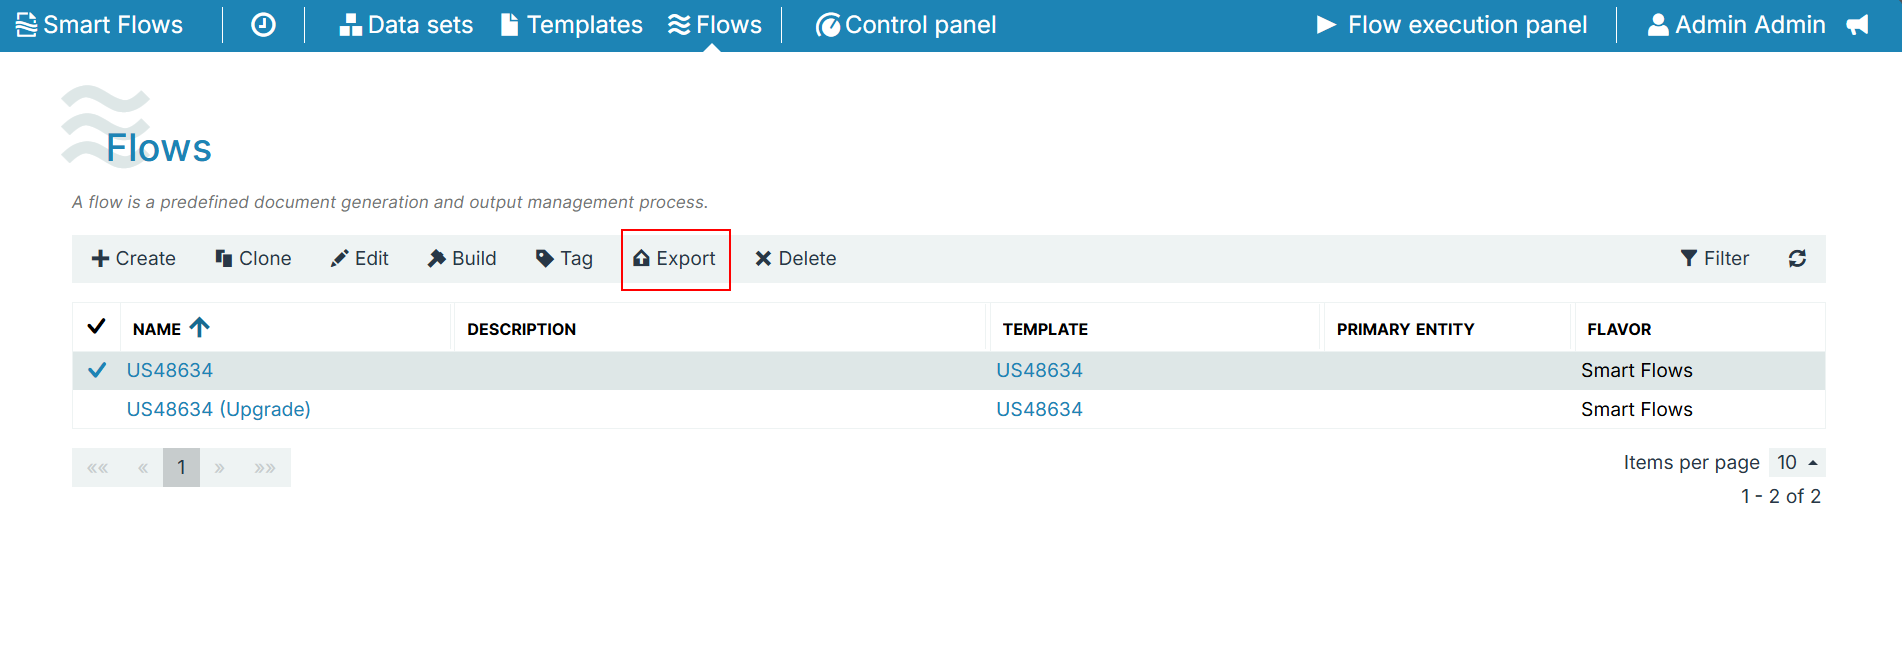
In the Flow List window, select the flow.
-
Select Export.
-
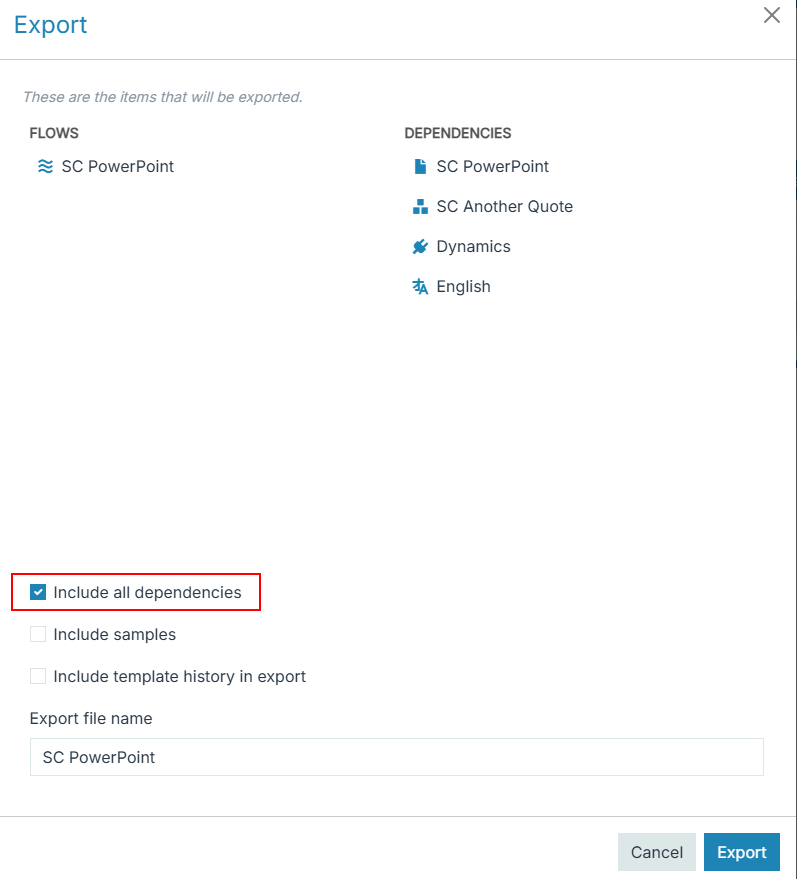
Select the include all dependencies checkbox when prompted.
-
Select OK.
Create a Sample in the Project Console
Create a Sample in the Project Console
-
Navigate to the dataset experiencing the issue in the Project Console.
The Basic settings page displays.
-
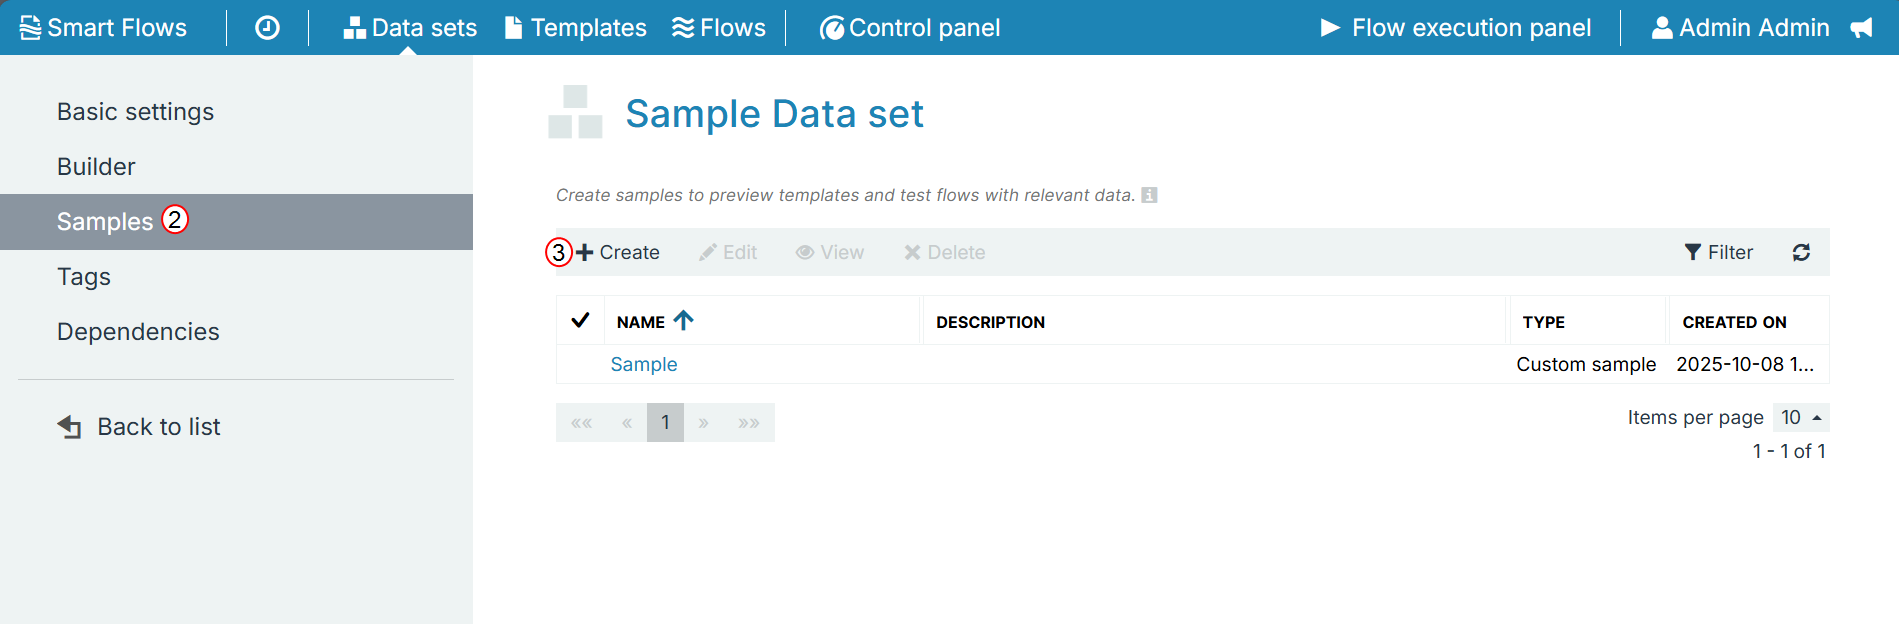
Select Samples > Create.
The Create sample window appears.
-
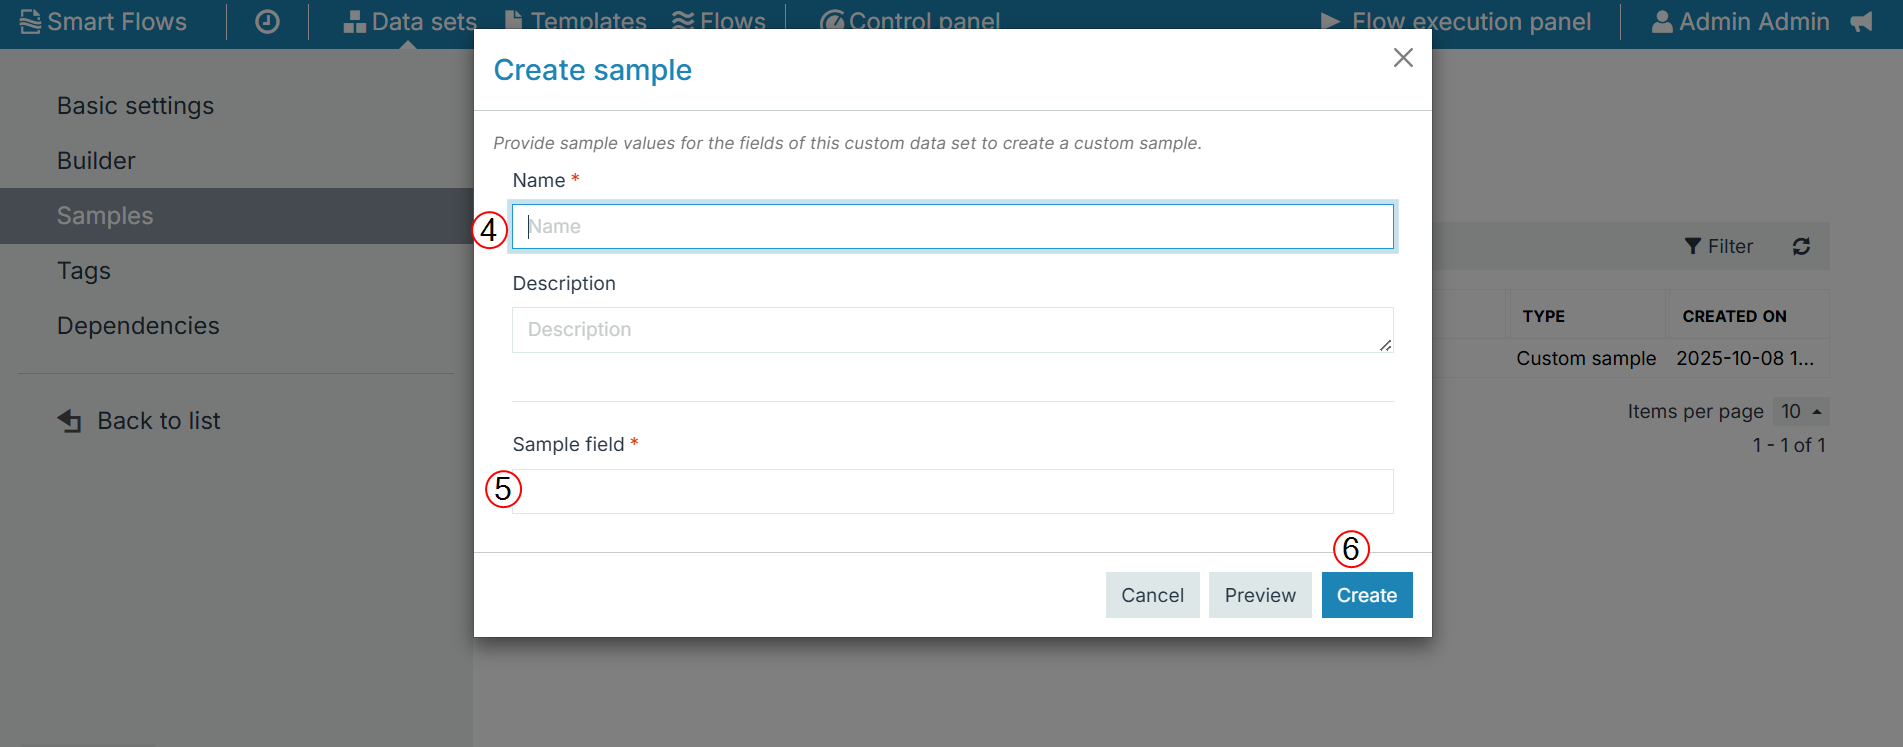
In the Name field, enter a unique name for the sample.
-
In the Reference field, select thethe Name field, give the sample a new, unique name.
-
In the Reference field, select the records to include with the sample.
-
Select Create.
Create a local Sample in the Template Builder
Create a local Sample in the Template Builder
-
Add a Sample to the data set of the template.
-
Open Word and navigate to the Template Builder.
-
Open the template that you wish to share.
-
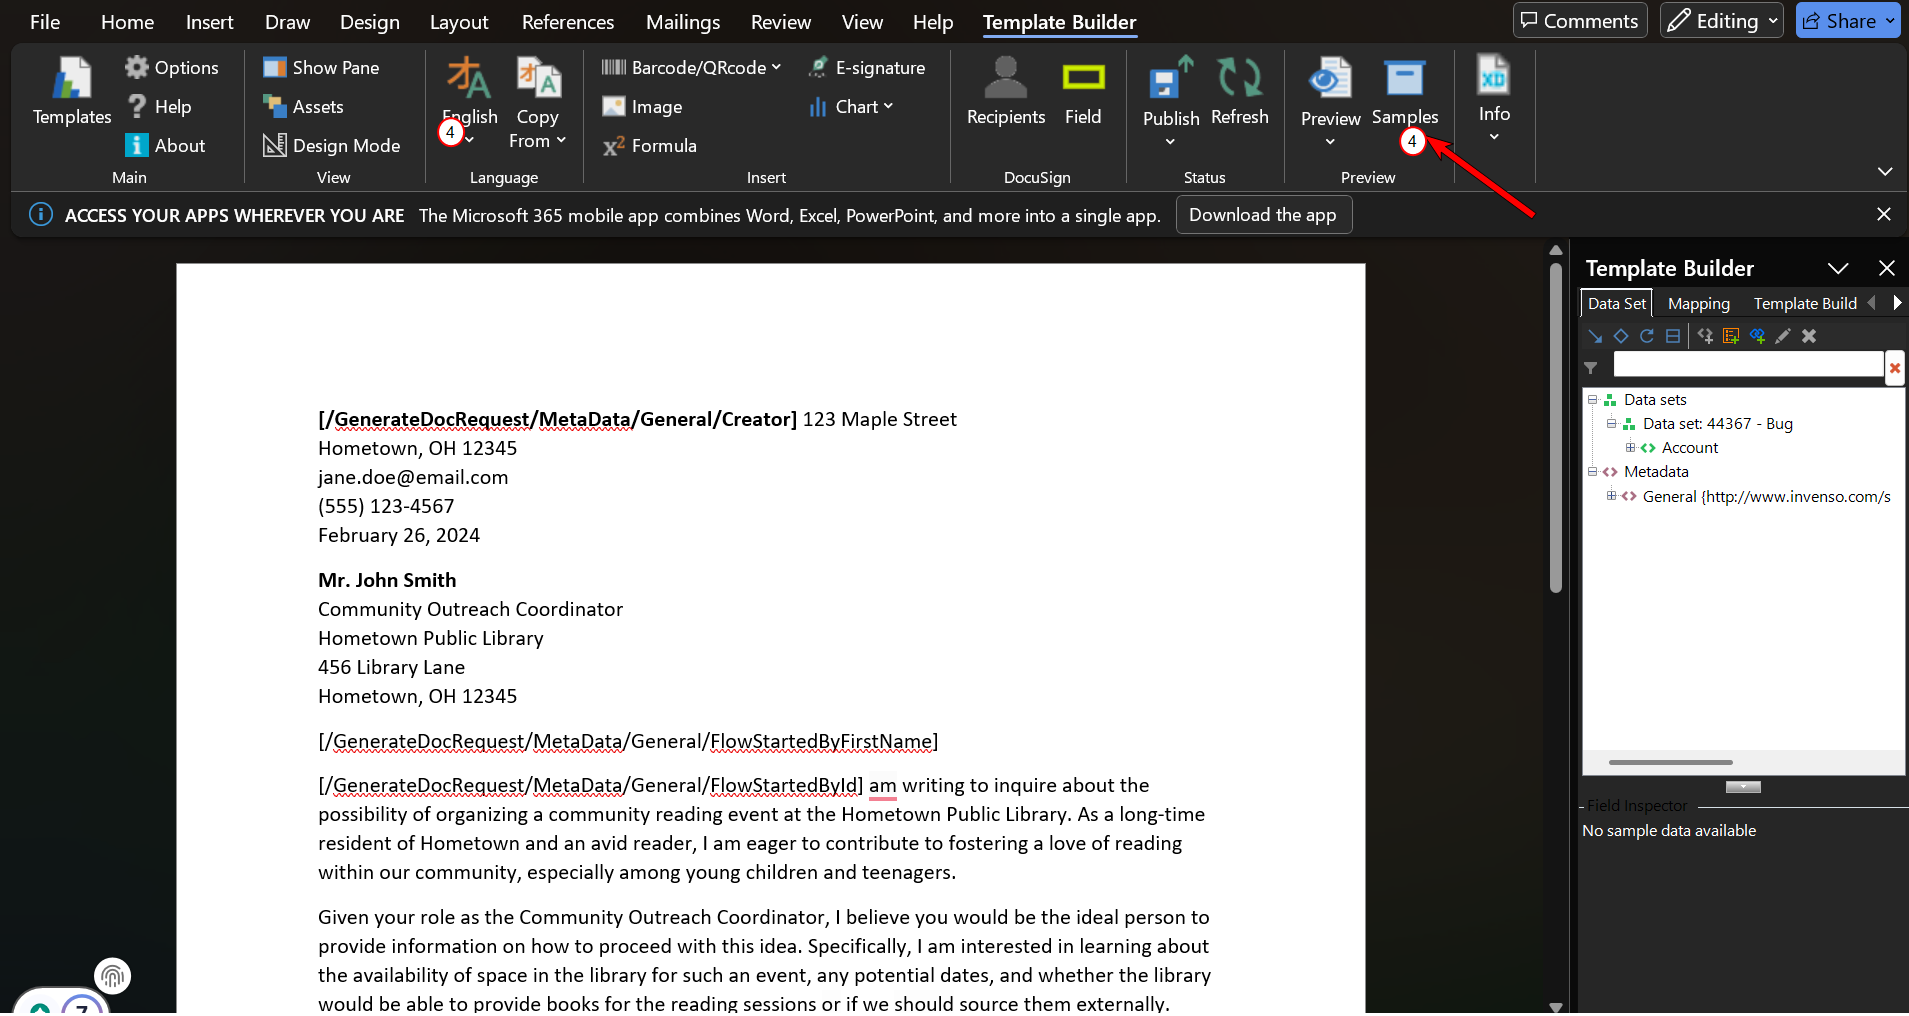
Select Samples in the ribbon.
-
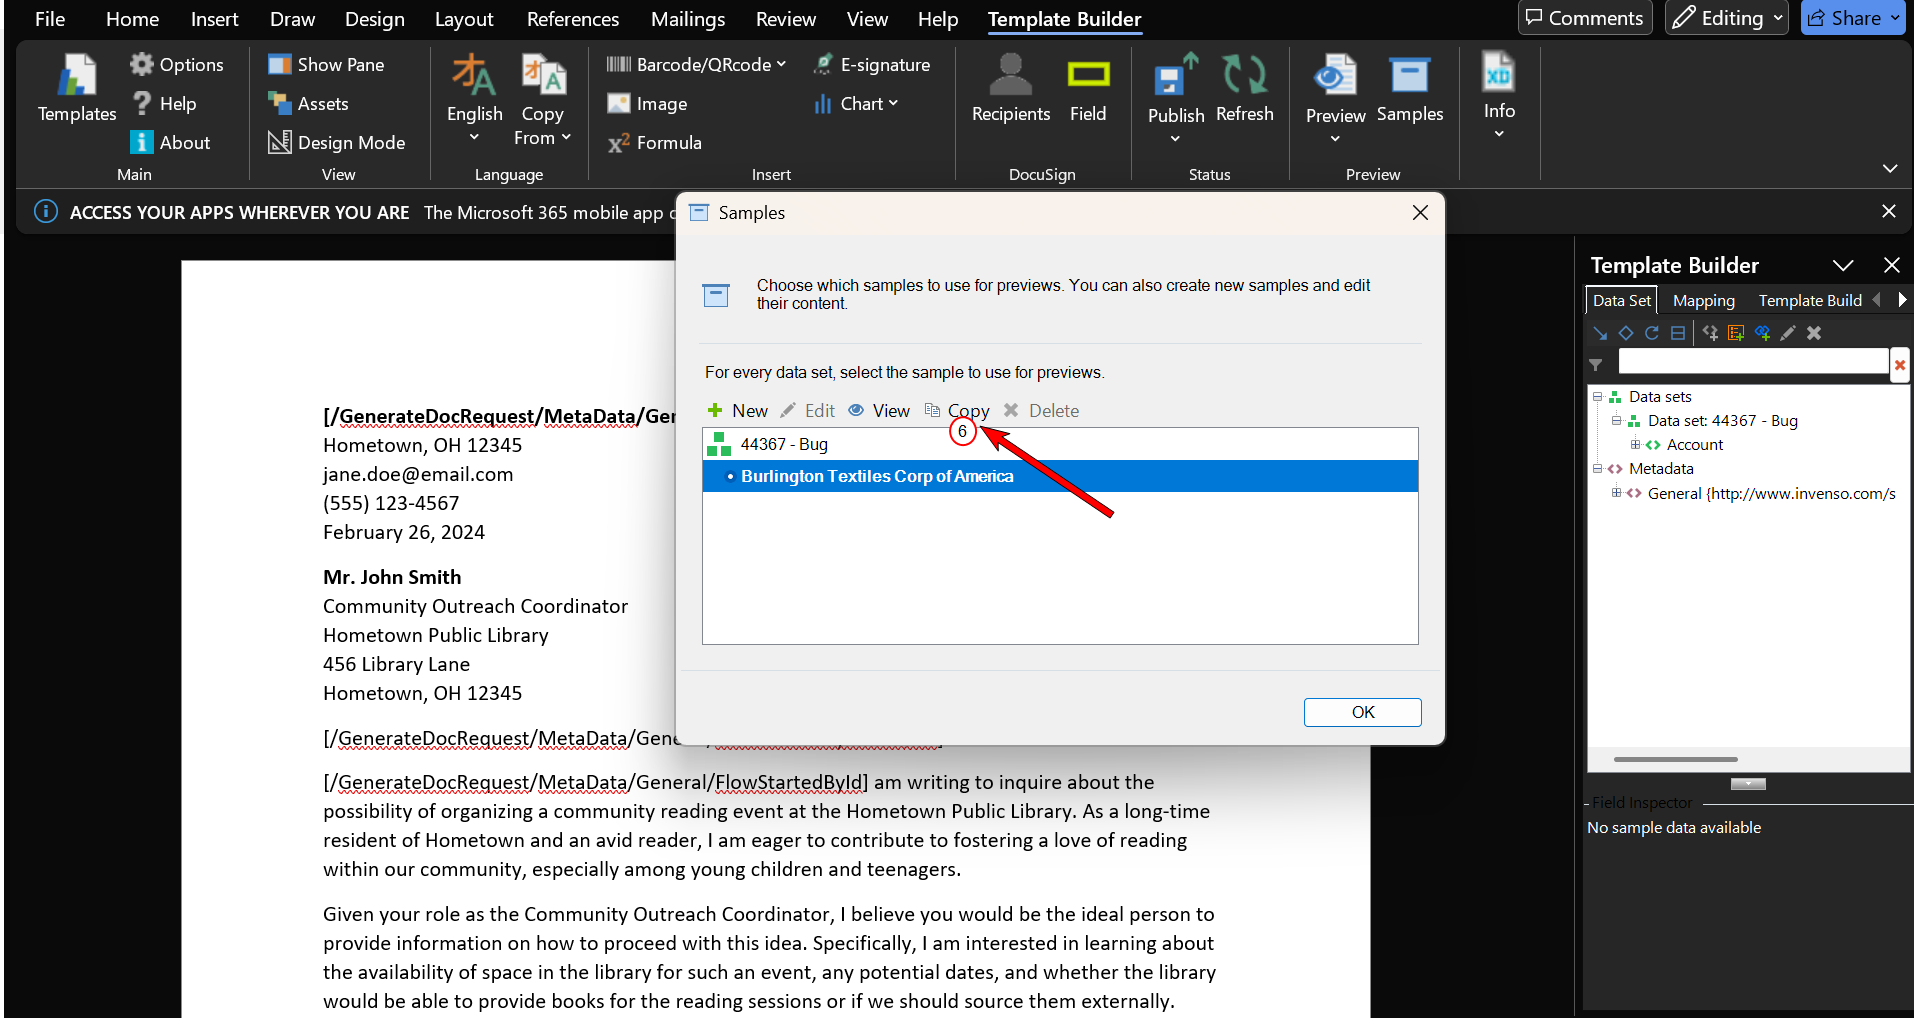
Select the Sample that is added to the data set.
-
Select Copy.
-
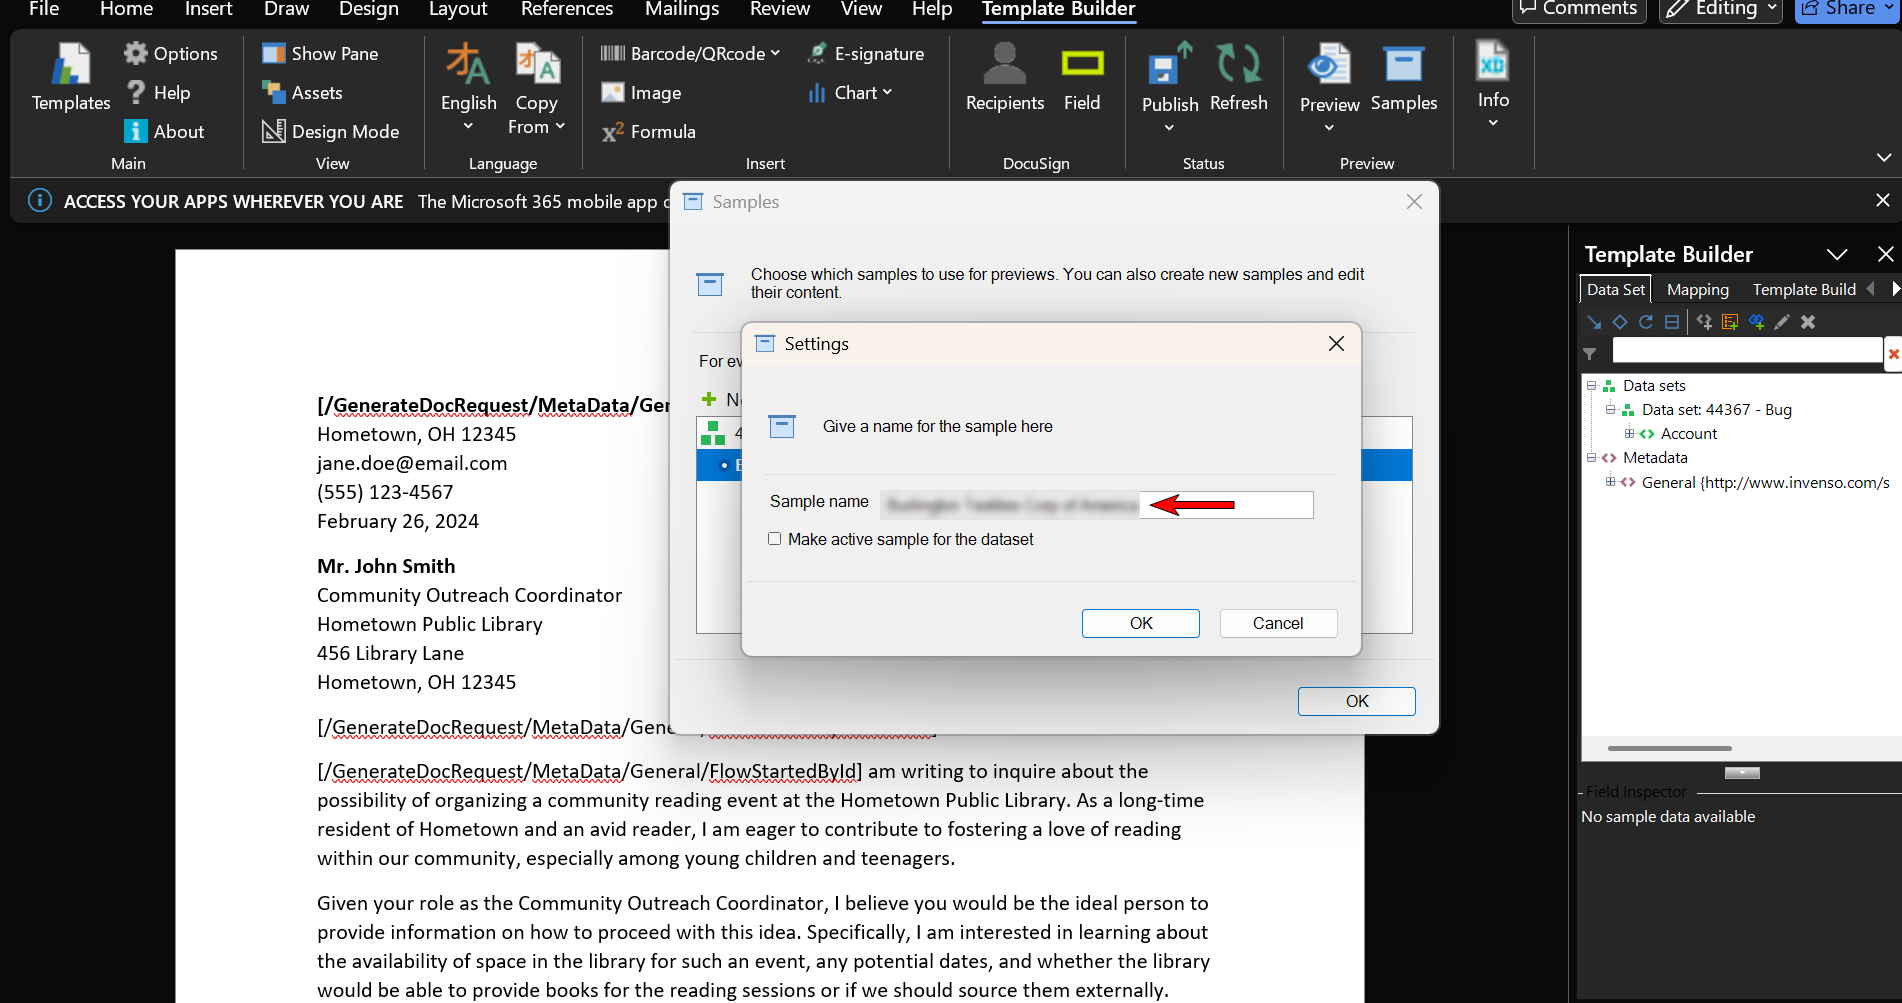
Save the document (ensure to save the copy under a different name).
-
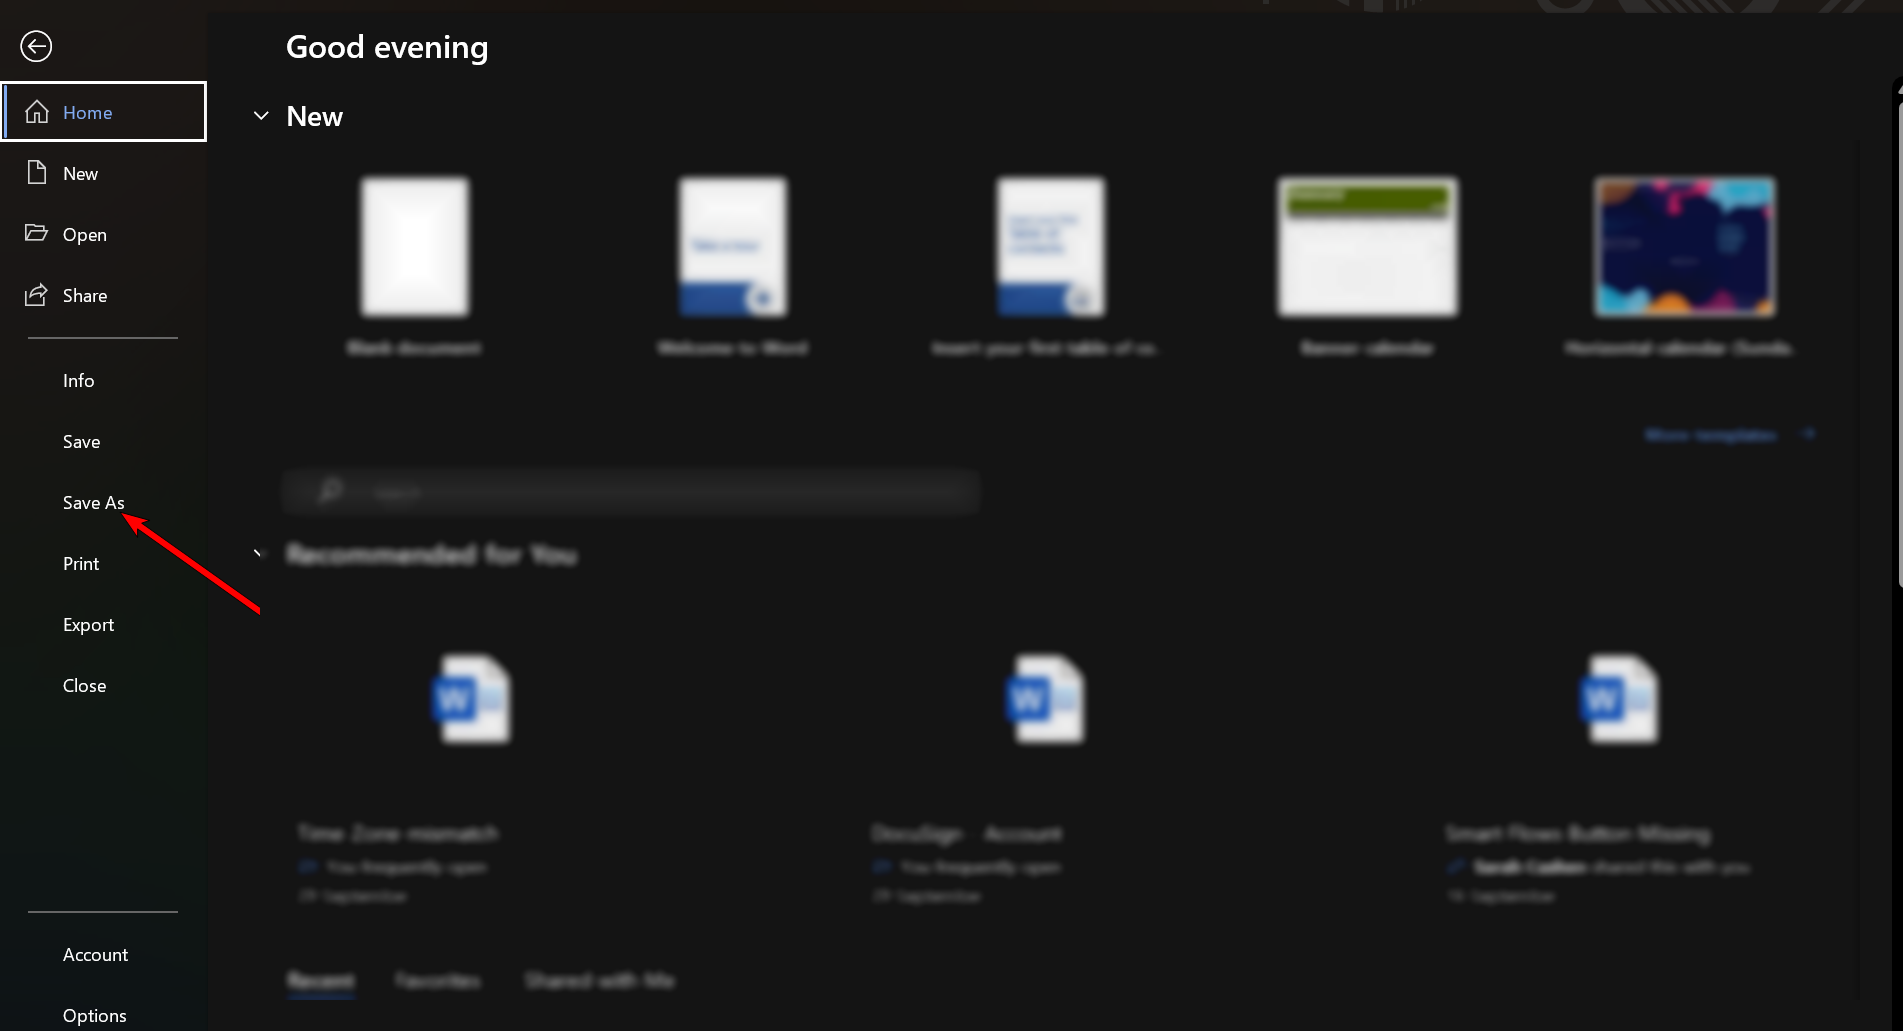
Save the document as a regular .docx file in the path 'File > Save As'.
-
Add the saved document to the ticket.
Get Template Builder Add-in Version
Get Template Builder Add-in Version
-
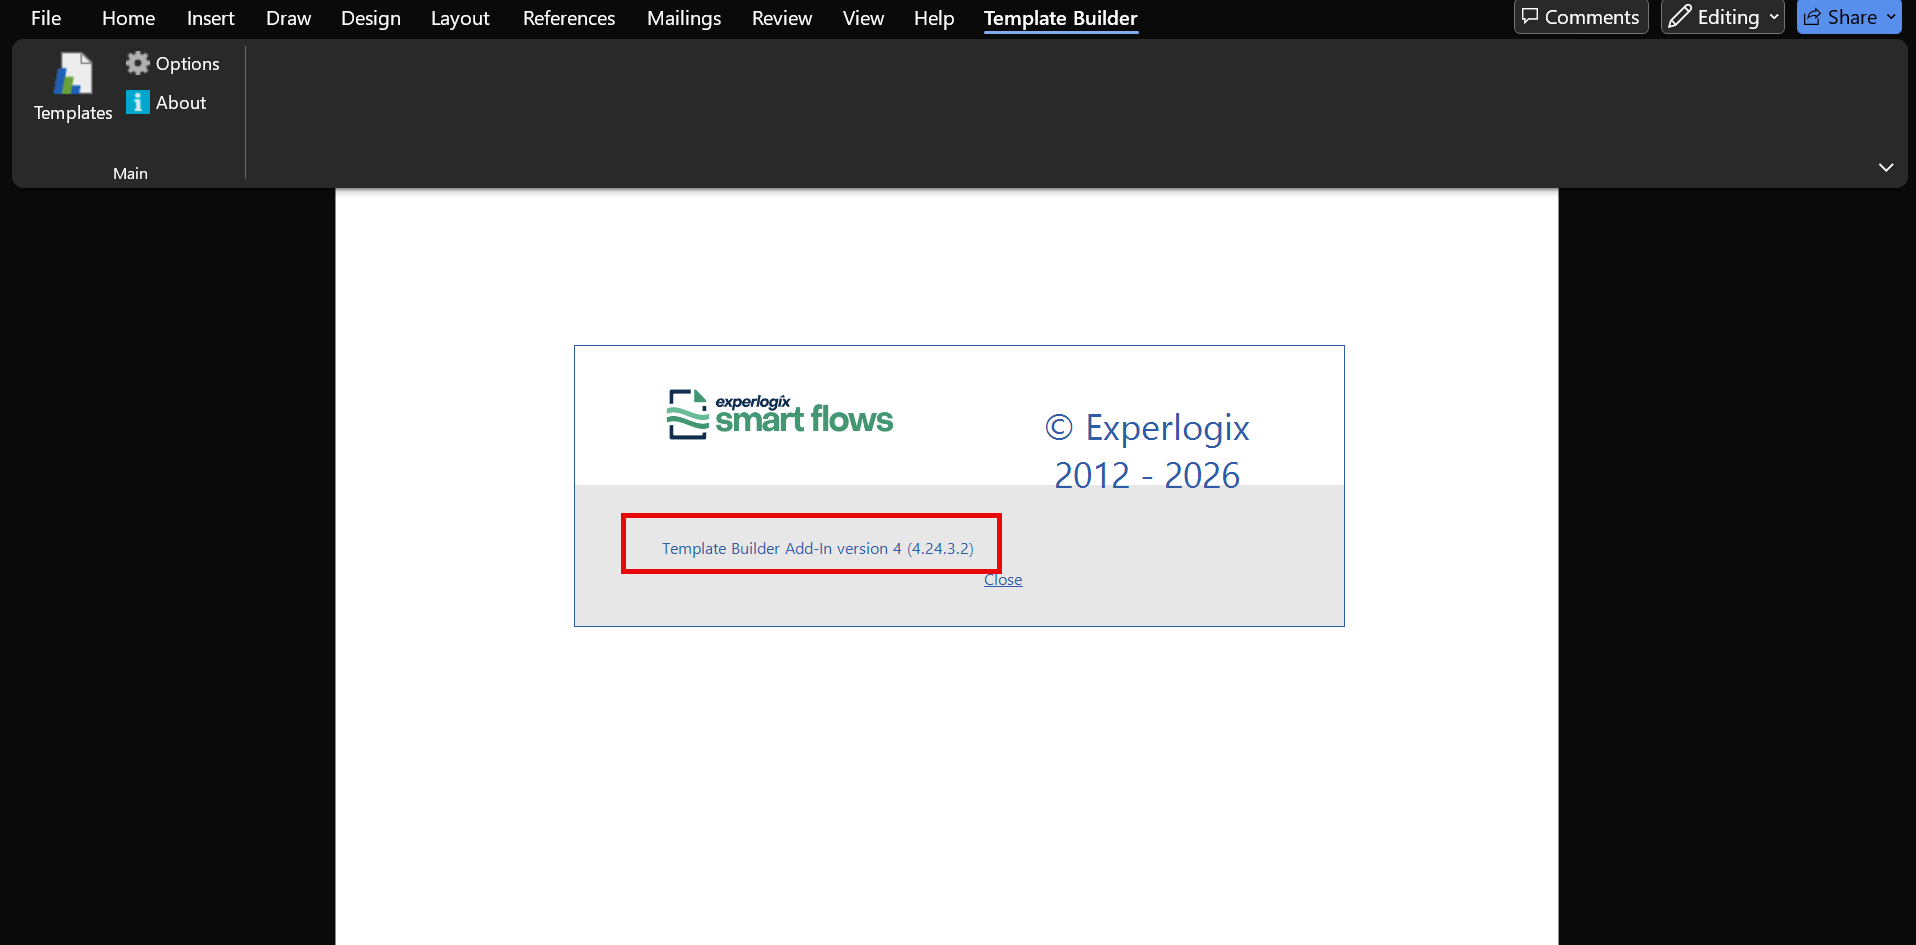
Open MS Word and click on Template Builder> About.
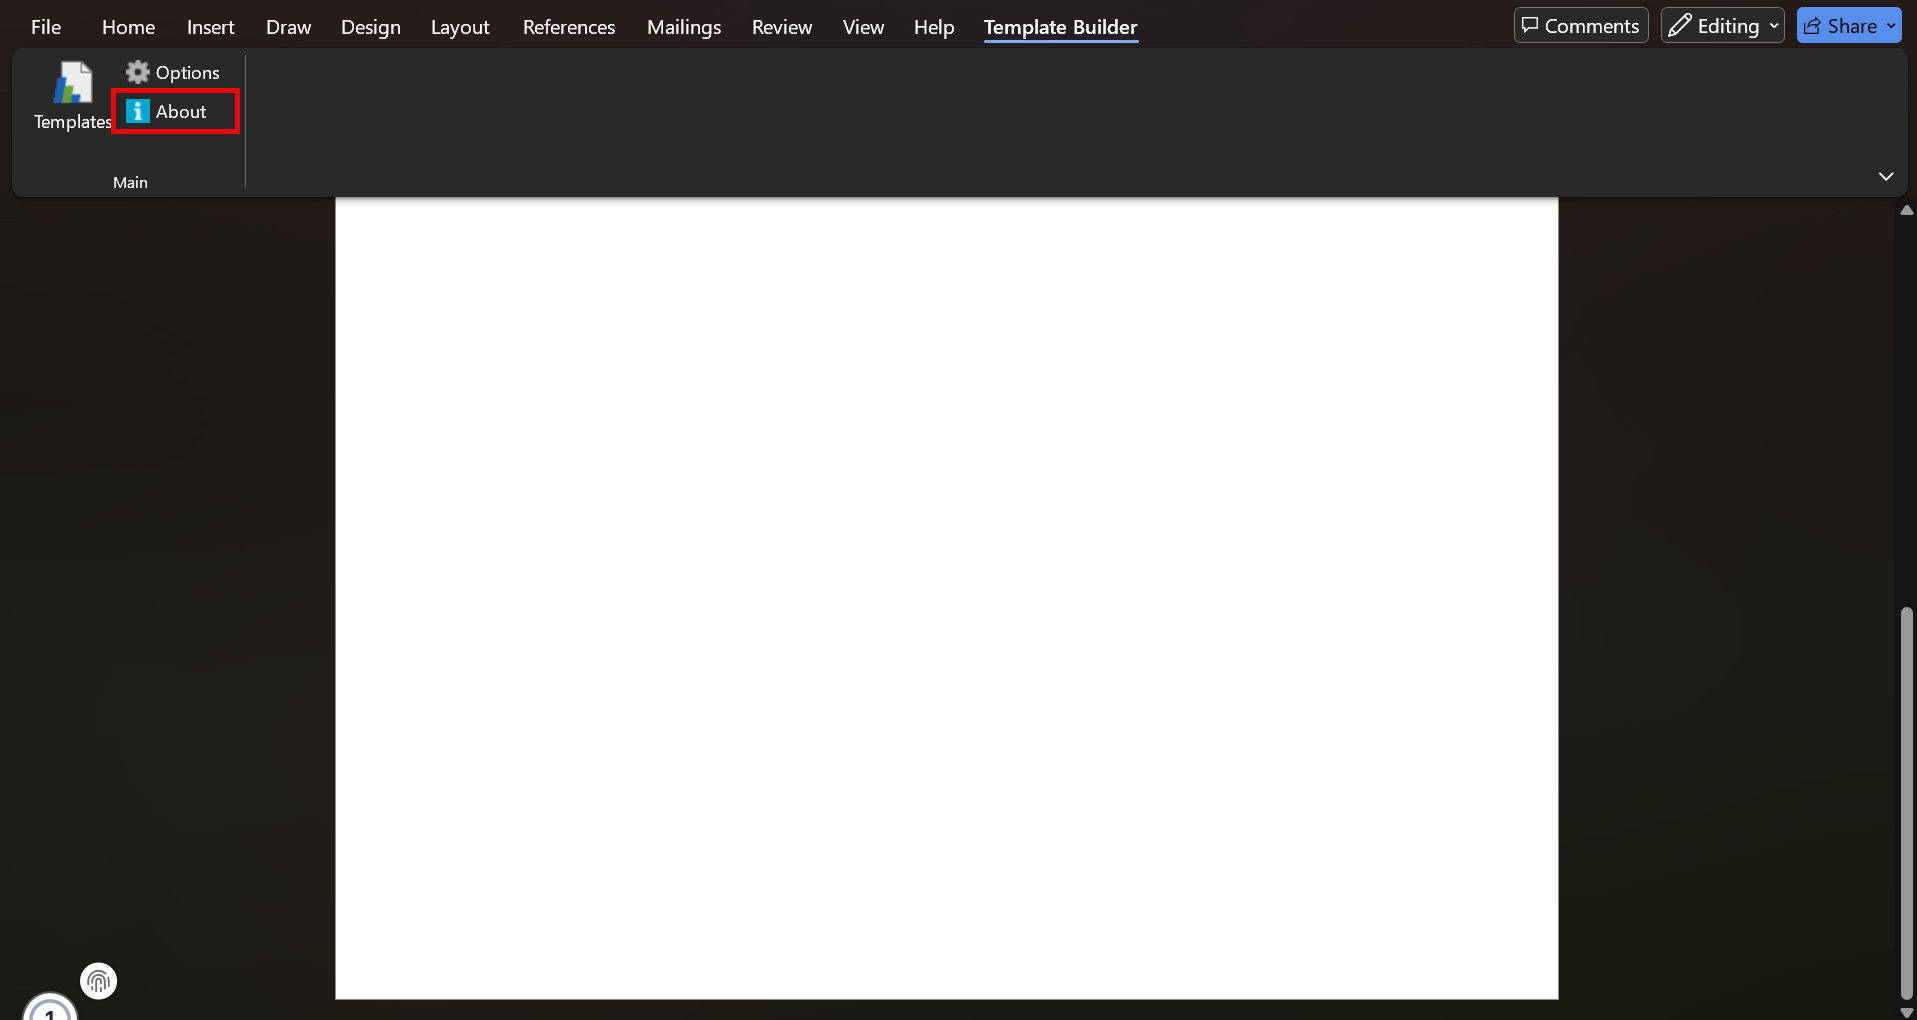
-
Review Template Builder Add-In Version.